Swiper
Swiper是一个滑块容器类组件,主要提供如下的一些属性。
| 属性名 | 类型 | 说明 | 支持版本 |
|---|---|---|---|
| indicator-dots | Boolean | 是否显示面板指示点 | |
| indicator-color | Color | 指示点颜色 | 1.1.0 |
| indicator-active-color | Color | 选中的指示点颜色 | 1.1.0 |
| current | Number | 当前所在滑块的 index | 1.1.0 |
| autoplay | Boolean | 是否自动切换 | |
| current-item-id | String | 当前所在滑块的 item-id ,不能与 current 被同时指定 | 1.9.0 |
| interval | Number | 自动切换时间间隔 | |
| duration | Number | 滑动动画时长 | |
| circular | Boolean | 是否采用衔接滑动 | |
| vertical | Boolean | 滑动方向是否为纵向 | |
| previous-margin | String | 前边距,可用于露出前一项的一小部分,接受 px 和 rpx 值 | 1.9.0 |
| next-margin | String | 后边距,可用于露出后一项的一小部分,接受 px 和 rpx 值 | 1.9.0 |
| display-multiple-items | Number | 同时显示的滑块数量 | 1.9.0 |
| skip-hidden-item-layout | Boolean | 是否跳过未显示的滑块布局,设为 true 可优化复杂情况下的滑动性能,但会丢失隐藏状态滑块的布局信息 | 1.9.0 |
| bindchange | EventHandle | current 改变时会触发 change 事件,event.detail = {current: current, source: source} | |
| bindanimationfinish | EventHandle | 动画结束时会触发 animationfinish 事件,event.detail 同上 | 1.9.0 |
说明:从 1.4.0 版本开始,change事件返回detail中包含一个source字段,表示导致变更的原因,可能值如下:
- autoplay:自动播放导致swiper变化;
- touch:用户划动引起swiper变化;
- 其他原因将用空字符串表示。
当然,作为一个容器控件,还需要和子组件搭配使用才能起到效果,而<swiper-item/>就是需要的子组件。
swiper-item
swiper-item组件的主要属性如下:
| 属性名 | 类型 | 说明 | 支持版本 |
|---|---|---|---|
| item-id | String | 该 swiper-item 的标识符 | 1.9.0 |
实例
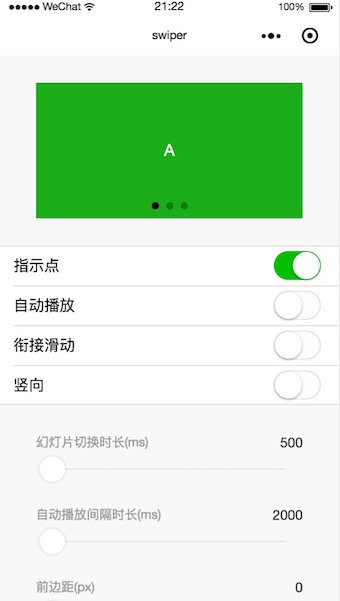
下面是官方提供的一个实例,可以在小程序开发工具中预览。
涉及的核心代码有:
swiper.wxml
<swiper indicator-dots="{{indicatorDots}}"
  autoplay="{{autoplay}}" interval="{{interval}}" duration="{{duration}}">
  <block wx:for="{{imgUrls}}">
    <swiper-item>
      <image src="{{item}}" class="slide-image" width="355" height="150"/>
    </swiper-item>
  </block>
</swiper>
<button bindtap="changeIndicatorDots"> indicator-dots </button>
<button bindtap="changeAutoplay"> autoplay </button>
<slider bindchange="intervalChange" show-value min="500" max="2000"/> interval
<slider bindchange="durationChange" show-value min="1000" max="10000"/> duration
swiper.js
Page({
  data: {
    imgUrls: [
      'http://img02.tooopen.com/images/20150928/tooopen_sy_143912755726.jpg',
      'http://img06.tooopen.com/images/20160818/tooopen_sy_175866434296.jpg',
      'http://img06.tooopen.com/images/20160818/tooopen_sy_175833047715.jpg'
    ],
    indicatorDots: false,
    autoplay: false,
    interval: 5000,
    duration: 1000
  },
  changeIndicatorDots: function(e) {
    this.setData({
      indicatorDots: !this.data.indicatorDots
    })
  },
  changeAutoplay: function(e) {
    this.setData({
      autoplay: !this.data.autoplay
    })
  },
  intervalChange: function(e) {
    this.setData({
      interval: e.detail.value
    })
  },
  durationChange: function(e) {
    this.setData({
      duration: e.detail.value
    })
  }
})
最终的效果如下: