detectron2训练自己的数据集
关于detectron2的一些介绍
Detectron2是Facebook AI Research的下一代库,是一个提供最先进的检测和分割算法的平台。它是Detectron和mask-benchmark的继承者。Detectron是Facebook人工智能研究的软件系统,它实现了最先进的目标检测算法,包括了Mask R-CNN,它是由python编写的,由caffe2深度学习框架提供支持。
在Facebook人工智能研究中,Detectron已经启动了许多研究项目,包括:用于物体检测的特征金字塔网络、掩模R-CNN、检测和识别人类与物体的相互作用、用于密集物体检测的焦距损失、非局部神经网络、学习分割每件事物、数据蒸馏:朝向全监督学习,DensePose:在野外进行密集的人体姿势估计,并进行组规范化。
Detectron2的源码:Detectron2
Detector2包括了对以下目标检测和实例分割算法的实现:
Faster R-CNN
Mask R-CNN
RPN
R-FCN
RetinaNet
Detector2包括了以下骨干网络的结构:
ResNeXt{50,101,152}
Mask R-CNN{50,101,152}
Feature Pyramid Networks(FPN也就是我们所熟知的特征金字塔结构)(with ResNet or ResNeXt)
VGG-16(很经典的特征提取网络)
这些骨干网络的具体实现可以查看Detectron的源代码中的modeling文件进行学习:骨干网络的具体代码实现
环境的配置以及Detectron2项目的下载
第一步:为我们的detectron2创建虚拟环境(我个人习惯使用pycharm+anaconda,这里我默认大家也是这样)
 win+R 打开终端界面(这里也可以直接打开Anaconda Prompt)
 在终端命令行中输入:conda env list
 既可查看本地已经存在几个虚拟环境。base是基础环境变量,安装了anaconda之后都会有一个base虚拟环境。我们首先进入base环境:
 在终端命令行中输入:conda activate base
 进入环境后我们在anaconda中为我们的detectron2项目创建虚拟环境:
 在终端命令行中输入:conda create -n detectron_env(自定义你的环境变量的名称,我这里取名为detectron_env) python=3.8
第二步:下载对应的版本的pytorch和cuda
为了加速我们的训练,我们往往在训练过程中调用GPU,因此需要下载对应cuda版本的pytorch(这里的detectron2是基于pytorch来实现的)
在终端命令行中输入:conda install pytorch==1.8.0 torchvision==0.9.0 torchaudio==0.8.0 cudatoolkit=11.1 -c pytorch -c conda-forge
这里需要查询一下自己的gpu支持什么版本的cuda 我自己的电脑是gtx1650ti,支持11.0版本的cuda,因此我这里安装的是11.0版本cuda。对应的pytorch版本,即pytorch==1.7.1(可以在官网查询不同cuda版本对应的pytorch版本:pytorch对应的cuda版本查询)
第三步:手动安装cython和opencv-python
在终端命令行中输入:pip install cython
在终端命令行中输入:pip install opencv-python
(在对应的环境变量下pip install,进入的方式是:activate 你的环境变量名称)
第四步:下载detectron2项目
我们可以使用git工具,先打开我们想下载项目的那个文件夹中,邮件点击git bash here:
在终端命令行中输入:git clone https://github.com/facebookresearch/detectron2.git
然后就是等待项目的下载完毕。
第五步:配置项目的各种依赖库
打开终端后cd到项目所在的主目录下,我的项目文件名称为detectron2:
在终端命令行中输入:cd xx/xx/xxx/detectron2
进入到包含项目代码的主目录中后
在终端命令行中输入:pip install -e .
等待所有依赖安装好
测试环节
在项目主目录中创建两个py文件,分别命名为:Detector.py和main.py
其中Detector.py:
from detectron2.engine import DefaultPredictor
from detectron2.config import get_cfg
from detectron2.data import MetadataCatalog
from detectron2.utils.visualizer import ColorMode, Visualizer
from detectron2 import model_zoo

import cv2
import numpy as np

class Detector:
    def __init__(self, model_type = "OD"):
        self.cfg = get_cfg()

        if model_type == "OD":
            self.cfg.merge_from_file(model_zoo.get_config_file("COCO-Detection/faster_rcnn_R_101_FPN_3x.yaml"))
            self.cfg.MODEL.WEIGHTS = model_zoo.get_checkpoint_url("COCO-Detection/faster_rcnn_R_101_FPN_3x.yaml")
        elif model_type =="IS":
            self.cfg.merge_from_file(model_zoo.get_config_file("COCO-InstanceSegmentation/mask_rcnn_R_50_FPN_3x.yaml"))
            self.cfg.MODEL.WEIGHTS = model_zoo.get_checkpoint_url("COCO-InstanceSegmentation/mask_rcnn_R_50_FPN_3x.yaml")
        self.cfg.MODEL.ROI_HEADS.SCORE_THRESH_TEST = 0.7
        self.cfg.MODEL.DEVICE = "cuda"

        self.predictor = DefaultPredictor(self.cfg)

    def onImage(self, imagepath):
        image = cv2.imread(imagepath, flags=1)

        predictions = self.predictor(image)

        viz = Visualizer(image[:,:,::-1], metadata = MetadataCatalog.get(self.cfg.DATASETS.TRAIN[0]),
                         instance_mode = ColorMode.SEGMENTATION)

        output = viz.draw_instance_predictions(predictions["instances"].to("cpu"))

        cv2.namedWindow("Result", 0)
        cv2.resizeWindow("Result", 1200, 600)
        cv2.imshow("Result", output.get_image()[:,:,::-1])
        cv2.waitKey(0)
其中main.py:
from Detector import *

detector = Detector(model_type="IS")

detector.onImage('1.jpg')
运行main.py文件不出意外的能够显示结果:
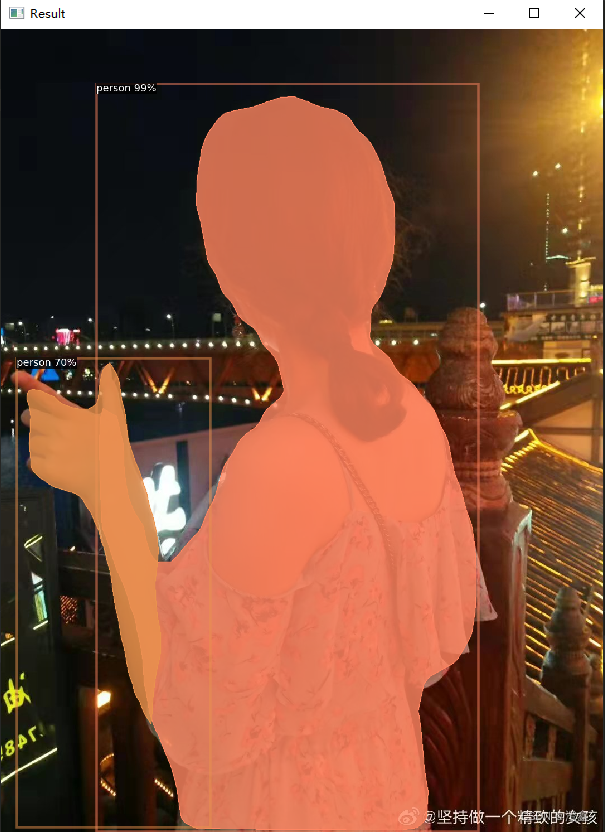
这里我们用的是项目中已经训练过的网络模型,直接在Detector.py文件中读取检测/分割算法的配置文件后,并且读取对应的预训练权重文件,然后将保存配置文件参数的cfg传入给调用的DefaultPredictor,进行算法的效果演示。
使用labelme制作自己的数据集
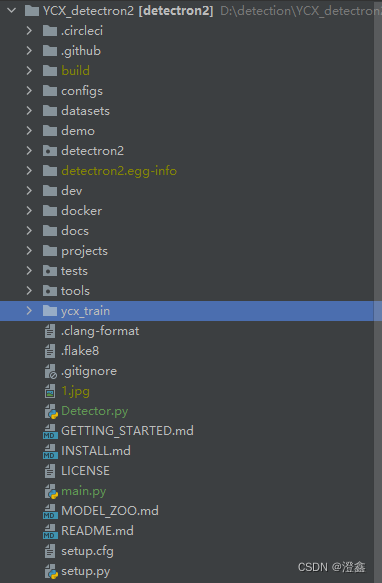
首先在我们的项目主目录下创建一个包含我们数据集的训练和预测的文件夹(这里我命名为ycx_train文件夹):
win + R 打开终端,在终端命令行中输入:labelme
打开labelme之后 就可以制作我们自己的数据集了。
我将我的源图片都放在了一个“images”的文件中,分别创建了“train”和“test”这两个文件夹,分别放我们的训练集和测试集。从“images”中分别选取部分图片放入我们的训练集和测试集中,这里可以通过代码来自动实现选取,可以任意调整两者的比例,一般是7:3或者8:2吧。
然后就是使用labelme来进行制作,制作的过程网上有很多教程,这里我就不多赘述了。每制作好一张图片,都会得到一个json文件来保存,我们将每张图片的json文件保存在和它的图片同样路径下的文件中,train中的图片和test文件中都是这样的操作。这样我们就得到了同时包含图片和其对应json格式的“train”和“test”文件夹:

然后我们在“ycx_train”中创建一个labelme2coco.py文件,来实现labelme格式到coco格式的转变(模型训练需要读取的是coco格式的数据)。labelme2coco.py:
import os
import argparse
import json

from labelme import utils
import numpy as np
import glob
import PIL.Image


class labelme2coco(object):
    def __init__(self, labelme_json=[], save_json_path="./coco.json"):
        """
        :param labelme_json: the list of all labelme json file paths
        :param save_json_path: the path to save new json
        """
        self.labelme_json = labelme_json
        self.save_json_path = save_json_path
        self.images = []
        self.categories = []
        self.annotations = []
        self.label = []
        self.annID = 1
        self.height = 0
        self.width = 0

        self.save_json()

    def data_transfer(self):
        for num, json_file in enumerate(self.labelme_json):
            with open(json_file, "r") as fp:
                data = json.load(fp)
                self.images.append(self.image(data, num))
                for shapes in data["shapes"]:
                    label = shapes["label"].split("_")
                    if label not in self.label:
                        self.label.append(label)
                    points = shapes["points"]
                    self.annotations.append(self.annotation(points, label, num))
                    self.annID += 1

        # Sort all text labels so they are in the same order across data splits.
        self.label.sort()
        for label in self.label:
            self.categories.append(self.category(label))
        for annotation in self.annotations:
            annotation["category_id"] = self.getcatid(annotation["category_id"])

    def image(self, data, num):
        image = {

    }
        img = utils.img_b64_to_arr(data["imageData"])
        height, width = img.shape[:2]
        img = None
        image["height"] = height
        image["width"] = width
        image["id"] = num
        image["file_name"] = data["imagePath"].split("/")[-1]

        self.height = height
        self.width = width

        return image

    def category(self, label):
        category = {

    }
        category["supercategory"] = label[0]
        category["id"] = len(self.categories)
        category["name"] = label[0]
        return category

    def annotation(self, points, label, num):
        annotation = {

    }
        contour = np.array(points)
        x = contour[:, 0]
        y = contour[:, 1]
        area = 0.5 * np.abs(np.dot(x, np.roll(y, 1)) - np.dot(y, np.roll(x, 1)))
        annotation["segmentation"] = [list(np.asarray(points).flatten())]
        annotation["iscrowd"] = 0
        annotation["area"] = area
        annotation["image_id"] = num

        annotation["bbox"] = list(map(float, self.getbbox(points)))

        annotation["category_id"] = label[0]  # self.getcatid(label)
        annotation["id"] = self.annID
        return annotation

    def getcatid(self, label):
        for category in self.categories:
            if label == category["name"]:
                return category["id"]
        print("label: {} not in categories: {}.".format(label, self.categories))
        exit()
        return -1

    def getbbox(self, points):
        polygons = points
        mask = self.polygons_to_mask([self.height, self.width], polygons)
        return self.mask2box(mask)

    def mask2box(self, mask):

        index = np.argwhere(mask == 1)
        rows = index[:, 0]
        clos = index[:, 1]

        left_top_r = np.min(rows)  # y
        left_top_c = np.min(clos)  # x

        right_bottom_r = np.max(rows)
        right_bottom_c = np.max(clos)

        return [
            left_top_c,
            left_top_r,
            right_bottom_c - left_top_c,
            right_bottom_r - left_top_r,
        ]

    def polygons_to_mask(self, img_shape, polygons):
        mask = np.zeros(img_shape, dtype=np.uint8)
        mask = PIL.Image.fromarray(mask)
        xy = list(map(tuple, polygons))
        PIL.ImageDraw.Draw(mask).polygon(xy=xy, outline=1, fill=1)
        mask = np.array(mask, dtype=bool)
        return mask

    def data2coco(self):
        data_coco = {

    }
        data_coco["images"] = self.images
        data_coco["categories"] = self.categories
        data_coco["annotations"] = self.annotations
        return data_coco

    def save_json(self):
        print("save coco json")
        self.data_transfer()
        self.data_coco = self.data2coco()

        print(self.save_json_path)
        os.makedirs(
            os.path.dirname(os.path.abspath(self.save_json_path)), exist_ok=True
        )
        json.dump(self.data_coco, open(self.save_json_path, "w"), indent=4)


if __name__ == "__main__":
    # python labelme2coco.py train(images and annotations) --output train.json(coco file)
    # python labelme2coco.py test --output test.json(coco file)

    import argparse

    parser = argparse.ArgumentParser(
        description="labelme annotation to coco data json file."
    )
    parser.add_argument(
        "labelme_images",
        help="Directory to labelme images and annotation json files.",
        type=str,
    )
    parser.add_argument(
        "--output", help="Output json file path.", default="trainval.json"
    )
    args = parser.parse_args()
    labelme_json = glob.glob(os.path.join(args.labelme_images, "*.json"))
    labelme2coco(labelme_json, args.output)
然后在终端中cd到该py文件所在的目录下,在命令行中输入:
python labelme2coco.py train(你定义的该文件名是啥就是啥,这里我定义的文件名为“train”,上文已经提及) --output train.json(你想保存的coco格式数据的文件名)
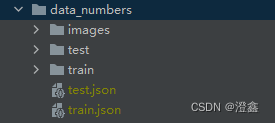
此时我们就得到了train.json。test的操作方式和这个一样:
python labelme2coco.py test(你定义的该文件名是啥就是啥,这里我定义的文件名为“test”,上文已经提及) --output test.json(你想保存的coco格式数据的文件名)
这里我们得到了:
训练模型和输出预测结果
这里我们需要三个py文件,分别是:utils.py,train.py和test.py文件。
首先是utils文件,帮助我们设置训练所需的配置参数,并且返回cfg参数,并且utils还包含了最后预测时的输出函数,我们可以对图片进行预测,也可以对视频文件进行预测,也可以调用外部摄像头进行实时预测。
utils.py
from detectron2.data import DatasetCatalog, MetadataCatalog
from detectron2.utils.visualizer import Visualizer
from detectron2.config import get_cfg
from detectron2 import model_zoo

from detectron2.utils.visualizer import ColorMode

import random
import cv2
import matplotlib.pyplot as plt

def plot_samples(dataset_name, n=1):
    dataset_custom = DatasetCatalog.get(dataset_name)
    dataset_custom_metadata = MetadataCatalog.get(dataset_name)

    for s in random.sample(dataset_custom, n):
        img = cv2.imread(s["file_name"])
        v = Visualizer(img[:,:,::-1], metadata=dataset_custom_metadata, scale=0.5)
        v = v.draw_dataset_dict(s)
        plt.figure(figsize=(15,20))
        plt.imshow(v.get_image())
        plt.show()

def get_train_cfg(config_file_path, checkpoint_url, train_dataset_name, test_dataset_name, num_classes, device, output_dir):
    cfg = get_cfg()
    cfg.merge_from_file(model_zoo.get_config_file(config_file_path))
    cfg.MODEL.WEIGHTS = model_zoo.get_checkpoint_url(checkpoint_url)
    cfg.DATASETS.TRAIN = (train_dataset_name,)
    cfg.DATASETS.TEST = (test_dataset_name,)

    cfg.DATALOADER.NUM_WORKERS = 2

    cfg.SOLVER.IMS_PER_BATCH = 2
    cfg.SOLVER.BASE_LR = 0.00025
    cfg.SOLVER.MAX_ITER = 1000
    cfg.SOLVER.STEPS = []

    cfg.MODEL.ROI_HEADS.NUM_CLASSES = num_classes
    cfg.MODEL.DEVICE = device
    cfg.OUTPUT_DIR = output_dir
    return cfg

def on_Image(image_path, predictor):
    class_names = ["five","four","one","three","two"]
    # colors = ["red",]
    im = cv2.imread(image_path)
    outputs = predictor(im)

    # instance_mode:
    IMAGE = 0
    """
    Picks a random color for every instance and overlay segmentations with low opacity.
    """
    SEGMENTATION = 1
    """
    Let instances of the same category have similar colors
    (from metadata.thing_colors), and overlay them with
    high opacity. This provides more attention on the quality of segmentation.
    """
    IMAGE_BW = 2
    """
    Same as IMAGE, but convert all areas without masks to gray-scale.
    Only available for drawing per-instance mask predictions.
    """

    v = Visualizer(im[:,:,::-1], metadata={

    'thing_classes':class_names}, scale=0.5, instance_mode = ColorMode.IMAGE_BW)
    v = v.draw_instance_predictions(outputs["instances"].to("cpu"))

    plt.figure(figsize=(14, 10))
    plt.imshow(v.get_image())
    plt.show()

def on_Video(videoPath, predictor):
    class_names = ["five", "four", "one", "three", "two"]
    cap = cv2.VideoCapture(videoPath)
    if (cap.isOpened() == False):
        print("Error opening file...")
        return

    (success, image) = cap.read()
    while success:
        predictions = predictor(image)
        v = Visualizer(image[:,:,::-1], metadata={

    'thing_classes':class_names}, scale=0.5 ,instance_mode = ColorMode.SEGMENTATION)
        output = v.draw_instance_predictions(predictions["instances"].to("cpu"))

        # cv2.imread("Reuslt", output.get_image()[:,:,::-1])
        # cv2.namedWindow("result", 0)
        # cv2.resizeWindow("result", 1200, 600)

        #调用电脑摄像头进行检测
        cv2.namedWindow("result", cv2.WINDOW_FREERATIO) # 设置输出框的大小,参数WINDOW_FREERATIO表示自适应大小
        cv2.imshow("result" , output.get_image()[:,:,::-1])

        key = cv2.waitKey(1) & 0xFF
        if key == ord("q"):
            break
        (success, image) = cap.read()
train.py
from detectron2.utils.logger import setup_logger

setup_logger()
from detectron2.data.datasets import register_coco_instances
from detectron2.engine import DefaultTrainer

import os
import pickle

from utils import *

# config_file_path = "COCO-Detection/faster_rcnn_R_50_FPN_3x.yaml"
# checkpoint_url = "COCO-Detection/faster_rcnn_R_50_FPN_3x.yaml"


'''
instance segmentation
'''
config_file_path = "COCO-InstanceSegmentation/mask_rcnn_R_50_FPN_3x.yaml"
checkpoint_url = "COCO-InstanceSegmentation/mask_rcnn_R_50_FPN_3x.yaml"

output_dir = "./output/number_detection"

num_classes = 5
class_names = ["five","four","one","three","two"]

device = "cuda"

train_dataset_name = "LP_train"
train_images_path = "data_numbers/train"
train_json_annot_path = "data_numbers/train.json"

test_dataset_name = "LP_test"
test_images_path = "data_numbers/test"
test_json_annot_path = "data_numbers/test.json"

cfg_save_path = "OD_cfg.pickle"


###########################################################
# 注册训练集
register_coco_instances("LP_train", {

    },train_json_annot_path, train_images_path)
MetadataCatalog.get("LP_train").set(thing_classes = class_names,
                                    evaluator_type = 'coco',
                                    json_file=train_json_annot_path,
                                    image_root=train_images_path)


# 注册测试集
register_coco_instances("LP_test", {

    }, test_json_annot_path, test_images_path)
MetadataCatalog.get("LP_test").set(thing_classes = class_names,
                                    evaluator_type = 'coco',
                                    json_file=test_json_annot_path,
                                    image_root=test_images_path)
# plot_samples(dataset_name=train_dataset_name, n=3)

#####################################################
def main():
    cfg = get_train_cfg(config_file_path, checkpoint_url, train_dataset_name, test_dataset_name, num_classes, device, output_dir)

    with open(cfg_save_path, 'wb') as f:
        pickle.dump(cfg, f, protocol=pickle.HIGHEST_PROTOCOL)

    os.makedirs(cfg.OUTPUT_DIR, exist_ok=True)

    trainer = DefaultTrainer(cfg)
    trainer.resume_or_load(resume=False)

    trainer.train()

if __name__ == '__main__':
    main()
test.py
from detectron2.engine import DefaultPredictor
import os
import pickle
from utils import *

cfg_save_path = "OD_cfg.pickle"

with open(cfg_save_path, 'rb') as f:
    cfg = pickle.load(f)

cfg.MODEL.WEIGHTS = os.path.join(cfg.OUTPUT_DIR, "model_final.pth")
cfg.MODEL.ROI_HEADS.SCORE_THRESH_TEST = 0.5

predictor = DefaultPredictor(cfg)

image_path = "D:\\detection\\YCX_detectron2\\ycx_train\\Ycx-data\\data_numbers\\test\\WIN_20221124_10_46_40_Pro.jpg"
# on_Image(image_path, predictor)


video_path = ""
on_Video(0, predictor)#0 表示调用电脑的摄像头来实时预测
实现以上代码之后,修改相对应的路径信息,我们就可以成功的进行算法的训练和预测啦!
写到这里,突然想起来我遇到过的一个问题,在train文件中,对于训练集和测试集的注册,我们是通过register_coco_instances函数来注册信息,通过MetadataCatalog函数来获取注册信息的id,并设置其类别信息和路径信息等。要知道,我们的类别信息的设置需要严格按照顺序写入在类别列表中:
见train.py文件中的25行:
class_names = ["five","four","one","three","two"]
在一开始我的顺序就是按照labelme的定义顺序来排序的,后来在训练过程中报错。后来经过我的一番努力,我发现顺序设置可以在我们的“train.json”和“test.json”这两个文件中获取,我们选择“train.json”文件打开:
在这个字典形式的存储信息中,有一个主类的key:categories:
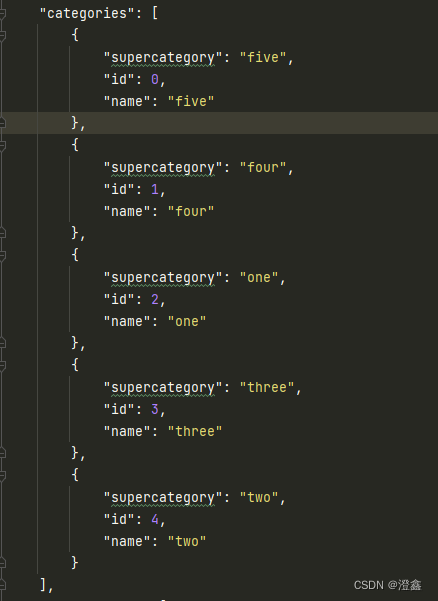
这里边存放着我们的类别顺序了,我们这里的类别key是“name”,因此我们的class_names列表可以按照这个顺序写入:[“five”,“four”,“one”,“three”,“two”].这样一来,最后输出的预测结果的类别就不会串味了,哈哈哈!