文章目录
前言
使用Libtorch在Windows环境下调用pytorch模型。
一、Libtorch下载
pytorch官网网址:https://pytorch.org/
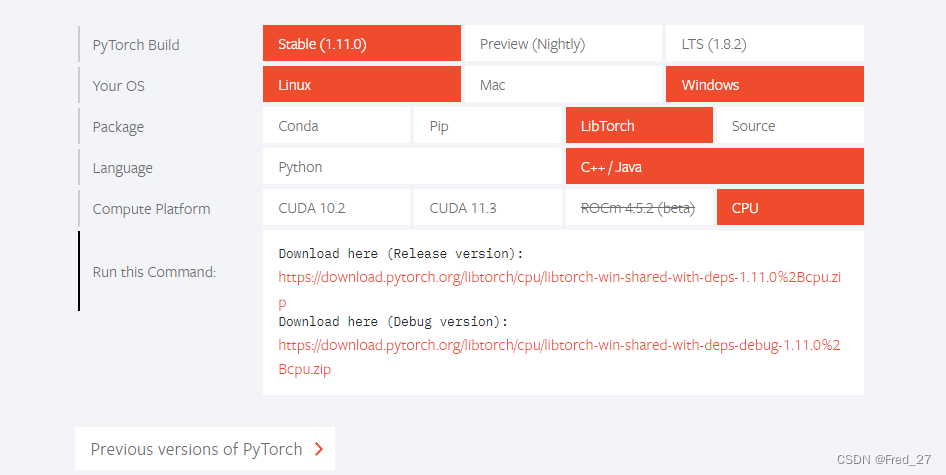
下载完成之后,解压出来

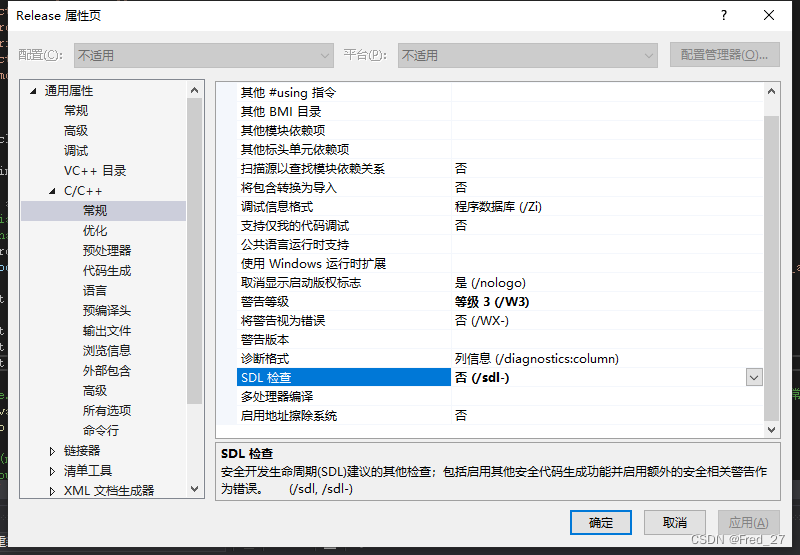
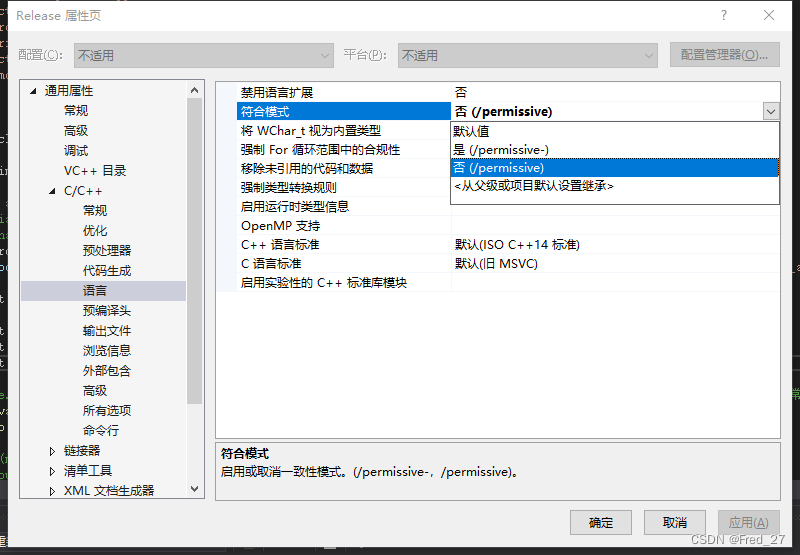
二、配置Visual Studio环境
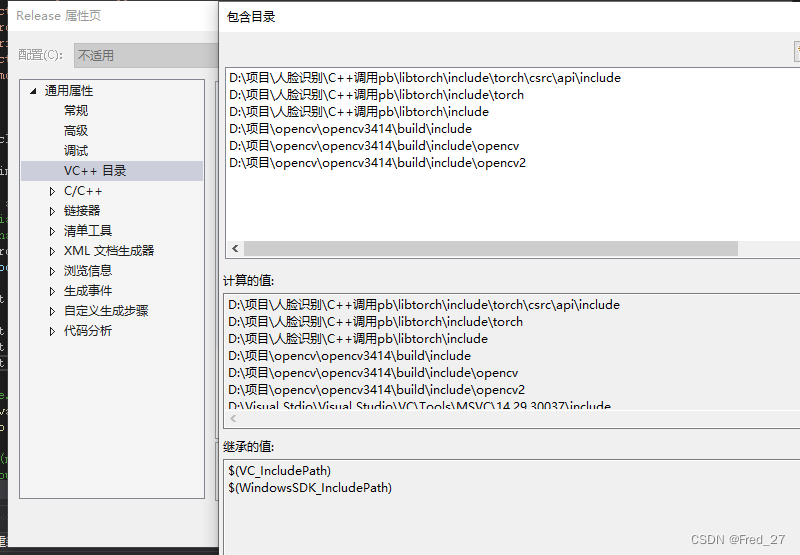
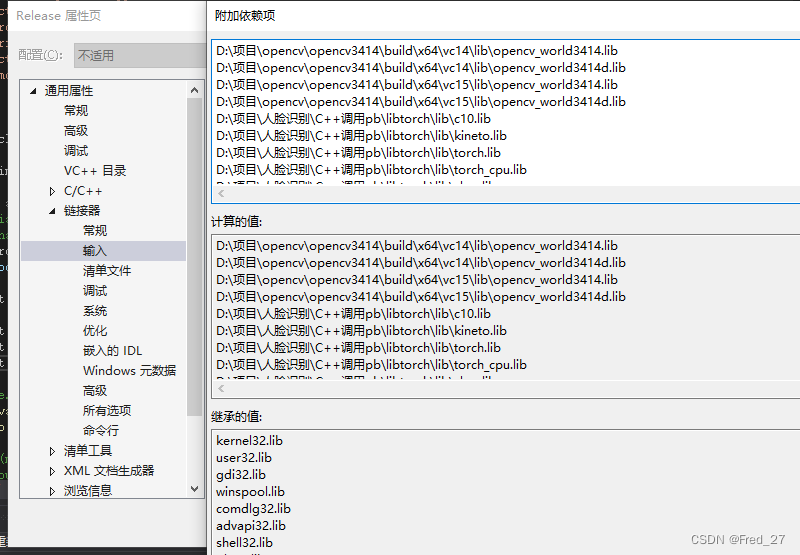
1.配置管理器

2.配置Release环境属性
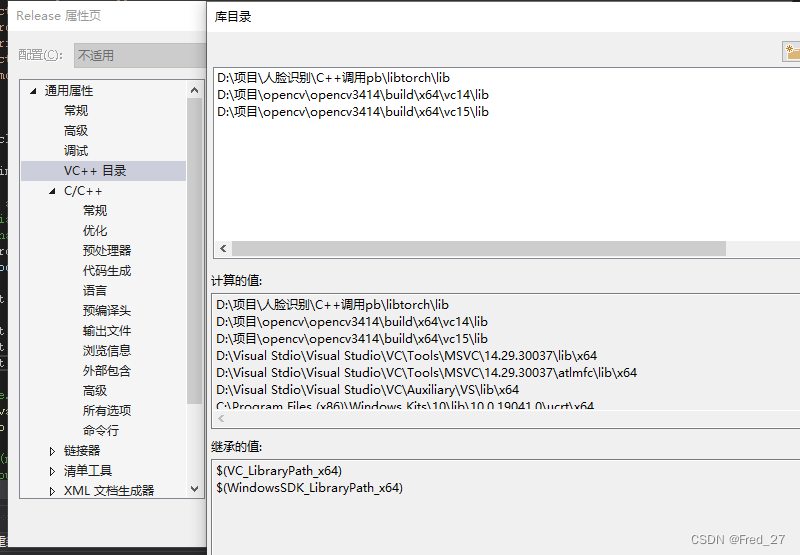
将Libtorch中的lib文件夹里面的所有.lib文件都加到附加依赖项中。之后再将这些.lib文件拷贝到C:\Windows\System32文件夹中。
三、生成pt模型
# pth转pt
import os
import torch
from PIL import Image
from torchvision import transforms
from model import AlexNet
def main():
device = torch.device("cuda:0" if torch.cuda.is_available() else "cpu")
print("using {} device.".format(device))
# create model
model = AlexNet(num_classes=5).to(device)
img_path = r'D:\项目\人脸识别\deep-learning-for-image-processing-master\data_set\flower_data\rose.jpg'
image = Image.open(img_path).convert('RGB')
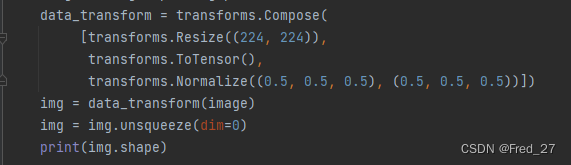
data_transform = transforms.Compose(
[transforms.Resize((224, 224)),
transforms.ToTensor(),
transforms.Normalize((0.5, 0.5, 0.5), (0.5, 0.5, 0.5))])
img = data_transform(image)
img = img.unsqueeze(dim=0)
print(img.shape)
# load model weights
weights_path = "./AlexNet.pth"
assert os.path.exists(weights_path), "file: '{}' dose not exist.".format(weights_path)
testsize = 224
if torch.cuda.is_available():
modelState = torch.load(weights_path, map_location='cuda')
model.load_state_dict(modelState, strict=False)
model = model.cuda()
model = model.eval()
# An example input you would normally provide to your model's forward() method.
example = torch.rand(1, 3, testsize, testsize)
example = example.cuda()
traced_script_module = torch.jit.trace(model, example)
output = traced_script_module(img.cuda())
print(output.shape)
pred = torch.argmax(output, dim=1)
print(pred)
traced_script_module.save('model_cuda.pt')
else:
modelState = torch.load(weights_path, map_location='cpu')
model.load_state_dict(modelState, strict=False)
example = torch.rand(1, 3, testsize, testsize)
example = example.cpu()
traced_script_module = torch.jit.trace(model, example)
output = traced_script_module(img.cpu())
print(output.shape)
pred = torch.argmax(output, dim=1)
print(pred)
traced_script_module.save('AlexNet.pt')
if __name__ == '__main__':
main()
Visual Studio调用脚本
#include<iostream>
#include <torch/script.h>
#include "torch/torch.h"
#include <opencv2/opencv.hpp>
#include "opencv2/core.hpp"
#include "opencv2/imgproc.hpp"
#include "opencv2/highgui.hpp"
#include "opencv2/imgcodecs.hpp"
#include <vector>
#include <chrono>
#include <string>
#include <vector>
#include <memory>

std::string classList[5] = {

     "daisy", "dandelion", "rose", "sunflower", "tulip" };
std::string image_path = "D:/项目/人脸识别/deep-learning-for-image-processing-master/data_set/flower_data/tulip.jpg";

int main(int argc, const char* argv[]) {


	// Deserialize the ScriptModule from a file using torch::jit::load().
	//std::shared_ptr<torch::jit::script::Module> module = torch::jit::load("../../model_resnet_jit.pt");
	using torch::jit::script::Module;
	Module module = torch::jit::load("D:/项目/人脸识别/deep-learning-for-image-processing-master/pytorch_classification/Test2_alexnet/AlexNet.pt");
	std::cout << "测试图片:" << image_path << std::endl;
	std::cout << "cuda support:" << (torch::cuda::is_available() ? "ture" : "false") << std::endl;
	std::cout << "CUDNN:  " << torch::cuda::cudnn_is_available() << std::endl;
	std::cout << "GPU(s): " << torch::cuda::device_count() << std::endl;
	// module.to(at::kCUDA); //cpu下会在(auto image = cv::imread(image_path, cv::IMREAD_COLOR))行引起c10:error,未经处理的异常
	module.eval();
	module.to(at::kCPU);
	//assert(module != nullptr);
	//std::cout << "ok\n";
	//输入图像
	auto image = cv::imread(image_path, cv::IMREAD_COLOR);
	cv::cvtColor(image, image, cv::COLOR_BGR2RGB);
	cv::Mat image_transfomed = cv::Mat(cv::Size(224, 224), image.type());
	cv::resize(image, image_transfomed, cv::Size(224, 224));
	//cv::cvtColor(image_transfomed, image_transfomed, cv::COLOR_BGR2RGB);
	// 转换为Tensor
	torch::Tensor tensor_image = torch::from_blob(image_transfomed.data,
		{

     image_transfomed.rows, image_transfomed.cols,3 }, torch::kByte);
	// 通道转换 {0,1,2} --> {2,0,1} {C,H,W} --> {H,W,C}
	tensor_image = tensor_image.permute({

     2,0,1 });
	// 数据类型转换
	tensor_image = tensor_image.toType(torch::kFloat);
	auto tensor_image_Tmp = torch::autograd::make_variable(tensor_image, false);
	// 归一化,做除法:1/255
	tensor_image = tensor_image.div(255);
	// 标准化
	tensor_image[0] = (tensor_image[0] - 0.5) / 0.5;
	tensor_image[1] = (tensor_image[1] - 0.5) / 0.5;
	tensor_image[2] = (tensor_image[2] - 0.5) / 0.5;
	// 解压,将图片解压到1维
	tensor_image = tensor_image.unsqueeze(0);
	// tensor_image = tensor_image.to(at::kCUDA);
	tensor_image = tensor_image.to(at::kCPU);
	// 网络前向计算
	at::Tensor output = module.forward({

     tensor_image }).toTensor();
	std::cout << "output:" << output << std::endl;
	auto prediction = output.argmax(1);
	std::cout << "prediction:" << prediction << std::endl;
	int maxk = 5;
	auto top3 = std::get<1>(output.topk(maxk, 1, true, true));
	std::cout << "top3: " << top3 << '\n';
	std::vector<int> res;
	for (auto i = 0; i < maxk; i++) {


		res.push_back(top3[0][i].item().toInt());
	}
	int pre = torch::Tensor(prediction).item<int>();
	std::string result = classList[pre];
	std::cout << "This is:" << result << std::endl;

	cvWaitKey();
	return 0;
}
注意事项 —— 图像预处理
在pytorch的.pth网络模型转.pt过程中,要保证图像image的预处理方式与之前在训练.pth模型时保持一致。
在写C++代码调用.pt模型时,也要注意预处理方式要和之前保持一致,不然在C++环境下的模型预测结果会和在python环境下的结果相差很大。