写在前面
- 为了保证整个示例项目更加直观,方便理解,在展示一些函数的源码时会使用numpy版本进行展示,而在示例程序中并未使用numpy版本的库,在Cython版本与numpy版本出现差异的原码前会有标注,希望读者留意。
- 3DMM实例程序的jupyter版本后续会更新,完全免费,欢迎大家下载
准备工作
3DMM的例程里面需要用到BFM模型,这些数据需要自行下载,下面是下载教程:
准备 BFM 数据
1.下载原始BFM模型
网站: https://faces.dmi.unibas.ch/bfm/main.php?nav=1-2&id=downloads
 将上面的框全部打勾后在下方填上自己的姓名机构和接受数据的邮箱再填一下验证码就可以了。
然后填写的邮箱会收到这样一封邮件:
 会给你一个用户名和密码,用户名就是邮箱,密码是随机的,复制这俩然后打开上面的链接,填写信息之后就可以下载了。
下载好的文件解压缩,在里面找到01_MorphabelModel.mat

然后在face3d/examples/Data/BFM目录下新建一个文件夹raw,再将01_MorphabelModel.mat复制到raw/
2.从 3DDFA和 HFPE下载额外的 BFM 信息
网站: http://www.cbsr.ia.ac.cn/users/xiangyuzhu/projects/3DDFA/main.htm
打开后在这里
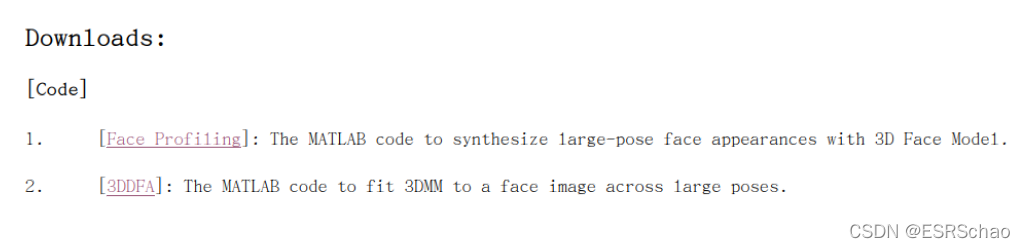
下载图中的[Face Profiling] 和 [3DDFA]
另一个网站: http://www.cbsr.ia.ac.cn/users/xiangyuzhu/projects/HPEN/main.htm
打开后找到Downloads:

下载第一个[HPEN]
将下载好的三个压缩包解压,分别在里面找到如下文件:
model_info.mat
Model_Expression.mat
Model_face_contour_trimed.mat
Model_tri_mouth.mat
Modelplus_nose_hole.mat
Modelplus_parallel.mat
vertex_code.mat
然后在face3d/examples/Data/BFM目录下新建一个文件夹3ddfa
将上述文件拷贝进去。
3.从3DMMasSTN下载UV
网站: https://github.com/anilbas/3DMMasSTN/blob/master/util/BFM_UV.mat
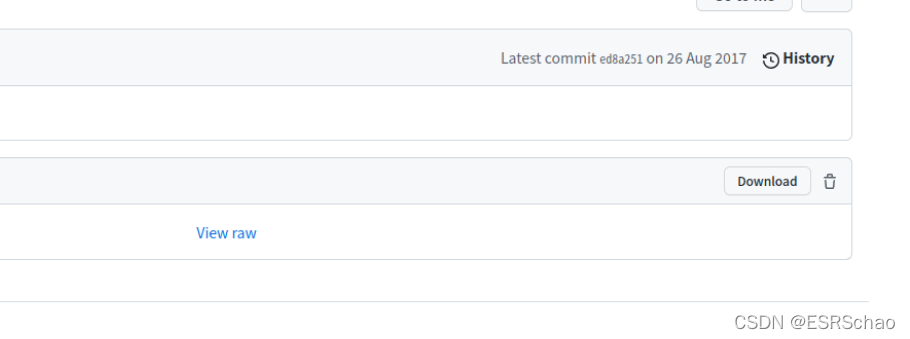 点击download下载后解压,在face3d/examples/Data/BFM目录下新建一个文件夹stn,再将BFM_UV.mat复制到stn/
4.生成模型数据
在BFM目录下创建Out文件夹
在 Matlab 中打开文件generate.m并运行,我用的MATLAB R2018a,这个.m文件有不少地方有问题,修正后得到Out文件夹里面的三个输出,Out输出我会放在这,但是其他部分因为隐私条款暂不提供,请自行下载调试(可以找作者私聊)。
此外,修改后的generate.m代码如下:
% addpath(genpath(pwd))
% --> model

%% load raw BFM models
load('raw/01_MorphableModel.mat');

%% load 3ddfa data
% 1. load bfm information. trim
load('3ddfa/model_info.mat');
trimIndex_f = [3*trimIndex-2, 3*trimIndex-1, 3*trimIndex]';
trimIndex_f = trimIndex_f(:);

model.shapeMU = shapeMU(trimIndex_f,:);
model.shapePC = shapePC(trimIndex_f, :);
model.shapeEV = shapeEV;
model.texMU = texMU(trimIndex_f, :);
model.texPC = texPC(trimIndex_f, :);
model.texEV = texEV;
model.tri = tri;
model.kpt_ind = keypoints;

model_info.kpt_ind = keypoints;
model_info.trimIndex = trimIndex;
model_info.symlist = symlist;
model_info.symlist_tri = symlist_tri;
%segbin: nose eyes mouth rest
model_info.segbin = segbin(trimIndex, :)';
model_info.segbin_tri = segbin_tri';

% 2. load expression
load('3ddfa/Model_Expression.mat');
model.expMU = mu_exp;
model.expPC = w_exp;
model.expEV = sigma_exp;

% 3. load mouth tri
load('3ddfa/Model_tri_mouth.mat');
model.tri_mouth = tri_mouth;
model_info.tri_mouth = tri_mouth;

% 4. face contour
load('3ddfa/Model_face_contour_trimed.mat');
model_info.face_contour = face_contour;
model_info.face_contour_line = face_contour_line;
model_info.face_contour_front = face_contour_front;
model_info.face_contour_front_line = face_contour_front_line;

% 5. nose hole
load('3ddfa/Modelplus_nose_hole.mat');
model_info.nose_hole = nose_hole;
model_info.nose_hole_right = nose_hole_right;
model_info.nose_hole_left = nose_hole_left;

% 6. parallel for key points
load('3ddfa/Modelplus_parallel.mat')
model_info.parallel = parallel;
model_info.parallel_face_contour = parallel_face_contour;

% 7. pncc
copyfile('C:\Users\����\Desktop\BFM\3ddfa\vertex_code.mat', 'Out/pncc_code.mat') %这里用的是绝对路径,请自行更改

%% load 3DMMasSTN UV coords
load('stn/BFM_UV.mat');
uv_coords = UV(trimIndex, :)';

% modify bad vers
bad_ind = [10032, 10155, 10280];
round1 = [10033, 10158 ];
round2 = [10534, 10157, 10661];
round3 = [10916, 10286];
uv_coords(:, bad_ind(1)) = mean(uv_coords(:, round1), 2);
uv_coords(:, bad_ind(2)) = mean(uv_coords(:, round2), 2);
uv_coords(:, bad_ind(3)) = mean(uv_coords(:, round3), 2);

model_info.uv_coords = uv_coords';
UV = model_info.uv_coords;

% modify tri mouth
tm_inner = model.tri_mouth;
tm_inner_add =[6420 6542 6664;  %% add inner mouth triangles
                        6420 6294 6167;
                        6167 6297 6420;
                        6167 6297 6296;
                        6167 6296 6295;
                        6167 6295 6039;
                        6168 6295 6039];
ind_bad = 38;
all_ind = 1:size(tm_inner, 2);
tm_inner = tm_inner(:, setdiff(all_ind, bad_ind));
tm_inner = [tm_inner tm_inner_add'];
model_info.tri_mouth = tm_inner;
model.tri_mouth = tm_inner;

% save
clearvars -except model model_info UV

save 'C:\Users\����\Desktop\BFM\Out\BFM.mat' model %这里用的是绝对路径,请自行更改
save 'C:\Users\����\Desktop\BFM\Out\BFM_info.mat' model_info %这里用的是绝对路径,请自行更改
save 'C:\Users\����\Desktop\BFM\Out\BFM_UV.mat' UV %这里用的是绝对路径,请自行更改
% copyfile('3ddfa/pncc_code.mat', 'Out/pncc_code.mat')
至此,准备工作完成。可以运行2_3dmm.py得到下面三个图像输出结果:


 由于这部分是作者要研究的核心部分,所以将分片进行,下面将从原理出发逐步分析源码,期待大家关注。