如何在其它项目中调用yolov5模型
在一些小项目中往往需要使用检测模型检测出一些物体所在的位置,因此需要将检测模型添加到该项目中。接下来,我会详细描述将yolov5模型添加到项目中,并且使用该模型进行目标检测。
一、添加模型
1、下载代码
将yolov5代码添加到项目文件中,假如你的项目名称是viwer,那么添加后应该如下图所示。
git clone https://github.com/ultralytics/yolov5
2、安装环境
根据yolov5项目安装环境。如果你之前安装了一些包,那么可以一个一个安装(但是需要满足yolov5项目的需求),或者直接运行项目,需要什么包就安装什么包。
cd yolov5
pip install -r requirements.txt
二、调用模型
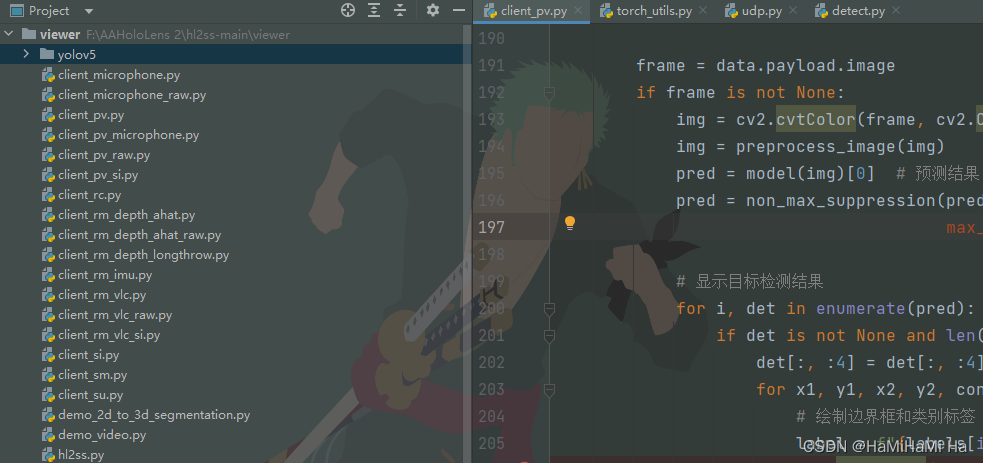
当yolov5项目环境安装好之后,可以使用代码调用yolov5模型,进行目标检测。直接放完整代码了
import torch
import cv2
import numpy as np
from yolov5.utils.general import non_max_suppression
from yolov5.models.experimental import attempt_load


def preprocess_image(image):
    input_size = 640  # yolov5要求输入网络的图片大小为640
    h, w = image.shape[:2]
    aspect_ratio = input_size / max(h, w)  # 计算缩放比例
    resized_h, resized_w = int(h * aspect_ratio), int(w * aspect_ratio)  # 调整图片的尺寸
    image = cv2.resize(image, (resized_w, resized_h))

    pad_h = input_size - resized_h  # 填充图片
    pad_w = input_size - resized_w
    if pad_h > 0 or pad_w > 0:
        image = cv2.copyMakeBorder(image, 0, pad_h, 0, pad_w, cv2.BORDER_CONSTANT, value=0)

    # 将处理后的图片转换为浮点数格式,并保持数值在0到1之间。变换维度,将通道维度放在前面。添加新维度,并且转换为pytorch张量
    image = image.astype(np.float32) / 255.0
    image = image.transpose(2, 0, 1)
    image = np.expand_dims(image, axis=0)
    image = torch.from_numpy(image).to(device)
    return image


device = torch.device('cuda:0' if torch.cuda.is_available() else 'cpu')

weights = 'yolov5s.pt'
model = attempt_load(weights)  # 读取训练好的模型
model.to(device)

# 设置阈值和IOU(非极大抑制)阈值
conf_thres = 0.4
iou_thres = 0.45

# 标签
labels = {


    0: 'person',
    1: 'bicycle',
    2: 'car',
    3: 'motorcycle',
    4: 'airplane',
    5: 'bus',
    6: 'train',
    7: 'truck',
    8: 'boat',
    9: 'traffic light',
    10: 'fire hydrant',
    11: 'stop sign',
    12: 'parking meter',
    13: 'bench',
    14: 'bird',
    15: 'cat',
    16: 'dog',
    17: 'horse',
    18: 'sheep',
    19: 'cow',
    20: 'elephant',
    21: 'bear',
    22: 'zebra',
    23: 'giraffe',
    24: 'backpack',
    25: 'umbrella',
    26: 'handbag',
    27: 'tie',
    28: 'suitcase',
    29: 'frisbee',
    30: 'skis',
    31: 'snowboard',
    32: 'sports ball',
    33: 'kite',
    34: 'baseball bat',
    35: 'baseball glove',
    36: 'skateboard',
    37: 'surfboard',
    38: 'tennis racket',
    39: 'bottle',
    40: 'wine glass',
    41: 'cup',
    42: 'fork',
    43: 'knife',
    44: 'spoon',
    45: 'bowl',
    46: 'banana',
    47: 'apple',
    48: 'sandwich',
    49: 'orange',
    50: 'broccoli',
    51: 'carrot',
    52: 'hot dog',
    53: 'pizza',
    54: 'donut',
    55: 'cake',
    56: 'chair',
    57: 'couch',
    58: 'potted plant',
    59: 'bed',
    60: 'dining table',
    61: 'toilet',
    62: 'tv',
    63: 'laptop',
    64: 'mouse',
    65: 'remote',
    66: 'keyboard',
    67: 'cell phone',
    68: 'microwave',
    69: 'oven',
    70: 'toaster',
    71: 'sink',
    72: 'refrigerator',
    73: 'book',
    74: 'clock',
    75: 'vase',
    76: 'scissors',
    77: 'teddy bear',
    78: 'hair drier',
    79: 'toothbrush'
}

# 读取视频,并获取视频帧数和帧大小
cap = cv2.VideoCapture(r"F:\AAM\6\test\Task3.mp4")

# 循环遍历视频每一帧,进行车辆重识别并标注出每个车辆的位置
while True:
    # 读取视频中的帧
    ret, frame = cap.read()
    if not ret:
        break

    # 对帧进行预处理
    img = preprocess_image(frame)

    ratio = max(frame.shape[0], frame.shape[1]) / 640

    # 使用 yolov5s.pt 模型检测
    pred = model(img)[0]
    pred = non_max_suppression(pred, conf_thres=0.4, iou_thres=0.5, classes=None, agnostic=False, max_det=100)  # 去除重叠框

    # 循环遍历
    for i, det in enumerate(pred):
        if det is not None and len(det):
            det[:, :4] = det[:, :4].clamp(min=0, max=max(frame.shape[0], frame.shape[1]))  # 检测框不能超出图像范围
            for x1, y1, x2, y2, conf, cls in reversed(det):

                    x1 = int(x1 * ratio)
                    y1 = int(y1 * ratio)
                    x2 = int(x2 * ratio)
                    y2 = int(y2 * ratio)

                    label = f"{

      labels[int(cls)]}: {

      conf:.2f}"
                    cv2.rectangle(frame, (x1, y1), (x2, y2), (255, 0, 0), 2)
                    cv2.putText(frame, label, (x1, y1 - 10), cv2.FONT_HERSHEY_SIMPLEX, 0.9, (36, 255, 12), 2)

    # 显示标注后的帧
    cv2.imshow('frame', frame)
    if cv2.waitKey(1) & 0xFF == ord('q'):
        break

# 释放资源
cap.release()
cv2.destroyAllWindows()
接下来,需要根据自己的项目修改代码。
三、可能存在的问题
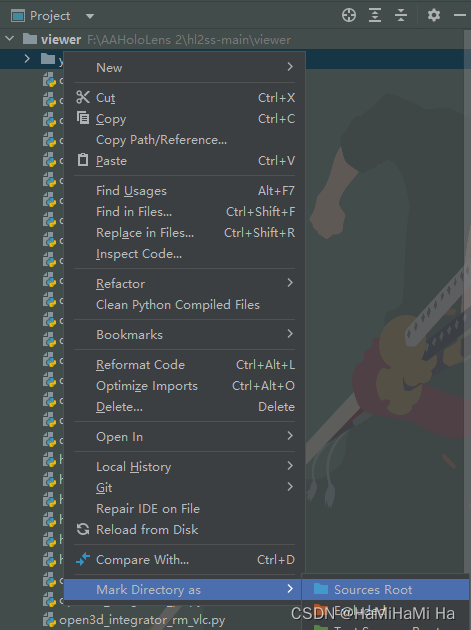
将yolov5项目添加到自己的项目后,按照要求安装好环境,仍然会报错。
ModuleNotFoundError: No module named 'utils'
我的做法是将yolov5项目标记为根目录,如下图所示:
总结
在yolov5项目中,许多代码都有关联,这里就将整个yolov5项目添加到了自己的项目中。如果有更好的方法,欢迎交流!