基于C#调用TensorRT 部署Yolov5模型
NVIDIA TensorRT™ 是用于高性能深度学习推理的 SDK,可为深度学习推理应用提供低延迟和高吞吐量。详细安装方式参考以下博客: NVIDIA TensorRT 安装 (Windows C++)

前文中已经介绍了在C++中利用TensorRT 部署Yolov5模型,但在实际应用中,经常会出现在C#中部署模型的需求,目前TensorRT无法直接在C#调用函数接口实现模型部署,此处利用动态链接库功能,构建TensorRTSharp,实现C#部署模型。
3.1 新建C#项目
右击解决方案,添加->新建项目,选择添加C#控制台项目,项目框架根据电脑中的框架选择,此处使用的是.NET 5.0。
新建完成后,右击项目,选择属性,点击新页面中的生成,在常规下,将目标平台改为X64。具体操作如图1- 14所示。

3.2 添加OpenCVsharp
右击项目,选择管理NuGet程序包,在新页面中选择浏览,在搜索框中输入opencvsharp3,在搜索结果中,找到OpenCvSharp3-AnyCPU,然后右侧点击安装,具体操作步骤如图1- 15所示。

3.3 添加项目引用
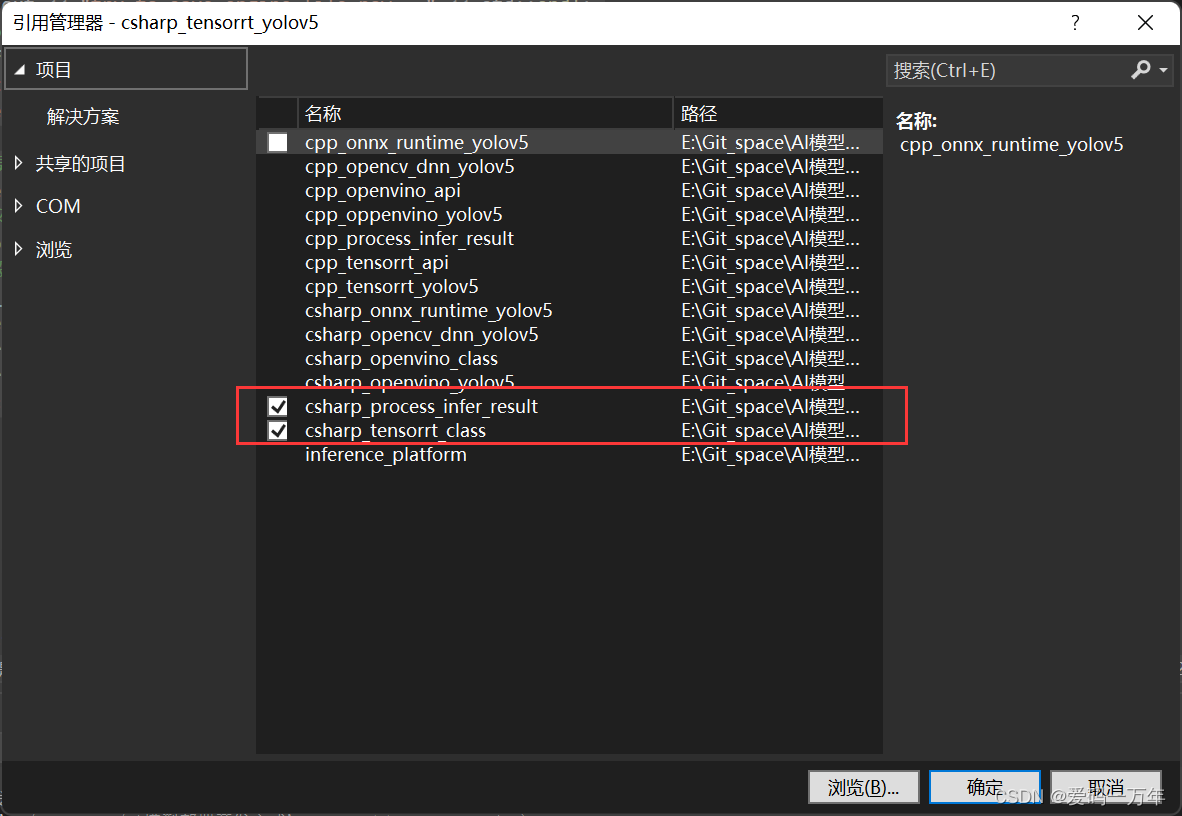
上一步中我们将dll文件中的方法引入到C#中,并组建了Core类,在这一步中,我们主要通过调用Core类,进行Al模型的部署,所以需要引入上一步的项目。
右击当前项目,选择添加,选择项目引用,在出现的窗体中,选择上一步中创建的项目OpenVinoSharp,点击确定;然后在当前项目下,添加using OpenVinoSharp命名空间。具体操作如图1- 16所示。
3.4 TensorRT部署Yolov5模型
1. 引入模型相关信息
string engine_path = "E:/Text_Model/yolov5/yolov5s1.engine";
string image_path = "E:/Text_dataset/YOLOv5/0001.jpg";
string lable_path = "E:/Git_space/Al模型部署开发方式/model/yolov5/lable.txt";
string input_node_name = "images";
string output_node_name = "output";
2. 初始化推理核心类
由于有些情况下我们需要先一步进行模型转换,所以不能再模型初始化的时候直接读取转换好的模型文件,所以在此处多加一步进行模型的初始化。
// 创建模型推理类
Nvinfer nvinfer = new Nvinfer();
// 读取模型信息
nvinfer.init(engine_path, 2);
3. 配置输入输出gpu缓存区
在此处我们分别创建输入与输出节点的缓存区,并且需要指定输入与输出数据的数据长度。
nvinfer.creat_gpu_buffer(input_node_name, 640 * 640 * 3);
nvinfer.creat_gpu_buffer(output_node_name, 25200 * 85);
4. 加载推理图片数据
由于Yolov5模型已经固定输入数据大小,因此此处不需要在设置大小,根据Yolov5模型要求输入,进行图片预处理。
Mat image = new Mat(image_path);
// 将图片放在矩形背景下
Mat max_image = Mat.Zeros(new Size(1024, 1024), MatType.CV_8UC3);
Rect roi = new Rect(0, 0, image.Cols, image.Rows);
image.CopyTo(new Mat(max_image, roi));
此处通过OpenCvSharp将图片数据读取到内存中,并将图片放置在正方形背景下,后续的其他数据处理会在封装的C++程序中实现,因此此处不需要再做进一步处理。接下来将图片转为矩阵数据,方便数据能在C++与C#之间传输。
byte[] image_data = new byte[2048 * 2048 * 3];
ulong image_size = new ulong();
image_data = max_image.ImEncode(".bmp");
image_size = Convert.ToUInt64(image_data.Length);
接下来直接调用load_image_data ()加载输入数据方法,加载输入数据。
nvinfer.load_image_data(input_node_name, image_data, image_size, BNFlag.Normal);
5. 模型推理
nvinfer.infer();
6. 结果处理
首先是读取输出结果,yolov5模型数据输出为浮点型数据,因此只需要调用read_infer_result()方法读取数据即可。
float[] result_array = nvinfer.read_infer_result(output_node_name, 25200 * 85);
然后就是处理读取后的数据,在此处我们提供了一个专门针对Yolov5结果处理类,用于处理结果,此处我们只需要调用该类,便可以实现。
ResultYolov5 result = new ResultYolov5();
result.read_class_names(lable_path);
result.factor = (float)(image.Cols > image.Rows ? image.Cols : image.Rows) / (float)640;
Mat result_image = result.process_resule(image,result_array);
Yolov5结果处理类
/// <summary>
/// yolov5模型结果处理类
/// </summary>
public class ResultYolov5
{
// 识别结果类型
public string[] class_names;
// 图片放缩比例
public float factor;
/// <summary>
/// 读取本地识别结果类型文件到内存
/// </summary>
/// <param name="path">文件路径</param>
public void read_class_names(string path)
{
List<string> str = new List<string>();
StreamReader sr = new StreamReader(path);
string line;
while ((line = sr.ReadLine()) != null)
{
str.Add(line);
}
class_names = str.ToArray();
}
/// <summary>
/// 处理yolov5模型结果
/// </summary>
/// <param name="image">原图片</param>
/// <param name="result">识别结果</param>
/// <returns>处理后的图片</returns>
public Mat process_resule(Mat image, float[] result)
{
Mat result_image = image.Clone();
Mat result_data = new Mat(25200, 85, MatType.CV_32F, result);
// 存放结果list
List<Rect> position_boxes = new List<Rect>();
List<int> class_ids = new List<int>();
List<float> confidences = new List<float>();
// 预处理输出结果
for (int i = 0; i < result_data.Rows; i++)
{
// 获取置信值
float confidence = result_data.At<float>(i, 4);
if (confidence < 0.2)
{
continue;
}
Console.WriteLine(confidence);
Mat classes_scores = result_data.Row(i).ColRange(5, 85);//GetArray(i, 5, classes_scores);
Point max_classId_point, min_classId_point;
double max_score, min_score;
// 获取一组数据中最大值及其位置
Cv2.MinMaxLoc(classes_scores, out min_score, out max_score,
out min_classId_point, out max_classId_point);
// 置信度 0~1之间
// 获取识别框信息
if (max_score > 0.25)
{
float cx = result_data.At<float>(i, 0);
float cy = result_data.At<float>(i, 1);
float ow = result_data.At<float>(i, 2);
float oh = result_data.At<float>(i, 3);
int x = (int)((cx - 0.5 * ow) * factor);
int y = (int)((cy - 0.5 * oh) * factor);
int width = (int)(ow * factor);
int height = (int)(oh * factor);
Rect box = new Rect();
box.X = x;
box.Y = y;
box.Width = width;
box.Height = height;
position_boxes.Add(box);
class_ids.Add(max_classId_point.X);
confidences.Add((float)max_score);
}
}
// NMS非极大值抑制
int[] indexes = new int[position_boxes.Count];
CvDnn.NMSBoxes(position_boxes, confidences, 0.25f, 0.45f, out indexes);
// 将识别结果绘制到图片上
for (int i = 0; i < indexes.Length; i++)
{
int index = indexes[i];
int idx = class_ids[index];
Cv2.Rectangle(result_image, position_boxes[index], new Scalar(0, 0, 255), 2, LineTypes.Link8);
Cv2.Rectangle(result_image, new Point(position_boxes[index].TopLeft.X, position_boxes[index].TopLeft.Y - 20),
new Point(position_boxes[index].BottomRight.X, position_boxes[index].TopLeft.Y), new Scalar(0, 255, 255), -1);
Cv2.PutText(result_image, class_names[idx] + "-" + confidences[index].ToString("0.00"),
new Point(position_boxes[index].X, position_boxes[index].Y - 10),
HersheyFonts.HersheySimplex, 0.6, new Scalar(0, 0, 0), 1);
}
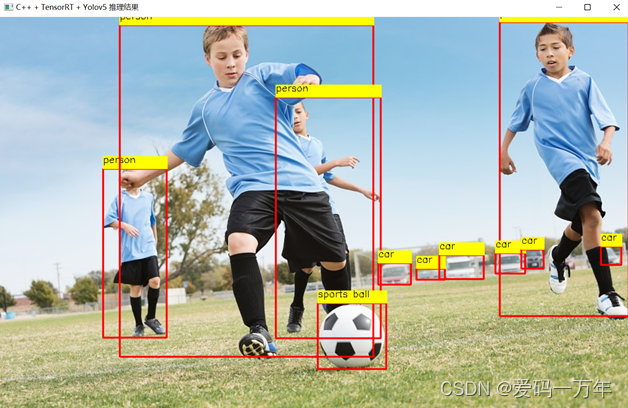
//Cv2.ImShow("C# + TensorRT + Yolov5 推理结果", result_image);
//Cv2.WaitKey();
result_data.Dispose();
return result_image;
}
}
最终输出结果为处理完的结果图片,如图所示。