目录
2.fasterrcnn_resnet50_fpn预训练模型预测图片
(3)ssdlite320_mobilenet_v3_large
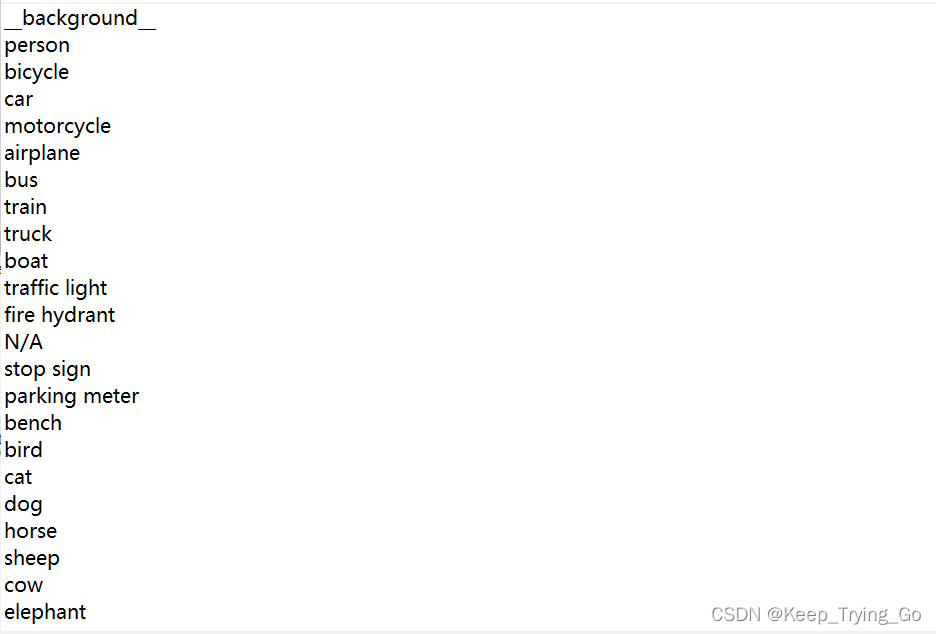
1.COCO数据集类别文件下载
链接:https://pan.baidu.com/s/17M-lhHh0t-rw2egWuaPWKg
提取码:az39
2.fasterrcnn_resnet50_fpn预训练模型预测图片
提示:Faster R-CNN模型是以ResNet-50-FPN为骨干网络。
- 第一:对于模型的输入图像,首先需要转换为tensor类型,并且图像的格式为[C,H,W],并且对于每一张图片,将其值转换为[0-1]之间,允许不同的尺寸的图片。
- 第二:对于模型的训练:
- 第一步:输入图像转换为tensor类型;
- 第二步:对于target包含:
- 图像中目标的坐标[x1,y1,x2,y2],其中0<=x1<x2=W和0<=y1<y2<=H;
- 图像中每一个物体的标签(对应类别)。
- 第三步:模型最后会返回一个字典的tensor,其中包含类别,坐标值回归的损失值。
- 第三步:对于模型的前向推断(预测):
- 第一步:只需要输入到模型中类型为tensor类型的图像;
- 第二步:模型最后返回的值为一个列表字典的tensor,其中包含的内容;
- 图像中目标的坐标[x1,y1,x2,y2],其中0<=x1<x2=W和0<=y1<y2<=H;
- 图像中每一个物体的标签(对应类别);
- 对应目标的预测概率。
导入相关的包
"""
@Author : Keep_Trying_Go
@Major  : Computer Science and Technology
@Hobby  : Computer Vision
@Time   : 2023-01-08 21:09
"""

import os
import cv2
import time
import torch
import cvzone
import numpy as np
from PIL import Image
from torchvision import transforms
from torch.utils.data import DataLoader,Dataset
from torchvision.models.detection import fasterrcnn_resnet50_fpn
(1)读取类别文件
with open('classes.txt','r') as fp:
    classes=fp.read().splitlines()
print(len(classes))
(2)数据变换
#数据变换
transform=transforms.Compose([
    transforms.ToTensor()
    # transforms.Normalize(mean=[0.48235, 0.45882, 0.40784],std=[1.0 / 255.0, 1.0 / 255.0, 1.0 / 255.0])
])
(3)加载预训练模型
#加载预训练模型
# 预训练模型下载 https://download.pytorch.org/models/fasterrcnn_resnet50_fpn_coco-258fb6c6.pth
modelFRCNNResNet50Fpn=fasterrcnn_resnet50_fpn(pretrained=True,progress=True)
# print(modelSSD300VGG)
(4)检测一张图片

#返回模型检测的结果
def detectSignalImage(img_path):
    """
    :param img_path: 图像的路径
    :return:
    """
    img=Image.open(img_path)
    img_transfer=transform(img)
    #注意这个地方需要对图像进行升维
    imgReshape=torch.unsqueeze(input=img_transfer,dim=0)
    # print(img_transfer.shape)
    # print(type(img_transfer))
    #将模型设置为eval模式
    modelFRCNNResNet50Fpn.eval()
    detection=modelFRCNNResNet50Fpn(imgReshape)
    print('detection: {}'.format(detection))
    print('box: {}'.format(detection[0]['boxes']))
    print('label: {}'.format(detection[0]['labels']))
    print('scores: {}'.format(detection[0]['scores']))
    # pred_class = [classes[i] for i in list(detection[0]['labels'].numpy())]

    return detection[0]['boxes'],detection[0]['labels'],detection[0]['scores']
#根据模型返回的结果,将其绘制到图像中
def drawRectangle(boxes,labels,scores,img_path):
"""
:param boxes: 对应目标的坐标
:param labels: 对应目标的标签
:param scores: 对应目标的类别分数
:return:
"""
imgRe=cv2.imread(img_path)
for k in range(len(labels)):
#左上角坐标(xleft,yleft)和右下角坐标(xright,yright)
xleft=int(boxes[k][0])
yleft=int(boxes[k][1])
xright=int(boxes[k][2])
yright=int(boxes[k][3])
class_id=labels[k].item()
print(class_id)
confidence=scores[k].item()
if confidence>0.7:
text = classes[class_id] + ': ' + str('{:.4f}'.format(confidence))
cv2.rectangle(imgRe, (xleft, yleft), (xright, yright), (255, 0, 255), 2)
cvzone.putTextRect(img=imgRe, text=text, pos=(xleft + 9, yleft - 12),
scale=1, thickness=1, colorR=(0, 255, 0))
cv2.imshow('img', imgRe)
cv2.waitKey(0)
if __name__ == '__main__':
    boxes,labels,scores=detectSignalImage(img_path='images/fourDogs.png')
    drawRectangle(boxes=boxes,labels=labels,scores=scores,img_path='images/fourDogs.png')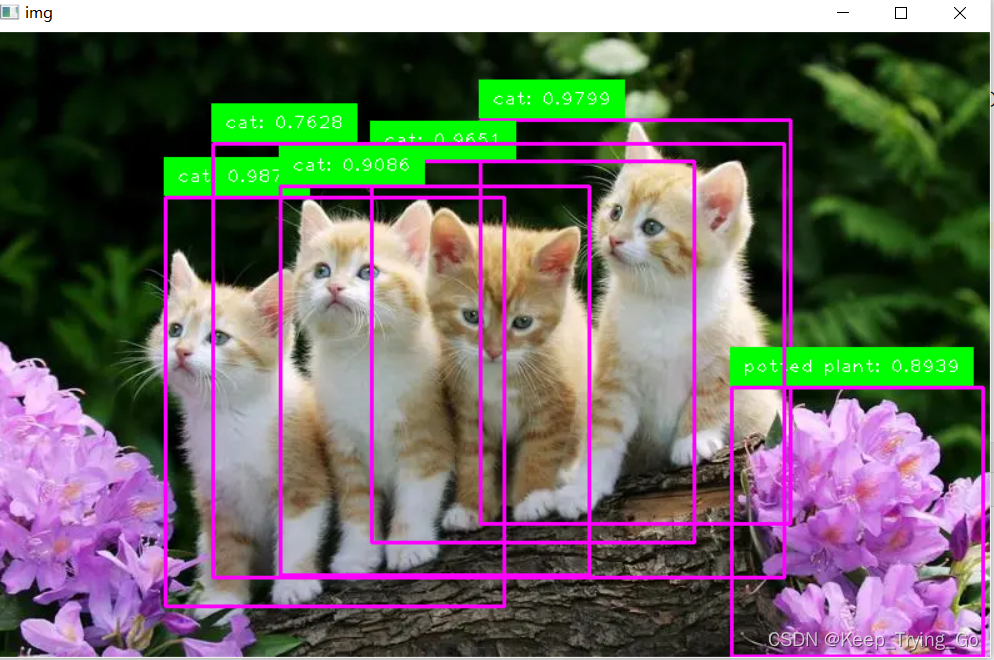
(5)实时检测
def timeDetect():
    # 计算开始时间
    start_time = time.time()
    # 计算帧率
    countFPS = 0
    # 开启摄像头
    cap = cv2.VideoCapture(0)
    while cap.isOpened():
        ret, frame = cap.read()
        frame = cv2.resize(src=frame, dsize=(520, 520))
        frame = cv2.flip(src=frame, flipCode=2)
        #将其opencv读取的图像格式转换为PIL读取的类型格式
        frame_PIL = Image.fromarray(frame)
        img_transform = transform(frame_PIL)
        # 对图像进行升维
        img_Transform = torch.unsqueeze(input=img_transform, dim=0)
        # 预测图片
        modelFRCNNResNet50Fpn.eval()
        detection = modelFRCNNResNet50Fpn(img_Transform)
        # 获取类别概率值
        end_time = time.time()
        countFPS += 1
        FPS = round(countFPS / (end_time - start_time), 0)
        cv2.putText(img=frame, text='FPS: ' + str(FPS), org=(10, 50),
                    fontFace=cv2.FONT_HERSHEY_SIMPLEX,
                    fontScale=1.0, color=(0, 255, 0), thickness=2)
        boxes=detection[0]['boxes']
        labels=detection[0]['labels']
        scores=detection[0]['scores']
        for k in range(len(labels)):
            xleft = int(boxes[k][0])
            yleft = int(boxes[k][1])
            xright = int(boxes[k][2])
            yright = int(boxes[k][3])

            class_id = labels[k].item()
            print(class_id)

            confidence = scores[k].item()
            if confidence>0.3:
                text = classes[class_id] + ': ' + str('{:.4f}'.format(confidence))
                cv2.rectangle(frame, (xleft, yleft), (xright, yright), (255, 0, 255), 2)
                cvzone.putTextRect(img=frame, text=text, pos=(xleft + 9, yleft - 12),
                               scale=1, thickness=1, colorR=(0, 255, 0))
        cv2.imshow('img', frame)
        key = cv2.waitKey(1)
        if key == 27:
            break
    cap.release()
    cv2.destroyAllWindows()
3.对预训练目标检测模型的类别和backbone的修改
(1)fasterrcnn_resnet50_fpn
对其训练的类别进行修改:
import torchvision
from torchvision.models.detection.faster_rcnn import FastRCNNPredictor

# 在COCO上加载经过预训练的预训练模型
model = torchvision.models.detection.fasterrcnn_resnet50_fpn(pretrained=True)

# replace the classifier with a new one, that has
# 将分类器替换为具有用户定义的 num_classes的新分类器
num_classes = 2  # 1 class (person) + background
# 获取分类器的输入参数的数量
in_features = model.roi_heads.box_predictor.cls_score.in_features
# 用新的头部替换预先训练好的头部
model.roi_heads.box_predictor = FastRCNNPredictor(in_features, num_classes)
对其backbone相关进行修改:

import torchvision
from torchvision.models.detection import FasterRCNN
from torchvision.models.detection.rpn import AnchorGenerator

# 加载预先训练的模型进行分类和返回
# 只有功能
backbone = torchvision.models.mobilenet_v2(pretrained=True).features
# FasterRCNN需要知道骨干网中的输出通道数量。对于mobilenet_v2,它是1280,所以我们需要在这里添加它
backbone.out_channels = 1280

# 我们让RPN在每个空间位置生成5 x 3个锚点
# 具有5种不同的大小和3种不同的宽高比。
# 我们有一个元组[元组[int]]
# 因为每个特征映射可能具有不同的大小和宽高比
anchor_generator = AnchorGenerator(sizes=((32, 64, 128, 256, 512),),
                                   aspect_ratios=((0.5, 1.0, 2.0),))

# 定义一下我们将用于执行感兴趣区域裁剪的特征映射,以及重新缩放后裁剪的大小。
# 如果您的主干返回Tensor,则featmap_names应为[0]。
# 更一般地,主干应该返回OrderedDict [Tensor]
# 并且在featmap_names中,您可以选择要使用的功能映射。
roi_pooler = torchvision.ops.MultiScaleRoIAlign(featmap_names=['0', '1', '2', '3'],
                                                output_size=7,
                                                sampling_ratio=2)

# 将这些pieces放在FasterRCNN模型中
model = FasterRCNN(backbone,
                   num_classes=2,
                   rpn_anchor_generator=anchor_generator,
                   box_roi_pool=roi_pooler)
(2)ssd300_vgg16
#修改模型分类头的类别数
def modelSSDVgg16(num_classes):
    #加载在COCO数据集上训练的预训练模型
    modelSSDLite=ssd300_vgg16(pretrained=True,progress=True)

    # replace the classifier with a new one, that has
    # 将分类器替换为具有用户定义的 num_classes的新分类器
    # 获取分类器的输入参数的数量
    c_in_features=[modelSSDLite.head.classification_head.module_list[i].in_channels for i in range(len(modelSSDLite.head.classification_head.module_list))]
    num_anchors=modelSSDLite.anchor_generator.num_anchors_per_location()
    # # 用新的头部替换预先训练好的头部
    modelSSDLite.head.classification_head=SSDClassificationHead(in_channels=c_in_features,num_anchors=num_anchors,num_classes=num_classes)

    return modelSSDLite
(3)ssdlite320_mobilenet_v3_large
#修改模型分类头的类别数
def modelSSD320(num_classes):
    #加载在COCO数据集上训练的预训练模型
    modelSSDLite=ssdlite320_mobilenet_v3_large(pretrained=True,progress=True)

    # replace the classifier with a new one, that has
    # 将分类器替换为具有用户定义的 num_classes的新分类器
    # 获取分类器的输入参数的数量

    c_in_features=[]
    norm_Layers=[]
    for i in range(len(modelSSDLite.head.classification_head.module_list)):
        in_channels_1=modelSSDLite.head.classification_head.module_list[i][0][0].in_channels
        normLayer=modelSSDLite.head.classification_head.module_list[i][0][1]
        c_in_features.append(in_channels_1)
        norm_Layers.append(normLayer)

    num_anchors=modelSSDLite.anchor_generator.num_anchors_per_location()
    # # 用新的头部替换预先训练好的头部
    modelSSDLite.head.classification_head=SSDLiteClassificationHead(in_channels=c_in_features,num_anchors=num_anchors,
                                                                    num_classes=num_classes,norm_layer=torch.nn.BatchNorm2d)

    return modelSSDLite
(4)怎么使用预训练模型进行自己的数据集的一个小实例
#怎么使用预训练模型进行自己的数据集的一个小实例
def example():
    model = fasterrcnn_resnet50_fpn(pretrained=True, progress=True)
    #images:四张图像,每一张图像的格式为[C,H,W]
    #boxes:对于每一张图像中包含11个目标,每一个目标包含四个坐标
    images, boxes = torch.rand(4, 3, 600, 1200), torch.rand(4, 11, 4)
    # print('images.shape: {}'.format(images.shape))
    # print('boxes.shape: {}'.format(boxes.shape))
    print('boxes: {}'.format(boxes))
    boxes[:, :, 2:4] = boxes[:, :, 0:2] + boxes[:, :, 2:4]
    print('boxes.shape: {}'.format(boxes.shape))
    # print('boxes: {}'.format(boxes))
    #这里的整数范围[1,91),其二维形状为[4,11]
    labels = torch.randint(1, 91, (4, 11))
    print('labels.shape: {}'.format(labels.shape))
    #将图像存放在一个列表中
    images = list(image for image in images)
    targets = []
    #将坐标和对应的标签存放在一个字典当中
    for i in range(len(images)):
        d = {}
        d['boxes'] = boxes[i]
        # print('boxes.shape: {}'.format(boxes[i].shape))
        d['labels'] = labels[i]
        # print('labels[i].shape: {}'.format(labels[i].shape))
        targets.append(d)
        # print('d: {}'.format(d))
    print('images.shape: {}'.format(len(images)))
    print('targets.shape: {}'.format(len(targets)))
    print('images: {}'.format(images))
    print('targets: {}'.format(targets))
    #注意模型默认的模式为训练模式
    # model.train()
    # output = model(images, targets)
    # print(output)
    # print(output['loss_classifier'].item())
    # For inference
    #设置为eval模式并进行检测
    model.eval()
    x = [torch.rand(3, 300, 400), torch.rand(3, 500, 400)]
    predictions = model(x)
    print('predictions: {}'.format(predictions))
    print('boxes.shape: {}')
提示:关于一个目标检测的完整实例,可能得后面给出。但是我相信给出了上面的三个目标检测模型类别的修改和backbone的修改之后以及一个模型训练的一个小实例之后,读者可以尝试写出一个完整的训练自己的目标检测的模型代码。