简介
MindSpore是华为昇腾开发的深度学习框架,旨在提供端边云全场景的AI框架。
Pytorch是由Facebook推出的AI框架。
本教程使用MindStudio中的X2MindSpore功能自动将Pytorch脚本转换为MindSpore脚本的案例。使用的模型是分类任务模型mobileNet,数据集是cifar-100。
本教程对应的视频讲解链接:https://www.bilibili.com/video/BV1tM411z7W1
环境准备
Windows端:
MindStudio 官网:https://www.hiascend.com/software/mindstudio
Python 需要配置在环境变量中,需要安装三个软件包(pandas libcst jedi)
pip3 install pandas #pandas版本需大于或等于1.2.4
pip3 install libcst #libcst 版本号需要大于或等于0.4.3
pip3 install jedi #跨文件分析库,安装后有助于工具解析不同文件中的变量,推荐安装
源代码下载 https://github.com/weiaicunzai/pytorch-cifar100
训练服务器:
硬件平台:Ascend 910 arm64架构
操作系统:Ubuntu 18.04.6 LTS
软件环境:
Python3.7.5
MindSpore 1.8.0 框架安装请参考
https://www.mindspore.cn/install#installTip
CANN 5.1.RC2
请参考昇腾软件快速部署指南:
https://www.hiascend.com/document/detail/zh/quick-installation/22.0.RC2/quickinstg/300T_9000/300T_9000_00001.html
X2MindSpore
简介
X2MindSpore工具可将基于PyTorch和TensorFlow开发的模型及其训练脚本根据适配规则迁移为可基于MindSpore运行的代码,大幅度提高了脚本迁移速度,降低了开发者的工作量。
Ascend Training项目创建
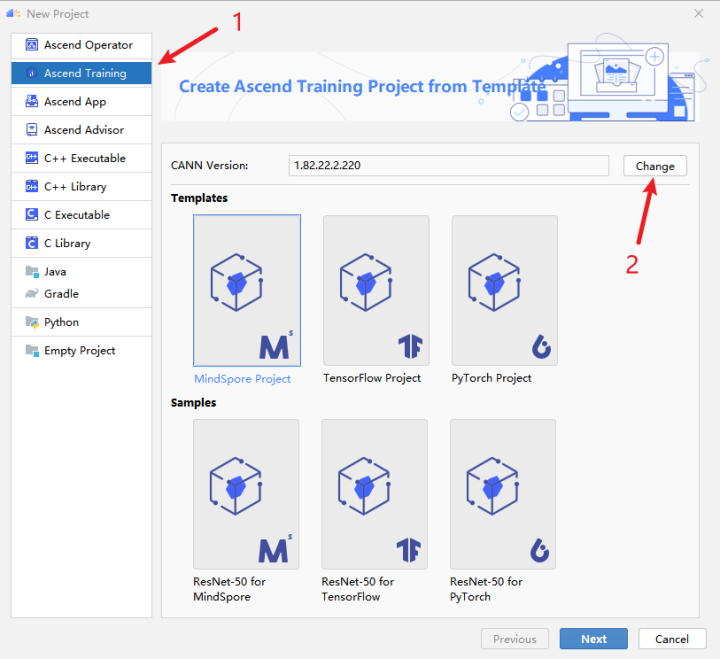
安装好MindStudio后新建一个项目,左侧选择Ascend Training,然后点击Change选择远程服务器的CANN ,参照下图。

需要填写服务器的IP,端口,用户名,密码。
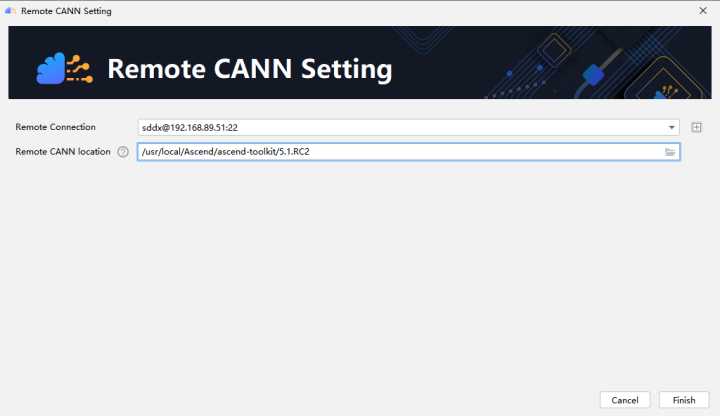
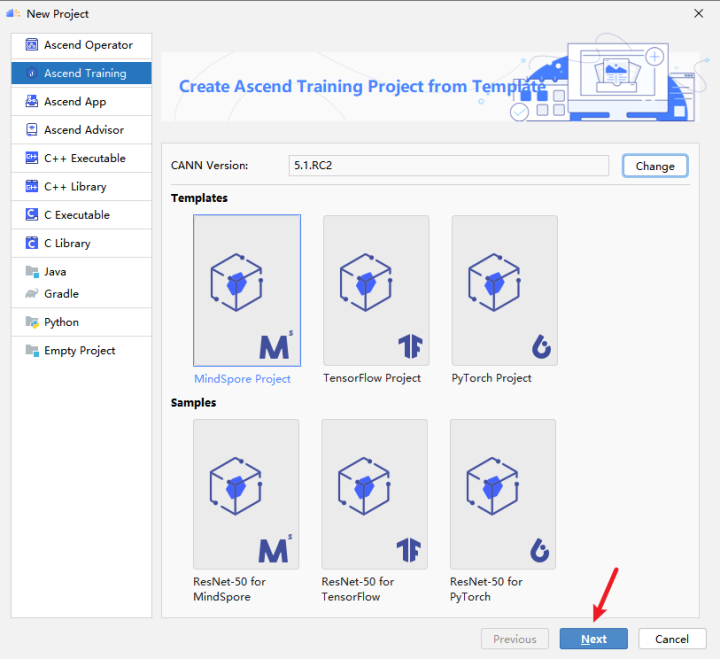
Remote Connection配置好之后,选择正确的Remote CANN location,按照自己安装的CANN路径选择,最后需要选择到5.1.RC2(这个名字和安装的CANN版本相同)
点击Finish后,需要等待一段时间完成CANN同步。
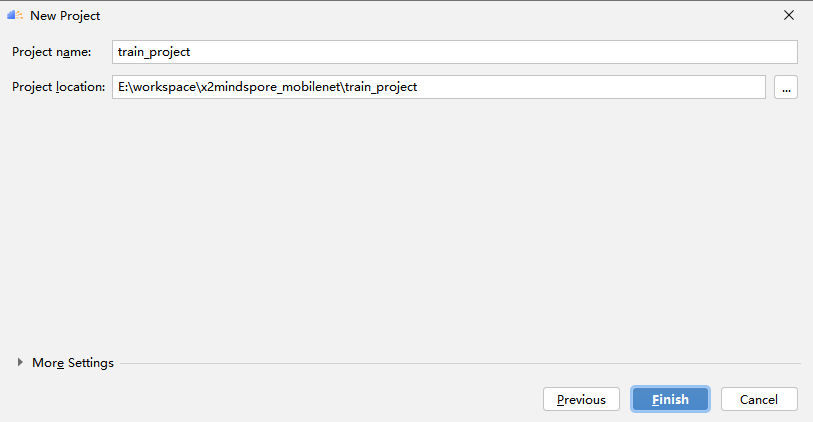
设置项目路径,点击Finish即可完成项目创建。
X2MindSpore
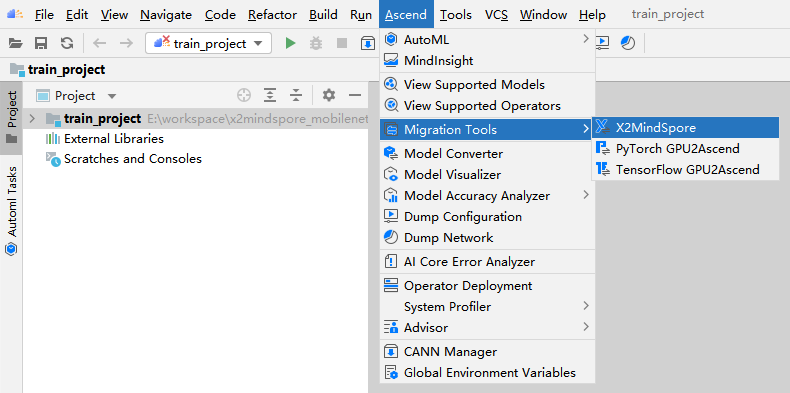
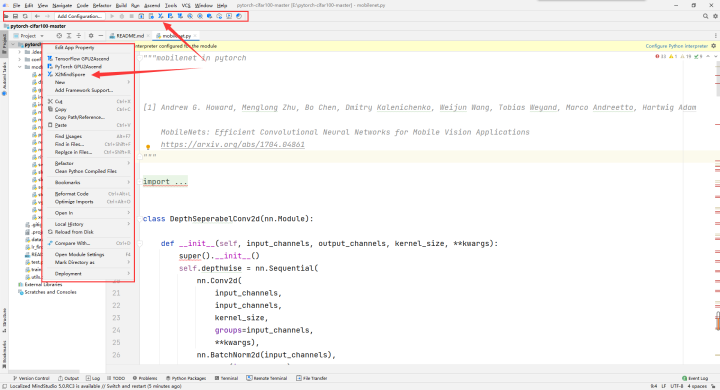
菜单栏依次选择Ascend->Migration Tools->X2MindSpore
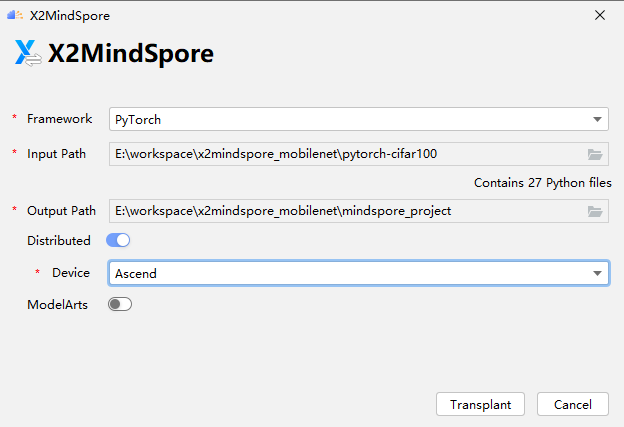
Framework:原始脚本框架类型,选择PyTorch
Input Path:原始项目输入路径就是我们要转换的源代码文件
Output Path:输出路径是转换完成后的路径,可以新建一个文件夹
点击Distributed,这个是选择转为分布式训练脚本,Device选择Ascend。
参照截图都选择完成后,点击Transplant。
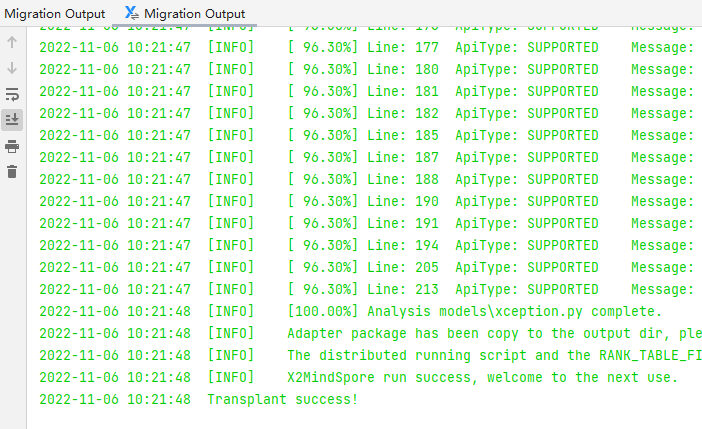
等待一段时间,出现这个界面就代表转换成功了。
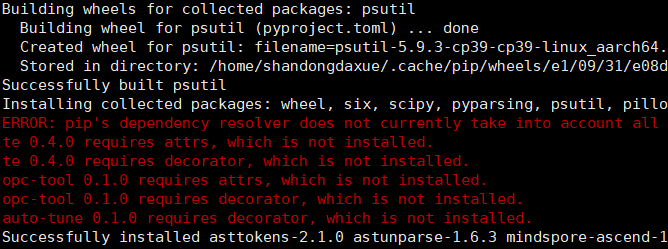
如果有找不到包这种报错一般是python环境的问题,教程末尾FAQ有相关解决方案。
转换完成后在Output Path下面会生成一个文件夹,现在看一下项目下有哪些文件,X2MindSpore工具会在输出路径下额外生成一些文件
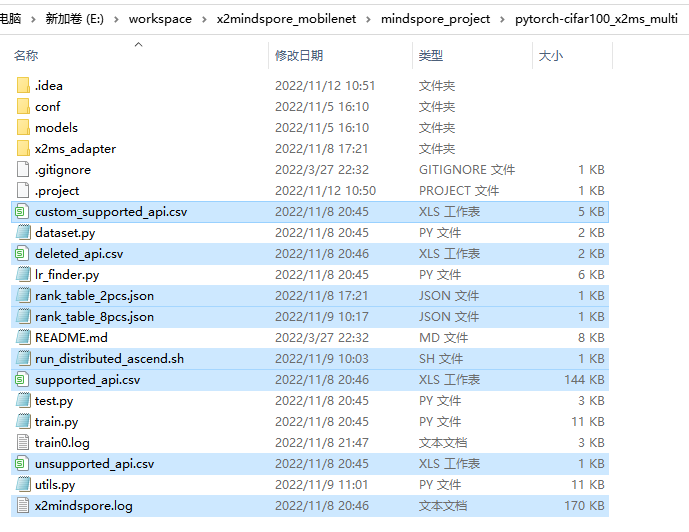
这里介绍几个重要的,更多细节请参考MindStudio官方文档
https://www.hiascend.com/document/detail/zh/mindstudio/50RC2/msug/msug_000048.html
run_distributed_ascend.sh 启动分布式训练的shell脚本
rank_table_2pcs.json 2卡组网配置文件
rank_table_8pcs.json 8卡组网配置文件
这两个配置文件格式一样,根据自己训练服务器卡的数量选择。
x2mindspore.log转换日志文件(可以查看转换过程是否有报错)
.csv结尾的文件是关于API的支持与否信息,可用于深入分析转换情况。
MindSpore项目打开与配置
pytorch-cifar100_x2ms_multi,这个就是我们转换成功后的项目文件,现在需要在MindStudio中打开这个项目
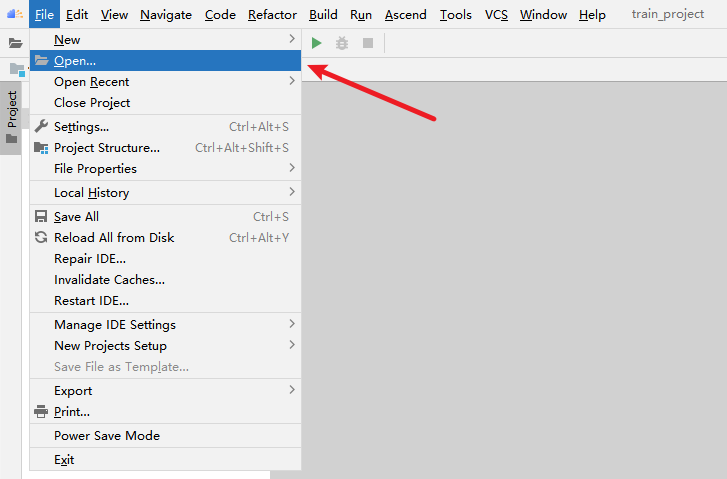
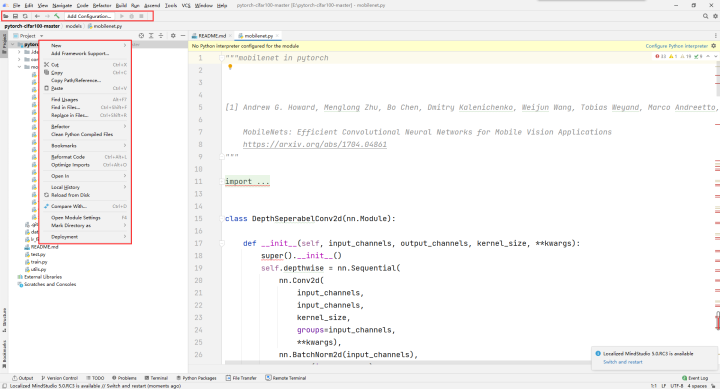
左上角依次点击File、Open
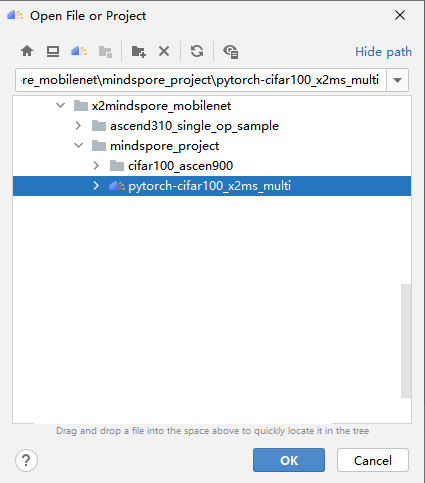
选择转换完成的文件夹,然后点击OK
直接打开一个文件夹默认是一个非昇腾项目,需要把它转换为Ascend Training项目。

菜单栏依次点击Ascend、Convert To Ascend Project
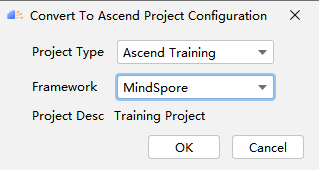
然后选择项目类型Ascend Training,选择框架MindSpore,点击OK
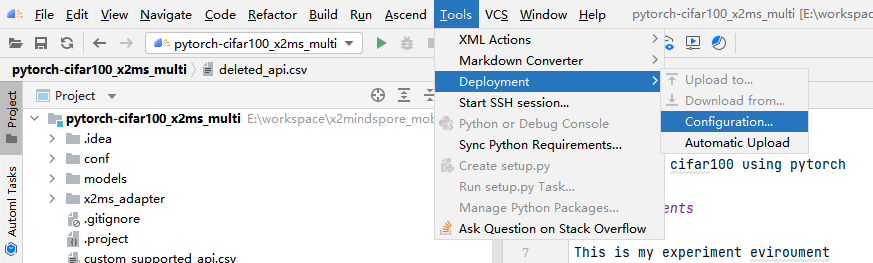
设置部署路径,方便我们将Windows端的代码同步到服务器端,服务器端输出的日志也可以同步回来。
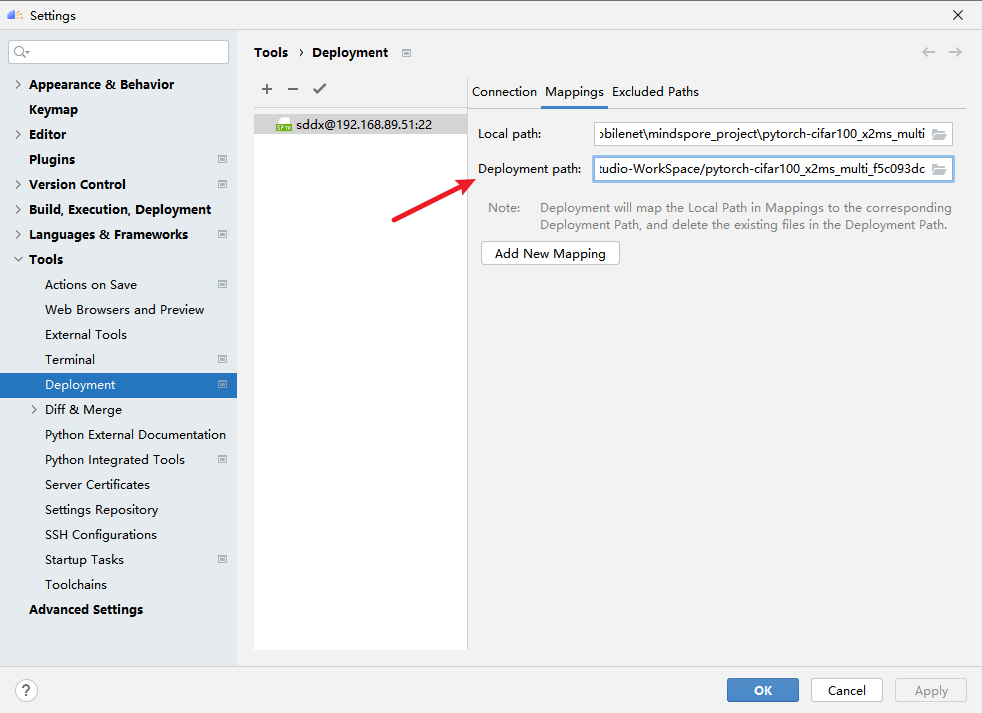
Deployment path根据自己服务器情况选择一个路径。
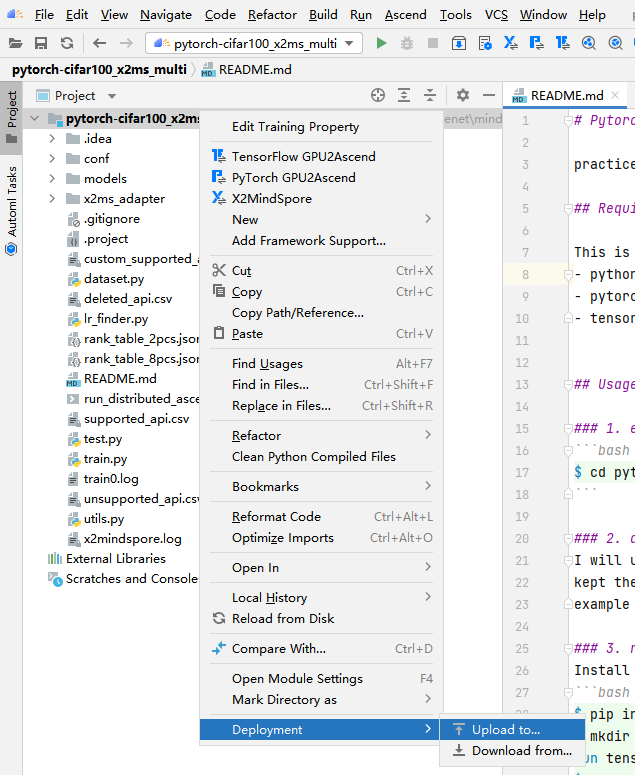
右键选择Deployment,Upload to上传到服务器,Download是下载到本地。
这个功能可以选中部分文件或者文件夹,根据自己需要使用。
数据集配置
数据集下载
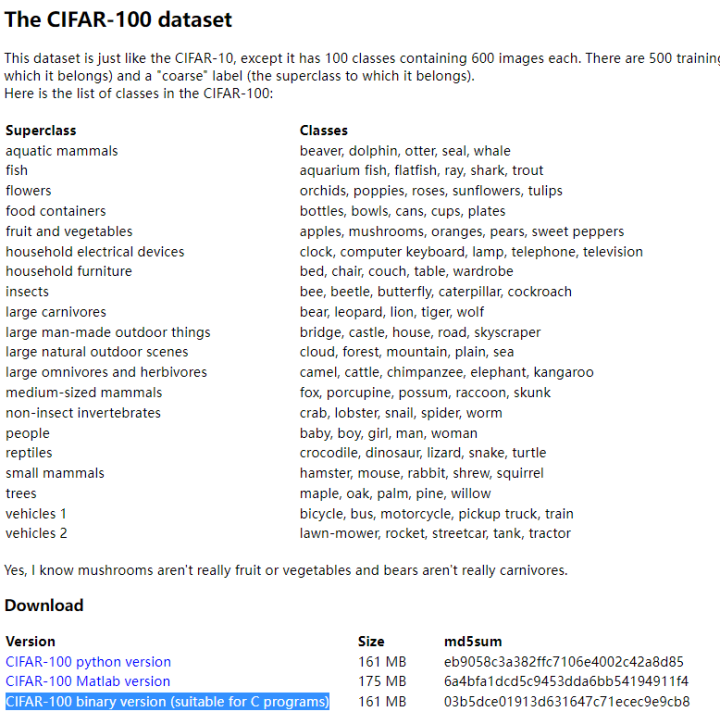
http://www.cs.toronto.edu/~kriz/cifar.html
下载CIFAR-100 binary version (suitable for C programs)
可以点击链接下载,也可以直接Linux下用命令下载。我这里用MindStudio提供的SSH session来操作。

菜单栏点击Tools,Start SSH session
然后点击设置好的session
切换到合适的数据下载目录中,然后按照下图所示命令下载数据集。

curl http://www.cs.toronto.edu/~kriz/cifar-100-binary.tar.gz --output ./cifar-100-binary.tar.gz
使用命令解压该压缩包
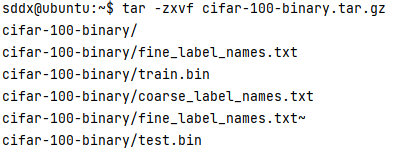
tar -zxvf cifar-100-binary.tar.gz
然后就得到了训练需要的数据集

我把数据放置在了/home/sddx/workspace/data 大家按照自己的情况放置即可。
数据集路径修改
在utils.py文件做三处修改


MindSpore脚本训练
步骤简介
(1)配置rank_table_8pcs.json
(2)修改run_distributed_ascend.sh
(3)启动脚本
配置rank_table_8pcs.json
rank_table_8pcs.json 需要我们写入组网信息
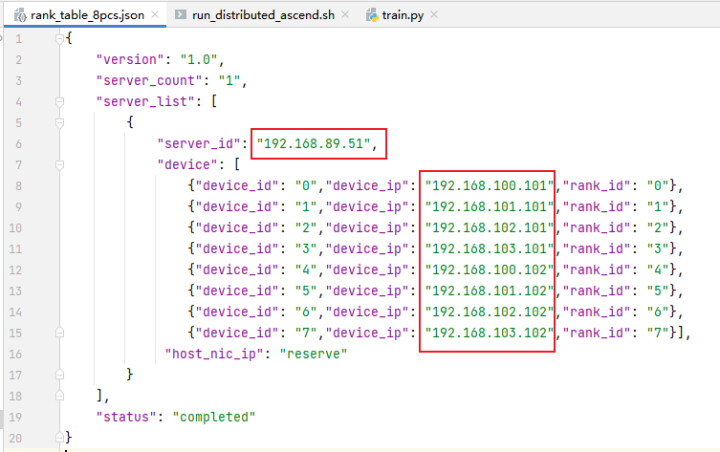
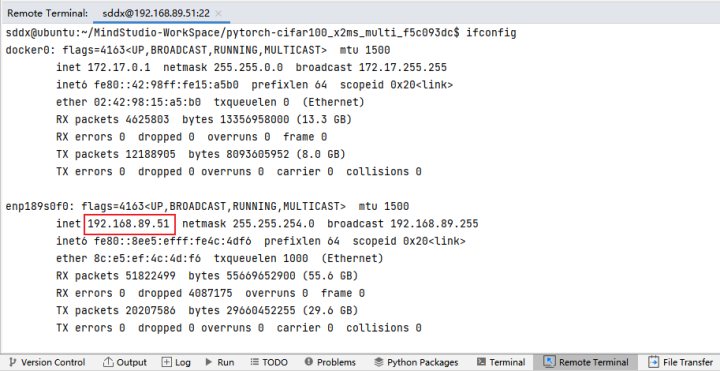
server_id 服务器的IP地址,可以使用ifconfig命令获取
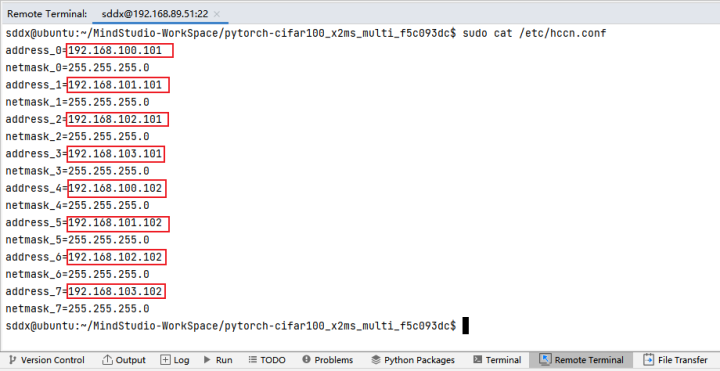
device_ip表示集成网卡的IP地址,可以在当前机器执行指令cat /etc/hccn.conf,address_x的键值就是网卡IP地址。
run_distributed_ascend.sh介绍
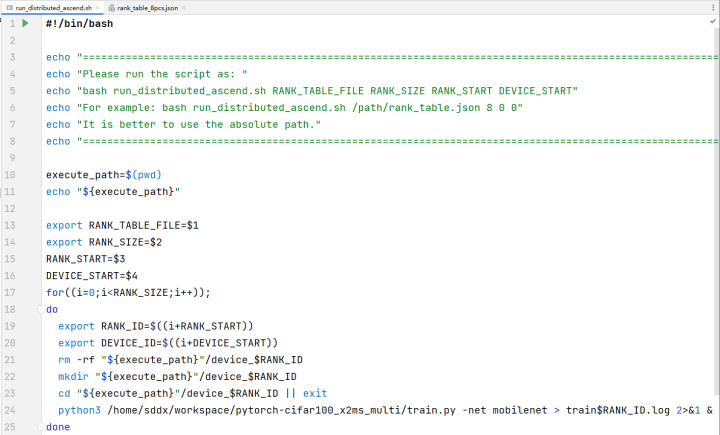
(1)指定了shell脚本解释器的路径
(3-8)输出一些提示信息到终端
(10)定义变量execute_path,值是pwd命令获得的当前目录
(13)$1是命令第一个参数,多卡环境的组网信息文件
(14)$2是命令第二个参数,卡的数量
(15)$3是命令第三个参数,卡逻辑起始编号
(16)$4是命令第四个参数,卡物理起始编号
(17)循环RANK_SIZE次,开启RANK_SIZE个进程,也就是一个卡对应一个python进程
(19-20)导出环境变量RANK_ID,DEVICE_ID
(21)删除执行路径下面的device_X目录(之前运行过会创建,所以先清空)
(22)新建执行路径下面的device_X目录
(23)切换当前目录到device_X目录
(24)启动训练脚本,-net参数指定使用的网络,后面的 > trainX.log 2>&1 是将标准输出、标准错误输出重定向到trainX.log 中,末尾的&设置该进程为后台进程。
修改run_distributed_ascend.sh
这个启动脚本需要我们修改的就是第24行,我们需要把单卡训练启动脚本的命令写在这里,特别需要注意的是:涉及到文件的路径需要使用 ‘/’开头的绝对路径,不然会因为执行目录在device_X中而找不到该文件。

python3 /home/sddx/MindStudio-WorkSpace/pytorch-cifar100_x2ms_multi_f5c093dc/train.py -net mobilenet
启动分布式训练脚本
两种方式都可以启动,推荐第一种
方式一:MindStudio内启动

左上角点击选择Edit Configurations
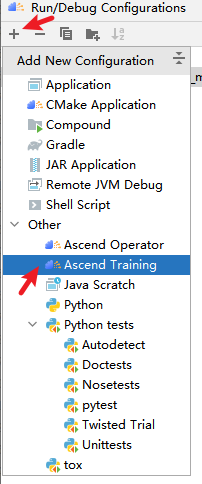
点击加号,选择Ascend Training
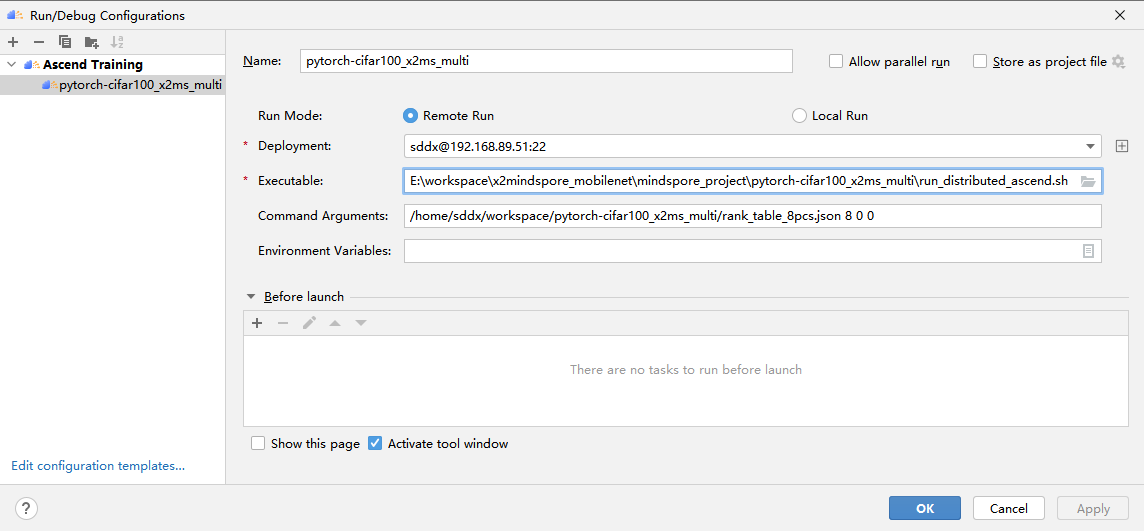
Deployment已经配置好,直接选中即可
Executable选择自己项目路径下面的run_distributed_ascend.sh
Command Arguments 命令参数,共有四个,第一个是rank_table_8pcs.json(写服务器端绝对路径),8是卡数量,后两个一般写0。之前的“run_distributed_ascend.sh介绍”小节有详细介绍,可以返回观看。
全部选择好之后点击OK

点击绿色三角即可启动

方式二:命令启动
配置好run_distributed_ascend.sh 以及rank_table_8pcs.json这两个文件后,就可以启动分布式训练脚本了
bash run_distributed_ascend.sh RANK_TABLE_FILE RANK_SIZE RANK_START DEVICE_START
RANK_TABLE_FILE 多卡环境的组网信息文件,rank_table_8pcs.json
RANK_SIZE 卡的数量
RANK_START 卡逻辑起始编号,当前仅支持单机多卡,填0即可
DEVICE_START 卡物理起始编号
实例命令:(根据实际路径修改)
bash run_distributed_ascend.sh /home/sddx/workspace/pytorch-cifar100_x2ms_multi/rank_table_8pcs.json 8 0 0

注意:使用绝对路径
bash run_distributed_ascend.sh rank_table_8pcs.json 8 0 0 (这样写是不行的)
训练脚本运行情况查看
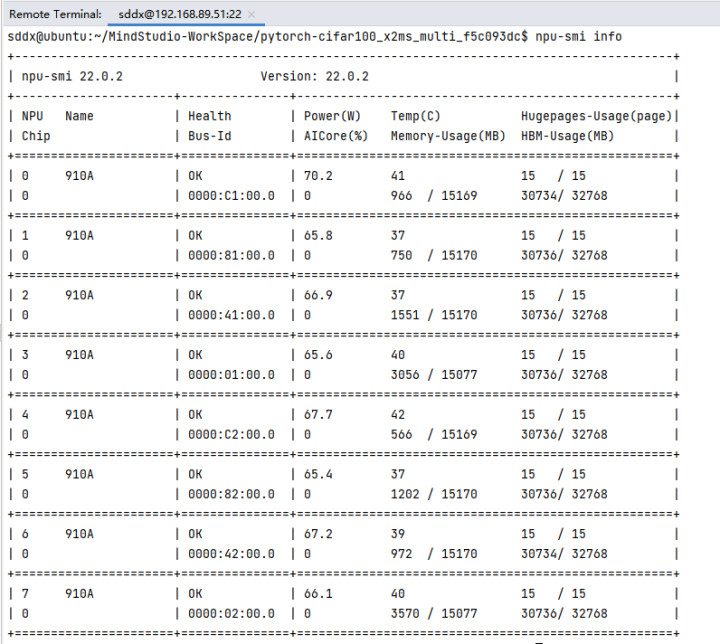
npu-smi info 查看卡信息,HBM-Usage(MB)被使用了一部分就说明程序正常运行起来了。
同时项目路径下会自动生成device_0/train0.log,训练输出的日志信息在这里可以看到。
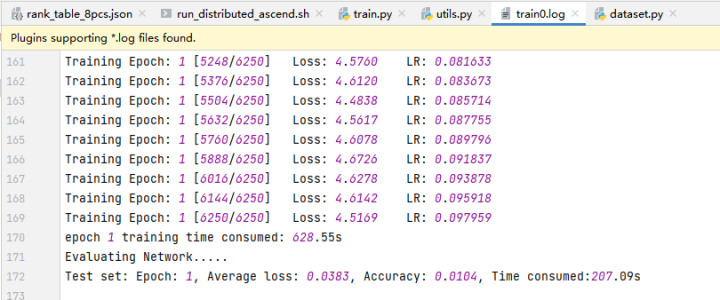
我这里只让它训练了一个epoch,可以看到训练正常。
FAQ
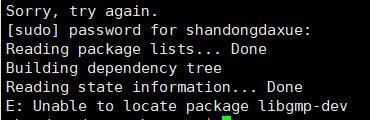
安装MindSpore依赖找不到gmp这个包
可能是源的问题,更新源,换源
cp /etc/apt/sources.list /etc/apt/sources.list.copy #备份源
sudo vim /etc/apt/sources.list
换源
# See http://help.ubuntu.com/community/UpgradeNotes for how to upgrade to
# newer versions of the distribution.
deb http://ports.ubuntu.com/ubuntu-ports/ bionic main restricted
# deb-src http://ports.ubuntu.com/ubuntu-ports/ bionic main restricted
## Major bug fix updates produced after the final release of the
## distribution.
deb http://ports.ubuntu.com/ubuntu-ports/ bionic-updates main restricted
# deb-src http://ports.ubuntu.com/ubuntu-ports/ bionic-updates main restricted
## N.B. software from this repository is ENTIRELY UNSUPPORTED by the Ubuntu
## team. Also, please note that software in universe WILL NOT receive any
## review or updates from the Ubuntu security team.
deb http://ports.ubuntu.com/ubuntu-ports/ bionic universe
# deb-src http://ports.ubuntu.com/ubuntu-ports/ bionic universe
deb http://ports.ubuntu.com/ubuntu-ports/ bionic-updates universe
# deb-src http://ports.ubuntu.com/ubuntu-ports/ bionic-updates universe
## N.B. software from this repository is ENTIRELY UNSUPPORTED by the Ubuntu
## team, and may not be under a free licence. Please satisfy yourself as to
## your rights to use the software. Also, please note that software in
## multiverse WILL NOT receive any review or updates from the Ubuntu
## security team.
deb http://ports.ubuntu.com/ubuntu-ports/ bionic multiverse
# deb-src http://ports.ubuntu.com/ubuntu-ports/ bionic multiverse
deb http://ports.ubuntu.com/ubuntu-ports/ bionic-updates multiverse
# deb-src http://ports.ubuntu.com/ubuntu-ports/ bionic-updates multiverse
## N.B. software from this repository may not have been tested as
## extensively as that contained in the main release, although it includes
## newer versions of some applications which may provide useful features.
## Also, please note that software in backports WILL NOT receive any review
## or updates from the Ubuntu security team.
deb http://ports.ubuntu.com/ubuntu-ports/ bionic-backports main restricted universe multiverse
# deb-src http://ports.ubuntu.com/ubuntu-ports/ bionic-backports main restricted universe multiverse
## Uncomment the following two lines to add software from Canonical's
## 'partner' repository.
## This software is not part of Ubuntu, but is offered by Canonical and the
## respective vendors as a service to Ubuntu users.
# deb http://archive.canonical.com/ubuntu bionic partner
# deb-src http://archive.canonical.com/ubuntu bionic partner
deb http://ports.ubuntu.com/ubuntu-ports/ bionic-security main restricted
# deb-src http://ports.ubuntu.com/ubuntu-ports/ bionic-security main restricted
deb http://ports.ubuntu.com/ubuntu-ports/ bionic-security universe
# deb-src http://ports.ubuntu.com/ubuntu-ports/ bionic-security universe
deb http://ports.ubuntu.com/ubuntu-ports/ bionic-security multiverse
# deb-src http://ports.ubuntu.com/ubuntu-ports/ bionic-security multiverse
deb https://apt.kitware.com/ubuntu/ bionic main
# deb-src https://apt.kitware.com/ubuntu/ bionic main
同步软件源的软件包版本
sudo apt-get update
MindSpore安装问题

MindSpore version 1.9.0 and Ascend AI software package (Ascend Data Center Solution)version 1.81 does not match, the version of software package expect one of ['1.83']
版本不匹配,重新安装1.8版本的MindSpore,请参考官方文档选择对应CANN的版本安装。
ImportError: /home/shandongdaxue/.local/lib/python3.7/site-packages/mindspore/lib/libmindspore_backend.so: undefined symbol: MsprofRegisterCallback
MindSpore版本与cann版本对应关系必须对应!!!
https://www.mindspore.cn/versions 往下翻有对应关系

RuntimeError: mindspore/ccsrc/plugin/device/ascend/hal/device/ascend_memory_adapter.cc:52 Initialize] Internal Error: Get Device HBM memory size failed, ret = 0, total HBM size :0
推理服务器不支持训练,需要使用训练类型服务器。
TypeError: Not supported to get attribute for InterpretedObject: '<x2ms_adapter.context.Context object at 0xffff3e71c950>'
The first argument should be a NameSpace, but got AbstractScalar(Type: External, Value: InterpretedObject: '<x2ms_adapter.context.Context object at 0xffff3e71c950>', Shape: NoShape)
需要正确配置MindStudio 对应的服务器的cann版本
ValueError: The folder ./data does not exist or is not a directory or permission denied!

数据需要使用绝对路径
训练后查看device_1/train1.log 显示 can't open file 'train.py'
python3: can't open file 'train.py': [Errno 2] No such file or directory
运行命令需要使用绝对路径
RuntimeError:Runtime init failed

init_hccl() mindspore/ccsrc/pipeline/jit/pipeline.cc:1538 InitHccl
初始化hccl失败了,通常由于rank json没写对
我这里是因为rank_table_8pcs.json没有使用绝对路径,修改为
/home/sddx/workspace/pytorch-cifar100_x2ms_multi/rank_table_8pcs.json
X2MindSpore功能找不到
工具栏没有相应图标且右键单击工程目录中的文件夹,找不到“X2MindSpore”
原因分析:该项目不是Ascend项目,需要进行转换。
解决步骤:
- 单击Ascend > Convert To Ascend Project
- 根据自己的需要选择好Project Type和Sub Type后点击“OK”

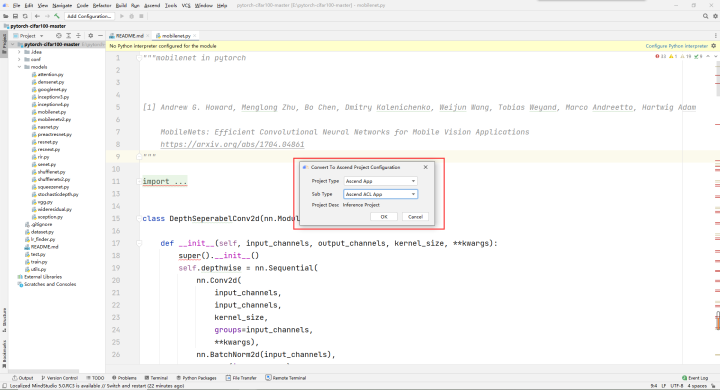
解决成功界面:
点击转换提示“ ModuleNotFoundError: No module named 'libcst' ”
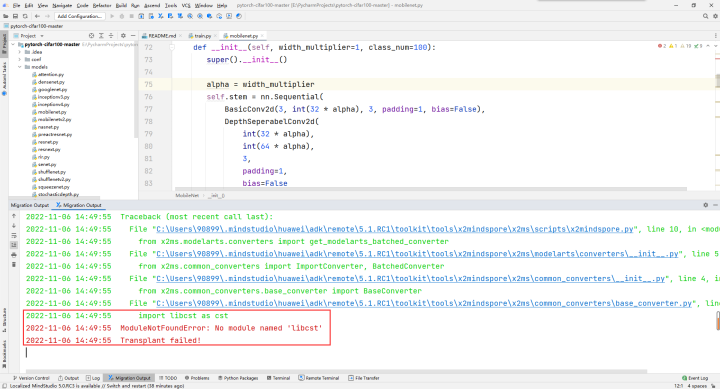
原因分析:libcst包未安装好。X2MindSpore运行的时候使用的是默认路径下的python.exe,而不是虚拟环境中的python.exe。如果想让它使用虚拟环境中的python.exe,需要设置环境变量。注意安装libcst包的时候需要在X2MindSpore运行时使用的python的环境下安装,否则就会出现以上的错误。
解决步骤:pip3 install libcst #注意libcst版本号需要大于或等于0.4.3
建议
大家可以登录昇腾论坛分享 MindStudio 使用经验
https://bbs.huaweicloud.com/forum/forum-945-1.html
遇到解决不了的问题可以在这里提问,能得到华为专家的技术指导。