1.需求说明
2.实现原理说明
3.实现过程
3.1集成uView2.0
3.2 自定义tabbar
3.3 vuex定义tabbar共享信息
3.4 tabbar显示个数控制
1.需求说明
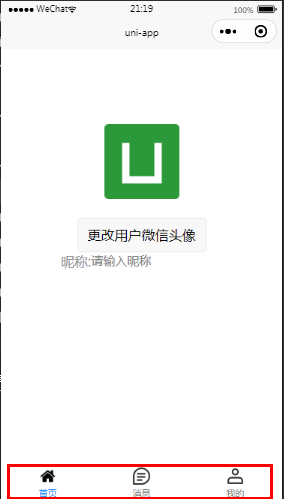
要求不同时间显示不同的tabbar.点击不同的tabbar跳转到不同的页面,能随时实现tabbar显示个数的切换。一种是只需要显示首页、我的页面;另一种是显示首页、消息、我的页面。效果图如下: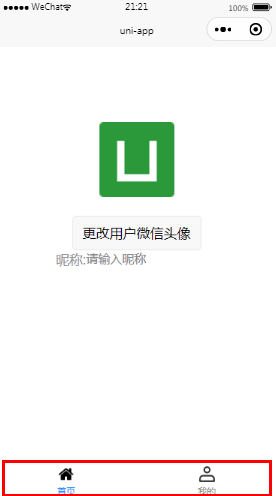
2.实现原理说明
基于uview2.0的u-tabbar实现自定义tabbar,使用vuex实现tabbar显示状态数据共享。首页和我的页面初始化时调用后端接口获取当前tabbar状态,根据不同的状态控制页面显示两个还是显示三个tabbar.
3.实现过程
3.1集成uView2.0
Hbuilder导入插件,uniapp插件市场搜索:uView2.0
uni.scss中添加如下:
// 导入uView全局scss变量文件
@import "./uni_modules/uview-ui/theme.scss";
main.js中添加如下:
// 引入全局uView
import uView from './uni_modules/uview-ui'
Vue.use(uView)
3.2.自定义tabbar
自定义组件:custom-tabbar
<template>
	<view >
	<u-tabbar
		:value="tabbarIndex"
		:fixed="true"
		:safeAreaInsetBottom="true"
		:placeholder="true"
	>

		<u-tabbar-item  v-for="(tabbarItem,index) in tabbar" :key="index" :text="tabbarItem.text" @click="switchTo()">
				<image
					class="image_class"
					slot="active-icon"
					:src="tabbarItem.selectedIconPath"
				></image>
				<image
					class="image_class"
					slot="inactive-icon"
					:src="tabbarItem.iconPath"
				></image>
			</u-tabbar-item>
	</u-tabbar>
	</view>
</template>

<script>
	import {


			mapState
		} from 'vuex';
	export default {


		name:"custom-tabbar",
		data() {


			return {


				tabbar:[]  // tabbar信息
			};
		},
		computed: mapState({


					tabbarIndex:'tabbarIndex',
					tabbarList:'tabbarList'
				}),
	     // 自定义组件中属性
	    props:['tabbarState'],
		created() {


					// 模拟调用服务端接口,显示首页和我的页面
					if(this.tabbarState == 1){


						const storeTabbar=this.$store.state.tabbarList;
						this.tabbar = this.tabbar.concat(storeTabbar[0]).concat(storeTabbar[2]);
					}
					// 模拟调用服务端接口,显示首页、消息和我的页面
					if(this.tabbarState == 2){


						this.tabbar = this.$store.state.tabbarList;
					}

		},
		methods:{


			// 页面跳转
			switchTo(event){


				wx.switchTab({


					url: this.tabbar[event].pagePath,
					success: () => {


						this.$store.state.tabbarIndex = event
					}
				})

		}
	},
	}
</script>

<style lang="scss">
.image_class{


	width: 50rpx;
	height: 50rpx;
}
</style>
3.3.vuex定义tabbar共享信息
项目根目录下创建storage文件夹,然后创建index.js.内容如下:
import Vue from 'vue'
import Vuex from 'vuex'
Vue.use(Vuex)
const store = new Vuex.Store({


	// 这个代表全局可以访问数据对象,就像是咱们在组件中声明的 data 属性,区别在于data中数据为组件私有,这里state为项目全局共享。
	state: {


		// 自定义tabbar索引
		tabbarIndex:  0,
		// tabbar信息
		tabbarList:[{


							iconPath: "/static/index.png",
							selectedIconPath: "/static/index_select.png",
							text: '首页',
							count: 2,
							isDot: true,
							pagePath: "/pages/index/index"
						},
						{


							iconPath: "/static/message.png",
							selectedIconPath: "/static/message_select.png",
							text: '消息',
							midButton: true,
							pagePath: "/pages/news/news"
						},
						{


							iconPath: "/static/mine.png",
							selectedIconPath: "/static/mine_select.png",
							text: '我的',
							pagePath: "/pages/mine/mine"
						},
					]

	},
	// 这个实时监听 state 内的数据对象变化,类似 咱们组件中的 computed 属性,会依赖 state 数据变化而变化
	getters: {


	},
	// 用来同步设置 state 的值
	mutations: {


	},
	// 通过提交 mutations 内部的方法,异步更新 state 的状态,官方推荐都使用这种方法比较合适
	actions: {


	}
})
export default store
main.js中引入storage信息
// 引入 store
import store from '@/store/index.js'
Vue.prototype.$store = store

const app = new Vue({


    ...App,
	store
})
page.json中设置tabbar路径,否则调用wx.switchTab方法不生效(仅针对于tabbar页面实现跳转)
"tabBar": {


	  "custom": true,
	  "list": [{


	      "pagePath": "pages/index/index"
	    },
	    {


	      "pagePath": "pages/news/news"
	    },
		{


		  "pagePath": "pages/mine/mine"
		}
	  ]
	}
3.4 tabbar显示个数控制
以下代码中通过手动修改tabbarState模拟调用服务端接口查询状态.首页与我的页面需要动态获取,消息页面固定显示三个tabbar设置即可.
我的页面:

<template>
	<view>
		<view>我的页面</view>
		<view>
			<!-- 自定义tabbar -->
			<custom-tabbar :tabbarState='tabbarState'></custom-tabbar>
		</view>
	</view>

</template>

<script>
	export default {


		data() {


			return {


				tabbarState: 3 //tabbar显示个数 1.显示2个;2.显示3个
			};
		},
		created() {


			// 控制tabbar显示个数 1.显示2个;2.显示3个
			this.tabbarState=1;
			console.log("首页状态:"+this.tabbarState)
		}
	}
</script>

<style lang="scss">


</style>
首页:
<template>
	<view class="content">
		<image class="user_img" :src="userImg"></image>
		<view class="nick_class">
			<text class="title">昵称:</text>
			<input type="nickname" class="weui-input" placeholder="请输入昵称"/>
		</view>
		<view>
			<!-- 自定义tabbar -->
			<custom-tabbar :tabbarState='tabbarState'></custom-tabbar>
		</view>
	</view>
</template>

<script>
	export default {


		data() {


			return {


				userImg:"../../static/logo.png",
				tabbarState: 3 //tabbar显示个数 1.显示2个;2.显示3个
			}
		},
		created() {


			// 控制tabbar显示个数 1.显示2个;2.显示3个
			this.tabbarState=1;
			console.log("首页状态:"+this.tabbarState)
		},
		methods: {


			}

		}
	}
</script>

<style>
	.content {


		display: flex;
		flex-direction: column;
		align-items: center;
		justify-content: center;

	}

	.user_img {


		height: 200rpx;
		width: 200rpx;
		margin-top: 200rpx;
		margin-left: auto;
		margin-right: auto;
		margin-bottom: 50rpx;
	}

	.text-area {


		display: flex;
		justify-content: center;
	}

	.title {


		font-size: 36rpx;
		color: #8f8f94;
	}
	.nick_class{


		display: flex;
		flex-direction: row;
	}
</style>
消息页面:
<template>
	<view>
		<view>消息页面</view>
		<view>
			<!-- 自定义tabbar -->
			<custom-tabbar tabbarState=2></custom-tabbar>
		</view>
	</view>
</template>

<script>
	export default {


		data() {


			return {


				value1: 0
			};
		},
		methods:{


		}


	}
</script>

<style lang="scss">

</style>
补充:
可以直接在自定义tabbar中请求渲染之前设置tabbar信息:
beforeCreate() {


		// 调用接口
		findTabbarSetting({

    }).then((res)=>{


			if(res.Flag){


				this.tabbar = this.$store.state.tabbarList;
				console.log("显示三个"+JSON.stringify(this.tabbar))
			}else{


				const storeTabbar=this.$store.state.tabbarList;
				this.tabbar = this.tabbar.concat(storeTabbar[0]).concat(storeTabbar[2]);
				console.log("显示两个"+JSON.stringify(this.tabbar))
			}
		})
	}
各页面引用tabbar时则不需要传参,可以直接引用,实例:
<template>
	<view>
		<view>消息页面</view>
		<view>
			<custom-tabbar></custom-tabbar>
		</view>
	</view>
</template>
以上是实现tabbar动态显示的实现过程,如果感觉有帮助欢迎评论区点赞或留言!