1、前言
当前的点云3D检测主要分为两大类,第一类为grid-based的方法,第二类为point-based的方法。
grid-based的方法将不规则的点云数据转换成规则的3D voxels (VoxelNet, SECOND , Fast PointRCNN, Part A^2 Net)或者转化成 2D的BEV特征图(PIXOR, HDNet,PointPillars),这种方法可以将不规则的数据转换后使用3D或者2D的CNN来高效的进行特征提取。
point-based的方法主要由PointNet和他的变形作为特征提取器来直接的从原始的点云数据中提取基于点的特征,主要有PointRCNN,STD, F-PointNet。
一般来说,基于grid-based的方法可以获得更好的计算效率,但是由于进行voxelize的量化操作,不可避免的导致信息丢失,使得网络的定位精度下降;而point-based的方法因为通过Set Abstraction操作拥有可变的感受野,使特征拥有良好的定位信息,然而基于Point-based的方法不可避免的会带来更大的计算量。
因此作者在这里想到了将两种方法的优势结合起来,使网络达到一个更好的检测性能。
之前已经介绍过VoxelNet,SECOND,PointPillars,PointRCNN,想了解的小伙伴可以看我之前的博客;同时由于PV-RCNN大部分网络结构与SECOND和PointRCNN中相同,也建议先了解前两个网络后再看PV-RCNN。
PV-RCNN论文地址:https://arxiv.org/pdf/1912.13192.pdf![]() https://arxiv.org/pdf/1912.13192.pdf
https://arxiv.org/pdf/1912.13192.pdf
PV-RCNN代码:
https://github.com/open-mmlab/OpenPCDet![]() https://github.com/open-mmlab/OpenPCDet
https://github.com/open-mmlab/OpenPCDet
我的注释代码仓库:

PV-RCNN(Point-Voxel RCNN)在OpenPCDet中的类流程图:

PV-RCNN的8个模块
第一阶段:
1、MeanVFE (voxel特征编码)
2、VoxelBackBone8x(3D CNN 提取voxel特征)
3、HeightCompression(高度方向Z轴堆叠)
4、VoxelSetAbstraction(VSA模块,对不同voxel特征层完成SA)
5、BaseBEVBackbone(SECOND中的RPN层)
6、AnchorHeadSingle(anchor分类和回归头)
4、VoxelSetAbstraction(VSA模块,对不同voxel特征层完成SA)
第二阶段:
7、PointHeadSimple Predicted Keypoint Weighting (PKW前背景权重加权)
8、PVRCNNHead(二阶proposal精调)
注1:其中黑色部分均与SECOND中相同。
注2:为了方便解析,将第4部分内容移动到第一阶段最后进行,不会影响网络的结构,因为在第一阶段中第四部分和其余部分是并行的两条计算线,这样除去第四部分,其他的内容都与SECOND相同。如下图所示

这篇博客第三部分内容除了在最后预测部分需要生成预测结果用以box refinement以外,其余基本与SECOND一致,已经了解的小伙伴可以直接看第二篇博客与PV-RCNN相关的内容。
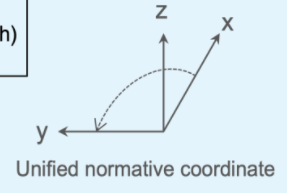
PCDet中的统一规范坐标:
2、PV-RCNN网络解析
作者认为使用3D CNN backbone with anchor based的方法可以取得相比于point-based方法更高的proposal召回率,所以PV-RCNN使用了该方法作为第一阶段的提议网络;但同时因为1)特征经过了8x的下采样,这使得难以对物体进行精确定位,2)尽管可以将特征图进行上采样获得高分辨率的特征图,但是这样会使得特征图更加的稀疏,让ROI Pooling、ROI Align中的插值操作产生更多的0值,造成计算和内存的浪费。
另一方面,set abstraction(SA)操作在PointNet的变种网络中展现了很强的领域编码能力,因此,作者提出将3D CNN和SA操作进行结合并实现第二阶段的的精确的proposal refinement。
PV-RCNN结合了voxel-based(grid-based)的高效编码多尺度特征层来产生3D的proposal,同时又采用了point-based的灵活感受野实现精确的位置定位;将这两种方式有效的进行结合成了PV-RCNN的关键任务。
但是如果直接在每个3D-proposal中均匀的采样几个grid-point,然后对这些grid-point进行SA(Set Abstraction)操作来进行proposal的优化的话,会造成很高的内存消耗;因为要达到不错的检测性能,voxels的数量和grid-point的数量都会相当大。
所以,为了更好的将两种方法进行结合,作者提出了两个模块来完成这一融合。
1、voxel-to-keypoint scene encoding
首先,将原始的点云数据就voxelization,然后使用3D稀疏卷积来进行高效的特征提取。同时为了减少直接对庞大的voxel进行场景编码,导致内存消耗较大的问题,这里先使用FPS最远点采样方法,选取N个点后并根据这N个点来对Voxel的特征进行操作来概括整个场景信息。相当于PointNet++对每一层的voxel进行SA操作。在进行3D卷积时,会得到多层不同尺度的voxel特征层,分别在不同尺度的voxel特征层上进行基于Voxel的Grouping、SA操作,这样就可以获得不同尺度的点云信息。整个点云场景就可以被一小部分拥有多尺度信息关键点高效的编码。
2、keypoint-to-grid ROI feature abstraction
再通过AnchorHeadSingle获得3D proposal后,为了取得准确的置信度分数预测和精确的box微调,每个proposal结合他grid-point的位置,使用ROI-grid pooling方法将多尺度的关键点特征和每一个grid point进行融合来给每个grid point丰富的感受野信息。
3、PV-RCNN与SECOND相同的部分(proposal生成)
3.1 voxelization
Kitti中点云截取范围为[ 0., -40., -3., 70.4, 40., 1. ];每个voxel的长宽高分别是[0.05, 0.05, 0.1];每个点云的特征维度是4 (x, y, z, reflect intensity);每个voxel中最大的采样点数为5;训练和推理时分别最大选取16k,40k个非空voxel。
代码在:pcdet/datasets/processor/data_processor.py
此处完成了
其中VoxelGeneratorWrapper在pcdet/datasets/processor/data_processor.py。
3.2 MeanVFE
MeanVFE由VoxelNet中的tacked Voxel Feature Encoding改变而来直接计算每个voxel内点的平均值,当成这个voxel的特征;大幅提高了计算的速度,并且也取得了不错的检测效果。
(Batch*16000, 5, 4) --> (Batch*16000, 4)
代码在:pcdet/models/backbones_3d/vfe/mean_vfe.py
class MeanVFE(VFETemplate):
    def __init__(self, model_cfg, num_point_features, **kwargs):
        super().__init__(model_cfg=model_cfg)
        # 每个点多少个特征(x,y,z,r)
        self.num_point_features = num_point_features

    def get_output_feature_dim(self):
        return self.num_point_features

    def forward(self, batch_dict, **kwargs):
        """
        Args:
            batch_dict:
                voxels: (num_voxels, max_points_per_voxel, C)
                voxel_num_points: optional (num_voxels) how many points in a voxel
            **kwargs:

        Returns:
            vfe_features: (num_voxels, C)
        """
        # here use the mean_vfe module to substitute for the original pointnet extractor architecture
        voxel_features, voxel_num_points = batch_dict['voxels'], batch_dict['voxel_num_points']
        # 求每个voxel内 所有点的和
        # eg:SECOND/PV-RCNN  shape (Batch*16000, 5, 4) -> (Batch*16000, 4)
        points_mean = voxel_features[:, :, :].sum(dim=1, keepdim=False)
        # 正则化项, 保证每个voxel中最少有一个点,防止除0
        normalizer = torch.clamp_min(voxel_num_points.view(-1, 1), min=1.0).type_as(voxel_features)
        # 求每个voxel内点坐标的平均值, 并用该值来代表该voxel
        points_mean = points_mean / normalizer
        # 将处理好的voxel_feature信息重新加入batch_dict中
        batch_dict['voxel_features'] = points_mean.contiguous()
        return batch_dict
3.3 VoxelBackBone8x
使用3D的稀疏卷积来完成对非空voxel的特征提取,大大减少传统3D卷积的计算量。
此处分别对voxel wise feature进行了1x, 2x, 4x, 8x的下采样操作,VoxelSetAbstraction模块会在每一层的特征图上进行VSA操作。
代码在:pcdet/models/backbones_3d/spconv_backbone.py
class VoxelBackBone8x(nn.Module):
    def __init__(self, model_cfg, input_channels, grid_size, **kwargs):
        super().__init__()
        self.model_cfg = model_cfg
        norm_fn = partial(nn.BatchNorm1d, eps=1e-3, momentum=0.01)

        self.sparse_shape = grid_size[::-1] + [1, 0, 0]

        self.conv_input = spconv.SparseSequential(
            spconv.SubMConv3d(input_channels, 16, 3, padding=1, bias=False, indice_key='subm1'),
            norm_fn(16),
            nn.ReLU(),
        )
        block = post_act_block

        self.conv1 = spconv.SparseSequential(
            block(16, 16, 3, norm_fn=norm_fn, padding=1, indice_key='subm1'),
        )

        self.conv2 = spconv.SparseSequential(
            # [1600, 1408, 41] <- [800, 704, 21]
            block(16, 32, 3, norm_fn=norm_fn, stride=2, padding=1, indice_key='spconv2', conv_type='spconv'),
            block(32, 32, 3, norm_fn=norm_fn, padding=1, indice_key='subm2'),
            block(32, 32, 3, norm_fn=norm_fn, padding=1, indice_key='subm2'),
        )

        self.conv3 = spconv.SparseSequential(
            # [800, 704, 21] <- [400, 352, 11]
            block(32, 64, 3, norm_fn=norm_fn, stride=2, padding=1, indice_key='spconv3', conv_type='spconv'),
            block(64, 64, 3, norm_fn=norm_fn, padding=1, indice_key='subm3'),
            block(64, 64, 3, norm_fn=norm_fn, padding=1, indice_key='subm3'),
        )

        self.conv4 = spconv.SparseSequential(
            # [400, 352, 11] <- [200, 176, 5]
            block(64, 64, 3, norm_fn=norm_fn, stride=2, padding=(0, 1, 1), indice_key='spconv4', conv_type='spconv'),
            block(64, 64, 3, norm_fn=norm_fn, padding=1, indice_key='subm4'),
            block(64, 64, 3, norm_fn=norm_fn, padding=1, indice_key='subm4'),
        )

        last_pad = 0
        last_pad = self.model_cfg.get('last_pad', last_pad)
        self.conv_out = spconv.SparseSequential(
            # [200, 150, 5] -> [200, 150, 2]
            spconv.SparseConv3d(64, 128, (3, 1, 1), stride=(2, 1, 1), padding=last_pad,
                                bias=False, indice_key='spconv_down2'),
            norm_fn(128),
            nn.ReLU(),
        )
        self.num_point_features = 128
        self.backbone_channels = {
            'x_conv1': 16,
            'x_conv2': 32,
            'x_conv3': 64,
            'x_conv4': 64
        }

    def forward(self, batch_dict):
        """
        Args:
            batch_dict:
                batch_size: int
                vfe_features: (num_voxels, C)
                voxel_coords: (num_voxels, 4), [batch_idx, z_idx, y_idx, x_idx]
        Returns:
            batch_dict:
                encoded_spconv_tensor: sparse tensor
        """
        # voxel_features, voxel_coords  shape (Batch * 16000, 4)
        voxel_features, voxel_coords = batch_dict['voxel_features'], batch_dict['voxel_coords']
        batch_size = batch_dict['batch_size']
        # 根据voxel坐标,并将每个voxel放置voxel_coor对应的位置,建立成稀疏tensor
        input_sp_tensor = spconv.SparseConvTensor(
            # (Batch * 16000, 4)
            features=voxel_features,
            # (Batch * 16000, 4) 其中4为 batch_idx, x, y, z
            indices=voxel_coords.int(),
            # [41,1600,1408] ZYX 每个voxel的长宽高为0.05,0.05,0.1 点云的范围为[0, -40, -3, 70.4, 40, 1]
            spatial_shape=self.sparse_shape,
            # 4
            batch_size=batch_size
        )

        """
        稀疏卷积的计算中,feature,channel,shape,index这几个内容都是分开存放的,
        在后面用out.dense才把这三个内容组合到一起了,变为密集型的张量
        spconv卷积的输入也是一样,输入和输出更像是一个  字典或者说元组
        注意卷积中pad与no_pad的区别
        """

        # # 进行submanifold convolution
        # [batch_size, 4, [41, 1600, 1408]] --> [batch_size, 16, [41, 1600, 1408]]
        x = self.conv_input(input_sp_tensor)

        # [batch_size, 16, [41, 1600, 1408]] --> [batch_size, 16, [41, 1600, 1408]]
        x_conv1 = self.conv1(x)
        # [batch_size, 16, [41, 1600, 1408]] --> [batch_size, 32, [21, 800, 704]]
        x_conv2 = self.conv2(x_conv1)
        # [batch_size, 32, [21, 800, 704]] --> [batch_size, 64, [11, 400, 352]]
        x_conv3 = self.conv3(x_conv2)
        # [batch_size, 64, [11, 400, 352]] --> [batch_size, 64, [5, 200, 176]]
        x_conv4 = self.conv4(x_conv3)


        # for detection head
        # [200, 176, 5] -> [200, 176, 2]
        # [batch_size, 64, [5, 200, 176]] --> [batch_size, 128, [2, 200, 176]]
        out = self.conv_out(x_conv4)

        batch_dict.update({
            'encoded_spconv_tensor': out,
            'encoded_spconv_tensor_stride': 8
        })
        batch_dict.update({
            'multi_scale_3d_features': {
                'x_conv1': x_conv1,
                'x_conv2': x_conv2,
                'x_conv3': x_conv3,
                'x_conv4': x_conv4,
            }
        })
        batch_dict.update({
            'multi_scale_3d_strides': {
                'x_conv1': 1,
                'x_conv2': 2,
                'x_conv3': 4,
                'x_conv4': 8,
            }
        })

        return batch_dict
其中block为稀疏卷积构建:
def post_act_block(in_channels, out_channels, kernel_size, indice_key=None, stride=1, padding=0,
                   conv_type='subm', norm_fn=None):
    # 后处理执行块,根据conv_type选择对应的卷积操作并和norm与激活函数封装为块
    if conv_type == 'subm':
        conv = spconv.SubMConv3d(in_channels, out_channels, kernel_size, bias=False, indice_key=indice_key)
    elif conv_type == 'spconv':
        conv = spconv.SparseConv3d(in_channels, out_channels, kernel_size, stride=stride, padding=padding,
                                   bias=False, indice_key=indice_key)
    elif conv_type == 'inverseconv':
        conv = spconv.SparseInverseConv3d(in_channels, out_channels, kernel_size, indice_key=indice_key, bias=False)
    else:
        raise NotImplementedError

    m = spconv.SparseSequential(
        conv,
        norm_fn(out_channels),
        nn.ReLU(),
    )

    return m
3.4 HeightCompression
将经过8x下采样的voxel特征在Z轴方向进行堆叠,增大Z轴的感受野(不考虑3D的物体会在Z轴上堆叠的问题)。
该设计的好处如下:
1.简化了网络检测头的设计难度
2.增加了高度方向上的感受野
3.加快了网络的训练、推理速度
[batch_size, 128, [2, 200, 176]]
最终得到的BEV特征图为:(batch_size, 128*2, 200, 176) ,然后就可以将图片的区域提议方法用在该特征图上,生成3D 的proposal。
# 在高度方向上进行压缩
class HeightCompression(nn.Module):
    def __init__(self, model_cfg, **kwargs):
        super().__init__()
        self.model_cfg = model_cfg
        # 高度的特征数
        self.num_bev_features = self.model_cfg.NUM_BEV_FEATURES

    def forward(self, batch_dict):
        """
        Args:
            batch_dict:
                encoded_spconv_tensor: sparse tensor
        Returns:
            batch_dict:
                spatial_features:

        """
        # 得到VoxelBackBone8x的输出特征
        encoded_spconv_tensor = batch_dict['encoded_spconv_tensor']
        # 将稀疏的tensor转化为密集tensor, [bacth_size, 128, 2, 200, 176]
        # 结合batch,spatial_shape、indice和feature将特征还原到密集tensor中对应位置
        spatial_features = encoded_spconv_tensor.dense()
        # batch_size,128,2,200,176
        N, C, D, H, W = spatial_features.shape
        """
        将密集的3D tensor reshape为2D鸟瞰图特征
        将两个深度方向内的voxel特征拼接成一个 shape : (batch_size, 256, 200, 176)
        z轴方向上没有物体会堆叠在一起,这样做可以增大Z轴的感受野,
        同时加快网络的速度,减小后期检测头的设计难度
        """
        # shape (batch, 128*2, 200, 176)
        spatial_features = spatial_features.view(N, C * D, H, W)
        # 将特征和采样尺度加入batch_dict
        batch_dict['spatial_features'] = spatial_features
        # 特征图的下采样倍数 8倍
        batch_dict['spatial_features_stride'] = batch_dict['encoded_spconv_tensor_stride']
        return batch_dict
3.5 BaseBEVBackBone
在获得类图片的特征数据后,需要在对该特征在BEV的视角上进行特征提取。分别对特征图进行不同尺度的下采样然后再进行上采样后,再在通道维度进行拼接。
SECOND \ PV-RCNN中存在两个下采样分支结构,则对应存在两个反卷积结构:
经过HeightCompression得到的BEV特征图是:(batch_size, 128*2, 200, 176)
下采样分支一:(batch_size, 128*2, 200, 176) --> (batch, 128, 200, 176)
下采样分支二:(batch_size, 128*2, 200, 176) --> (batch, 128, 200, 176)
反卷积分支一:(batch, 128, 200, 176) --> (batch, 256, 200, 176)
反卷积分支二:(batch, 256, 100, 88) --> (batch, 256, 200, 176)
最终将结构在通道维度上进行拼接的特征图维度:(batch, 256 * 2, 200, 176)
代码在pcdet/models/backbones_2d/base_bev_backbone.py
    def forward(self, data_dict):
        """
        Args:
            data_dict:
                spatial_features : (batch, c, W, H)
        Returns:
        """
        spatial_features = data_dict['spatial_features']
        ups = []
        ret_dict = {}
        x = spatial_features

        # 对不同的分支部分分别进行conv和deconv的操作
        for i in range(len(self.blocks)):
            """
            SECOND中一共存在两个下采样分支,
            分支一: (batch,128,200,176)
            分支二: (batch,256,100,88)
            """
            x = self.blocks[i](x)

            stride = int(spatial_features.shape[2] / x.shape[2])
            ret_dict['spatial_features_%dx' % stride] = x

            # 如果存在deconv,则对经过conv的结果进行反卷积操作
            """
            SECOND中存在两个下采样,则分别对两个下采样分支进行反卷积操作
            分支一: (batch,128,200,176)-->(batch,256,200,176)
            分支二: (batch,256,100,88)-->(batch,256,200,176)
            """
            if len(self.deblocks) > 0:
                ups.append(self.deblocks[i](x))
            else:
                ups.append(x)

        # 将上采样结果在通道维度拼接
        if len(ups) > 1:
            """
            最终经过所有上采样层得到的2个尺度的的信息
            每个尺度的 shape 都是 (batch, 256, 200, 176)
            在第一个维度上进行拼接得到x  维度是 (batch, 512, 200, 176)
            """
            x = torch.cat(ups, dim=1)
        elif len(ups) == 1:
            x = ups[0]

        # Fasle
        if len(self.deblocks) > len(self.blocks):
            x = self.deblocks[-1](x)

        # 将结果存储在spatial_features_2d中并返回
        data_dict['spatial_features_2d'] = x

        return data_dict
3.6 AnchorHeadSingle
经过BaseBEVBackbone后得到的特征图为(batch, 256 * 2, 200, 176);在SECOND中,作者提出了方向分类,将原来VoxelNet的两个预测头上增加了一个方向分类头,来解决角度训练过程中一个预测的结果与GTBox的方向相反导致大loss的情况。
检测头图:

每个头分别采用了1*1的卷积来进行预测。
3.6.1 anchor生成
由于在3D世界中,每个类别的物体大小相对固定,所以直接使用了基于KITTI数据集上每个类别的平均长宽高作为anchor大小,同时每个类别的anchor都有两个方向角为0度和90度。
anchor的类别尺度大小(单位:米):
分别是车 [3.9, 1.6, 1.56],anchor的中心在Z轴的-1米、
人[0.8, 0.6, 1.73],anchor的中心在Z轴的-0.6米、
自行车[1.76, 0.6, 1.73],anchor的中心在Z轴的-0.6米
每个anchro都有被指定两个个one-hot向量,一个用于方向分类,一个用于类别分类;还被指定一个7维的向量用于anchor box的回归,分别是(x, y, z, l, w, h, θ)其中θ为PCDet坐标系下物体的朝向信息。
最终可以得到3个类别的anchor,维度都是[z, y, x, num_size, num_rot, 7], 其中num_size是每个类别有几个尺度(1个);num_rot为每个anchor有几个方向类别(2个);7维向量表示为 [x, y, z, dx, dy, dz, rot](每个anchor box的信息)。
代码在:pcdet/models/dense_heads/target_assigner/anchor_generator.py
注:SECOND\PV-RCNN的特征图尺度大小为 宽200, 长176,下面注释中需要将所有216替换为176,248替换为200即可。同时点云的尺度信息是[0, -40, -3, 70.4, 40, 1]。
class AnchorGenerator(object):
    def __init__(self, anchor_range, anchor_generator_config):
        super().__init__()
        self.anchor_generator_cfg = anchor_generator_config  # list:3
        # 得到anchor在点云中的分布范围[0, -39.68, -3, 69.12, 39.68, 1], [0, -40, -3, 70.4, 40, 1]
        self.anchor_range = anchor_range
        # 得到配置参数中所有尺度anchor的长宽高
        # list:3 --> 车、人、自行车[[[3.9, 1.6, 1.56]],[[0.8, 0.6, 1.73]],[[1.76, 0.6, 1.73]]]
        self.anchor_sizes = [config['anchor_sizes'] for config in anchor_generator_config]
        # 得到anchor的旋转角度,这是是弧度,也就是0度和90度
        # list:3 --> [[0, 1.57],[0, 1.57],[0, 1.57]]
        self.anchor_rotations = [config['anchor_rotations'] for config in anchor_generator_config]
        # 得到每个anchor初始化在点云中z轴的位置,其中在kitti中点云的z轴范围是-3米到1米
        # list:3 -->  [[-1.78],[-0.6],[-0.6]]
        self.anchor_heights = [config['anchor_bottom_heights'] for config in anchor_generator_config]
        # 每个先验框产生的时候是否需要在每个格子的中间,
        # 例如坐标点为[1,1],如果需要对齐中心点的话,需要加上0.5变成[1.5, 1.5]
        # 默认为False
        # list:3 --> [False, False, False]
        self.align_center = [config.get('align_center', False) for config in anchor_generator_config]

        assert len(self.anchor_sizes) == len(self.anchor_rotations) == len(self.anchor_heights)
        self.num_of_anchor_sets = len(self.anchor_sizes)  # 3

    def generate_anchors(self, grid_sizes):
        assert len(grid_sizes) == self.num_of_anchor_sets
        # 1.初始化
        all_anchors = []
        num_anchors_per_location = []
        # 2.三个类别的先验框逐类别生成
        for grid_size, anchor_size, anchor_rotation, anchor_height, align_center in zip(
                grid_sizes, self.anchor_sizes, self.anchor_rotations, self.anchor_heights, self.align_center):
            # 2 = 2x1x1 --> 每个位置产生2个anchor,这里的2代表两个方向
            num_anchors_per_location.append(len(anchor_rotation) * len(anchor_size) * len(anchor_height))
            #  不需要对齐中心点来生成先验框
            if align_center:
                x_stride = (self.anchor_range[3] - self.anchor_range[0]) / grid_size[0]
                y_stride = (self.anchor_range[4] - self.anchor_range[1]) / grid_size[1]
                # 中心对齐,平移半个网格
                x_offset, y_offset = x_stride / 2, y_stride / 2
            else:
                # 2.1计算每个网格的在点云空间中的实际大小
                # 用于将每个anchor映射回实际点云中的大小
                # (69.12 - 0) / (216 - 1) = 0.3214883848678234  单位:米
                x_stride = (self.anchor_range[3] - self.anchor_range[0]) / (grid_size[0] - 1)
                # (39.68 - (-39.68.)) / (248 - 1) = 0.3212955490297634  单位:米
                y_stride = (self.anchor_range[4] - self.anchor_range[1]) / (grid_size[1] - 1)
                # 由于没有进行中心对齐,所有每个点相对于左上角坐标的偏移量都是0
                x_offset, y_offset = 0, 0

            # 2.2 生成单个维度x_shifts,y_shifts和z_shifts
            # 以x_stride为step,在self.anchor_range[0] + x_offset和self.anchor_range[3] + 1e-5,
            # 产生x坐标 --> 216个点 [0, 69.12]
            x_shifts = torch.arange(
                self.anchor_range[0] + x_offset, self.anchor_range[3] + 1e-5, step=x_stride, dtype=torch.float32,
            ).cuda()
            # 产生y坐标 --> 248个点 [0, 79.36]
            y_shifts = torch.arange(
                self.anchor_range[1] + y_offset, self.anchor_range[4] + 1e-5, step=y_stride, dtype=torch.float32,
            ).cuda()
            """
            new_tensor函数可以返回一个新的张量数据,该张量数据与指定的tensor具有相同的属性
            如拥有相同的数据类型和张量所在的设备情况等属性;
            并使用anchor_height数值个来填充这个张量
            """
            # [-1.78]
            z_shifts = x_shifts.new_tensor(anchor_height)
            # num_anchor_size = 1
            # num_anchor_rotation = 2
            num_anchor_size, num_anchor_rotation = anchor_size.__len__(), anchor_rotation.__len__()  # 1, 2
            #  [0, 1.57] 弧度制
            anchor_rotation = x_shifts.new_tensor(anchor_rotation)
            # [[3.9, 1.6, 1.56]]
            anchor_size = x_shifts.new_tensor(anchor_size)

            # 2.3 调用meshgrid生成网格坐标
            x_shifts, y_shifts, z_shifts = torch.meshgrid([
                x_shifts, y_shifts, z_shifts
            ])
            # meshgrid可以理解为在原来的维度上进行扩展,例如:
            # x原来为(216,)-->(216,1, 1)--> (216,248,1)
            # y原来为(248,)--> (1,248,1)--> (216,248,1)
            # z原来为 (1, )  --> (1,1,1)    --> (216,248,1)

            # 2.4.anchor各个维度堆叠组合,生成最终anchor(1,432,496,1,2,7)
            # 2.4.1.堆叠anchor的位置
            # [x, y, z, 3]-->[216, 248, 1, 3] 代表了每个anchor的位置信息
            # 其中3为该点所在映射tensor中的(z, y, x)数值
            anchors = torch.stack((x_shifts, y_shifts, z_shifts), dim=-1)
            # 2.4.2.将anchor的位置和大小进行组合,编程为将anchor扩展并复制为相同维度(除了最后一维),然后进行组合
            # (216, 248, 1, 3) --> (216, 248, 1 , 1, 3)
            # 维度分别代表了: z,y,x, 该类别anchor的尺度数量,该个anchor的位置信息
            anchors = anchors[:, :, :, None, :].repeat(1, 1, 1, anchor_size.shape[0], 1)
            # (1, 1, 1, 1, 3) --> (216, 248, 1, 1, 3)
            anchor_size = anchor_size.view(1, 1, 1, -1, 3).repeat([*anchors.shape[0:3], 1, 1])
            # anchors生成的最终结果需要有位置信息和大小信息 --> (216, 248, 1, 1, 6)
            # 最后一个纬度中表示(z, y, x, l, w, h)
            anchors = torch.cat((anchors, anchor_size), dim=-1)
            # 2.4.3.将anchor的位置和大小和旋转角进行组合
            # 在倒数第二个维度上增加一个维度,然后复制该维度一次
            # (216, 248, 1, 1, 2, 6)        长, 宽, 深, anchor尺度数量, 该尺度旋转角个数,anchor的6个参数
            anchors = anchors[:, :, :, :, None, :].repeat(1, 1, 1, 1, num_anchor_rotation, 1)
            # (216, 248, 1, 1, 2, 1)        两个不同方向先验框的旋转角度
            anchor_rotation = anchor_rotation.view(1, 1, 1, 1, -1, 1).repeat(
                [*anchors.shape[0:3], num_anchor_size, 1, 1])
            # [z, y, x, num_size, num_rot, 7] --> (216, 248, 1, 1, 2, 7)
            # 最后一个纬度表示为anchors的位置+大小+旋转角度(z, y, x, l, w, h, theta)
            anchors = torch.cat((anchors, anchor_rotation), dim=-1)  # [z, y, x, num_size, num_rot, 7]

            # 2.5 置换anchor的维度
            # [z, y, x, num_anchor_size, num_rot, 7]-->[x, y, z, num_anchor_zie, num_rot, 7]
            # 最后一个纬度代表了 : [x, y, z, dx, dy, dz, rot]
            anchors = anchors.permute(2, 1, 0, 3, 4, 5).contiguous()
            # 使得各类anchor的z轴方向从anchor的底部移动到该anchor的中心点位置
            # 车 : -1.78 + 1.56/2 = -1.0
            # 人、自行车 : -0.6 + 1.73/2 = 0.23
            anchors[..., 2] += anchors[..., 5] / 2
            all_anchors.append(anchors)
        # all_anchors: [(1,248,216,1,2,7),(1,248,216,1,2,7),(1,248,216,1,2,7)]
        # num_anchors_per_location:[2,2,2]
        return all_anchors, num_anchors_per_location
3.6.2 检测头实现
对特征图上的每个anchor预测对应的类别,方向和box的7个回归参数。
类别预测 shape :(batch_size, 200, 176, 18)
方向分类 shape :(batch_size, 200, 176, 12)
box回归shape:(batch_size, 200, 176, 42)
代码在:pcdet/models/dense_heads/anchor_head_single.py
注:SECOND的特征图尺度大小为 宽200, 长176,下面注释中需要将所有216替换为176,248替换为200即可。同时点云的尺度信息是[0, -40, -3, 70.4, 40, 1]。
class AnchorHeadSingle(AnchorHeadTemplate):
    """
    Args:
        model_cfg: AnchorHeadSingle的配置
        input_channels: 384 | 512 输入通道数
        num_class: 3
        class_names: ['Car','Pedestrian','Cyclist']
        grid_size: (X, Y, Z)
        point_cloud_range: (0, -39.68, -3, 69.12, 39.68, 1) ,[0, -40, -3, 70.4, 40, 1]
        predict_boxes_when_training: False
    """

    def __init__(self, model_cfg, input_channels, num_class, class_names, grid_size, point_cloud_range,
                 predict_boxes_when_training=True, **kwargs):
        super().__init__(
            model_cfg=model_cfg, num_class=num_class, class_names=class_names, grid_size=grid_size,
            point_cloud_range=point_cloud_range,
            predict_boxes_when_training=predict_boxes_when_training
        )
        # 每个点有3个尺度的个先验框  每个先验框都有两个方向(0度,90度) num_anchors_per_location:[2, 2, 2]
        self.num_anchors_per_location = sum(self.num_anchors_per_location)  # sum([2, 2, 2])
        # Conv2d(512,18,kernel_size=(1,1),stride=(1,1))
        self.conv_cls = nn.Conv2d(
            input_channels, self.num_anchors_per_location * self.num_class,
            kernel_size=1
        )
        # Conv2d(512,42,kernel_size=(1,1),stride=(1,1))
        self.conv_box = nn.Conv2d(
            input_channels, self.num_anchors_per_location * self.box_coder.code_size,
            kernel_size=1
        )
        # 如果存在方向损失,则添加方向卷积层Conv2d(512,12,kernel_size=(1,1),stride=(1,1))
        if self.model_cfg.get('USE_DIRECTION_CLASSIFIER', None) is not None:
            self.conv_dir_cls = nn.Conv2d(
                input_channels,
                self.num_anchors_per_location * self.model_cfg.NUM_DIR_BINS,
                kernel_size=1
            )
        else:
            self.conv_dir_cls = None
        self.init_weights()

    # 初始化参数
    def init_weights(self):
        pi = 0.01
        # 初始化分类卷积偏置
        nn.init.constant_(self.conv_cls.bias, -np.log((1 - pi) / pi))
        # 初始化分类卷积权重
        nn.init.normal_(self.conv_box.weight, mean=0, std=0.001)

    def forward(self, data_dict):
        # 从字典中取出经过backbone处理过的信息
        # spatial_features_2d 维度 (batch_size, W, H, 216)
        spatial_features_2d = data_dict['spatial_features_2d']
        # 每个坐标点上面6个先验框的类别预测 --> (batch_size, 18, W, H)
        cls_preds = self.conv_cls(spatial_features_2d)
        # 每个坐标点上面6个先验框的参数预测 --> (batch_size, 42, W, H)
        # 其中每个先验框需要预测7个参数,分别是(x, y, z, w, l, h, θ)
        box_preds = self.conv_box(spatial_features_2d)
        # 维度调整,将类别放置在最后一维度   [N, H, W, C] --> (batch_size, W, H, 18)
        cls_preds = cls_preds.permute(0, 2, 3, 1).contiguous()
        # 维度调整,将先验框调整参数放置在最后一维度   [N, H, W, C] --> (batch_size ,W, H, 42)
        box_preds = box_preds.permute(0, 2, 3, 1).contiguous()
        # 将类别和先验框调整预测结果放入前向传播字典中
        self.forward_ret_dict['cls_preds'] = cls_preds
        self.forward_ret_dict['box_preds'] = box_preds
        # 进行方向分类预测
        if self.conv_dir_cls is not None:
            # # 每个先验框都要预测为两个方向中的其中一个方向 --> (batch_size, 12, W, H)
            dir_cls_preds = self.conv_dir_cls(spatial_features_2d)
            # 将类别和先验框方向预测结果放到最后一个维度中   [N, H, W, C] --> (batch_size, W, H, 12)
            dir_cls_preds = dir_cls_preds.permute(0, 2, 3, 1).contiguous()
            # 将方向预测结果放入前向传播字典中
            self.forward_ret_dict['dir_cls_preds'] = dir_cls_preds
        else:
            dir_cls_preds = None

        """
        如果是在训练模式的时候,需要对每个先验框分配GT来计算loss
        """
        if self.training:
            # targets_dict = {
            #     'box_cls_labels': cls_labels, # (4,211200)
            #     'box_reg_targets': bbox_targets, # (4,211200, 7)
            #     'reg_weights': reg_weights # (4,211200)
            # }
            targets_dict = self.assign_targets(
                gt_boxes=data_dict['gt_boxes']  # (4,39,8)
            )
            # 将GT分配结果放入前向传播字典中
            self.forward_ret_dict.update(targets_dict)

        # 如果不是训练模式,则直接生成进行box的预测,在PV-RCNN中在训练时候也要生成bbox用于refinement
        if not self.training or self.predict_boxes_when_training:
            # 根据预测结果解码生成最终结果
            batch_cls_preds, batch_box_preds = self.generate_predicted_boxes(
                batch_size=data_dict['batch_size'],
                cls_preds=cls_preds, box_preds=box_preds, dir_cls_preds=dir_cls_preds
            )
            data_dict['batch_cls_preds'] = batch_cls_preds  # (1, 211200, 3) 70400*3=211200
            data_dict['batch_box_preds'] = batch_box_preds  # (1, 211200, 7)
            data_dict['cls_preds_normalized'] = False

        return data_dict
3.6.3 anchor与GT的Target assignment
由于预测的时候,将不同类别的anchor堆叠在了一个点进行预测,所有进行Target assignment时候,要分类别进行Target assignment操作。这里与2D 的SSD或YOLO的匹配不同。
因此在匹配的时候,需要逐帧逐类别对生成的anchor进行匹配;其中
函数assign_targets负责一帧的匹配,
函数assign_targets_single负责一帧中单个类别的匹配
完成Target assignment的结果分别包含:
targets_dict = {
'box_cls_labels': cls_labels, # (batch,200*176*6)
'box_reg_targets': bbox_targets, # (batch,200*176*6,7)
reg_weights': reg_weights # (batch,200*176*6)
}
其中,box_cls_labels代表anchor的GT类别,box_reg_targets代表anchor的GT的方向分类结果,
reg_weights代表了anchor的GT的box的7个回归参数;200*176为BEV的长宽,6为每个grid point上的anchor数量,3个类别,每个类别1个尺度大小,每个尺度大小2个方向。
代码在:pcdet/models/dense_heads/target_assigner/axis_aligned_target_assigner.py
注:SECOND的特征图尺度大小为 宽200, 长176,下面注释中需要将所有216替换为176,248替换为200即可。同时点云的尺度信息是[0, -40, -3, 70.4, 40, 1]。
import numpy as np
import torch
from ....ops.iou3d_nms import iou3d_nms_utils
from ....utils import box_utils
class AxisAlignedTargetAssigner(object):
def __init__(self, model_cfg, class_names, box_coder, match_height=False):
super().__init__()
# anchor生成配置参数
anchor_generator_cfg = model_cfg.ANCHOR_GENERATOR_CONFIG
# 为预测box找对应anchor的参数
anchor_target_cfg = model_cfg.TARGET_ASSIGNER_CONFIG
# 编码box的7个残差参数(x, y, z, w, l, h, θ) --> pcdet.utils.box_coder_utils.ResidualCoder
self.box_coder = box_coder
# 在PointPillars中指定正负样本的时候由BEV视角计算GT和先验框的iou,不需要进行z轴上的高度的匹配,
# 想法是:1、点云中的物体都在同一个平面上,没有物体在Z轴发生重叠的情况
# 2、每个类别的高度相差不是很大,直接使用SmoothL1损失就可以达到很好的高度回归效果
self.match_height = match_height
# 类别名称['Car', 'Pedestrian', 'Cyclist']
self.class_names = np.array(class_names)
# ['Car', 'Pedestrian', 'Cyclist']
self.anchor_class_names = [config['class_name'] for config in anchor_generator_cfg]
# anchor_target_cfg.POS_FRACTION = -1 < 0 --> None
# 前景、背景采样系数 PointPillars、SECOND不考虑
self.pos_fraction = anchor_target_cfg.POS_FRACTION if anchor_target_cfg.POS_FRACTION >= 0 else None
# 总采样数 PointPillars不考虑
self.sample_size = anchor_target_cfg.SAMPLE_SIZE # 512
# False 前景权重由 1/前景anchor数量 PointPillars不考虑
self.norm_by_num_examples = anchor_target_cfg.NORM_BY_NUM_EXAMPLES
# 类别iou匹配为正样本阈值{'Car':0.6, 'Pedestrian':0.5, 'Cyclist':0.5}
self.matched_thresholds = {}
# 类别iou匹配为负样本阈值{'Car':0.45, 'Pedestrian':0.35, 'Cyclist':0.35}
self.unmatched_thresholds = {}
for config in anchor_generator_cfg:
self.matched_thresholds[config['class_name']] = config['matched_threshold']
self.unmatched_thresholds[config['class_name']] = config['unmatched_threshold']
self.use_multihead = model_cfg.get('USE_MULTIHEAD', False) # False
# self.separate_multihead = model_cfg.get('SEPARATE_MULTIHEAD', False)
# if self.seperate_multihead:
# rpn_head_cfgs = model_cfg.RPN_HEAD_CFGS
# self.gt_remapping = {}
# for rpn_head_cfg in rpn_head_cfgs:
# for idx, name in enumerate(rpn_head_cfg['HEAD_CLS_NAME']):
# self.gt_remapping[name] = idx + 1
def assign_targets(self, all_anchors, gt_boxes_with_classes):
"""
处理一批数据中所有点云的anchors和gt_boxes,
计算每个anchor属于前景还是背景,
为每个前景的anchor分配类别和计算box的回归残差和回归权重
Args:
all_anchors: [(N, 7), ...]
gt_boxes_with_classes: (B, M, 8) # 最后维度数据为 (x, y, z, l, w, h, θ,class)
Returns:
all_targets_dict = {
# 每个anchor的类别
'box_cls_labels': cls_labels, # (batch_size,num_of_anchors)
# 每个anchor的回归残差 -->(∆x, ∆y, ∆z, ∆l, ∆w, ∆h, ∆θ)
'box_reg_targets': bbox_targets, # (batch_size,num_of_anchors,7)
# 每个box的回归权重
'reg_weights': reg_weights # (batch_size,num_of_anchors)
}
"""
# 1.初始化结果list并提取对应的gt_box和类别
bbox_targets = []
cls_labels = []
reg_weights = []
# 得到批大小
batch_size = gt_boxes_with_classes.shape[0] # 4
# 得到所有GT的类别
gt_classes = gt_boxes_with_classes[:, :, -1] # (4,num_of_gt)
# 得到所有GT的7个box参数
gt_boxes = gt_boxes_with_classes[:, :, :-1] # (4,num_of_gt,7)
# 2.对batch中的所有数据逐帧匹配anchor的前景和背景
for k in range(batch_size):
cur_gt = gt_boxes[k] # 取出当前帧中的 gt_boxes (num_of_gt,7)
"""
由于在OpenPCDet的数据预处理时,以一批数据中拥有GT数量最多的帧为基准,
其他帧中GT数量不足,则会进行补0操作,使其成为一个矩阵,例:
[
[1,1,2,2,3,2],
[2,2,3,1,0,0],
[3,1,2,0,0,0]
]
因此这里从每一行的倒数第二个类别开始判断,
截取最后一个非零元素的索引,来取出当前帧中真实的GT数据
"""
cnt = cur_gt.__len__() - 1 # 得到一批数据中最多有多少个GT
# 这里的循环是找到最后一个非零的box,因为预处理的时候会按照batch最大box的数量处理,不足的进行补0
while cnt > 0 and cur_gt[cnt].sum() == 0:
cnt -= 1
# 2.1提取当前帧非零的box和类别
cur_gt = cur_gt[:cnt + 1]
# cur_gt_classes 例: tensor([1, 1, 2, 2, 2, 2, 2, 3, 3, 3, 3], device='cuda:0', dtype=torch.int32)
cur_gt_classes = gt_classes[k][:cnt + 1].int()
target_list = []
# 2.2 对每帧中的anchor和GT分类别,单独计算前背景
# 计算时候 每个类别的anchor是独立计算的
for anchor_class_name, anchors in zip(self.anchor_class_names, all_anchors):
# anchor_class_name : 车 | 行人 | 自行车
# anchors : (1, 200, 176, 1, 2, 7) 7 --> (x, y, z, l, w, h, θ)
if cur_gt_classes.shape[0] > 1:
# self.class_names : ["car", "person", "cyclist"]
# 这里减1是因为列表索引从0开始,目的是得到属于列表中gt中哪些类别是与当前处理的了类别相同,得到类别mask
mask = torch.from_numpy(self.class_names[cur_gt_classes.cpu() - 1] == anchor_class_name)
else:
mask = torch.tensor([self.class_names[c - 1] == anchor_class_name
for c in cur_gt_classes], dtype=torch.bool)
# 在检测头中是否使用多头,是的话 此处为True,默认为False
if self.use_multihead: # False
anchors = anchors.permute(3, 4, 0, 1, 2, 5).contiguous().view(-1, anchors.shape[-1])
# if self.seperate_multihead:
# selected_classes = cur_gt_classes[mask].clone()
# if len(selected_classes) > 0:
# new_cls_id = self.gt_remapping[anchor_class_name]
# selected_classes[:] = new_cls_id
# else:
# selected_classes = cur_gt_classes[mask]
selected_classes = cur_gt_classes[mask]
else:
# 2.2.1 计算所需的变量 得到特征图的大小
feature_map_size = anchors.shape[:3] # (1, 248, 216)
# 将所有的anchors展平 shape : (216, 248, 1, 1, 2, 7) --> (107136, 7)
anchors = anchors.view(-1, anchors.shape[-1])
# List: 根据累呗mask索引得到该帧中当前需要处理的类别 --> 车 | 行人 | 自行车
selected_classes = cur_gt_classes[mask]
# 2.2.2 使用assign_targets_single来单独为某一类别的anchors分配gt_boxes,
# 并为前景、背景的box设置编码和回归权重
single_target = self.assign_targets_single(
anchors, # 该类的所有anchor
cur_gt[mask], # GT_box shape : (num_of_GT_box, 7)
gt_classes=selected_classes, # 当前选中的类别
matched_threshold=self.matched_thresholds[anchor_class_name], # 当前类别anchor与GT匹配为正样本的阈值
unmatched_threshold=self.unmatched_thresholds[anchor_class_name] # 当前类别anchor与GT匹配为负样本的阈值
)
target_list.append(single_target)
# 到目前为止,处理完该帧单个类别和该类别anchor的前景和背景分配
if self.use_multihead:
target_dict = {
'box_cls_labels': [t['box_cls_labels'].view(-1) for t in target_list],
'box_reg_targets': [t['box_reg_targets'].view(-1, self.box_coder.code_size) for t in target_list],
'reg_weights': [t['reg_weights'].view(-1) for t in target_list]
}
target_dict['box_reg_targets'] = torch.cat(target_dict['box_reg_targets'], dim=0)
target_dict['box_cls_labels'] = torch.cat(target_dict['box_cls_labels'], dim=0).view(-1)
target_dict['reg_weights'] = torch.cat(target_dict['reg_weights'], dim=0).view(-1)
else:
target_dict = {
# feature_map_size:(1,200,176, 2)
'box_cls_labels': [t['box_cls_labels'].view(*feature_map_size, -1) for t in target_list],
# (1,248,216, 2, 7)
'box_reg_targets': [t['box_reg_targets'].view(*feature_map_size, -1, self.box_coder.code_size)
for t in target_list],
# (1,248,216, 2)
'reg_weights': [t['reg_weights'].view(*feature_map_size, -1) for t in target_list]
}
# list : 3*anchor (1, 248, 216, 2, 7) --> (1, 248, 216, 6, 7) -> (321408, 7)
target_dict['box_reg_targets'] = torch.cat(
target_dict['box_reg_targets'], dim=-2
).view(-1, self.box_coder.code_size)
# list:3 (1, 248, 216, 2) --> (1,248, 216, 6) -> (1*248*216*6, )
target_dict['box_cls_labels'] = torch.cat(target_dict['box_cls_labels'], dim=-1).view(-1)
# list:3 (1, 200, 176, 2) --> (1, 200, 176, 6) -> (1*248*216*6, )
target_dict['reg_weights'] = torch.cat(target_dict['reg_weights'], dim=-1).view(-1)
# 将结果填入对应的容器
bbox_targets.append(target_dict['box_reg_targets'])
cls_labels.append(target_dict['box_cls_labels'])
reg_weights.append(target_dict['reg_weights'])
# 到这里该batch的点云全部处理完
# 3.将结果stack并返回
bbox_targets = torch.stack(bbox_targets, dim=0) # (batch_size,321408,7)
cls_labels = torch.stack(cls_labels, dim=0) # (batch_size,321408)
reg_weights = torch.stack(reg_weights, dim=0) # (batch_size,321408)
all_targets_dict = {
'box_cls_labels': cls_labels, # (batch_size,321408)
'box_reg_targets': bbox_targets, # (batch_size,321408,7)
'reg_weights': reg_weights # (batch_size,321408)
}
return all_targets_dict
def assign_targets_single(self, anchors, gt_boxes, gt_classes, matched_threshold=0.6, unmatched_threshold=0.45):
"""
针对某一类别的anchors和gt_boxes,计算前景和背景anchor的类别,box编码和回归权重
Args:
anchors: (107136, 7)
gt_boxes: (该帧中该类别的GT数量,7)
gt_classes: (该帧中该类别的GT数量, 1)
matched_threshold: 0.6
unmatched_threshold: 0.45
Returns:
前景anchor
ret_dict = {
'box_cls_labels': labels, # (107136,)
'box_reg_targets': bbox_targets, # (107136,7)
'reg_weights': reg_weights, # (107136,)
}
"""
# ----------------------------1.初始化-------------------------------#
num_anchors = anchors.shape[0] # 216 * 248 = 107136
num_gt = gt_boxes.shape[0] # 该帧中该类别的GT数量
# 初始化anchor对应的label和gt_id ,并置为 -1,-1表示loss计算时候不会被考虑,背景的类别被设置为0
labels = torch.ones((num_anchors,), dtype=torch.int32, device=anchors.device) * -1
gt_ids = torch.ones((num_anchors,), dtype=torch.int32, device=anchors.device) * -1
# ---------------------2.计算该类别中anchor的前景和背景------------------------#
if len(gt_boxes) > 0 and anchors.shape[0] > 0:
# 1.计算该帧中某一个类别gt和对应anchors之间的iou(jaccard index)
# anchor_by_gt_overlap shape : (107136, num_gt)
# anchor_by_gt_overlap代表当前类别的所有anchor和当前类别中所有GT的iou
anchor_by_gt_overlap = iou3d_nms_utils.boxes_iou3d_gpu(anchors[:, 0:7], gt_boxes[:, 0:7]) \
if self.match_height else box_utils.boxes3d_nearest_bev_iou(anchors[:, 0:7], gt_boxes[:, 0:7])
# NOTE: The speed of these two versions depends the environment and the number of anchors
# anchor_to_gt_argmax = torch.from_numpy(anchor_by_gt_overlap.cpu().numpy().argmax(axis=1)).cuda()
# 2.得到每一个anchor与哪个的GT的的iou最大
# anchor_to_gt_argmax表示数据维度是anchor的长度,索引是gt
anchor_to_gt_argmax = anchor_by_gt_overlap.argmax(dim=1)
# anchor_to_gt_max得到每一个anchor最匹配的gt的iou数值
anchor_to_gt_max = anchor_by_gt_overlap[
torch.arange(num_anchors, device=anchors.device), anchor_to_gt_argmax]
# gt_to_anchor_argmax = torch.from_numpy(anchor_by_gt_overlap.cpu().numpy().argmax(axis=0)).cuda()
# 3.找到每个gt最匹配anchor的索引和iou
# (num_of_gt,) 得到每个gt最匹配的anchor索引
gt_to_anchor_argmax = anchor_by_gt_overlap.argmax(dim=0)
# (num_of_gt,)找到每个gt最匹配anchor的iou数值
gt_to_anchor_max = anchor_by_gt_overlap[gt_to_anchor_argmax, torch.arange(num_gt, device=anchors.device)]
# 4.将GT中没有匹配到的anchor的iou数值设置为-1
empty_gt_mask = gt_to_anchor_max == 0 # 得到没有匹配到anchor的gt的mask
gt_to_anchor_max[empty_gt_mask] = -1 # 将没有匹配到anchor的gt的iou数值设置为-1
# 5.找到anchor中和gt存在最大iou的anchor索引,即前景anchor
"""
由于在前面的实现中,仅仅找出来每个GT和anchor的最大iou索引,但是argmax返回的是索引最小的那个,
在匹配的过程中可能一个GT和多个anchor拥有相同的iou大小,
所以此处要找出这个GT与所有anchors拥有相同最大iou的anchor
"""
# 以gt为基础,逐个anchor对应,比如第一个gt的最大iou为0.9,则在所有anchor中找iou为0.9的anchor
# nonzero函数是numpy中用于得到数组array中非零元素的位置(数组索引)的函数
"""
矩阵比较例子 :
anchors_with_max_overlap = torch.tensor([[0.78, 0.1, 0.9, 0],
[0.0, 0.5, 0, 0],
[0.0, 0, 0.9, 0.8],
[0.78, 0.1, 0.0, 0]])
gt_to_anchor_max = torch.tensor([0.78, 0.5, 0.9,0.8])
anchors_with_max_overlap = anchor_by_gt_overlap == gt_to_anchor_max
# 返回的结果中包含了在anchor中与该GT拥有相同最大iou的所有anchor
anchors_with_max_overlap = tensor([[ True, False, True, False],
[False, True, False, False],
[False, False, True, True],
[ True, False, False, False]])
在torch中nonzero返回的是tensor中非0元素的位置,此函数在numpy中返回的是非零元素的行列表和列列表。
torch返回结果tensor([[0, 0],
[0, 2],
[1, 1],
[2, 2],
[2, 3],
[3, 0]])
numpy返回结果(array([0, 0, 1, 2, 2, 3]), array([0, 2, 1, 2, 3, 0]))
所以可以得到第一个GT同时与第一个anchor和最后一个anchor最为匹配
"""
"""所以在实际的一批数据中可以到得到结果为
tensor([[33382, 9],
[43852, 10],
[47284, 5],
[50370, 4],
[58498, 8],
[58500, 8],
[58502, 8],
[59139, 2],
[60751, 1],
[61183, 1],
[61420, 11],
[62389, 0],
[63216, 13],
[63218, 13],
[65046, 12],
[65048, 12],
[65478, 12],
[65480, 12],
[71924, 3],
[78046, 7],
[80150, 6]], device='cuda:0')
在第1维度拥有相同gt索引的项,在该类所有anchor中同时拥有多个与之最为匹配的anchor
"""
# (num_of_multiple_best_matching_for_per_GT,)
anchors_with_max_overlap = (anchor_by_gt_overlap == gt_to_anchor_max).nonzero()[:, 0]
# 得到这些最匹配anchor与该类别的哪个GT索引相对应
# 其实和(anchor_by_gt_overlap == gt_to_anchor_max).nonzero()[:, 1]的结果一样
gt_inds_force = anchor_to_gt_argmax[anchors_with_max_overlap] # (35,)
# 将gt的类别赋值到对应的anchor的label中
labels[anchors_with_max_overlap] = gt_classes[gt_inds_force]
# 将gt的索引也赋值到对应的anchors的gt_ids中
gt_ids[anchors_with_max_overlap] = gt_inds_force.int()
# 6.根据matched_threshold和unmatched_threshold以及anchor_to_gt_max计算前景和背景索引,并更新labels和gt_ids
"""这里对labels和gt_ids的操作应该已经包含了上面的anchors_with_max_overlap"""
# 找到最匹配的anchor中iou大于给定阈值的mask #(107136,)
pos_inds = anchor_to_gt_max >= matched_threshold
# 找到最匹配的anchor中iou大于给定阈值的gt的索引 #(105,)
gt_inds_over_thresh = anchor_to_gt_argmax[pos_inds]
# 将pos anchor对应gt的类别赋值到对应的anchor的label中
labels[pos_inds] = gt_classes[gt_inds_over_thresh]
# 将pos anchor对应gt的索引赋值到对应的anchor的gt_id中
gt_ids[pos_inds] = gt_inds_over_thresh.int()
bg_inds = (anchor_to_gt_max < unmatched_threshold).nonzero()[:, 0] # 找到背景anchor索引
else:
bg_inds = torch.arange(num_anchors, device=anchors.device)
# 找到前景anchor的索引--> (num_of_foreground_anchor,)
# 106879 + 119 = 106998 < 107136 说明有一些anchor既不是背景也不是前景,
# iou介于unmatched_threshold和matched_threshold之间
fg_inds = (labels > 0).nonzero()[:, 0]
# 到目前为止得到哪些anchor是前景和哪些anchor是背景
# ------------------3.对anchor的前景和背景进行筛选和赋值--------------------#
# 如果存在前景采样比例,则分别采样前景和背景anchor,PointPillar中没有前背景采样操作,前背景均衡使用了focal loss损失函数
if self.pos_fraction is not None: # anchor_target_cfg.POS_FRACTION = -1 < 0 --> None
num_fg = int(self.pos_fraction * self.sample_size) # self.sample_size=512
# 如果前景anchor大于采样前景数
if len(fg_inds) > num_fg:
# 计算要丢弃的前景anchor数目
num_disabled = len(fg_inds) - num_fg
# 在前景数目中随机产生索引值,并取前num_disabled个关闭索引
# 比如:torch.randperm(4)
# 输出:tensor([ 2, 1, 0, 3])
disable_inds = torch.randperm(len(fg_inds))[:num_disabled]
# 将被丢弃的anchor的iou设置为-1
labels[disable_inds] = -1
# 更新前景索引
fg_inds = (labels > 0).nonzero()[:, 0]
# 计算所需背景数
num_bg = self.sample_size - (labels > 0).sum()
# 如果当前背景数大于所需背景数
if len(bg_inds) > num_bg:
# torch.randint在0到len(bg_inds)之间,随机产生size为(num_bg,)的数组
enable_inds = bg_inds[torch.randint(0, len(bg_inds), size=(num_bg,))]
# 将enable_inds的标签设置为0
labels[enable_inds] = 0
# bg_inds = torch.nonzero(labels == 0)[:, 0]
else:
# 如果该类别没有GT的话,将该类别的全部label置0,即所有anchor都是背景类别
if len(gt_boxes) == 0 or anchors.shape[0] == 0:
labels[:] = 0
else:
# anchor与GT的iou小于unmatched_threshold的anchor的类别设置类背景类别
labels[bg_inds] = 0
# 将前景赋对应类别
"""
此处分别使用了anchors_with_max_overlap和
anchor_to_gt_max >= matched_threshold来对该类别的anchor进行赋值
但是我个人觉得anchor_to_gt_max >= matched_threshold已经包含了anchors_with_max_overlap的那些与GT拥有最大iou的
anchor了,所以我对这里的计算方式有一点好奇,为什么要分别计算两次,
如果知道这里原因的小伙伴希望可以给予解答,谢谢!
"""
labels[anchors_with_max_overlap] = gt_classes[gt_inds_force]
# ------------------4.计算bbox_targets和reg_weights--------------------#
# 初始化每个anchor的7个回归参数,并设置为0数值
bbox_targets = anchors.new_zeros((num_anchors, self.box_coder.code_size)) # (107136,7)
# 如果该帧中有该类别的GT时候,就需要对这些设置为正样本类别的anchor进行编码操作了
if len(gt_boxes) > 0 and anchors.shape[0] > 0:
# 使用anchor_to_gt_argmax[fg_inds]来重复索引每个anchor对应前景的GT_box
fg_gt_boxes = gt_boxes[anchor_to_gt_argmax[fg_inds], :]
# 提取所有属于前景的anchor
fg_anchors = anchors[fg_inds, :]
"""
PointPillar编码gt和前景anchor,并赋值到bbox_targets的对应位置
7个参数的编码的方式为
∆x = (x^gt − xa^da)/d^a , ∆y = (y^gt − ya^da)/d^a , ∆z = (z^gt − za^ha)/h^a
∆w = log (w^gt / w^a) ∆l = log (l^gt / l^a) , ∆h = log (h^gt / h^a)
∆θ = sin(θ^gt - θ^a)
"""
bbox_targets[fg_inds, :] = self.box_coder.encode_torch(fg_gt_boxes, fg_anchors)
# 初始化回归权重,并设置值为0
reg_weights = anchors.new_zeros((num_anchors,)) # (107136,)
if self.norm_by_num_examples: # PointPillars回归权重中不需要norm_by_num_examples
num_examples = (labels >= 0).sum()
num_examples = num_examples if num_examples > 1.0 else 1.0
reg_weights[labels > 0] = 1.0 / num_examples
else:
reg_weights[labels > 0] = 1.0 # 将前景anchor的回归权重设置为1
ret_dict = {
'box_cls_labels': labels, # (107136,)
'box_reg_targets': bbox_targets, # (107136,7)编码后的结果
'reg_weights': reg_weights, # (107136,)
}
return ret_dict
3.6.4 获得一阶段预测结果
根据voxel-based的方法获得提议框,用以后面的box refinement。
代码在:pcdet/models/dense_heads/anchor_head_template.py
    def generate_predicted_boxes(self, batch_size, cls_preds, box_preds, dir_cls_preds=None):
        """
        Args:
            batch_size:
            cls_preds: (N, H, W, C1)
            box_preds: (N, H, W, C2)
            dir_cls_preds: (N, H, W, C3)

        Returns:
            batch_cls_preds: (B, num_boxes, num_classes)
            batch_box_preds: (B, num_boxes, 7+C)

        """
        if isinstance(self.anchors, list):
            # 是否使用多头预测,默认否
            if self.use_multihead:
                anchors = torch.cat([anchor.permute(3, 4, 0, 1, 2, 5).contiguous().view(-1, anchor.shape[-1])
                                     for anchor in self.anchors], dim=0)
            else:
                """
                每个类别anchor的生成情况:
                [(Z, Y, X, anchor尺度, 该尺度anchor方向, 7个回归参数)
                (Z, Y, X, anchor尺度, 该尺度anchor方向, 7个回归参数)
                (Z, Y, X, anchor尺度, 该尺度anchor方向, 7个回归参数)]
                在倒数第三个维度拼接
                anchors 维度 (Z, Y, X, 3个anchor尺度, 每个尺度两个方向, 7)
                            (1, 248, 216, 3, 2, 7)
                """
                anchors = torch.cat(self.anchors, dim=-3)
        else:
            anchors = self.anchors
        # 计算一共有多少个anchor Z*Y*X*num_of_anchor_scale*anchor_rot
        num_anchors = anchors.view(-1, anchors.shape[-1]).shape[0]
        # (batch_size, Z*Y*X*num_of_anchor_scale*anchor_rot, 7)
        batch_anchors = anchors.view(1, -1, anchors.shape[-1]).repeat(batch_size, 1, 1)

        # 将预测结果都flatten为一维的
        # (batch_size, Z*Y*X*num_of_anchor_scale*anchor_rot, 3)
        batch_cls_preds = cls_preds.view(batch_size, num_anchors, -1).float() \
            if not isinstance(cls_preds,
                              list) else cls_preds
        # (batch_size, Z*Y*X*num_of_anchor_scale*anchor_rot, 7)
        batch_box_preds = box_preds.view(batch_size, num_anchors, -1) if not isinstance(box_preds, list) \
            else torch.cat(box_preds, dim=1).view(batch_size, num_anchors, -1)
        # 对7个预测的box参数进行解码操作
        batch_box_preds = self.box_coder.decode_torch(batch_box_preds, batch_anchors)
        # 每个anchor的方向预测
        if dir_cls_preds is not None:
            # 0.78539 方向偏移
            dir_offset = self.model_cfg.DIR_OFFSET
            # 0
            dir_limit_offset = self.model_cfg.DIR_LIMIT_OFFSET  # 0
            # 将方向预测结果flatten为一维的 (batch_size, Z*Y*X*num_of_anchor_scale*anchor_rot, 2)
            dir_cls_preds = dir_cls_preds.view(batch_size, num_anchors, -1) if not isinstance(dir_cls_preds, list) \
                else torch.cat(dir_cls_preds, dim=1).view(batch_size, num_anchors, -1)  # (1, 321408, 2)
            # (batch_size, Z*Y*X*num_of_anchor_scale*anchor_rot)
            # 取出所有anchor的方向分类 : 正向和反向
            dir_labels = torch.max(dir_cls_preds, dim=-1)[1]
            # pi
            period = (2 * np.pi / self.model_cfg.NUM_DIR_BINS)
            # 将角度在0到pi之间    在OpenPCDet中,坐标使用的是统一规范坐标,x向前,y向左,z向上
            # 这里参考训练时候的原因,现将角度角度沿着x轴的逆时针旋转了45度得到dir_rot
            dir_rot = common_utils.limit_period(
                batch_box_preds[..., 6] - dir_offset, dir_limit_offset, period
            )
            """
            从新将角度旋转回到激光雷达坐标系中,所以需要加回来之前减去的45度,
            如果dir_labels是1的话,说明方向在是180度的,因此需要将预测的角度信息加上180度,
            否则预测角度即是所得角度
            """
            batch_box_preds[..., 6] = dir_rot + dir_offset + period * dir_labels.to(batch_box_preds.dtype)

        # PointPillars、SECOND、PV-RCNN中无此项
        if isinstance(self.box_coder, box_coder_utils.PreviousResidualDecoder):
            batch_box_preds[..., 6] = common_utils.limit_period(
                -(batch_box_preds[..., 6] + np.pi / 2), offset=0.5, period=np.pi * 2
            )
        # batch_cls_preds shape(batch, H*W*num_anchor, 3)
        # batch_box_preds shape(batch, H*W*num_anchor, 7)
        return batch_cls_preds, batch_box_preds
得到预测结果:
每个anchor的类别预测:
batch_cls_preds shape(batch, 200*176*6, 3)
每个anchor的位置大小信息,[x, y, z, l, w, h, theta]
batch_box_preds shape(batch, 200*176*6, 7)
至此,完成了PV-RCNN第一阶段的区域提议;下一篇文章将PV-RCNN中提出的三个关键模块进行解析。
参考文献或文章:
1、https://github.com/open-mmlab/OpenPCDet
2、https://arxiv.org/pdf/1912.13192.pdf
3、Sensors | Free Full-Text | SECOND: Sparsely Embedded Convolutional Detection
4、【3D计算机视觉】从PointNet到PointNet++理论及pytorch代码_小执着的博客-CSDN博客_pointnet