一.系统环境及工具:
在使用之前深度学习对图片进行分类时,你首先需要检查一下你的软件环境是否满足!该教程为基于:Python3,Keras,TensorFlow,在文章末尾我给出了完整的代码,我使用的具体版本为:
- Python 3.6.3
- TensorFlow 1.7(安装TensorFlow 1.7可以参考我之前的博客win10下安装Tensorflow1.7+CUDA9.0+Cudnn7.1.3)
- Keras 2.1.5
- Win10 1709 教育版
参考资料:
面向小数据集构建图像分类模型 :http://blog.keras.io/building-powerful-image-classification-models-using-very-little-data.html
二.数据准备:
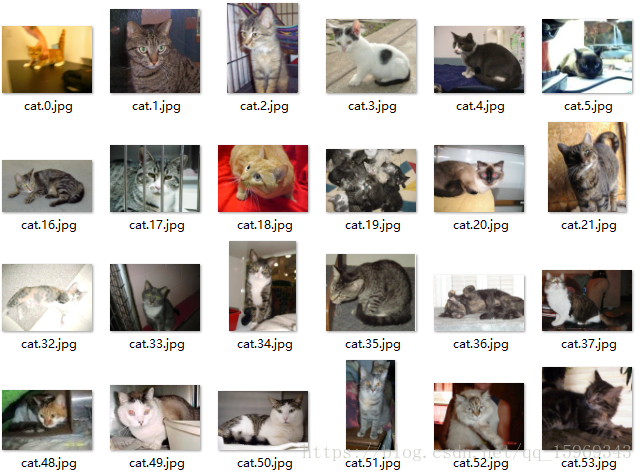
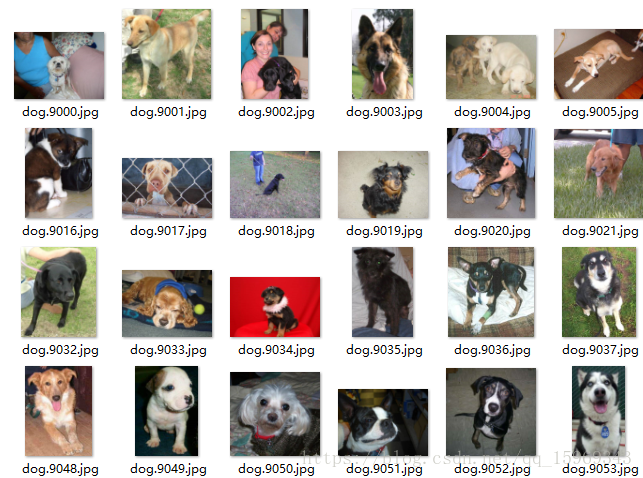
这里的数据集就是你自己的数据,由于Keras有提供在Imagenet上面已经预训练的模型权重,因此不必担心你的数据集没出现在Imagenet的目录中,即使不在Imagenet类别目录下的类别,利用各种模型的融合也能很好的识别和分类!本文为了方便大家理解,用最简单的二分类来进行阐述,具体使用了kaggle上面的猫狗大战数据集(Dogs VS Cats):
Dogs VS Cats :https://www.kaggle.com/c/dogs-vs-cats-redux-kernels-edition
该数据集具体有37500张图片,具体的:
训练集:12500(狗),12500(猫)
测试集:混合在一起的12500张没有分类的猫狗图片
因此,你只需要将你的训练集按照你需要分类的类别数目,分别建立对应数目的文件夹:
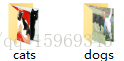
并且在每个文件夹中放入对应的图片(文件夹名称就是类别的名称):
这样,你的训练集就已经准备完毕了!
三.导入相关必要的包:
from keras.models import *
from keras.layers import *
from keras.applications import *
from keras.preprocessing.image import *
import h5py
from sklearn.utils import shuffle
from keras.utils import plot_model
from PIL import ImageFile
from keras.callbacks import ModelCheckpoint
但是有时候图片可能是破损的,因此我们还要加上一句,以保证将所有图片都读进去:
ImageFile.LOAD_TRUNCATED_IMAGES = True
四.利用Keras内置的神级网络对数据进行特征提取:
打开Keras的安装路径,可以看到Keras已经内置了目前主流的深度学习模型:
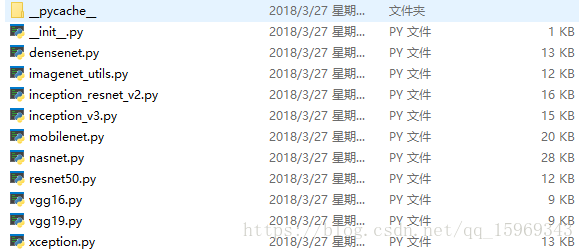
利用这些模型可以轻易的对图像进行分类,并且官方还提供了每个模型的预训练权重:
模型权重:https://github.com/fchollet/deep-learning-models/releases/
如果你下载不了的话,可以在下方留言!其实对于上述所说的分类猫狗。根本不需要融合这些模型,单一的网络已经可以很好的将猫狗分类出来,但是当你的数据集之间相似度很高,那么就有必要融合模型之间的优点了!
众所周知,下载下来的权重有两种,一种是top,一种是notop;它们之间的区别在于:
是否包含最后的3个全连接层(whether to include the 3 fully-connected layers at the top of the network),notop是专门用来做fine-tuning的,因此直接就选它吧。
但是我们还是需要有全连接层进行分类的,因此必须要在一个合适的位置加上全连接层!那么,在什么位置加上全连接层呢?如果在融合之前的每个notop后面都加上全连接,并且我们知道:全连接的参数数目相比于卷积层来说多得多!
那么每训练一个Epoch就需要跑一次巨大的网络,并且我们的卷积层都是不可训练的(仅用于提取特征),那么每次计算都计算了不可以训练的卷积层,这个计算完全就是在浪费时间和GPU资源!所以我们可以将多个不同的网络输出的特征向量先保存下来,以便后续的训练,这样做的好处是我们一旦保存了特征向量,即使是在普通笔记本上也能轻松训练;
结合上述所说,我们需要在模型融合之后,再加入用于分类的全连接层!但是,就算我们这样做了,参数依然非常的大,怎么办呢?
a.利用 GlobalAveragePooling2D降低参数数量
联想到一般网络的卷积层后面都会有池化层,那么我们能否使用池化层来降低参数的数目呢?答案是肯定的!在这里,我们将采用全局池化(GlobalAveragePooling2D或者GlobalMaxPooling2D)将参数进一步降低!
    base_model = MODEL(input_tensor=x, weights='imagenet', include_top=False)
    model = Model(base_model.input, GlobalAveragePooling2D()(base_model.output))
b.图片生成器ImageDataGenerator
但是很多时候,我们并不是有Kaggle那么多的数据集 ,例如分类数据只有很少的几百张的时候,非常容易过拟合,Keras已经考虑到了这点,因此专门有一个实时的数据增强工具:ImageDataGenerator,该工具里面包括了平移,旋转,随机裁剪,白化,等等操作,具体如下:
    def __init__(self,
                 featurewise_center=False,
                 samplewise_center=False,
                 featurewise_std_normalization=False,
                 samplewise_std_normalization=False,
                 zca_whitening=False,
                 zca_epsilon=1e-6,
                 rotation_range=0.,
                 width_shift_range=0.,
                 height_shift_range=0.,
                 brightness_range=None,
                 shear_range=0.,
                 zoom_range=0.,
                 channel_shift_range=0.,
                 fill_mode='nearest',
                 cval=0.,
                 horizontal_flip=False,
                 vertical_flip=False,
                 rescale=None,
                 preprocessing_function=None,
                 data_format=None,
                 validation_split=0.0)
在这里,我们只使用其中的的一部分参数进行数据增强,具体建立的生成器为:
    gen = ImageDataGenerator(
        rotation_range=40,
        width_shift_range=0.1,
        height_shift_range=0.1,
        shear_range=0.1,
        zoom_range=0.2,
        horizontal_flip=True
    )
在定义了该生成器之后 ,我们就可以利用它来生成“新样本”了,例如本来只有300个样本,现在增加到900个,只需要在生成器前面乘以一个3即可:
    train_generator = gen.flow_from_directory(traindir, image_size, shuffle=False,
                                              batch_size=batch_size)

    train = model.predict_generator(train_generator, 3*train_generator.samples//train_generator)
并且对这些增强的样本赋予对应的标签:
y_train = np.tile(y_train, 3)
如果你想继续了解它的具体信息可以打开下方的官方Demo:
面向小数据集构建图像分类模型 :http://blog.keras.io/building-powerful-image-classification-models-using-very-little-data.html
c.利用h5py保存图像的特征向量
训练是多次的,但是图像的特征是不变的!因此,我们只需要将第一次提取的特征保存下来,以后就可以直接用它进行训练了:
    with h5py.File("train_%s.h5" % MODEL.__name__) as h:
        h.create_dataset("train", data=train)
        h.create_dataset("label", data=train_generator.classes)
d.将上述步骤对每个模型进行复用
对多个网络我们如果都要手动进行a,b,c三个步骤的话,那也太麻烦了!因此,我们需要写一个函数帮我们重复这些过程:
def get_feature(MODEL, image_size, lambda_func=None):
    width = image_size[0]
    height = image_size[1]
    batch_size = 1
    input_tensor = Input((height, width, 3))
    x = input_tensor
    if lambda_func:
        x = Lambda(lambda_func)(x)
    base_model = MODEL(input_tensor=x, weights='imagenet', include_top=False)
    model = Model(base_model.input, GlobalAveragePooling2D()(base_model.output))


    gen = ImageDataGenerator(
        rotation_range=40,
        width_shift_range=0.1,
        height_shift_range=0.1,
        shear_range=0.1,
        zoom_range=0.2,
        horizontal_flip=True
    )
    train_generator = gen.flow_from_directory(traindir, image_size, shuffle=False, batch_size=batch_size)


    train = model.predict_generator(train_generator, 3*train_generator.samples//train_generator)


    with h5py.File("train_%s.h5" % MODEL.__name__) as h:
        h.create_dataset("train", data=train)
        h.create_dataset("label", data=train_generator.classes)
e.得到猫狗大战图像的特征文件
对你的数据数据集执行上面的所有步骤后,你就可以得到数据集的特征文件了;在这里,我使用了4个模型:
- ResNet50
- VGG19
- InceptionResNetV2
- Xception
print("正在提取第1个特征")
get_feature(ResNet50, (224, 224))
print("特征1已就绪")
# # #
print("正在提取第2个特征")
get_feature(Xception, (299, 299), xception.preprocess_input)
print("特征2已就绪")
# # #
print("正在提取第3个特征")
get_feature(InceptionResNetV2, (299, 299), inception_resnet_v2.preprocess_input)
print("特征4已就绪")
# # #
print("正在提取第4个特征")
get_feature(VGG19, (224, 224))
print("特征5已就绪")
最后导出的 h5 文件包括两个 numpy 数组:
- train (25000, 2048)
- label (25000,)
- train_InceptionResNetV2.h5
- train_VGG19.h5
- train_ResNet50.h5
- train_Xception.h5
五.对模型进行训练:
a.载入特征文件:
    with h5py.File(filename, 'r') as h:
        X_train.append(np.array(h['train']))
        y_train = np.array(h['label'])
b.将模型进行融合(重点):
上面已经说了,我们需要将模型融合以提高模型的分类精度,在这里,只需要将上述特征文件合成一个即可(注意shuffle数据和标签)。
X_train = []
aa = "train_InceptionResNetV2.h5"
bb = "train_VGG19.h5"
cc = "train_Xception.h5"
dd = "train_ResNet50.h5"

for filename in [aa, bb, dd, cc]:
    with h5py.File(filename, 'r') as h:
        X_train.append(np.array(h['train']))
        y_train = np.array(h['label'])

X_train = np.concatenate(X_train, axis=1)
y_train = np.tile(y_train, 3)
X_train, y_train = shuffle(X_train, y_train)
c.构建模型:
由于上述我们已经得到了数据集的特征,我们只需要加上我们自己的全连接层即可:
input_tensor = Input(X_train.shape[1:])
x = Dropout(0.5)(input_tensor)
x = Dense(1, activation='sigmoid')(x)
model = Model(input_tensor, x)

model.compile(optimizer='adam',
              loss='binary_crossentropy',
              metrics=['accuracy'])
如何你的分类超过两类,只需要将loss修改为categorical_crossentropy即可,并且将标签进行one-hot编码即可:
y_train = keras.utils.to_categorical(y_train, num_classes)
d.使用callback函数保存精度最高的模型以及使用Tensorboard:
checkpoint = ModelCheckpoint('my_model.h5', monitor='val_acc', save_best_only=True,
mode='max')
callbacks_list = [checkpoint, TensorBoard(log_dir="E:\\dogcat\\train")]
e.训练模型并打印出模型结构:
以上都准备完毕的话,我们设置验证集占数据集的20%,即训练集=20000张,验证集=5000张,并且使用plot_model函数打印出了函数的模型:
model.fit(X_train, y_train, batch_size=64, callbacks=callbacks_list, epochs=20, validation_split=0.2)
plot_model(model, to_file='my_model.png', show_shapes=True)
Train on 20000 samples, validate on 5000 samples
Epoch 13/20
20000/20000 [==============================] - 1s - loss: 0.1193 - acc: 0.9591 - val_loss: 0.0283 - val_acc: 0.9926
Epoch 14/20
20000/20000 [==============================] - 0s - loss: 0.0319 - acc: 0.9898 - val_loss: 0.0181 - val_acc: 0.9892
Epoch 15/20
20000/20000 [==============================] - 0s - loss: 0.0252 - acc: 0.9916 - val_loss: 0.0172 - val_acc: 0.9914
Epoch 16/20
20000/20000 [==============================] - 0s - loss: 0.0214 - acc: 0.9936 - val_loss: 0.0140 - val_acc: 0.9976
Epoch 17/20
20000/20000 [==============================] - 0s - loss: 0.0200 - acc: 0.9926 - val_loss: 0.0139 - val_acc: 0.9964
Epoch 18/20
20000/20000 [==============================] - 0s - loss: 0.0189 - acc: 0.9933 - val_loss: 0.0129 - val_acc: 0.9966
Epoch 19/20
20000/20000 [==============================] - 0s - loss: 0.0170 - acc: 0.9946 - val_loss: 0.0123 - val_acc: 0.9998
Epoch 20/20
20000/20000 [==============================] - 0s - loss: 0.0163 - acc: 0.9945 - val_loss: 0.0119 - val_acc: 0.9958
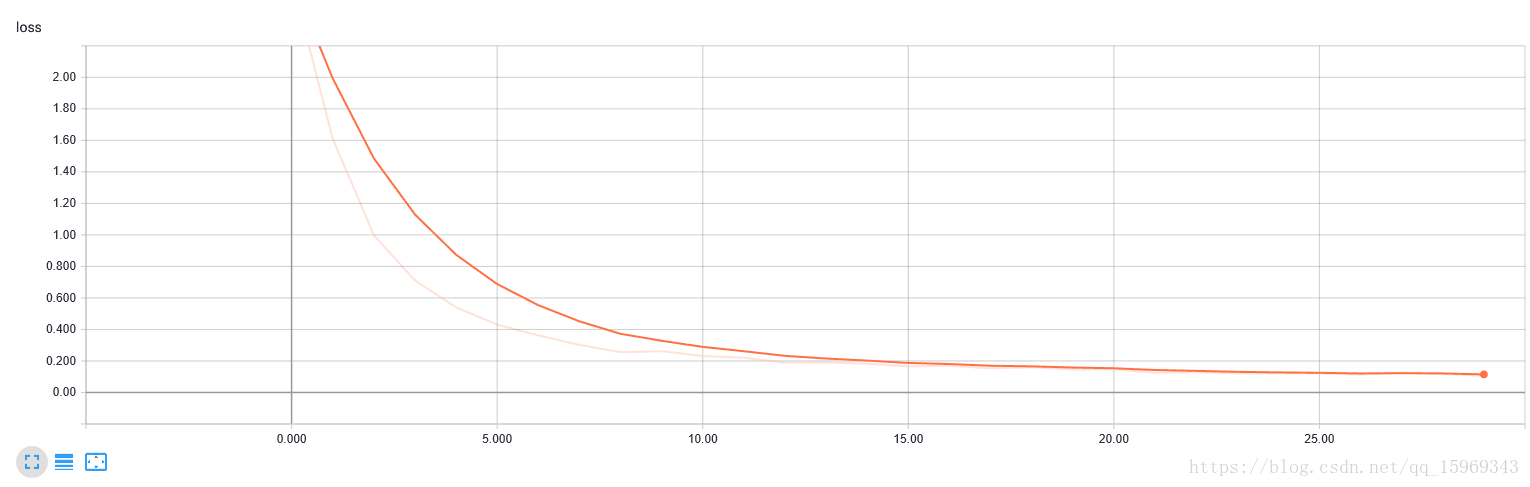
可以看到,我们利用ModelCheckpoint函数监测的是验证集的精度,在该验证集上,精度最高达到了99.98%,相当于在5000张图片中,只错了一张,这基本和没分错一样了,已经大大超越了人的分类精度!
通过tensorboard可以看到loss曲线下降的非常好:
六.完整代码:
from keras.models import *
from keras.layers import *
from keras.applications import *
from keras.preprocessing.image import *
import h5py
from sklearn.utils import shuffle
from keras.utils import plot_model
from PIL import ImageFile
from keras.callbacks import ModelCheckpoint, TensorBoard
ImageFile.LOAD_TRUNCATED_IMAGES = True

traindir = "E:/dogcat/train"#路径最后的文件夹下面应包含分类的文件夹

def get_feature(MODEL, image_size, lambda_func=None):
    width = image_size[0]
    height = image_size[1]
    batch_size = 1
    input_tensor = Input((height, width, 3))
    x = input_tensor
    if lambda_func:
        x = Lambda(lambda_func)(x)
    base_model = MODEL(input_tensor=x, weights='imagenet', include_top=False)
    model = Model(base_model.input, GlobalAveragePooling2D()(base_model.output))

    gen = ImageDataGenerator(
        rotation_range=40,
        width_shift_range=0.1,
        height_shift_range=0.1,
        shear_range=0.1,
        zoom_range=0.2,
        horizontal_flip=True
    )
    train_generator = gen.flow_from_directory(traindir, image_size, shuffle=False, batch_size=batch_size)

    train = model.predict_generator(train_generator, 3*train_generator.samples//train_generator)

    with h5py.File("train_%s.h5" % MODEL.__name__) as h:
        h.create_dataset("train", data=train)
        h.create_dataset("label", data=train_generator.classes)
#
print("正在提取第1个特征")
get_feature(ResNet50, (224, 224))
print("特征1已就绪")
# # #
print("正在提取第2个特征")
get_feature(Xception, (299, 299), xception.preprocess_input)
print("特征2已就绪")
# # #
print("正在提取第3个特征")
get_feature(InceptionResNetV2, (299, 299), inception_resnet_v2.preprocess_input)
print("特征3已就绪")
# # #
print("正在提取第4个特征")
get_feature(VGG19, (224, 224))
print("特征4已就绪")

np.random.seed(1993)

X_train = []
aa = "train_InceptionResNetV2.h5"
bb = "train_VGG19.h5"
cc = "train_Xception.h5"
dd = "train_ResNet50.h5"
ee = "train_InceptionV3.h5"

for filename in [dd, cc]:
    with h5py.File(filename, 'r') as h:
        X_train.append(np.array(h['train']))
        y_train = np.array(h['label'])

X_train = np.concatenate(X_train, axis=1)
y_train = np.tile(y_train, 3)
X_train, y_train = shuffle(X_train, y_train)

np.random.seed(1993)

input_tensor = Input(X_train.shape[1:])
x = Dropout(0.5)(input_tensor)
x = Dense(1, activation='sigmoid')(x)
model = Model(input_tensor, x)

model.compile(optimizer='adam',
              loss='binary_crossentropy',
              metrics=['accuracy'])

checkpoint = ModelCheckpoint('model.h5', monitor='val_acc', verbose=1, save_best_only=True,
mode='max')
callbacks_list = [checkpoint, TensorBoard(log_dir="E:\\dogcat\\train")]


model.fit(X_train, y_train, batch_size=128, callbacks=callbacks_list, epochs=30, validation_split=0.1)
plot_model(model, to_file='my_model.png', show_shapes=True)
关于在测试集上进行测试,请参考下一篇文章!
Keras:融合不同的模型并使用自己的数据进行fine-tuning及预测(二)