DOM文档事件
事件概述
HTML事件可以触发浏览器中的行为,比方说当用户点击某个 HTML 元素时启动一段 JavaScript。
窗口事件
由窗口触发该事件 (同样适用于 <body> 标签):
| 属性 | 描述 |
|---|---|
| onblur | 当窗口失去焦点时运行脚本。 |
| onfocus | 当窗口获得焦点时运行脚本。 |
| onload | 当文档加载之后运行脚本。 |
| onresize | 当调整窗口大小时运行脚本。 |
| onstorage | 当 Web Storage 区域更新时(存储空间中的数据发生变化时)运行脚本。 |
<!DOCTYPE html>
<html>
<head>
<meta charset="UTF-8">
<title></title>
</head>
<body>
<script>
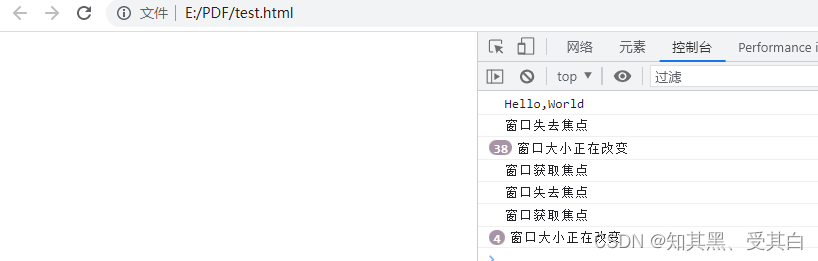
// 01 当窗口失去焦点时,输出 " 窗口失去焦点 "
window.onblur = function () {
console.log("窗口失去焦点");
};
// 02 当窗口获取焦点时,输出 “ 窗口获取焦点 ”
window.onfocus = function () {
console.log("窗口获取焦点");
};
// 03 当页面文档加载完成后,输出"Hello, World"
window.onload = function () {
console.log("Hello,World");
};
// 04 当调整窗口大小时,输出"窗口大小正在改变"
window.onresize = function () {
console.log("窗口大小正在改变");
};
// 当 Web Storage 区域更新时(存储空间中的数据发生变化时)运行脚本
window.onstorage = function () {
console.log("区域更新");
};
</script>
</body>
</html>
表单事件
表单事件在 HTML 表单中触发 (适用于所有 HTML 元素,但该 HTML 元素需在 form 表单内):
| 属性 | 描述 |
|---|---|
| onblur | 当元素失去焦点时运行脚本。 |
| onfocus | 当元素获得焦点时运行脚本。 |
| onchange | 当元素改变时运行脚本。 |
| oninput | 当元素获得用户输入时运行脚本。 |
| oninvalid | 当元素无效时运行脚本。 |
| onselect | 当选取元素时运行脚本。 |
| onsubmit | 当提交表单时运行脚本。 |
<!DOCTYPE html>
<html>
<head>
    <meta charset="UTF-8">
    <title></title>
</head>
<body>

<form  id="myform">
	<input type="text" id="text">
	 <!-- <input type="text" id="text" required> -->
	<input type="submit" value="submit">
</form>

<script>
	var textInput = document.getElementById("text");

	// 01 当文本框获取焦点,文本框背景为红色,当文本框失去焦点,文本框背景为黄色
	/* 当文本框获取焦点,文本框背景为红色 */
	textInput.onfocus = function () {


		this.style.background = "red";
	};
	/* 当文本框失去焦点,文本框背景为绿色 */
	textInput.onblur = function () {


		this.style.background = "green";
	};

	// 02 当文本框内容改变时,鼠标离开文本框,自动将文本框的内容输出到控制台
	textInput.onchange = function () {


		console.log(this.value);
	};

	// 03 当文本框内容改变时,立即将改变的内容 输出 到控制台
	textInput.oninput = function () {


		console.log(this.value);
	};

	// 04 如果单击“submit”,则不填写文本字段,将发生警报消息
	textInput.oninvalid = function () {


		console.log("请您完善表单内容!");
	};

	// 05  当选中文本框的内容时,输出“您已经选择了文本框内容!”
	textInput.onselect = function () {


		console.log("您已经选择了文本框内容!");
	};

	06 当提交表单的时候,在控制台输出“表单提交”
	var myform = document.getElementById("myform");

	myform.onsubmit = function () {


		console.log("表单提交");
		return false;/* 用来阻止表单提交的,你不写它会跳转请求 */
	};

</script>

</body>
</html>

键盘事件
通过键盘触发事件,类似用户的行为:
| 属性 | 描述 |
|---|---|
| onkeydown | 当按下按键时运行脚本。 |
| onkeyup | 当松开按键时运行脚本。 |
| onkeypress | 当按下并松开按键时运行脚本。 |
<!DOCTYPE html>
<html>
<head>
    <meta charset="UTF-8">
    <title></title>
</head>
<body>

<!-- 01  当键盘按下判断当前的按键是不是 a ,如果是就输出true,否则输出false  -->
<script>
	window.onkeydown = function () {


		/* 解决兼容性问题 */
		// event = event || window.event;

		if (event.keyCode == 65) {


			console.log("true");
		} else {


			console.log("false");
		}
	};
</script>

<!-- 02  使div可以根据不同的方向键向不同的方向移动 -->
<div id="box" style="width: 100px;height: 100px;background: red;position: absolute;"></div>
<script>
	var box = document.getElementById("box");

	//为document绑定一个按键按下的事件
	document.onkeydown = function (event) {


		// event = event || window.event;
		// 定义移动速度
		var speed = 10;
		// 选择移动方向
		switch (event.keyCode) {


			case 37:
				box.style.left = box.offsetLeft - speed + "px";
				break;
			case 39:
				box.style.left = box.offsetLeft + speed + "px";
				break;
			case 38:
				box.style.top = box.offsetTop - speed + "px";
				break;
			case 40:
				box.style.top = box.offsetTop + speed + "px";
				break;
		}
	};
</script>

</body>
</html>

鼠标事件
通过鼠标触发事件,类似用户的行为:
| 属性 | 描述 |
|---|---|
| onclick | 当单击鼠标时运行脚本。 |
| ondblclick | 当双击鼠标时运行脚本。 |
| onmousedown | 当按下鼠标按钮时运行脚本。 |
| onmouseup | 当松开鼠标按钮时运行脚本。 |
| onmousemove | 当鼠标指针移动时运行脚本。 |
| onmouseover | 当鼠标指针移至元素之上时运行脚本,不可以阻止冒泡。 |
| onmouseout | 当鼠标指针移出元素时运行脚本,不可以阻止冒泡。 |
| onmouseenter | 当鼠标指针移至元素之上时运行脚本,可以阻止冒泡。 |
| onmouseleave | 当鼠标指针移出元素时运行脚本,可以阻止冒泡。 |
| onmousewheel | 当转动鼠标滚轮时运行脚本。 |
| onscroll | 当滚动元素的滚动条时运行脚本。 |
<!DOCTYPE html>
<html>
<head>
    <meta charset="UTF-8">
    <title></title>
</head>
<body>

<!-- 01  创建一个正方形div,默认颜色为黑色,
		 当鼠标移入div,背景颜色变为红色,
		 当鼠标移出div,背景颜色变为绿色 -->
<div id="box" style="width: 100px;height: 100px;background: black;"></div>
<script>
	var box = document.getElementById("box");

	/* 当鼠标移入div,背景颜色变为红色 */
	box.onmouseenter = function () {


		this.style.background = "red";
	};
	/* 当鼠标移出div,背景颜色变为绿色 */
	box.onmouseleave = function () {


		this.style.background = "green";
	};
</script>

<!-- 02  编写一个通用的拖拽元素函数,
	 创建两个div,进行拖拽演示 -->
<div id="box1" style="width: 100px;height: 100px;background: red;position: absolute;"></div>
<div id="box2" style="width: 100px;height: 100px;background: green;position: absolute;"></div>

<script>
	var box1 = document.getElementById("box1");
	var box2 = document.getElementById("box2");

	drag(box1);
	drag(box2);
	// 提取一个专门用来设置拖拽的函数
	// 参数:开启拖拽的元素
	function drag(obj) {


		//当鼠标在被拖拽元素上按下时,开始拖拽
		obj.onmousedown = function (event) {


			// 设置obj捕获所有鼠标按下的事件

			// obj的偏移量 鼠标.clentX - 元素.offsetLeft
			// obj的偏移量 鼠标.clentY - 元素.offsetTop
			var ol = event.clientX - obj.offsetLeft;
			var ot = event.clientY - obj.offsetTop;

			// 为document绑定一个鼠标移动事件
			document.onmousemove = function (event) {


				// 当鼠标移动时被拖拽元素跟随鼠标移动
				// 获取鼠标的坐标
				var left = event.clientX - ol;
				var top = event.clientY - ot;
				// 修改obj的位置
				obj.style.left = left + "px";
				obj.style.top = top + "px";
			};

			// 为document绑定一个鼠标松开事件
			document.onmouseup = function () {


				// 取消document的onmousemove事件
				document.onmousemove = null;
				// 取消document的onmouseup事件
				document.onmouseup = null;
				// 当鼠标松开时,取消对事件的捕获
				obj.releaseCapture && obj.releaseCapture();
			};
			return false;
		}
	}
</script>

</body>
</html>
