除了手部触碰以及射线交互UI以外,还有一个目前很多VR一体机使用的凝视交互,这种方式不需要使用手柄去和UI交互,直接使用凝视,几秒钟自动触发事件,不过这种方式,目前只支持Button,其他UI控件不支持,做项目UI交互的话,还是使用前两种UI交互方式。
一、前期准备
新建场景,删除默认相机,将Player拖拽进入场景内
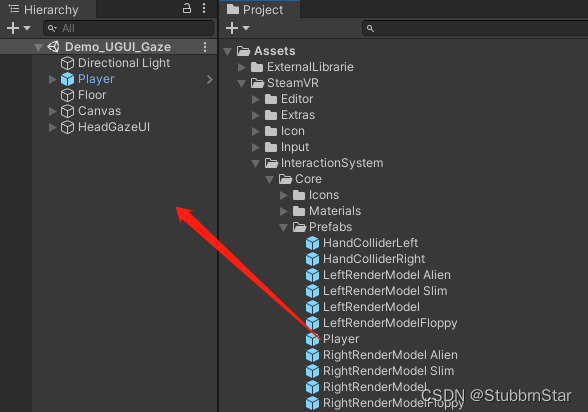
新建Plane,修改为Floor,上一个黑色材质球,Transform信息如下:

二、添加UI及组件
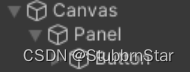
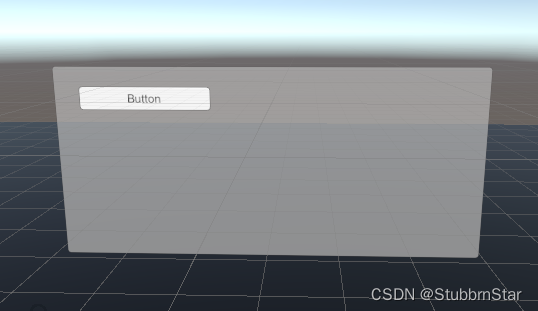
结构如下,添加画布、按钮
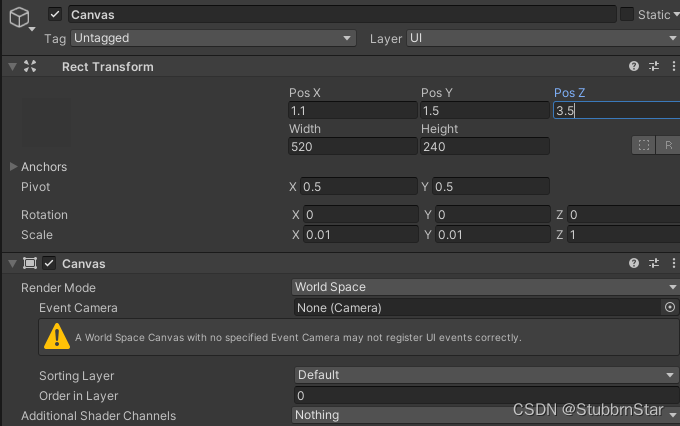
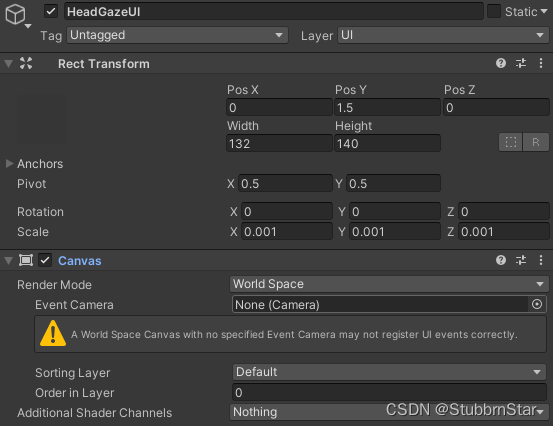
1、Canvas/画布信息
Render Mode要设置为World Space/世界模式
2、Button信息
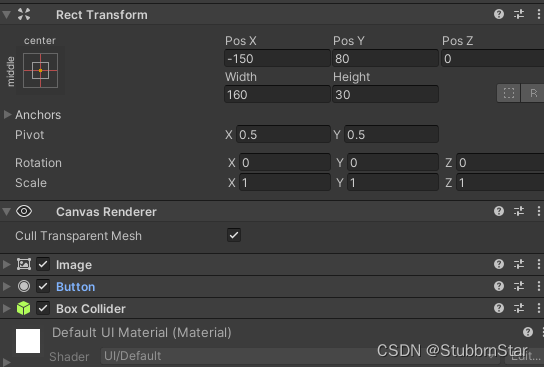
三、制作凝视组件
将图片下载并保存至项目中

组件结构如下:
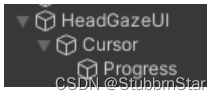
1、画布信息:
2、Cursor信息
我们可以手动改变Iamge的透明度和颜色

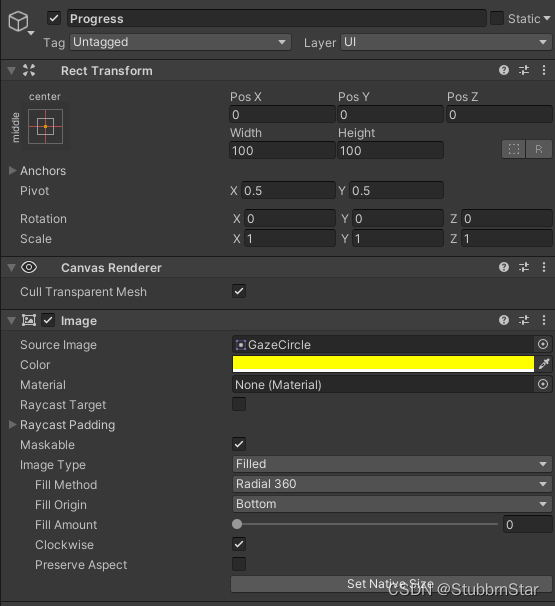
3、Process信息
进度我们可以改为黄色,Image Type改为Filled填充类型
四、编写脚本并挂载
using UnityEngine;
using UnityEngine.UI;
using Valve.VR.InteractionSystem;

public class SteamVR_HeadGaze : MonoBehaviour
{


    private Transform headCamera;                                       //头部相机
    private Transform cursor;                                           //射线光标
    private Image progress;                                             //凝视进度
    private LayerMask layerMask;                                        //凝视交互层
    private float stareTimer;                                           //凝视时间
    private Vector3 rayPositionOffset = new Vector3(0, 0.005f, 0);      //射线偏移量
    private float rayLength = 50f;                                      //射线长度
    private GameObject currentInteractable;                             //当前交互对象
    private GameObject previousInteractable;                            //上一个交互对象

    [Header("凝视激活时间")]
    public float activateTime = 3;

    private void Awake()
    {


        layerMask= 1 << LayerMask.NameToLayer("UI");
        headCamera = Camera.main.transform;
        cursor = transform.GetChild(0).transform;
        progress = cursor.GetChild(0).GetComponent<Image>();
    }

    private void Update()
    {


        if (headCamera == null) return;
        if (progress != null) {

     progress.fillAmount = 0; }

        EyeRaycast();
    }

    /// <summary>
    /// 眼部射线
    /// </summary>
    private void EyeRaycast()
    {


        Vector3 adjustedPosition = headCamera.position + (headCamera.right * rayPositionOffset.x) +
                                   (headCamera.up * rayPositionOffset.y) +
                                   (headCamera.forward * rayPositionOffset.z);

        Ray ray = new Ray(adjustedPosition, headCamera.forward);
        RaycastHit hit;
        if (Physics.Raycast(ray, out hit, rayLength, layerMask))
        {


            if (cursor != null)
            {


                cursor.gameObject.SetActive(true);
                cursor.position = hit.point;
                cursor.rotation = headCamera.rotation;
            }

            Button aButton = hit.transform.GetComponent<Button>();
            if (aButton == null)
            {


                ResetInteractable();
                currentInteractable = null;
                return;
            }

            currentInteractable = aButton.gameObject;

            if (currentInteractable && currentInteractable != previousInteractable)
            {


                InputModule.instance.HoverBegin(currentInteractable);
            }
            else if (currentInteractable == previousInteractable)
            {


                stareTimer += Time.deltaTime;

                if (progress != null)
                {


                    progress.fillAmount = (stareTimer / activateTime);
                }

                if (stareTimer > activateTime)
                {


                    InputModule.instance.Submit(currentInteractable);
                    stareTimer = 0;
                    ResetInteractable();
                }
            }

            if (currentInteractable != previousInteractable) {

     ResetInteractable(); }
            previousInteractable = currentInteractable;
        }
        else
        {


            ResetInteractable();
            currentInteractable = null;
        }
    }

    /// <summary>
    /// 重置交互
    /// </summary>
    private void ResetInteractable()
    {


        stareTimer = 0;
        if (progress != null) {

     progress.fillAmount = 0; }
        if (previousInteractable == null) {

     return; }

        InputModule.instance.HoverEnd(previousInteractable);
        previousInteractable = null;
        if (cursor != null)
        {


            cursor.gameObject.SetActive(false);
        }
    }
}
脚本就100来行,直接挂载到HeadGazeUI组件上,什么参数都不需要进行设置。
至此,只要Button上挂载了碰撞器,运行游戏后,头盔视野看向Button,会看到有一个黄色的圆圈在自动填充,3s后自动触发按钮