调整大小:
image = cv2.resize(image,dst=None,fx=0.5,fy = 0.5,dsize=None)
img = cv2.resize(img,dst=None,fx=0.5,fy = 0.5,dsize=None)
画轮廓
获得平均灰度值的办法:
**
template = cv2.imread('pl2.jpg')
#获得灰度图
template_gray = cv2.cvtColor(template, cv2.COLOR_BGR2GRAY)
h, w = template_gray.shape[:2] # template_gray 为灰度图
m = np.reshape(template_gray, [1, w*h])
mean = m.sum()/(w*h) # 图像平均灰度值
发现使用template_gray.shape[2]会报错,认为原因应该是灰度图是二维的,shape只有图像的尺寸,而无第三个通道数。
reshape函数:
numpy.arange(n).reshape(a, b) 依次生成n个自然数,并且以a行b列的数组形式显示
mat (or array).reshape(c, -1) 必须是矩阵格式或者数组格式,才能使用 .reshape(c, -1) 函数, 表示将此矩阵或者数组重组,以 c行d列的形式表示
arr.shape # (a,b)
arr.reshape(m,-1) #改变维度为m行、d列 (-1表示列数自动计算,d= ab /m )
arr.reshape(-1,m) #改变维度为d行、m列 (-1表示行数自动计算,d= ab /m )
-1的作用就在此: 自动计算d:d=数组或者矩阵里面所有的元素个数/c, d必须是整数,不然报错)mat (or array).reshape(c, -1) 必须是矩阵格式或者数组格式,才能使用 .reshape(c, -1) 函数, 表示将此矩阵或者数组重组,以 c行d列的形式表示
arr.shape # (a,b)
arr.reshape(m,-1) #改变维度为m行、d列 (-1表示列数自动计算,d= ab /m )
arr.reshape(-1,m) #改变维度为d行、m列 (-1表示行数自动计算,d= ab /m )
-1的作用就在此: 自动计算d:d=数组或者矩阵里面所有的元素个数/c, d必须是整数,不然报错)
上面的代码中reshape的第一个参数为1,可见它将矩阵转化为一行,输出m得到:
[[67 68 70 … 86 84 82]]
输出平均灰度mean:
166.6545988023952
函数cv2.threshold()
这个函数有四个参数,第一个原图像,第二个进行分类的阈值,第三个是高于(低于)阈值时赋予的新值,第四个是一个方法选择参数,常用的有:
• cv2.THRESH_BINARY(黑白二值)示阈值的二值化操作,大于阈值使用maxval表示,小于阈值使用0表示
• cv2.THRESH_BINARY_INV(黑白二值反转)表示阈值的二值化翻转操作,大于阈值的使用0表示,小于阈值的使用最大值表示
• cv2.THRESH_TRUNC (得到的图像为多像素值) 表示进行截断操作,大于阈值的使用阈值表示,小于阈值的不变
• cv2.THRESH_TOZERO 表示进行化零操作,大于阈值的不变,小于阈值的使用0表示
• cv2.THRESH_TOZERO_INV 表示进行化零操作的翻转,大于阈值的使用0表示,小于阈值的不变
将上面的参数0换成cv2.THRESH_TRUNC之后:
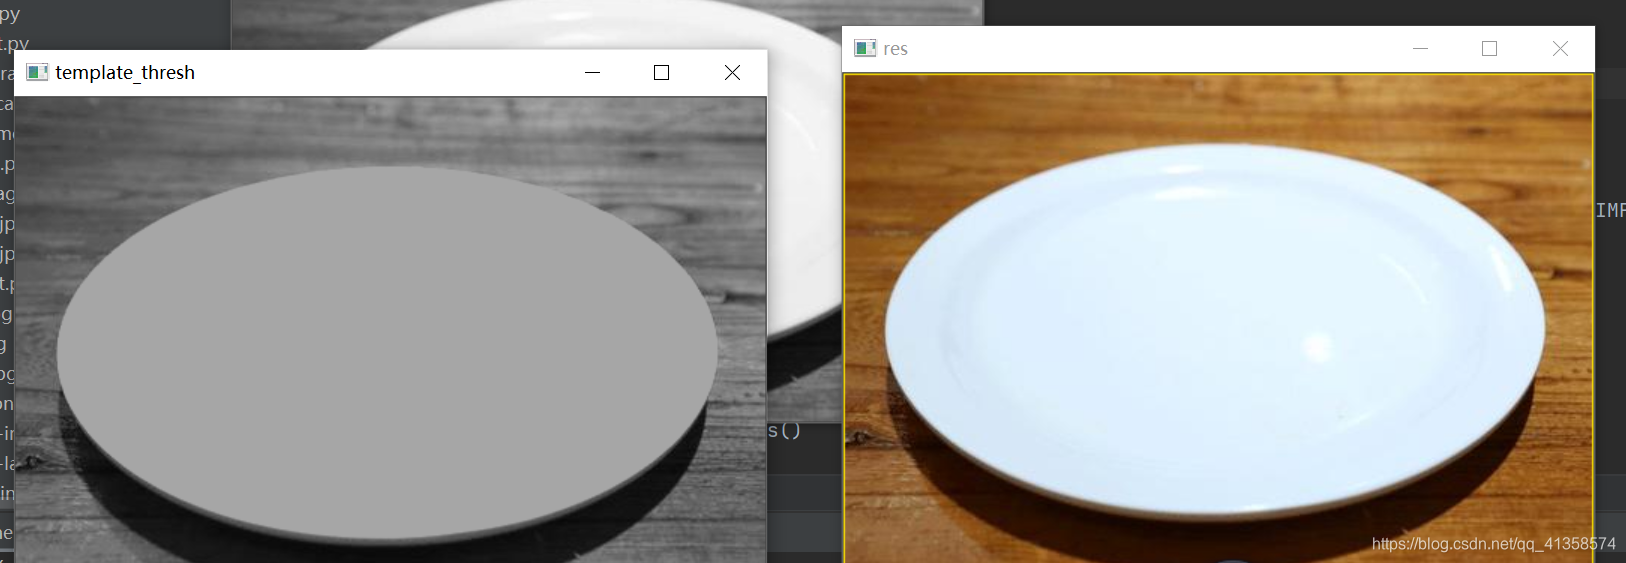
换成cv2.THRESH_BINARY_INV:
可见对于最后轮廓的提取并没有什么影响。
将第三个参数由原来的255换成100:
255为白色,100为上面的灰色,如果换成0图片变成一片黑:
即
template_thresh = cv2.threshold(template_gray, mean, 0,0)[1]
cv2.imshow('template_thresh', template_thresh)
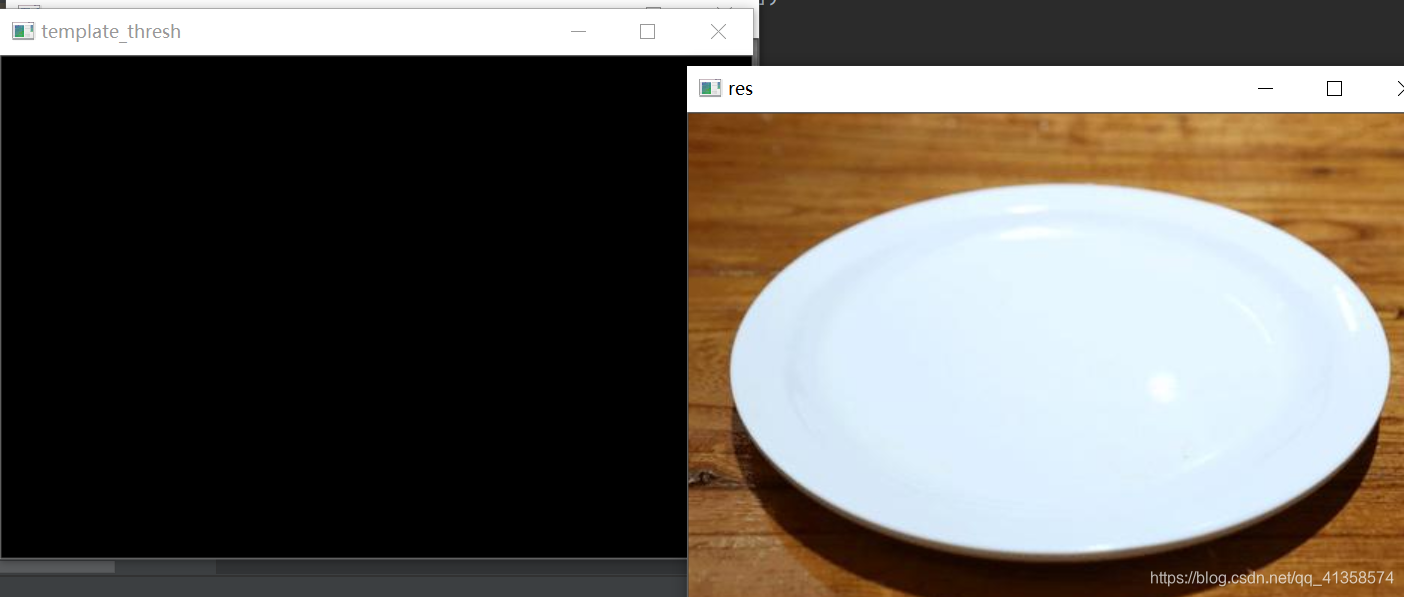
且可以看到轮廓也没有被提取出来,可见第三个参数对于结果也很重要。
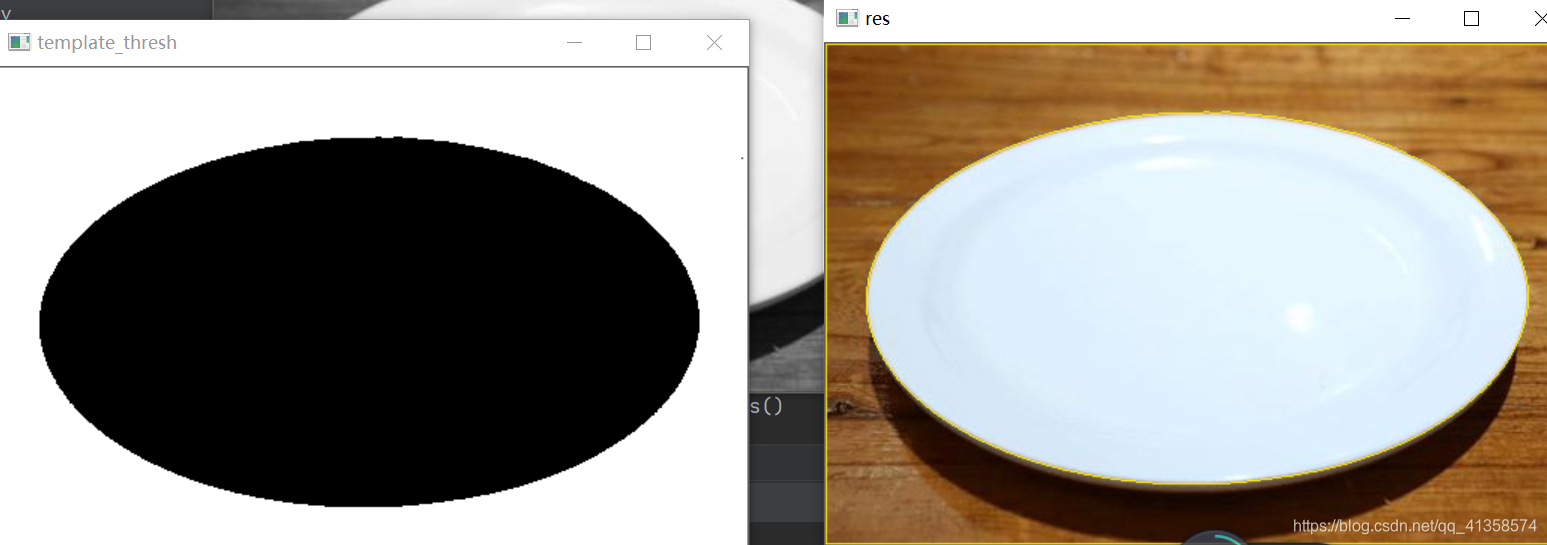
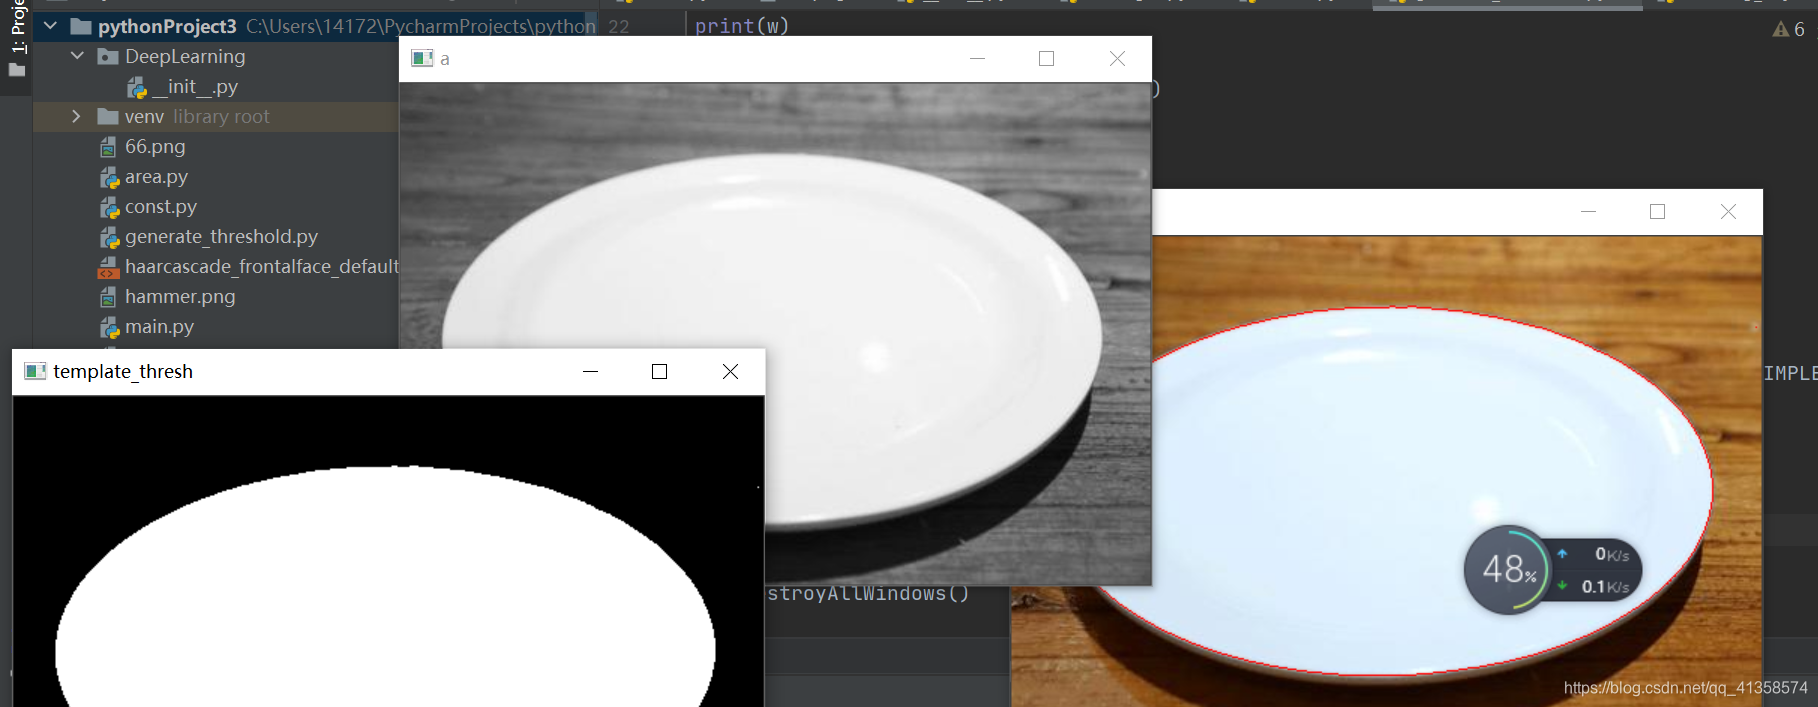
下面提取轮廓:
# 对模板图片进行二值化
cv2.imshow("a",template_gray)
template_thresh = cv2.threshold(template_gray, mean, 255,0)[1]
cv2.imshow('template_thresh', template_thresh)

# 轮廓检测 cv2.RETR_EXTERNAL--检测外侧轮廓
contours, hierarchy = cv2.findContours(template_thresh, cv2.RETR_EXTERNAL, cv2.CHAIN_APPROX_SIMPLE)
# print(contours)
# 轮廓绘制
res = cv2.drawContours(template.copy(), contours, -1, (0, 0, 255), 1)
cv2.imshow('res', res)
cv2.waitKey(0)
cv2.destroyAllWindows()
cv2.findContours
注意cv2.findContours的返回值现在只有两个,多写会报错。
counters是返回的轮廓
findContours( InputArray image, int mode,int method, Point offset = Point());
第一个参数:
image 8位单通道,所有非0值被处理为1,0值不变,也就是说灰度图会被自动处理为二值图,一般都是先处理为二值图之后再作为参数使用
第二个参数:
RETR_LIST 从解释的角度来看,这中应是最简单的。它只是提取所有的轮廓,而不去创建任何父子关系。
RETR_EXTERNAL 如果你选择这种模式的话,只会返回最外边的的轮廓,所有的子轮廓都会被忽略掉。
RETR_CCOMP 在这种模式下会返回所有的轮廓并将轮廓分为两级组织结构。
RETR_TREE 这种模式下会返回所有轮廓,并且创建一个完整的组织结构列表。它甚至会告诉你谁是爷爷,爸爸,儿子,孙子等
注意:后一个轮廓跟父子轮廓无关
第三个参数:
cv2.CHAIN_APPROX_NONE,,表示边界所有点都会被储存;而如果设为cv2.CHAIN_APPROX_SIMPLE 会压缩轮廓,将轮廓上冗余点去掉,比如说四边形就会只储存四个角点。
之前上面代码的运行结果:
将第三个参数cv2.CHAIN_APPROX_SIMPLE改为cv2.CHAIN_APPROX_NONE之后结果:

表示没有看出什么差别。
返回的第一个参数:返回的轮廓(opencv4中取消了返回的原始图像)
第二个参数:图像的拓扑信息(轮廓层次)
该返回值返回的是一组轮廓信息,每个轮廓都是由若干个点所构成的。例如,contours[i]是第i个轮廓(下标从0开始),contours[i][j]是第i个轮廓内的第j个点。
返回值contours的type属性是list类型,list的每个元素都是图像的一个轮廓,用Numpy中的ndarray结构表示。
使用如下语句,可以获取轮廓内第0个轮廓中具体点的位置属性: print(contours[0])#打印第0个轮廓中的像素点
cv2.drawContours()
cv2.drawContours()被用来绘制轮廓。第一个参数是一张图片,可以是原图或者其他。第二个参数是轮廓,也可以说是cv2.findContours()找出来的点集,一个列表。第三个参数是对轮廓(第二个参数)的索引,当需要绘制独立轮廓时很有用,若要全部绘制可设为-1。接下来的参数是轮廓的颜色和厚度。
(0,0,255)表示的是红色,如果换成(0, 230, 255),可以看见颜色变成了淡黄
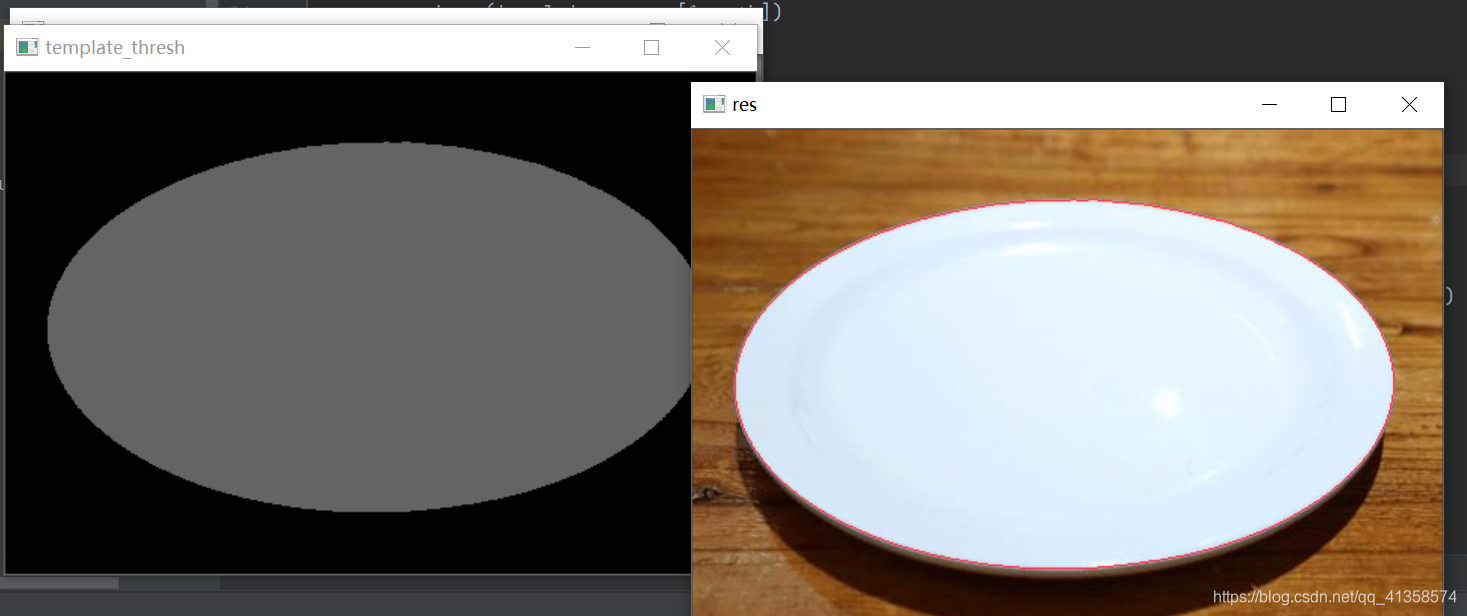
平均灰度值的获得非常重要,即这句话:
template_thresh = cv2.threshold(template_gray, mean, 255,0)[1]
mean是平均灰度值。如果数值不对,无法提取轮廓,现在换成另一个数字150尝试一下:(计算出来的数值是166)

可以看到旁边出现了一些其他的轮廓,即并没有正确框住轮廓。可见这个值对于结果非常重要。
完整代码:
template = cv2.imread('pl2.jpg')
template_gray = cv2.cvtColor(template, cv2.COLOR_BGR2GRAY)
h, w = template_gray.shape[:2] # gray 为灰度图
print(h)
print(w)

m = np.reshape(template_gray, [1, w*h])
mean = m.sum()/(w*h) # 图像平均灰度值
print(mean)
# 对模板图片进行二值化
cv2.imshow("a",template_gray)
template_thresh = cv2.threshold(template_gray, mean, 255,1)[1]
cv2.imshow('template_thresh', template_thresh)

# 轮廓检测 cv2.RETR_EXTERNAL--检测外侧轮廓
contours, hierarchy = cv2.findContours(template_thresh, cv2.RETR_LIST, cv2.CHAIN_APPROX_SIMPLE)
# print(contours)
# 轮廓绘制
res = cv2.drawContours(template.copy(), contours, -1, (80, 45, 255), 1) #注意这里!!!

cv2.imshow('res', res)
cv2.waitKey(0)
cv2.destroyAllWindows()
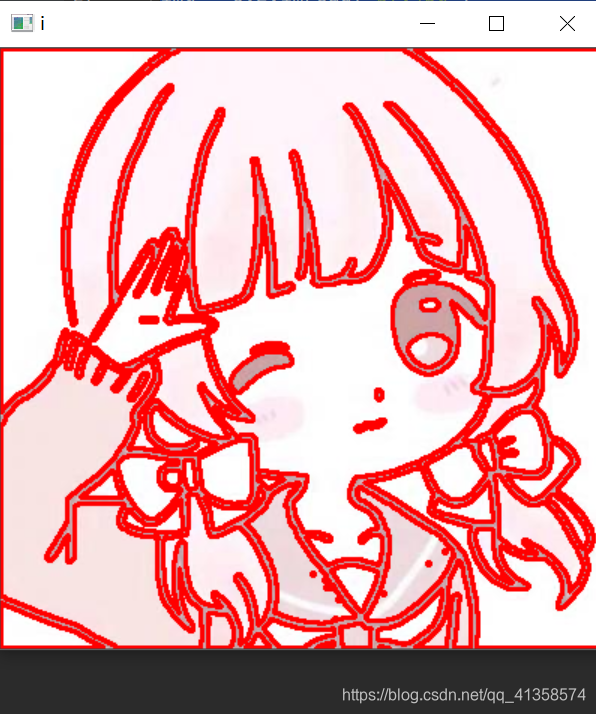
实例二:
img = cv2.imread("p7.jpg")

gray = cv2.cvtColor(img,cv2.COLOR_BGR2GRAY)
ret,newi = cv2.threshold(gray,0,255,cv2.THRESH_BINARY+cv2.THRESH_OTSU)
hire,counters = cv2.findContours(newi,cv2.RETR_LIST,cv2.CHAIN_APPROX_SIMPLE)
res = cv2.drawContours(img,hire,-1,(0,0,255),2)
cv2.imshow("i",res)


cv2.waitKey()
框矩形:
threshold函数的阈值设置非常重要,这里设置的是210
img = cv2.imread("pl2.jpg")

gray = cv2.cvtColor(img,cv2.COLOR_BGR2GRAY)
ret,newi = cv2.threshold(gray,210,255,cv2.THRESH_BINARY)

hire,counters = cv2.findContours(newi,cv2.RETR_LIST,cv2.CHAIN_APPROX_SIMPLE)
x,y,w,h = cv2.boundingRect(hire[0])
box = np.array([[x,y],[x+w,y],[x+w,y+h],[x,y+h]])
res = cv2.drawContours(img,[box],-1,(0,0,255),2)
cv2.imshow("i",img)
cv2.imshow("it",res)
cv2.waitKey()

另一种框矩形法:(不能用平均灰度,否则无法框出矩形)
最小矩形框
img = cv2.imread("pl2.jpg")

gray = cv2.cvtColor(img,cv2.COLOR_BGR2GRAY)
h, w = gray.shape[:2] # template_gray 为灰度图
m = np.reshape(gray, [1, w*h])
mean = m.sum()/(w*h) # 图像平均灰度值
t,newi = cv2.threshold(gray,185,255,cv2.THRESH_BINARY)

cv2.imshow("io",newi)
hire,counters = cv2.findContours(newi,cv2.RETR_LIST,cv2.CHAIN_APPROX_SIMPLE)
rect = cv2.minAreaRect(hire[0])
print(rect)
points = cv2.boxPoints(rect)
points = np.int0(points) #取整
image = cv2.drawContours(img,[points],0,(0,0,255),2)
cv2.imshow("i",img)
cv2.imshow("it",image)
(选图很重要,不然根本出不来)
由于原图中本来就有红色的边框,故改阈值:
t,newi = cv2.threshold(gray,0,255,cv2.THRESH_BINARY)
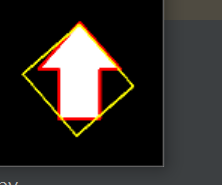
现在进行凸包操作:
rect = cv2.convexHull(hire[1])
print(rect)
cv2.polylines(img,[rect],True,(0,255,255),2)
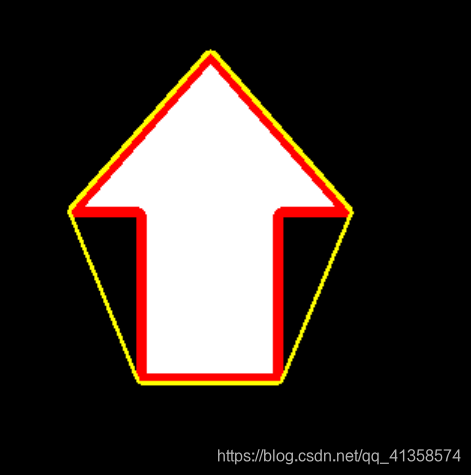
此时能完全刚好框住。如果不设置为0的话会发现没有全部框住:

遍历所有轮廓
由于图有问题,画的轮廓也有问题
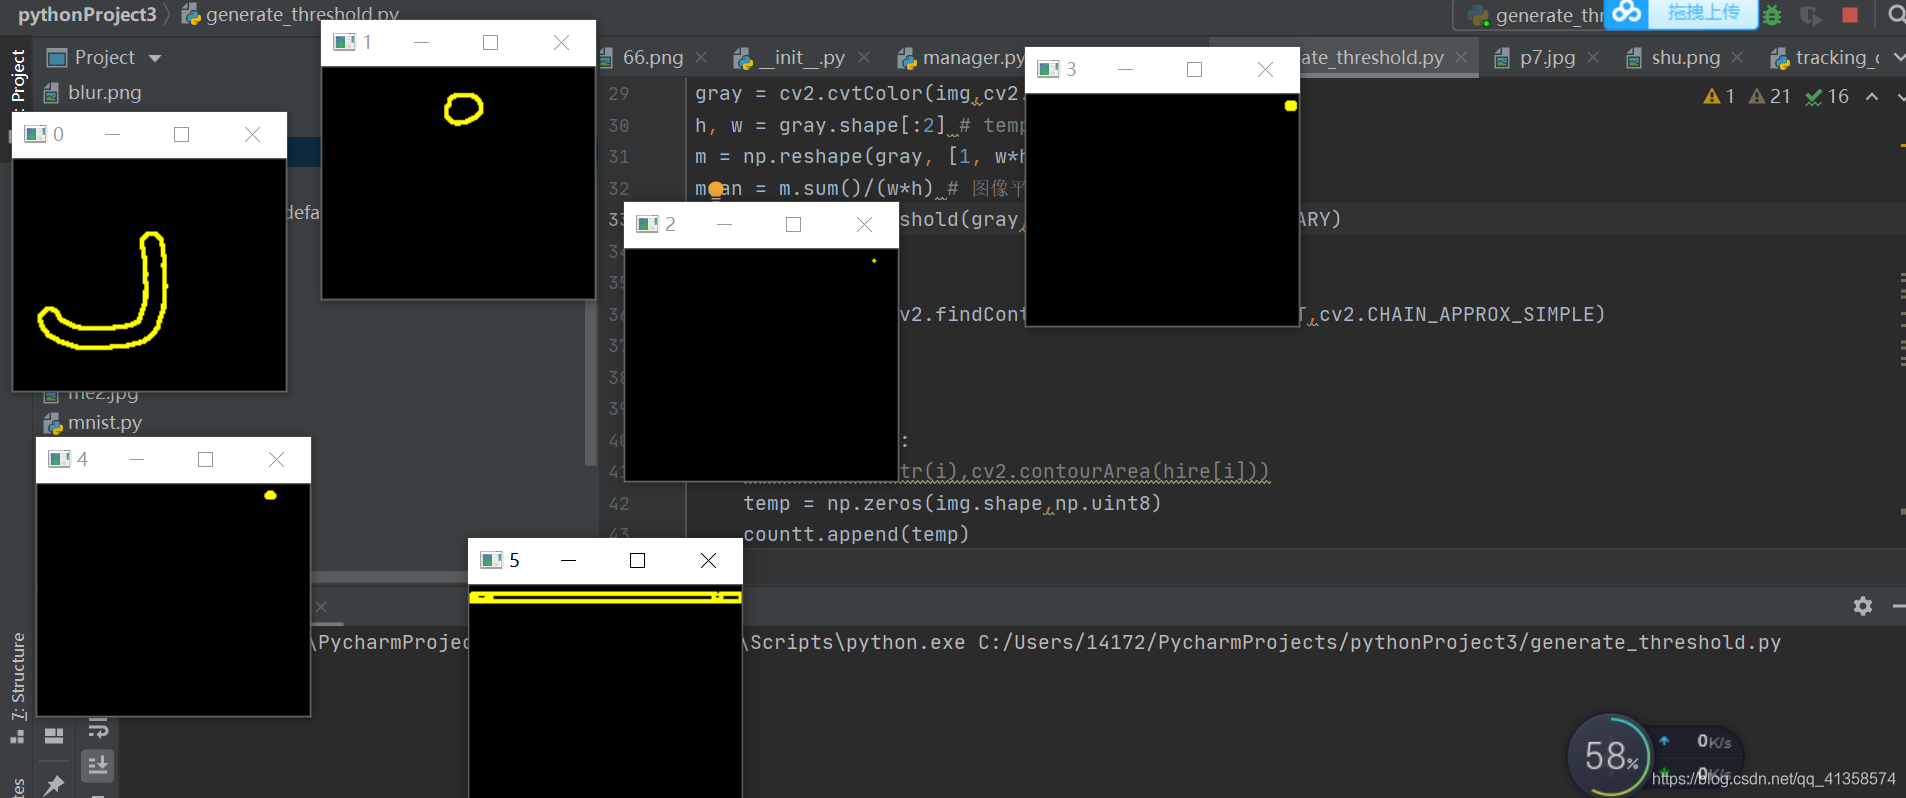
img = cv2.imread("erode.png")
t,newi = cv2.threshold(gray,245,255,cv2.THRESH_BINARY)
hire,counters = cv2.findContours(newi,cv2.RETR_LIST,cv2.CHAIN_APPROX_SIMPLE)
n = len(hire)
countt=[]
print(len(hire))
for i in range(n):
    #print('cc'+str(i),cv2.contourArea(hire[i]))
    temp = np.zeros(img.shape,np.uint8)
    countt.append(temp)
    countt[i] = cv2.drawContours(countt[i],hire,i,(0,255,255),2)
    cv2.imshow(str(i),countt[i])
换了一张图测试,效果好多了:

灰度图分解
效果:
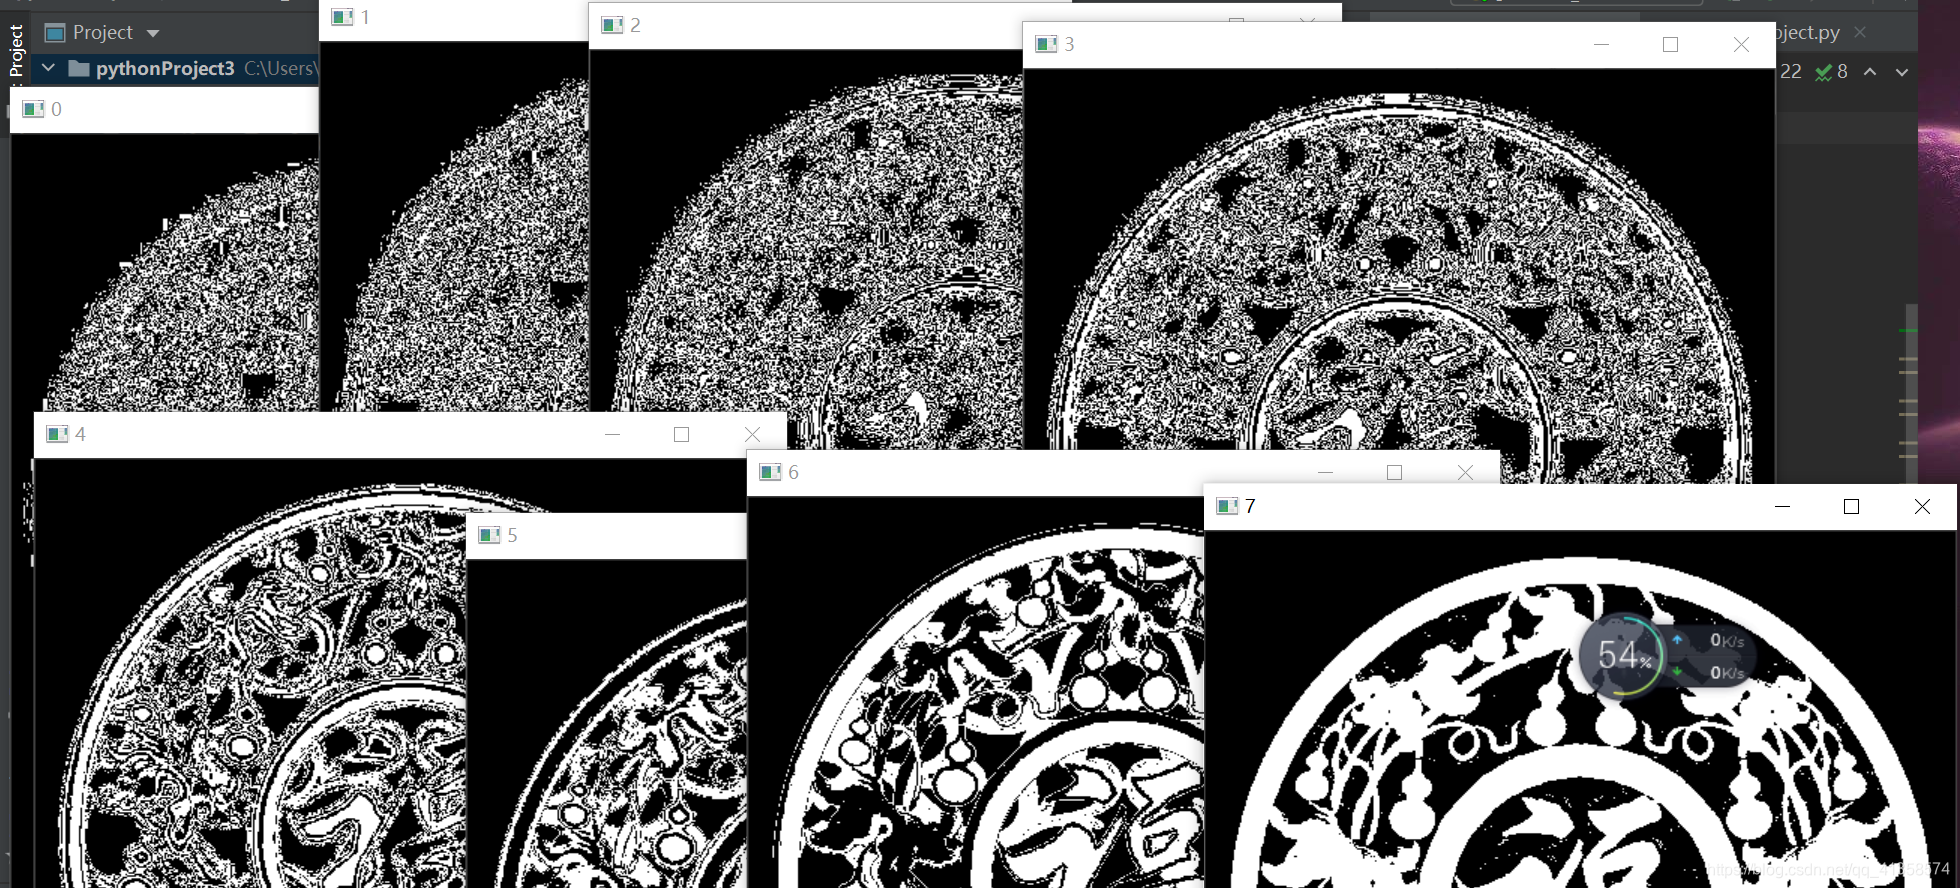
其中7最接近原始图像。第七位二进制值在八位二进制值中权值最高,与原图相关度最高
代码:
a = cv2.imread("p7.jpg",0)

h,w = a.shape
newpic =np.zeros((h,w,8),dtype=np.uint8)
for i in range(8):
    newpic[:,:,i] = 2**i
h = np.zeros((h,w,8),dtype=np.uint8)
for i in range(8):
    h[:,:,i] = np.bitwise_and(a,newpic[:,:,i])
    mask = h[:,:,i]>0
    h[mask] = 255
    cv2.imshow(str(i),h[:,:,i])

cv2.waitKey(0)
cv2.destroyAllWindows()
newpic =np.zeros((h,w,8),dtype=np.uint8):用于提取各个位平面的提取矩阵,8表示有8个通道,八个通道分别用来提取灰度图像的八个位位平面,newpic[:,:,0]用来提取灰度图像的第0个位平面
mask = h[:,:,i]>0将h中大于0的值处理为逻辑真,h[mask]=255,将h中对应mask中逻辑值为真的位置上的值替换为255
只框超过一定大小的轮廓:
img = cv2.imread("shu.png")

gray = cv2.cvtColor(img,cv2.COLOR_BGR2GRAY)
h, w = gray.shape[:2] # template_gray 为灰度图
ret,binaryimg = cv2.threshold(gray,100,255,cv2.THRESH_BINARY)
countimg = []
contours,hierarchy = cv2.findContours(binaryimg,cv2.RETR_LIST,cv2.CHAIN_APPROX_SIMPLE)
n = len(contours)
for i in range(n):
    temp = np.zeros(img.shape, np.uint8)
    countimg.append(temp)
    if cv2.contourArea(contours[i]) > 20000:

        countimg[i] = cv2.drawContours(img.copy(),contours,i,(0,0,255),3)
        cv2.resize(countimg[i],dst=None,fx = 0.5,fy=0.5,dsize=None)
        cv2.imshow("conter"+str(i),countimg[i])
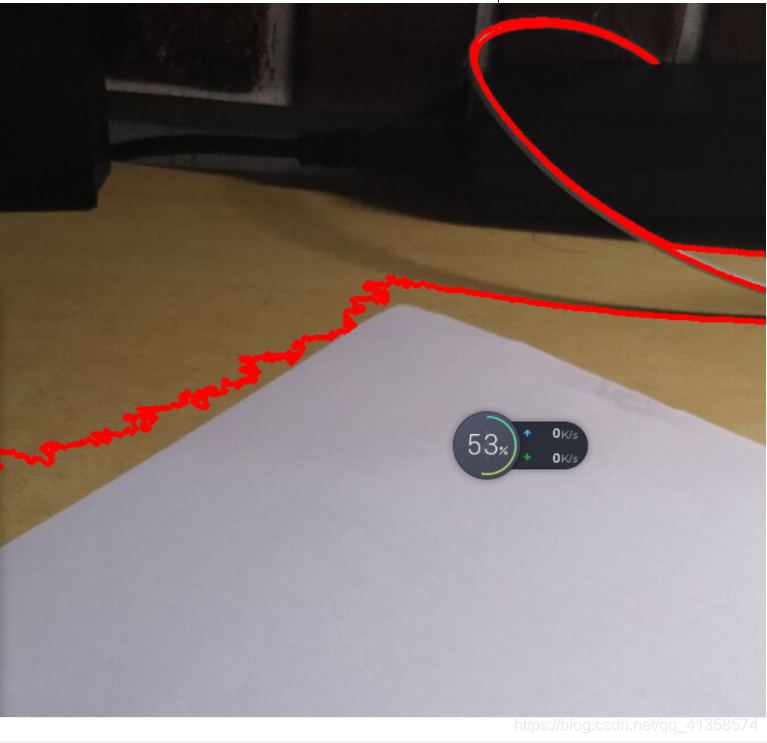
指定hsv范围框白色物体

试了好多次hsv的值终于框出来了,取值也太难了吧。中途因为取值问题压根无法获得边缘。
[外链图片转存失败,源站可能有防盗链机制,建议将图片保存下来直接上传(img-6aMVJq1E-1614539904373)(C:\Users\14172\AppData\Roaming\Typora\typora-user-images\image-20210301024314126.png)]
img = cv2.imread("shu.png")

gray = cv2.cvtColor(img,cv2.COLOR_BGR2GRAY)
hsv = cv2.cvtColor(img,cv2.COLOR_BGR2HSV)
h, w = gray.shape[:2] # template_gray 为灰度图
ret,binaryimg = cv2.threshold(gray,100,255,cv2.THRESH_BINARY_INV)
countimg = []
lowhsv = np.array([0,0,100])
highhsv = np.array([180,40,255])
mask = cv2.inRange(hsv,lowerb=lowhsv,upperb=highhsv)
median = cv2.medianBlur(mask,5)
cannypic = cv2.Canny(median,30,255)
cv2.imshow("f",cannypic)
#contours,hierarchy = cv2.findContours(binaryimg,cv2.RETR_LIST,cv2.CHAIN_APPROX_SIMPLE)
contours,hierarchy = cv2.findContours(cannypic,cv2.RETR_CCOMP,cv2.CHAIN_APPROX_SIMPLE)
n = len(contours)
print(n)
for i in range(n):
    temp = np.zeros(img.shape, np.uint8)
    countimg.append(temp)
    if cv2.contourArea(contours[i]) > 10000:

     countimg[i] = cv2.drawContours(img.copy(),contours,i,(0,0,255),3)
     countimg[i] = cv2.resize(countimg[i],dst=None,fx = 0.5,fy=0.5,dsize=None)
     cv2.imshow("conter"+str(i),countimg[i])