0.什么是轮廓
轮廓可以简单认为成将连续的点(连着边界)连在一起的曲线,具有相同的颜色或者灰度。轮廓在形状分析和物体的检测和识别中很有用。
- 为了更加准确,要使用二值化图像。在寻找轮廓之前,要进行阈值化处理或者Canny 边界检测。
- 查找轮廓的函数会修改原始图像。如果你在找到轮廓之后还想使用原始图像的话,你应该将原始图像存储到其他变量中。
- 在OpenCV 中,查找轮廓的原理如下:对于一幅背景为黑色、目标为白色的二值图像,如果在图中找到一个白色点,且它的8邻域(或4邻域)也均为白色,则说明该点是目标的内部点,将其置为黑色,视觉上就像内部被掏空一样;否则保持白色不变,该点是目标的边界点。
- 边缘检测和轮廓提取的区别:
- 边缘检测主要是通过一些手段检测数字图像中明暗变化剧烈(即梯度变化比较大)像素点,偏向于图像中像素点的变化。如canny边缘检测,结果通常保存在和源图片一样尺寸和类型的边缘图中。
- 轮廓检测指检测图像中的对象边界,更偏向于关注上层语义对象。如OpenCV中的findContours()函数, 它会得到每一个轮廓并以点向量方式存储,除此也得到一个图像的拓扑信息,即一个轮廓的后一个轮廓、前一个轮廓、父轮廓和内嵌轮廓的索引编号。
- 搬几张图来解释一下(来源):以下的图分别为灰度图、边缘图、轮廓图


1.查找并绘制轮廓
代码速记:
- cv2.findContours()
- cv2.drawContours()
参数解释:
#二值图像、轮廓检索模式(看本文第5条)、轮廓近似方法
image,contours,hierarchy=cv2.findContours(thresh_img,cv2.RETR_TREE,cv2.CHAIN_APPROX_SIMPLE)

#原图、轮廓、轮廓索引、颜色、thickness
img1=cv2.drawContours(self.img,contours,-1,(0,255,0),3)
- 函数cv2.findContours() 返回值有三个:图像、轮廓、(轮廓的)层析结构
- 轮廓(第二个返回值)是一个Python列表,其中存储这图像中的所有轮廓。每一个轮廓都是一个Numpy 数组,包含对象边界点(x,y)的坐标
实战:
def draw(self):
    #【1】把图像变灰,再二值化
    gray=cv2.cvtColor(self.img,cv2.COLOR_BGR2GRAY)
    ret,thresh_img=cv2.threshold(gray,127,255,0)
    #【2】寻找轮廓:会改变原始图像
    image,contours,hierarchy=cv2.findContours(thresh_img,cv2.RETR_TREE,cv2.CHAIN_APPROX_SIMPLE)
    #retr_tree,chain_approx_simple
    #【3】绘制所有轮廓
    img1=cv2.drawContours(self.img,contours,-1,(0,255,0),3)
    #【4】绘制索引为1的轮廓
    img2=cv2.drawContours(self.img,contours,1,(0,255,0),3)
    titles = ['all', 'one']
    imgs = [img1, img2]
    for i in range(2):
        plt.subplot(1, 2, i + 1), plt.imshow(cv2.cvtColor(imgs[i],cv2.COLOR_BGR2RGB))
        plt.title(titles[i])
        plt.xticks([]), plt.yticks([])
    plt.show()

2.轮廓特征
代码速记:
- cv2.moments():计算图像的中心矩(关于矩的知识)
- cv2.contourArea():计算轮廓区域的面积
- cv2.arcLength():计算轮廓长度
- cv2.approxPolyDP():逼近多边形曲线
- cv2.convexHull():提取轮廓凸包
- cv2.isContourConvex():测试轮廓的凸性
- cv2.boundingRect():轮廓的外包矩形
- cv2.minAreaRect():轮廓的最小外包矩形(考虑旋转)
- cv2.minEnclosingCircle():轮廓的最小外包圆
- cv2.fitEllipse():用椭圆拟合轮廓
- cv2.fitLine():用直线拟合轮廓
实战:
def features(self):
#【0】检测图像轮廓
img = cv2.imread('../images/test2.jpg',0)
cimg=cv2.cvtColor(img,cv2.COLOR_GRAY2BGR)#后面画图必须用三通道图像
ret,thresh = cv2.threshold(img,127,255,0)
img,contours,hierarchy = cv2.findContours(thresh, 1, 2)
#【1】轮廓的矩
cnt = contours[0]
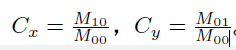
M = cv2.moments(cnt)#矩以一个字典的形式返回。可以求出质心坐标。
#cx = int(M['m10']/M['m00'])
#cy = int(M['m01']/M['m00'])
#【2】轮廓面积:可以用函数cv2.contourArea,也可以使用矩(0 阶矩)['m00']
area = cv2.contourArea(cnt)
#【3】轮廓周长:弧长。第二参数指定对象的形状是闭合的(True),还是打开的
perimeter = cv2.arcLength(cnt,True)
#【4】轮廓近似:近似到另外一种由更少点组成的轮廓形状,新轮廓的点的数目由我们设定的准确度来决定
epsilon = 0.1*cv2.arcLength(cnt,True)#从原始轮廓到近似轮廓的最大距离
approx = cv2.approxPolyDP(cnt,epsilon,True)
#【5】凸包
hull = cv2.convexHull(cnt)#points轮廓、hull输出、clockwise方向标志、returnPoints默认返回凸包上的点。否则返回轮廓点的索引。
#【6】凸性检测:检测一个曲线是不是凸的。
k = cv2.isContourConvex(cnt)
#【7】直边界矩形
x,y,w,h = cv2.boundingRect(cnt)#x,y是左上角坐标
img_rect = cv2.rectangle(cimg.copy(), (x, y), (x + w, y + h), (0, 255, 0), 2)
#【8】旋转的边界矩形
rect = cv2.minAreaRect(cnt)
box = cv2.boxPoints(rect)
box = np.int0(box)
img_min_rect = cv2.drawContours(cimg.copy(), [box], 0, (0, 0, 255), 2)
#【9】最小外接圆
(x,y),radius = cv2.minEnclosingCircle(cnt)
center = (int(x),int(y))
radius = int(radius)
img_circle = cv2.circle(cimg.copy(), center, radius, (0, 255, 0), 2)
#【10】椭圆拟合:返回旋转边界矩形的内切圆
ellipse = cv2.fitEllipse(cnt)
img_ellip = cv2.ellipse(cimg.copy(), ellipse, (0, 255, 0), 2)
#【11】直线拟合
rows,cols = img.shape[:2]
[vx,vy,x,y] = cv2.fitLine(cnt, cv2.DIST_L2,0,0.01,0.01)
lefty = int((-x*vy/vx) + y)
righty = int(((cols-x)*vy/vx)+y)
img_line = cv2.line(cimg.copy(), (cols - 1, righty), (0, lefty), (0, 255, 0), 2)
#【画图】
titles = ['raw', 'img_rect','img_min_rect','img_circle','img_ellip','img_line']
imgs = [img,img_rect,img_min_rect,img_circle,img_ellip,img_line]
for i in range(6):
plt.subplot(2, 3, i + 1), plt.imshow(imgs[i],'gray')
plt.title(titles[i])
plt.xticks([]), plt.yticks([])
plt.show()
根据矩的值,我们可以计算出对象的重心:

3.轮廓性质
代码速记:

- cv2.findNonZero()
- cv2.mean()
实战:
def properties(self):
    img = cv2.imread('test2.jpg',0)
	ret,thresh = cv2.threshold(img,127,255,0)
	contours,hierarchy = cv2.findContours(thresh, 1, 2)
	cnt = contours[0]

	#【1】边界矩形的长宽比
	x,y,w,h = cv2.boundingRect(cnt)
	aspect_ratio = float(w)/h
	#【2】Extent:轮廓面积与边界矩形面积的比
	area = cv2.contourArea(cnt)
	x,y,w,h = cv2.boundingRect(cnt)
	rect_area = w*h
	extent = float(area)/rect_area
	#【3】Solidity:轮廓面积与凸包面积的比
	hull = cv2.convexHull(cnt)
	hull_area = cv2.contourArea(hull)
	solidity = float(area)/hull_area
	#【4】Equivalent Diameter:与轮廓面积相等的圆形的直径
	equi_diameter = np.sqrt(4*area/np.pi)
	#【5】方向:对象的方向,下面的方法还会返回长轴和短轴的长度
	(x,y),(MA,ma),angle = cv2.fitEllipse(cnt)
	#【6】掩模和像素点
	mask = np.zeros(imgray.shape,np.uint8)
	# 这里一定要使用参数-1, 绘制填充的的轮廓
	cv2.drawContours(mask,[cnt],0,255,-1)
	pixelpoints = np.transpose(np.nonzero(mask))
	#pixelpoints = cv2.findNonZero(mask)
	#【7】最大值和最小值及它们的位置
	min_val, max_val, min_loc, max_loc = cv2.minMaxLoc(imgray,mask = mask)
	#【8】平均颜色及平均灰度
	mean_val = cv2.mean(im,mask = mask)
	#【9】极点:一个对象最上面,最下面,最左边,最右边的点
	leftmost = tuple(cnt[cnt[:,:,0].argmin()][0])
	rightmost = tuple(cnt[cnt[:,:,0].argmax()][0])
	topmost = tuple(cnt[cnt[:,:,1].argmin()][0])
	bottommost = tuple(cnt[cnt[:,:,1].argmax()][0])
4.凸缺陷、最短距离、形状匹配
代码速记:
- cv2.convexityDefects()
- cv2.pointPolygonTest()
实战:
def find_defects(self):
    img = self.img
    img_gray = cv2.cvtColor(img, cv2.COLOR_BGR2GRAY)
    ret, thresh = cv2.threshold(img_gray, 127, 255, 0)
    image,contours, hierarchy = cv2.findContours(thresh, 2, 1)
    cnt = contours[0]#第一个轮廓
    # 【1】找到凸缺陷
    hull = cv2.convexHull(cnt, returnPoints=False)
    defects = cv2.convexityDefects(cnt, hull)
    for i in range(defects.shape[0]):
        s, e, f, d = defects[i, 0]#起点,终点,最远的点,到最远点的近似距离
        #返回结果的前三个值是轮廓点的索引,还要到轮廓点中去找它们
        start = tuple(cnt[s][0])
        end = tuple(cnt[e][0])
        far = tuple(cnt[f][0])
        cv2.line(img, start, end, [0, 255, 0], 2)#将起点和终点用一条绿线连接
        cv2.circle(img, far, 5, [0, 0, 255], -1)#在最远点画一个圆圈
    cv2.imshow('img', img)
    cv2.waitKey(0)
    cv2.destroyAllWindows()
    # 【2】求解图像中的一个点到一个对象轮廓的最短距离
    # 如果点在轮廓的外部,返回值为负。如果在轮廓上,返回值为0。如果在轮廓内部,返回值为正。
    dist = cv2.pointPolygonTest(cnt, (50, 50), True)#轮廓、point
    print(dist)
    # 此函数的第三个参数是measureDist。如果设置为True,就会计算最短距离。
    # 如果是False,只会判断这个点与轮廓之间的位置关系(返回值为+1,-1,0)。

代码速记:
- cv2.matchShapes()
实战:
def match(self):
     #【1】得到二值化图像
     img1 = cv2.imread('../images/shandian.jpg', 0)
     img2 = cv2.imread('../images/shandian2.jpg', 0)
     img3 = cv2.imread('../images/shandian3.jpg', 0)
     ret1, thresh1 = cv2.threshold(img1, 127, 255, 0)
     ret2, thresh2 = cv2.threshold(img2, 127, 255, 0)
     ret3, thresh3 = cv2.threshold(img3, 127, 255, 0)
     #【2】检测轮廓
     image1,contours, hierarchy = cv2.findContours(thresh1, 2, 1)
     cnt1 = contours[0]
     image2,contours, hierarchy = cv2.findContours(thresh2, 2, 1)
     cnt2 = contours[0]
     image3,contours, hierarchy = cv2.findContours(thresh3, 2, 1)
     cnt3 = contours[0]
     #【3】用轮廓进行匹配
     _1_1 = cv2.matchShapes(cnt1, cnt1, 1, 0.0)
     _1_2 = cv2.matchShapes(cnt1, cnt2, 1, 0.0)
     _1_3 = cv2.matchShapes(cnt1, cnt3, 1, 0.0)
     print(_1_1,_1_2,_1_3)
     #画图
     titles = ['1', '2', '3']
     imgs = [img1, img2, img3]
     for i in range(3):
         plt.subplot(2, 3, i + 1), plt.imshow(imgs[i], 'gray')
         plt.title(titles[i])
         plt.xticks([]), plt.yticks([])
     plt.show()

_1_1:0.0
_1_2:0.04955
_1_3:0.00479
5.轮廓的层次结构
什么是层次结构?
通常我们使用函数cv2.findContours 在图片中查找一个对象。有时对象可能位于不同的位置。还有些情况,一个形状在另外一个形状的内部。这种情况下我们称外部的形状为父,内部的形状为子。按照这种方式分类,一幅图像中的所有轮廓之间就建立父子关系。这样我们就可以确定一个轮廓与其他轮廓是怎样连接的,比如它是不是某个轮廓的子轮廓,或者是父轮廓。这种关系就成为组织结构。

- 在这幅图像中,我给这几个形状编号为0-5。2 和2a 分别代表最外边矩形的外轮廓和内轮廓。
- 在这里边轮廓0,1,2 在外部或最外边。我们可以称他们为(组织结构)0 级,简单来说就是他们属于同一级。
- 接下来轮廓2a。我们把它当成轮廓2 的子轮廓。它就成为(组织结构)第1 级。同样轮廓3 是轮廓2 的子轮廓,成为(组织结构)第3 级。最后轮廓4,5 是轮廓3a 的子轮廓,成为(组织结构)4 级(最后一级)。按照这种方式给这些形状编号,我们可以说轮廓4 是轮廓3a 的子轮廓(当然轮廓5 也是)
opencv中的层次结构:
不管层次结构是什么样的,每一个轮廓都包含自己的信息:谁是父,谁是子等。OpenCV 使用一个含有四个元素的数组表示。[Next,Previous,First_Child,Parent]。Next 表示同一级组织结构中的下一个轮廓。Previous 表示同一级结构中的前一个轮廓。First_Child 表示它的第一个子轮廓。Parent 表示它的父轮廓。
opencv中的轮廓检索模式:
RETR_LIST:4种中最简单的。它只是提取所有的轮廓,而不去创建任何父子关系。换句话说就是“人人平等”,它们属于同一级组织轮廓。
RETR_EXTERNAL: 如果你选择这种模式的话,只会返回最外边的的轮廓,所有的子轮廓都会被忽略掉。
RETR_CCOMP: 在这种模式下会返回所有的轮廓并将轮廓分为两级组织结构。例如,一个对象的外轮廓为第1 级组织结构。而对象内部中空洞的轮廓为第2 级组织结构,空洞中的任何对象的轮廓又是第1 级组织结构。空洞的组织结构为第2 级。
RETR_TREE: 这种模式下会返回所有轮廓,并且创建一个完整的组织结构列表。
