此文章用于记录经验,方便下次借鉴,为节省时间用于举例的UI也许有点简陋,将就将就…重要的是方法。
1、导出json文件
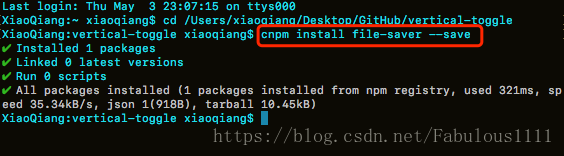
1.1、安装file-saver
使用cnpm install file-saver --save安装file-saver
1.2、使用file-saver
进入需要导出json文件的组件,使用file-saver
<template>
  <div class="hello">
    <button @click="exportJSON">导出jsonn</button>
  </div>
</template>

<script>
import FileSaver from 'file-saver'
export default {
  data () {
    return {
      // 待导出的json数据
      CfgInfo: {
        CAN: {
          Chn: 0,
          name: 'CAN通道'
        },
        LIN: {
          Chn: 1,
          name: 'LIN通道'
        }
      }
    }
  },
  methods: {
    exportJSON () {
      // 将json转换成字符串
      const data = JSON.stringify(this.CfgInfo)
      const blob = new Blob([data], {type: ''})
      FileSaver.saveAs(blob, 'hahaha.json')
    }
  }
}
</script>

<!-- Add "scoped" attribute to limit CSS to this component only -->
<style scoped>
</style>
点击按钮后,json文件将被导成你设置的文件(谷歌浏览器会默认下载到默认地址,不会弹框,ie、360等会弹框让你选择保存地址),如下:

2、导入JSON文件
在导出逻辑上添加了导入逻辑后的代码:
<template>
  <div class="hello">
    <button @click="exportJSON">导出jsonn</button>
    <div>
      <input id="file" type="file" accept=".json"/>
      <button @click="importJSON">导入json</button>
    </div>
  </div>
</template>

<script>
import FileSaver from 'file-saver'
export default {
  data () {
    return {
      // 待导出的json数据
      CfgInfo: {
        CAN: {
          Chn: 0,
          name: 'CAN通道'
        },
        LIN: {
          Chn: 1,
          name: 'LIN通道'
        }
      },
      // 将导入的json保存在这个对象下
      ImportJSON: {}
    }
  },
  methods: {
    // 导出json
    exportJSON () {
      // 将json转换成字符串
      const data = JSON.stringify(this.CfgInfo)
      const blob = new Blob([data], {type: ''})
      FileSaver.saveAs(blob, 'hahaha.json')
    },
    // 导入json
    importJSON () {
      const file = document.getElementById('file').files[0]
      const reader = new FileReader()
      reader.readAsText(file)
      const _this = this
      reader.onload = function () {
        // this.result为读取到的json字符串,需转成json对象
        _this.ImportJSON = JSON.parse(this.result)
        // 检测是否导入成功
        console.log(_this.ImportJSON)
      }
    }
  }
}
</script>

<!-- Add "scoped" attribute to limit CSS to this component only -->
<style scoped>
</style>
选择之前导出的文件后,点击导入,可见控制台输入了导入的json值,如下:

真实项目中除了UI需要大概外,还需要注意添加异常处理等,请根据自己的项目需求更改,以上demo仅作基础功能参考。