一、前言
本文主要尝试将自己的数据集制作成lmdb格式,送进lenet作训练和测试,参考了http://blog.csdn.net/liuweizj12/article/details/52149743和http://blog.csdn.net/xiaoxiao_huitailang/article/details/51361036这两篇博文
二、从训练模型到使用模型预测图片分类
(1)自己准备的图像数据
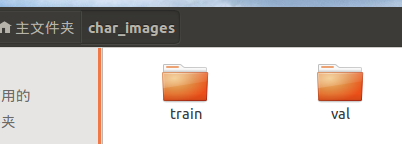
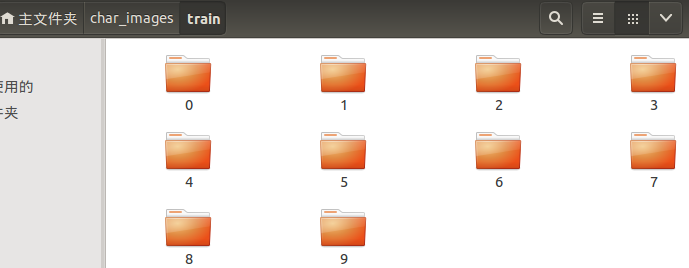
由于主要是使用lenet模型训练自己的图片数据,我的图像数据共有10个类别,分别是0~9,相应地保存在名为0~9的文件夹,在/homg/您的用户名/下新建一文件夹char_images,用于保存图像数据,在/homg/您的用户名/char_images/下新建两个文件夹,名字分别为train和val,各自都包含了名为0~9的文件夹,例如文件夹0内存放的是字符”0”的图像,我的文件夹 如下:
(2)对图像数据作统一缩放至28*28,并生成txt标签
为了计算均值文件,需要将所有图片缩放至统一的尺寸,在train和val文件夹所在路径下创建python文件,命名getPath.py,并写入以下内容:
#coding:utf-8
import cv2
import os
def IsSubString( SubStrList , Str): #判断SubStrList的元素
flag = True #是否在Str内
for substr in SubStrList:
if not ( substr in Str):
flag = False
return flag
def GetFileList(FindPath,FlagStr=[]): #搜索目录下的子文件路径
FileList=[]
FileNames=os.listdir(FindPath)
if len(FileNames)>0:
for fn in FileNames:
if len(FlagStr)>0:
if IsSubString(FlagStr,fn): #不明白这里判断是为了啥
fullfilename=os.path.join(FindPath,fn)
FileList.append(fullfilename)
else:
fullfilename=os.path.join(FindPath,fn)
FileList.append(fullfilename)
if len(FileList)>0:
FileList.sort()
return FileList
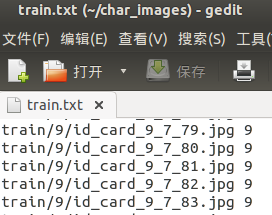
train_txt = open('train.txt' , 'w') #制作标签数据
classList =['0','1','2','3','4','5','6','7','8','9']
for idx in range(len(classList)) :
imgfile=GetFileList('train/'+ classList[idx])#将数据集放在与.py文件相同目录下
for img in imgfile:
srcImg = cv2.imread( img);
resizedImg = cv2.resize(srcImg , (28,28))
cv2.imwrite( img ,resizedImg)
strTemp=img+' '+classList[idx]+'\n' #用空格代替转义字符 \t
train_txt.writelines(strTemp)
train_txt.close()
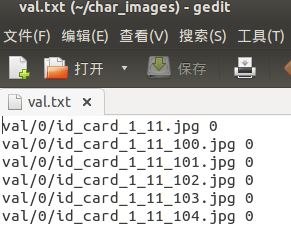
test_txt = open('val.txt' , 'w') #制作标签数据
for idx in range(len(classList)) :
imgfile=GetFileList('val/'+ classList[idx])
for img in imgfile:
srcImg = cv2.imread( img);
resizedImg = cv2.resize(srcImg , (28,28))
cv2.imwrite( img ,resizedImg)
strTemp=img+' '+classList[idx]+'\n' #用空格代替转义字符 \t
test_txt.writelines(strTemp)
test_txt.close()
print("成功生成文件列表")
(3)生成lmdb格式的数据集
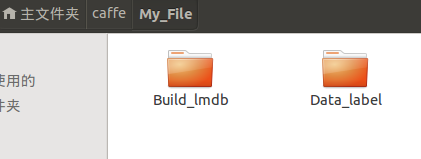
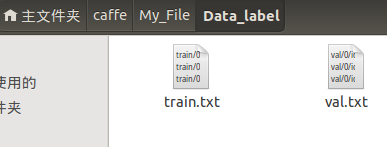
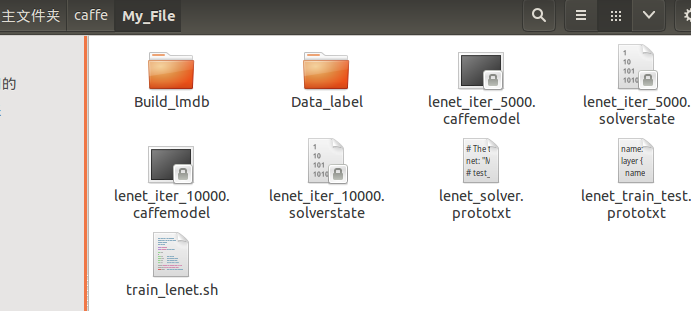
首先于caffe路径下新建一文件夹My_File,并在My_File下新建两个文件夹Build_lmdb和Data_label,将(2)中生成文本文件train.txt和val.txt搬至Data_label下
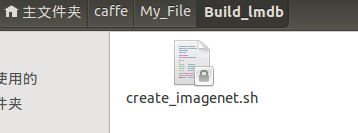
将caffe路径下 examples/imagenet/create_imagenet.sh 复制一份到Build_lmdb文件夹下
打开create_imagenet.sh ,修改内容如下:
#!/usr/bin/env sh
# Create the imagenet lmdb inputs
# N.B. set the path to the imagenet train + val data dirs
set -e
EXAMPLE=My_File/Build_lmdb #生成的lmdb格式数据保存地址
DATA=My_File/Data_label #两个txt标签文件所在路径
TOOLS=build/tools #caffe自带工具,不用管
TRAIN_DATA_ROOT=/home/zjy/char_images/ #预先准备的训练图片路径,该路径和train.txt上写的路径合起来是图片完整路径
VAL_DATA_ROOT=/home/zjy/char_images/ #预先准备的测试图片路径,...
# Set RESIZE=true to resize the images to 256x256. Leave as false if images have
# already been resized using another tool.
RESIZE=false
if $RESIZE; then
RESIZE_HEIGHT=28
RESIZE_WIDTH=28
else
RESIZE_HEIGHT=0
RESIZE_WIDTH=0
fi
if [ ! -d "$TRAIN_DATA_ROOT" ]; then
echo "Error: TRAIN_DATA_ROOT is not a path to a directory: $TRAIN_DATA_ROOT"
echo "Set the TRAIN_DATA_ROOT variable in create_imagenet.sh to the path" \
"where the ImageNet training data is stored."
exit 1
fi
if [ ! -d "$VAL_DATA_ROOT" ]; then
echo "Error: VAL_DATA_ROOT is not a path to a directory: $VAL_DATA_ROOT"
echo "Set the VAL_DATA_ROOT variable in create_imagenet.sh to the path" \
"where the ImageNet validation data is stored."
exit 1
fi
echo "Creating train lmdb..."
GLOG_logtostderr=1 $TOOLS/convert_imageset \
--resize_height=$RESIZE_HEIGHT \
--resize_width=$RESIZE_WIDTH \
--shuffle \
--gray \ #灰度图像加上这个
$TRAIN_DATA_ROOT \
$DATA/train.txt \
$EXAMPLE/train_lmdb #生成的lmdb格式训练数据集所在的文件夹
echo "Creating val lmdb..."
GLOG_logtostderr=1 $TOOLS/convert_imageset \
--resize_height=$RESIZE_HEIGHT \
--resize_width=$RESIZE_WIDTH \
--shuffle \
--gray \ #灰度图像加上这个
$VAL_DATA_ROOT \
$DATA/val.txt \
$EXAMPLE/val_lmdb #生成的lmdb格式训练数据集所在的文件夹
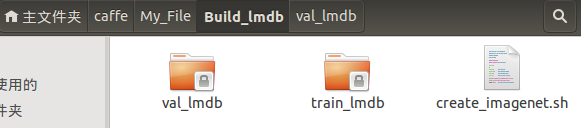
echo "Done."以上只是为了说明修改的地方才添加汉字注释,实际时sh文件不要出现汉字,运行该sh文件,可在Build_lmdb文件夹内生成2个文件夹train_lmdb和val_lmdb,里面各有2个lmdb格式的文件
(4)更改lenet_solver.prototxt和lenet_train_test.prototxt
将caffe/examples/mnist下的 train_lenet.sh 、lenet_solver.prototxt 、lenet_train_test.prototxt 这三个文件复制至 My_File,首先修改train_lenet.sh 如下,只改了solver.prototxt的路径
#!/usr/bin/env sh
set -e

./build/tools/caffe train --solver=My_File/lenet_solver.prototxt $@ #改路径然后再更改lenet_solver.prototxt,如下:
# The train/test net protocol buffer definition
net: "My_File/lenet_train_test.prototxt"            #改这里
# test_iter specifies how many forward passes the test should carry out.
# In the case of MNIST, we have test batch size 100 and 100 test iterations,
# covering the full 10,000 testing images.
test_iter: 100
# Carry out testing every 500 training iterations.
test_interval: 500
# The base learning rate, momentum and the weight decay of the network.
base_lr: 0.01
momentum: 0.9
weight_decay: 0.0005
# The learning rate policy
lr_policy: "inv"
gamma: 0.0001
power: 0.75
# Display every 100 iterations
display: 100
# The maximum number of iterations
max_iter: 10000
# snapshot intermediate results
snapshot: 5000
snapshot_prefix: "My_File/"         #改这里
# solver mode: CPU or GPU
solver_mode: GPU
最后修改lenet_train_test.prototxt ,如下:
name: "LeNet"
layer {
  name: "mnist"
  type: "Data"
  top: "data"
  top: "label"
  include {
    phase: TRAIN
  }
  transform_param {
    scale: 0.00390625
  }
  data_param {
    source: "My_File/Build_lmdb/train_lmdb"       #改成自己的
    batch_size: 64
    backend: LMDB
  }
}
layer {
  name: "mnist"
  type: "Data"
  top: "data"
  top: "label"
  include {
    phase: TEST
  }
  transform_param {
    scale: 0.00390625
  }
  data_param {
    source: "My_File/Build_lmdb/val_lmdb"        #改成自己的
    batch_size: 100
    backend: LMDB
  }
}
layer {
  name: "conv1"
  type: "Convolution"
  bottom: "data"
  top: "conv1"
  param {
    lr_mult: 1
  }
  param {
    lr_mult: 2
  }
  convolution_param {
    num_output: 20
    kernel_size: 5
    stride: 1
    weight_filler {
      type: "xavier"
    }
    bias_filler {
      type: "constant"
    }
  }
}
layer {
  name: "pool1"
  type: "Pooling"
  bottom: "conv1"
  top: "pool1"
  pooling_param {
    pool: MAX
    kernel_size: 2
    stride: 2
  }
}
layer {
  name: "conv2"
  type: "Convolution"
  bottom: "pool1"
  top: "conv2"
  param {
    lr_mult: 1
  }
  param {
    lr_mult: 2
  }
  convolution_param {
    num_output: 50
    kernel_size: 5
    stride: 1
    weight_filler {
      type: "xavier"
    }
    bias_filler {
      type: "constant"
    }
  }
}
layer {
  name: "pool2"
  type: "Pooling"
  bottom: "conv2"
  top: "pool2"
  pooling_param {
    pool: MAX
    kernel_size: 2
    stride: 2
  }
}
layer {
  name: "ip1"
  type: "InnerProduct"
  bottom: "pool2"
  top: "ip1"
  param {
    lr_mult: 1
  }
  param {
    lr_mult: 2
  }
  inner_product_param {
    num_output: 500
    weight_filler {
      type: "xavier"
    }
    bias_filler {
      type: "constant"
    }
  }
}
layer {
  name: "relu1"
  type: "ReLU"
  bottom: "ip1"
  top: "ip1"
}
layer {
  name: "ip2"
  type: "InnerProduct"
  bottom: "ip1"
  top: "ip2"
  param {
    lr_mult: 1
  }
  param {
    lr_mult: 2
  }
  inner_product_param {
    num_output: 10
    weight_filler {
      type: "xavier"
    }
    bias_filler {
      type: "constant"
    }
  }
}
layer {
  name: "accuracy"
  type: "Accuracy"
  bottom: "ip2"
  bottom: "label"
  top: "accuracy"
  include {
    phase: TEST
  }
}
layer {
  name: "loss"
  type: "SoftmaxWithLoss"
  bottom: "ip2"
  bottom: "label"
  top: "loss"
}
(5)生成均值文件
均值文件主要用于图像预测的时候,由caffe/build/tools/compute_image_mean生成,在My_File文件夹下新建一文件夹Mean,用于存放均值文件,在caffe/下执行:
build/tools/compute_image_mean My_File/Build_lmdb/train_lmdb My_File/Mean/mean.binaryproto
可在My_File/Mean/下生成均值文件mean.binaryproto
(6)生成deploy.prototxt
deploy.prototxt是在lenet_train_test.prototxt的基础上删除了开头的Train和Test部分以及结尾的Accuracy、SoftmaxWithLoss层,并在开始时增加了一个data层描述,结尾增加softmax层,可以参照博文http://blog.csdn.net/lanxuecc/article/details/52474476 使用python生成,也可以直接由train_val.prototxt上做修改,在My_File文件夹下新建一文件夹Deploy,将 lenet_train_test.prototxt复制至文件夹Deploy下,并重命名为deploy.prototxt ,修改里面的内容如下:
name: "LeNet"
layer {                   #删去原来的Train和Test部分,增加一个data层
  name: "data"
  type: "Input"
  top: "data"
  input_param { shape: { dim: 1 dim: 1 dim: 28 dim: 28 } }
}
layer {
  name: "conv1"
  type: "Convolution"
  bottom: "data"
  top: "conv1"
  param {
    lr_mult: 1
  }
  param {
    lr_mult: 2
  }
  convolution_param {
    num_output: 20
    kernel_size: 5
    stride: 1
    weight_filler {
      type: "xavier"
    }
    bias_filler {
      type: "constant"
    }
  }
}
layer {
  name: "pool1"
  type: "Pooling"
  bottom: "conv1"
  top: "pool1"
  pooling_param {
    pool: MAX
    kernel_size: 2
    stride: 2
  }
}
layer {
  name: "conv2"
  type: "Convolution"
  bottom: "pool1"
  top: "conv2"
  param {
    lr_mult: 1
  }
  param {
    lr_mult: 2
  }
  convolution_param {
    num_output: 50
    kernel_size: 5
    stride: 1
    weight_filler {
      type: "xavier"
    }
    bias_filler {
      type: "constant"
    }
  }
}
layer {
  name: "pool2"
  type: "Pooling"
  bottom: "conv2"
  top: "pool2"
  pooling_param {
    pool: MAX
    kernel_size: 2
    stride: 2
  }
}
layer {
  name: "ip1"
  type: "InnerProduct"
  bottom: "pool2"
  top: "ip1"
  param {
    lr_mult: 1
  }
  param {
    lr_mult: 2
  }
  inner_product_param {
    num_output: 500
    weight_filler {
      type: "xavier"
    }
    bias_filler {
      type: "constant"
    }
  }
}
layer {
  name: "relu1"
  type: "ReLU"
  bottom: "ip1"
  top: "ip1"
}
layer {
  name: "ip2"
  type: "InnerProduct"
  bottom: "ip1"
  top: "ip2"
  param {
    lr_mult: 1
  }
  param {
    lr_mult: 2
  }
  inner_product_param {
    num_output: 10
    weight_filler {
      type: "xavier"
    }
    bias_filler {
      type: "constant"
    }
  }
}
layer {                   #增加softmax层
  name: "prob"
  type: "Softmax"
  bottom: "ip2"
  top: "prob"
}在My_File文件夹下创建一文件夹Pic,用于存放测试的图片;在My_File文件夹下创建另一文件夹Synset,在其中新建synset_words.txt文件,之后在里面输入:
0
1
2
3
4
5
6
7
8
9
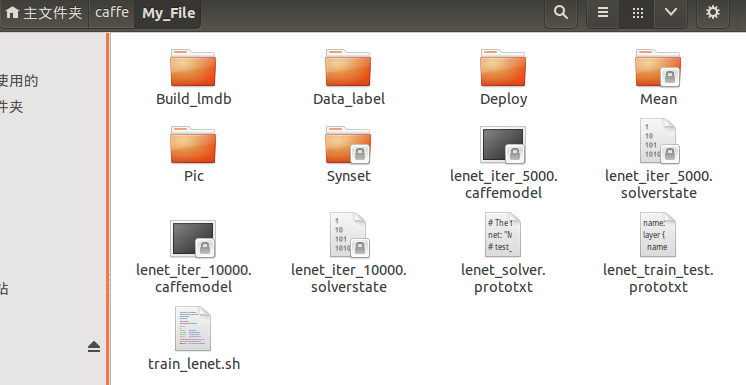
看看My_File文件夹都有啥了
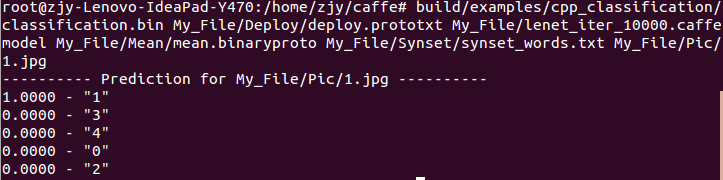
最后使用caffe/build/examples/cpp_classification/classification.bin对图片作预测,在终端输入:
三、结束语
真是篇又臭又长的博文,高手自行忽略,刚刚入门的可以看看!