转载自:https://blog.csdn.net/liangjun_feng/article/details/79698809?spm=5176.9876270.0.0.39062ef1d8LNGc
Tensorflow 作为主流的深度学习框架,初学者们根据教程一步一步的敲代码是十分方便,封装的非常好。但是说实话,这种过度的封装在一定阶段真的让人非常抓狂,尤其是在自己写一个小例子的时候,很多时候会发现难以下手。官方教程和各种书上也总是拿MNIST和CIFAR_10这种处理好的数据集说事。没有办法查看底部细节,对于还不太了解这个框架的初学者来说,完全不知道三维的图片数据集是如何输入的。我在这里折腾了几天,走遍了CSDN、知乎、简书、github、stackoverflow,踩了一万个坑,几乎看遍了所有能查到的教程和其中有可能出现的bug解决方案,总结了一个比较好的实现模版,和大家分享一下,希望后来者不用再像我一样被折磨好久了
TensorFlow对于读取数据官网一共给出了三种方法,其中有两种都是需要将图片先读取到内存中的,这些方法并不适合大规模的数据读取,因为当数据量上升的时候,内存的大量被占用会给程序运行带来困难。这里给大家介绍的第三种tfrecords文件与queue队列组合读取数据的方法不会受到内存的限制,我会结合具体的数据集和程序给大家讲解。
先给出数据和程序的链接,对细节不感兴趣的可以直接拿去用:
数据集 : YaleB_dataset
处理程序 : Batch Generator.py
使用queue读取图片数据方法的大致思路分为三步:
1、根据数据集的具体存储情况生成一个txt清单,清单上记载了每一张图片的存储地址还有一些相关信息(如标签、大小之类的)
2、根据第一步的清单记录,读取数据和信息,并将这些数据和信息按照一定的格式写成Tensorflow的专用文件格式(.tfrecords)
3、从.tfrecords文件中批量的读取数据供给模型使用
数据清单的生成
根据数据的存储情况生成的数据清单,不同的情况写的代码肯定也是不一样的,这里根据我的具体情况说一下过程和程序
我的数据存储地址为:/Users/zhuxiaoxiansheng/Desktop/doc/SICA_data/YaleB
具体情况如下:
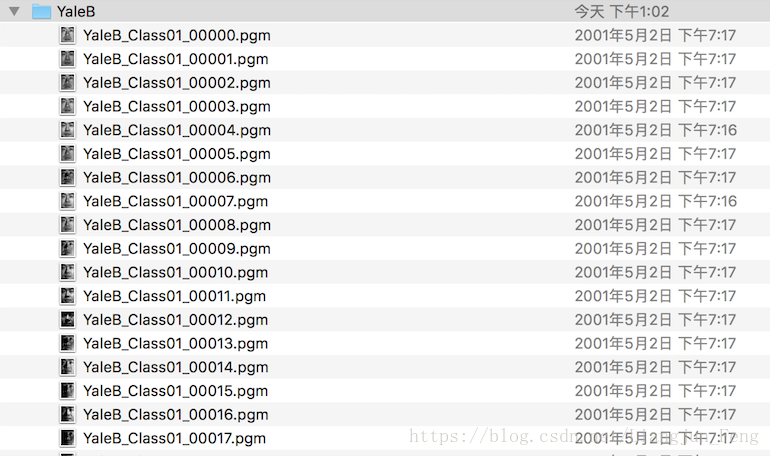
这里第一张图片的的Class01表示的是第一个类别,00000表示的是第一个类别里的第一张,生成清单的程序如下:
##相关库函数导入
import os
import cv2 as cv
import tensorflow as tf
from PIL import Image
import matplotlib.pyplot as plt- 1
- 2
- 3
- 4
- 5
- 6
def getTrianList():
    root_dir = "/Users/zhuxiaoxiansheng/Desktop/doc/SICA_data/YaleB"  #数据存储文件夹地址
    with open('/Users/zhuxiaoxiansheng/Desktop'+"/Yaledata.txt","w") as f:    #txt文件生成地址
        for file in os.listdir(root_dir):
            if len(file) == 23:                     #图片名长为23个字节,避免读入其他的文件
f.write(root_dir+'/'+file+" "+ file[11:13] +"\n") #file[11:13]表示类别编号- 1
- 2
- 3
- 4
- 5
- 6
- 7
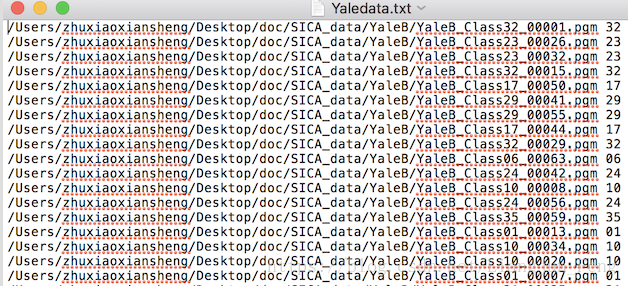
生成的清单文件是这样的
生成tfrecords文件
在得到txt清单文件以后,根据这份文件就可以进入流程式的步骤了,首先我们需要生成.tfrecords文件,代码如下
def load_file(example_list_file):   #从清单中读取地址和类别编号,这里的输入是清单存储地址
   lines = np.genfromtxt(example_list_file,delimiter=" ",dtype=[('col1', 'S120'), ('col2', 'i8')])
   examples = []
   labels = []
   for example,label in lines:
       examples.append(example)
       labels.append(label)
   return np.asarray(examples),np.asarray(labels),len(lines)

def trans2tfRecord(trainFile,output_dir):    #生成tfrecords文件
    _examples,_labels,examples_num = load_file(trainFile)
    filename = output_dir + '.tfrecords'
    writer = tf.python_io.TFRecordWriter(filename)
    for i,[example,label] in enumerate(zip(_examples,_labels)):
        example = example.decode("UTF-8")
        image = cv.imread(example)
        image = cv.resize(image,(192,168))    #这里的格式需要注意,一定要尽量保证图片的大小一致
        image_raw = image.tostring()          #将图片矩阵转化为字符串格式
        example = tf.train.Example(features=tf.train.Features(feature={
                'image_raw':tf.train.Feature(bytes_list=tf.train.BytesList(value=[image_raw])),
                'label':tf.train.Feature(int64_list=tf.train.Int64List(value=[label]))
                }))
        writer.write(example.SerializeToString())
    writer.close()     #写入完成,关闭指针
return filename #返回文件地址- 1
- 2
- 3
- 4
- 5
- 6
- 7
- 8
- 9
- 10
- 11
- 12
- 13
- 14
- 15
- 16
- 17
- 18
- 19
- 20
- 21
- 22
- 23
- 24
- 25
这里生成的是.tfrecords不好打开,就不展示了
从tfrecords文件中读取数据
设置从tfrecords文件中读取文件方式的函数如下:
def read_tfRecord(file_tfRecord):     #输入是.tfrecords文件地址
    queue = tf.train.string_input_producer([file_tfRecord])
    reader = tf.TFRecordReader()
    _,serialized_example = reader.read(queue)
    features = tf.parse_single_example(
            serialized_example,
            features={
          'image_raw':tf.FixedLenFeature([], tf.string),
          'label':tf.FixedLenFeature([], tf.int64)
                    }
            )
    image = tf.decode_raw(features['image_raw'],tf.uint8)
    image = tf.reshape(image,[192,168,3])
    image = tf.cast(image, tf.float32)
    image = tf.image.per_image_standardization(image)
    label = tf.cast(features['label'], tf.int64)   这里设置了读取信息的格式
return image,label- 1
- 2
- 3
- 4
- 5
- 6
- 7
- 8
- 9
- 10
- 11
- 12
- 13
- 14
- 15
- 16
- 17
测试代码
上面就是主要的代码,这里也附上测试是否成功的代码:
if __name__ == '__main__':
getTrianList()
dataroad = "/Users/zhuxiaoxiansheng/Desktop/Yaledata.txt"
outputdir = "/Users/zhuxiaoxiansheng/Desktop/Yaledata"
trainroad = trans2tfRecord(dataroad,outputdir)
traindata,trainlabel = read_tfRecord(trainroad)
image_batch,label_batch = tf.train.shuffle_batch([traindata,trainlabel],
batch_size=100,capacity=2000,min_after_dequeue = 1000)
with tf.Session() as sess:
sess.run(tf.local_variables_initializer())
sess.run(tf.global_variables_initializer())
coord = tf.train.Coordinator()
threads = tf.train.start_queue_runners(sess=sess,coord = coord)
train_steps = 10
try:
while not coord.should_stop(): # 如果线程应该停止则返回True
example,label = sess.run([image_batch,label_batch])
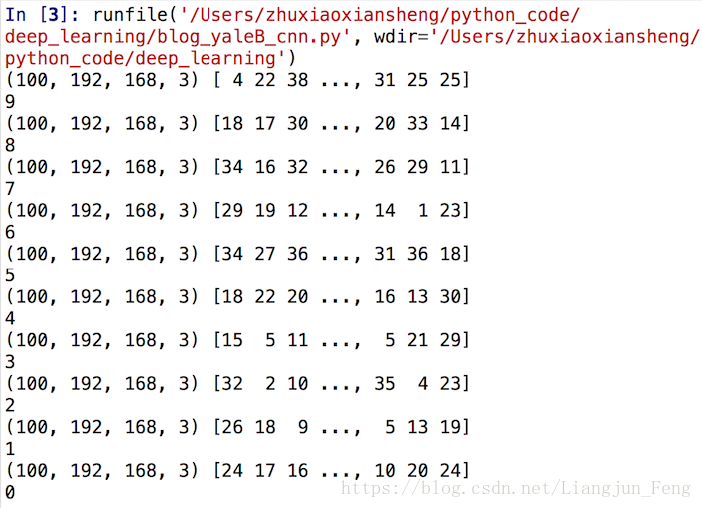
print(example.shape,label)
train_steps -= 1
print(train_steps)
if train_steps <= 0:
coord.request_stop() # 请求该线程停止
except tf.errors.OutOfRangeError:
print ('Done training -- epoch limit reached')
finally:
# When done, ask the threads to stop. 请求该线程停止
coord.request_stop()
# And wait for them to actually do it. 等待被指定的线程终止
coord.join(threads)
- 1
- 2
- 3
- 4
- 5
- 6
- 7
- 8
- 9
- 10
- 11
- 12
- 13
- 14
- 15
- 16
- 17
- 18
- 19
- 20
- 21
- 22
- 23
- 24
- 25
- 26
- 27
- 28
- 29
- 30
- 31
- 32
- 33
- 34
- 35
如果成功的话会有下面的输出
虽然这套代码我写的时候就已经考了很多错误了,当运用到你们自己的数据集的时候,肯定会因为一些具体情况出现一些问题,欢迎你们没办法的时候来这里留言,虽然我也不一定会回