electron-vue开发环境配置(针对windows):
electron-vue支持win7以上版本的开发,node版本要求是7以上的。
window小伙伴在安装electron-vue时会报错,所以,在安装之前,请先安装相关windows-build-tools。
这里注意安装windows-build-tools时,一定要以管理身份打开cmd命令提示符,然后输入以下yarn global add windows-build-tools或npm install --global windows-build-tools
一、electron-vue 项目创建:
- 新建electron-vue 项目之前一定查看当前环境是否符合,若符合,则输入以下语句即可,本人是win10系统,安装时会遇到点坑,可以参考此篇 https://blog.csdn.net/ee_11eeeeee/article/details/96028350,但个人觉得,官网的文档往往解释会更全面些,所以推荐大家查看官方文档 https://simulatedgreg.gitbooks.io/electron-vue/content/cn/。
# 安装 vue-cli 和 脚手架样板代码
npm install -g vue-cli
vue init simulatedgreg/electron-vue my-project

# 安装依赖并运行你的程序
cd my-project
yarn # 或者 npm install
yarn run dev # 或者 npm run dev
注意:安装时注意需要选择electron-packager 来直接构建自己的客户端应用
二、electron+vue打包编译
electron+vue打包编译生成.exe主要有两种方式:
1.electron-packager打包和2.electron-builder的打包,本次主要记录是前者electron-packager的打包过程记录。在新建项目时,记得选择packager打包。若正规些,大家可以自行百度后者.electron-builder的打包方式吧!可能过程有点繁琐。
打包后目录所在地:
打包编译成功后,所有electron-packager 生成的文件都可以在 build 文件夹中找到。
第一种编译打包:针对所有平台构建
#编译各个平台
npm run build
编译结果:

此时可以去build查看打包结果,可以找到以exe结尾的后缀文件,打开即可运行项目。
一些系统会默认隐藏后缀名,所以显示后缀名参考https://jingyan.baidu.com/article/ab69b2707a7deb2ca6189f6f.html。
第二种编译打包:针对特定平台构建
# win10打包编译
npm run build:win32

三、electron+vue打包编译报错
在打包过程中往往会各种报错,但多亏其他大神的博客。所以,一些问题都能得到解决。在打包时,请关掉本机的防火墙,否则会打包可能会失败。下面是我遇到部分错误记录。
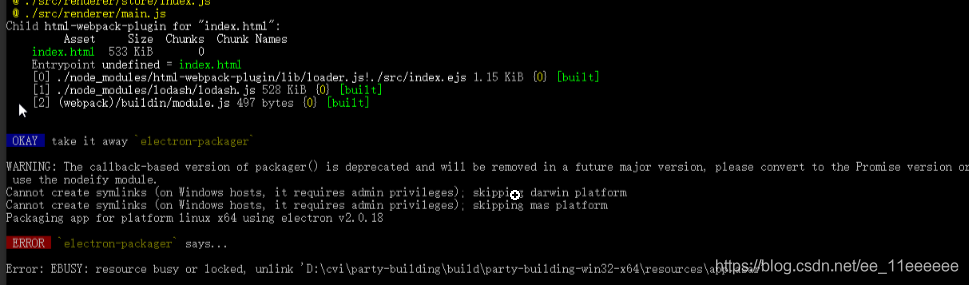
报错1:resource busy or locked, unlink ‘xxxxxxx
1.第一次打包编译成功后,第二次重新打包编译后,就会报一些错误
resource busy or locked, unlink ‘xxxxxxx’。
解决方式:关闭VS Code编辑器及其运行项目后重新编译就正常了。
参考https://segmentfault.com/q/1010000016669616
报错2:Cannot create symlinks (on Windows hosts, it requires admin privileges); skipping mas platform
解决:在项目根目录下以管理权限运行命令行窗口cmd后,输入打包编译语句npm run build即可解决管理员权限问题。此外注意的是及时执行npm run build后,windows系统也不能打包mas或darwin平台应用。
报错3:Error: read ECONNRESET ,请求超时解决和下面途径一样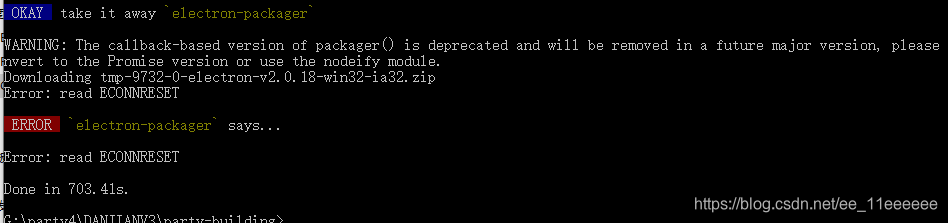
解决:
1.修改npm镜像
你可以更换阿里镜像源,执行如下语句
npm config set ELECTRON_MIRROR http://npm.taobao.org/mirrors/electron/
2.修改window系统环境变量,如下图所示。
变量名:ELECTRON_MIRROR
变量值:http://npm.taobao.org/mirrors/electron/
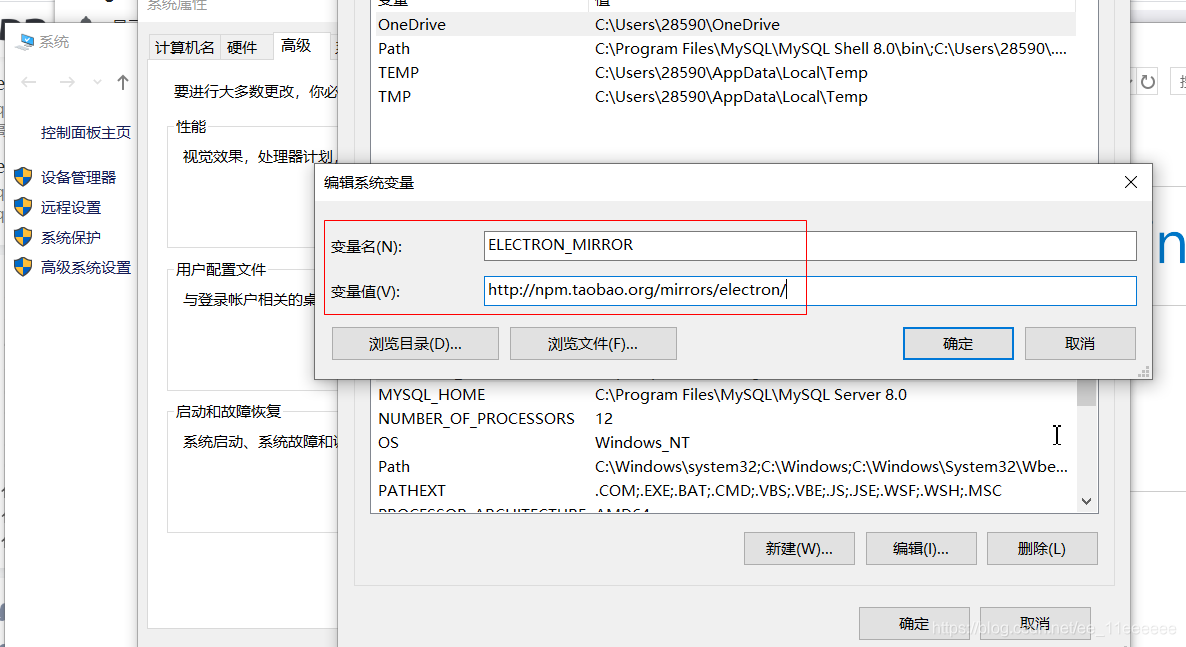
重启cmd后,再进行打包就可以解决read econnreset问题,参考:https://blog.csdn.net/qq_36145914/article/details/100898137
四、electron-vue编译后调用开发者工具
在electron-vue打包编译生成exe文件后,启动项目,发现无法调用出开发者工具。
解决:
在electron-vue主进程中添加以下语句,即可自动打开开发者工具。
mainWindow.webContents.openDevTools();
// 或者mainWindow.openDevTools();
在添加如上代码后,也要注意下package.json文件插件库,有些开发过程所需要,有些事项目依赖的库。所以,将package.json 中的devDependencies(开发环境使用)这几句添加到dependencies(生产环境使用),重新打包编译后即可调用开发者工具。
"electron-debug": "^1.5.0",
"electron-devtools-installer": "^2.2.4",
五、electron-vue编译后static文件资源加载失效
在编译后发现electron-vue无法加载static文件下的图片资源,这个是因为开发阶段及编译阶段中的static路径不一致导致的。只要将static改为官网提供的__static全局变量即可。
官网解释:https://simulatedgreg.gitbooks.io/electron-vue/content/cn/using-static-assets.html
解决:
    //默认图片:图片处理
    changeObj(item) {
      let reg = /^(https:|http:)/g; //正则:是否用httt或https开头
      if (item.img_url && reg.test(item.img_url)) {
         return { backgroundImage: "url(" + item.img_url + ")" };
      } else {
        return {
          // backgroundImage:"url('/static/img/histor.png')"
          backgroundImage:"url(/"+__static+"/img/histor.png)"
          //此处将static改为__static即可
        };
      }
    },
虽然以上步骤可以解决图片加载问题,但是开发阶段运行后,图片扔加载不了。所以需要修改.electron-vue/webpack.renderer.config.js文件的’__static’即可。
if (process.env.NODE_ENV !== 'production') {
  rendererConfig.plugins.push(
    new webpack.DefinePlugin({
      // '__static': `"${path.join(__dirname, '../static').replace(/\\/g, '\\\\')}"`
      '__static': JSON.stringify('./static')
    })
  )
}
参考博客:
https://blog.csdn.net/weixin_43103477/article/details/82259381
https://blog.csdn.net/aa661020/article/details/79757859
https://cloud.tencent.com/developer/article/1335881
六 electron-vue的vuex
工具js中使用:
  import store from '../store/index'

  import {
    socket_url
  } from '../utils/url'
  import store from '../store/index'
  export let socketService = {

   // path: "ws://192.168.9.190:8002",
    path:socket_url,
    socket: "",


    init: function () {
      if (typeof (WebSocket) === "undefined") {
        alert("您的浏览器不支持socket")
      } else {
        // 实例化socket
        this.socket = new WebSocket(this.path)
        // 监听socket连接
        this.socket.onopen = this.open
        // 监听socket错误信息
        this.socket.onerror = this.error
        // 监听socket消息
        this.socket.onmessage = this.getMessage
      }
    },
    getState: function () {
      return this.socket.readyState;
    },
    open: function () {
      console.log("socket连接成功")
    },
    error: ()=>{
      console.log("连接错误")
      setTimeout(()=>{
        console.log('重新连接中。。。。')
        this.init;
      },200)
    },
    getMessage: function (msg) {
      try{
        console.log('websocket feedback--',JSON.parse(msg.data))
        store.commit('modifyRecommend', JSON.parse(msg.data));
      }catch(err){
        console.log('捕获错误',err)
      }

    },
    send: function (params) {
      this.socket.send(params)
    },
    close: function () {
      console.log("socket已经关闭")
    },
    destroyed: function () {
      // 销毁监听
      this.socket.onclose = this.close
    }
  }
七、electron-vue设置全屏最大化
electron-vue设置全屏最大化,按esc退出全屏模式。
在main文件的index.js中修改如下
import { app, BrowserWindow,ipcMain,globalShortcut } from 'electron'

/**
 * Set `__static` path to static files in production
 * https://simulatedgreg.gitbooks.io/electron-vue/content/en/using-static-assets.html
 */
if (process.env.NODE_ENV !== 'development') {
  global.__static = require('path').join(__dirname, '/static').replace(/\\/g, '\\\\')
}

let mainWindow
const winURL = process.env.NODE_ENV === 'development'
  ? `http://localhost:9082`
  : `file://${__dirname}/index.html`

function createWindow () {

  /**
   * Initial window options
   */
  mainWindow = new BrowserWindow({
    height: 563,
    width: 1000,
    frame: false,//添加后自定义标题//自定义边框
    resizable: true,//可否改变窗口大小
    fullscreen: true,
    // fullscreenable: false,
    // fullscreen: true,
    autoHideMenuBar: true //是否隐藏菜单

// movable: false,//可否移动

// webPreferences: {webSecurity: false}
  })
  //调出开发者工具
  mainWindow.webContents.openDevTools()
  //设置全屏模式,按esc退出
  mainWindow.setFullScreen(true)
  globalShortcut.register('ESC',()=>{
    mainWindow.setFullScreen(false)
  })

  mainWindow.loadURL(winURL)

  mainWindow.on('closed', () => {
    mainWindow = null
  })
}
//准备就绪是加载
app.on('ready', createWindow)

app.on('window-all-closed', () => {
  if (process.platform !== 'darwin') {
    app.quit()
  }
})

app.on('activate', () => {
  if (mainWindow === null) {
    createWindow()
  }
})
//与渲染render通信,关闭缩小和放大
ipcMain.on('minimize',e=>mainWindow.minimize());

ipcMain.on('maximize',e=>{
  if (mainWindow.isMaximized()) {
      mainWindow.unmaximize()
  } else {
      mainWindow.maximize()
  }
});

ipcMain.on('close',e=>mainWindow.close());