DNN是OpenCV中的深度神经网络模块,OpenCV 3.3以后,dnn模块支持caffe、TensorFlow和torch三种深度学习框架,OpenCV 3.4.1以后,支持tensorflow的深度学习框架,可以直接读取已经训练好的模型完成相应的检测任务。
1 运行环境和前期准备
1、Windows 10 64位
2、OpenCV 3.4.3
3、Visual Studio 2015 Professional
4、Anaconda(Python3.6+Tensorflow1.8.0)
5、测试使用模型为:Mask-RCNN网络基于COCO的预训练模型,下载地址:http://download.tensorflow.org/models/object_detection/mask_rcnn_inception_v2_coco_2018_01_28.tar.gz
2 生成.pbtxt描述文件
OpenCV DNN需要根据.pbtxt模型描述文件来解析Tensorflow的pb模型文件,实现网络模型的加载。
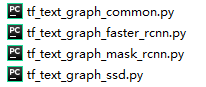
1、OpenCV源码中提供了生成.pbtxt文件的python脚本文件,文件位于OpenCV安装路径\opencv\sources\samples\dnn文件夹下,根据模型类别选择相应的文件即可。
2、在安装有tensorflow环境下的cmd中运行以下命令(一行):
(可以使用Anaconda Prompt终端)
python tf_text_graph_mask_rcnn.py --input E:\mask_rcnn_inception_v2_coco_2018_01_28\frozen_inference_graph.pb --output E:\mask_rcnn_inception_v2_coco_2018_01_28\graph.pbtxt --config E:\mask_rcnn_inception_v2_coco_2018_01_28\pipeline.config
–input 为.pb文件所在路径
–config 为.config文件所在路径
–output 为要生成的.pbtxt文件的路径
这里选用了OpenCV4系列的转换文件(4以下版本生成的文件使用会有问题):

3 测试
在VS2015中新建空项目,将.pb .pbtxt文件放入相应文件夹中;新建源文件,输入以下程序(来自OpenCV学堂公众号:OpenCV4中如何使用Mask RCNN网络):
include <iostream>
#include <opencv2/imgproc.hpp>
#include <opencv2/highgui.hpp>
#include <opencv2/dnn.hpp>

using namespace std;
using namespace cv;
using namespace dnn;

int main()
{
	String pb_model = "frozen_inference_graph.pb";
	String pb_txt = "graph.pbtxt";
	Mat frame = imread("person.jpg");

	// 加载模型
	Net net = readNetFromTensorflow(pb_model, pb_txt);
	net.setPreferableBackend(DNN_BACKEND_OPENCV);
	net.setPreferableTarget(DNN_TARGET_CPU);

	// 设置数据
	Mat blobImage = blobFromImage(frame, 1.0, Size(800, 800), Scalar(0, 0, 0), true, false);
	printf("blobImage width : %d, height: %d\n", blobImage.size[3], blobImage.size[2]);
	net.setInput(blobImage);

	// 推理
	vector<String> out_names;
	out_names.push_back("detection_out_final");
	out_names.push_back("detection_masks");
	vector<Mat> outs;
	net.forward(outs, out_names);
	Mat detection = outs[0];
	int id = outs[1].size[0];
	int numClasses = outs[1].size[1];
	int mh = outs[1].size[2];
	int mw = outs[1].size[3];
	Mat masks = outs[1]; // Nx90x15x15
	printf("id: %d, numClasses:%d, m:%d, s:%d \n", id, numClasses, mh, mw);

	// 解析对象检测输出
	Mat detectionMat(detection.size[2], detection.size[3], CV_32F, detection.ptr<float>());
	float confidence_threshold = 0.6;
	for (int i = 0; i < detectionMat.rows; i++)
	{
		float confidence = detectionMat.at<float>(i, 2);
		if (confidence > confidence_threshold)
		{
			size_t objIndex = (size_t)(detectionMat.at<float>(i, 1));
			float tl_x = detectionMat.at<float>(i, 3) * frame.cols;
			float tl_y = detectionMat.at<float>(i, 4) * frame.rows;
			float br_x = detectionMat.at<float>(i, 5) * frame.cols;
			float br_y = detectionMat.at<float>(i, 6) * frame.rows;

			Rect object_box((int)tl_x, (int)tl_y, (int)(br_x - tl_x), (int)(br_y - tl_y));
			rectangle(frame, object_box, Scalar(255, 0, 255), 1, 8, 0);
			putText(frame, format(" confidence %.2f", confidence), Point(tl_x - 10, tl_y - 5), FONT_HERSHEY_SIMPLEX, 0.7, Scalar(255, 0, 0), 2, 8);

			// 解析mask
			Mat mask(masks.size[2], masks.size[3], CV_32F, masks.ptr<float>(i, objIndex));
			Mat color_mask = Mat::zeros(mask.size(), CV_8UC3);
			Mat bin_mask = Mat::zeros(mask.size(), CV_8UC1);
			for (int row = 0; row < color_mask.rows; row++)
			{
				for (int col = 0; col < color_mask.cols; col++)
				{
					float m = mask.at<float>(row, col);
					if (m >= 0.5)
					{
						color_mask.at<Vec3b>(row, col) = Vec3b(0, 0, 255);
						bin_mask.at<uchar>(row, col) = 255;
					}
				}
			}
			Mat roi = frame(object_box);
			resize(color_mask, color_mask, roi.size());
			resize(bin_mask, bin_mask, roi.size());
			Mat result;
			bitwise_and(roi, roi, result, bin_mask);
			imshow("mask", result);
			addWeighted(roi, 0.5, color_mask, 0.5, 0, roi);
		}
	}
	imshow("mask-rcnn-demo", frame);

	waitKey();
}


参考资料:
微信公众号:OpenCV学堂
(OpenCV4中如何使用Mask RCNN网络)
(干货 | tensorflow模型导出与OpenCV DNN中使用)
https://blog.csdn.net/zziahgf/article/details/89672797
Juliet 于 2019.7