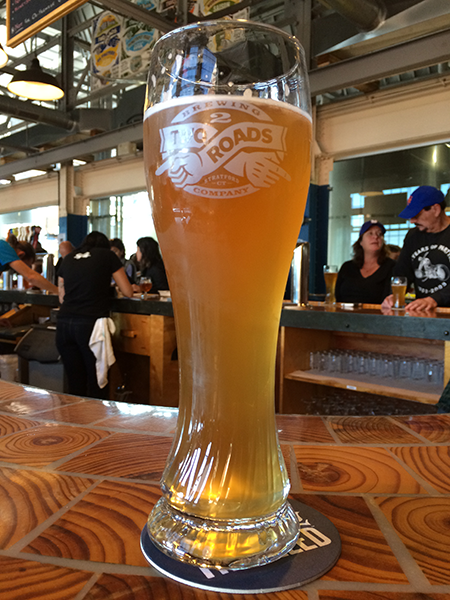
一 数据展示
[ ]
]


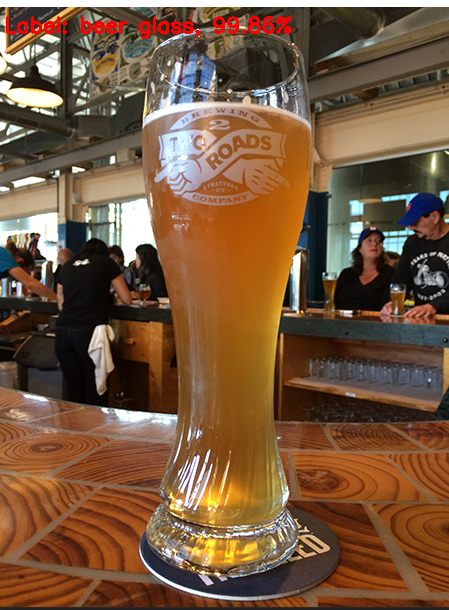
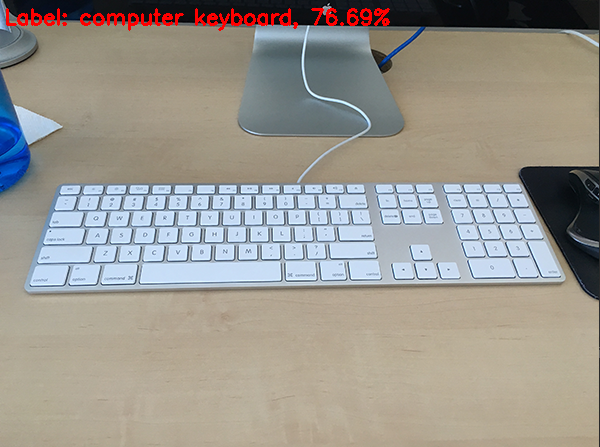
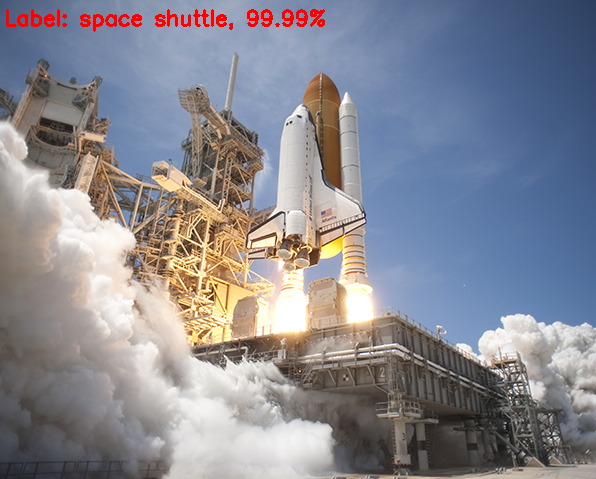
二 结果展示
OpenCV可以加载训练好的权重文件和模型,例如加载Google图片分类模型和权重对上述图片分类

 [
[ ]
]
部分代码:
链接: https://pan.baidu.com/s/13T9KCOR8jTHyvkRykcKjCA 提取码: hhq4
# 导入工具包
import utils_paths
import numpy as np
import cv2

# 标签文件处理
rows = open("synset_words.txt").read().strip().split("\n")
classes = [r[r.find(" ") + 1:].split(",")[0] for r in rows]

# Caffe所需配置文件
net = cv2.dnn.readNetFromCaffe("bvlc_googlenet.prototxt",
	"bvlc_googlenet.caffemodel")

# 图像路径
imagePaths = sorted(list(utils_paths.list_images("images/")))

# 图像数据预处理
image = cv2.imread(imagePaths[0])
resized = cv2.resize(image, (224, 224))
# image scalefactor size mean swapRB
blob = cv2.dnn.blobFromImage(resized, 1, (224, 224), (104, 117, 123))
print("First Blob: {}".format(blob.shape))

# 得到预测结果
net.setInput(blob)
preds = net.forward()

# 排序,取分类可能性最大的 [::-1]取反
idx = np.argsort(preds[0])[::-1][0]
text = "Label: {}, {:.2f}%".format(classes[idx],
	preds[0][idx] * 100)
cv2.putText(image, text, (5, 25),  cv2.FONT_HERSHEY_SIMPLEX,
	0.7, (0, 0, 255), 2)

# 显示
cv2.imshow("Image", image)
cv2.waitKey(0)

# Batch数据制作
images = []

# 方法一样,数据是一个batch
for p in imagePaths[1:]:
	image = cv2.imread(p)
	image = cv2.resize(image, (224, 224))
	images.append(image)

# blobFromImages函数,注意有s
blob = cv2.dnn.blobFromImages(images, 1, (224, 224), (104, 117, 123))
print("Second Blob: {}".format(blob.shape))

# 获取预测结果
net.setInput(blob)
preds = net.forward()
for (i, p) in enumerate(imagePaths[1:]):
	image = cv2.imread(p)
	idx = np.argsort(preds[i])[::-1][0]
	text = "Label: {}, {:.2f}%".format(classes[idx],
		preds[i][idx] * 100)
	cv2.putText(image, text, (5, 25),  cv2.FONT_HERSHEY_SIMPLEX,
		0.7, (0, 0, 255), 2)
	cv2.imshow("Image", image)
	cv2.waitKey(0)