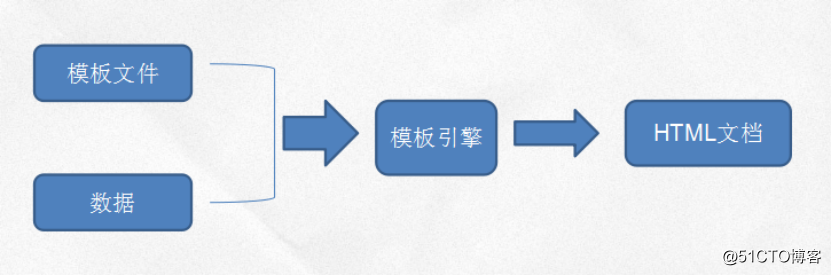
相对html+js的传统设计,现在很多网站都采用div&css+标签化+模块化的设计。模板引擎根据一定的语义,将数据填充到模板中,产生最终的HTML页面。模板引擎主要分两种:客户端引擎和服务端引擎。
客户端渲染:
模板和数据分别传送到客户端,在客户端由JavaScript模板引擎渲染出最终的HTML视图。将模板渲染放置在客户端做,可以降低服务端的压力,并且如果前端内容分别来自多个后台系统,而这些后台的架构各不相同(Java、.NET、Ruby等),则服务器端渲染需要采用不同的技术,模板资源无法共享。
服务端渲染:
引擎在服务器端将模板和数据合成,返回最终的html页面,相对于客户端渲染,数据存储更加安全。主要有freemarker、velocity、thymeleaf等。
相较与其他的模板引擎,thymeleaf它有如下三个特点:
(a)在有网络和无网络的环境下皆可运行,即它可以让美工在浏览器查看页面的静态效果,同时也可以让程序员在服务器查看带数据的动态页面效果。这是由于它支持 html 原型,然后在 html 标签里增加额外的属性来达到模板+数据的展示方式。浏览器解释 html 时会忽略未定义的标签属性,所以 thymeleaf 的模板可以静态地运行;当有数据返回到页面时,Thymeleaf 标签会动态地替换掉静态内容,使页面动态显示。
(b)开箱即用的特性。它提供标准和spring标准两种方言,可以直接套用模板实现JSTL、 OGNL表达式效果,避免每天套模板、改jstl、改标签的困扰。同时开发人员也可以扩展和创建自定义的方言。
(c)提供spring标准方言和一个与 SpringMVC 完美集成的可选模块,可以快速的实现表单绑定、属性编辑器、国际化等功能。
1、新建项目sc-thymeleaf,对应的pom.xml文件如下
<project xmlns="http://maven.apache.org/POM/4.0.0" xmlns:xsi="http://www.w3.org/2001/XMLSchema-instance"
    xsi:schemaLocation="http://maven.apache.org/POM/4.0.0 http://maven.apache.org/xsd/maven-4.0.0.xsd">
    <modelVersion>4.0.0</modelVersion>

    <groupId>spring-cloud</groupId>
    <artifactId>sc-thymeleaf</artifactId>
    <version>0.0.1-SNAPSHOT</version>
    <packaging>jar</packaging>

    <name>sc-thymeleaf</name>
    <url>http://maven.apache.org</url>

    <parent>
        <groupId>org.springframework.boot</groupId>
        <artifactId>spring-boot-starter-parent</artifactId>
        <version>2.0.4.RELEASE</version>
    </parent>

    <dependencyManagement>
        <dependencies>
            <dependency>
                <groupId>org.springframework.cloud</groupId>
                <artifactId>spring-cloud-dependencies</artifactId>
                <version>Finchley.RELEASE</version>
                <type>pom</type>
                <scope>import</scope>
            </dependency>

        </dependencies>
    </dependencyManagement>

    <dependencies>
        <dependency>
            <groupId>org.springframework.boot</groupId>
            <artifactId>spring-boot-starter-web</artifactId>
        </dependency>

        <dependency>
            <groupId>org.springframework.boot</groupId>
            <artifactId>spring-boot-starter-thymeleaf</artifactId>
        </dependency>
    </dependencies>
</project>
2、新建springboot启动类
package sc.thymeleaf;

import org.springframework.boot.SpringApplication;
import org.springframework.boot.autoconfigure.SpringBootApplication;

@SpringBootApplication
public class ThymeleafApplication {

    public static void main(String[] args) {

        SpringApplication.run(ThymeleafApplication.class, args);
    }

}
3、新建配置文件application.yml
server:
    port: 8090

spring:
    application:
        name: sc-thymeleaf
    thymeleaf:
        cache: false
说明:thymeleaf所有的配置项可以参考类
org.springframework.boot.autoconfigure.thymeleaf.ThymeleafProperties
常用配置说明:
# THYMELEAF (ThymeleafAutoConfiguration)
#开启模板缓存(默认值:true)
spring.thymeleaf.cache=true
#Check that the template exists before rendering it.
spring.thymeleaf.check-template=true
#检查模板位置是否正确(默认值:true)
spring.thymeleaf.check-template-location=true
#Content-Type的值(默认值:text/html)
spring.thymeleaf.content-type=text/html
#开启MVC Thymeleaf视图解析(默认值:true)
spring.thymeleaf.enabled=true
#模板编码
spring.thymeleaf.encoding=UTF-8
#要被排除在解析之外的视图名称列表,用逗号分隔
spring.thymeleaf.excluded-view-names=
#要运用于模板之上的模板模式。另见StandardTemplate-ModeHandlers(默认值:HTML5)
spring.thymeleaf.mode=HTML5
#在构建URL时添加到视图名称前的前缀(默认值:classpath:/templates/)
spring.thymeleaf.prefix=classpath:/templates/
#在构建URL时添加到视图名称后的后缀(默认值:.html)
spring.thymeleaf.suffix=.html
#Thymeleaf模板解析器在解析器链中的顺序。默认情况下,它排第一位。顺序从1开始,只有在定义了额外的TemplateResolver Bean时才需要设置这个属性。
spring.thymeleaf.template-resolver-order=
#可解析的视图名称列表,用逗号分隔
spring.thymeleaf.view-names=
其实完全可以使用不用配置,但是Spring Boot官方文档建议在开发时将缓存关闭,默认为true
4、新建Controller
package sc.thymeleaf.controller;

import java.util.ArrayList;
import java.util.List;

import org.springframework.stereotype.Controller;
import org.springframework.ui.Model;
import org.springframework.web.bind.annotation.RequestMapping;

import sc.thymeleaf.model.User;

@Controller
public class UserController {

    @RequestMapping("/user/list")
    public String userList2(Model model) throws Exception {
        model.addAttribute("hello", "Hello, thymeleaf!");
        List<User> list = new ArrayList<User>();
        User u1 = new User();
        u1.setId(1);
        u1.setName("huangjinjin");
        u1.setAge(30);
        u1.setPosition("cto");
        list.add(u1);

        User u2 = new User();
        u2.setId(2);
        u2.setName("huang ge");
        u2.setAge(32);
        u2.setPosition("cco");
        list.add(u2);

        model.addAttribute("list", list);
        return "/user/list";
    }

}
5、新建模板文件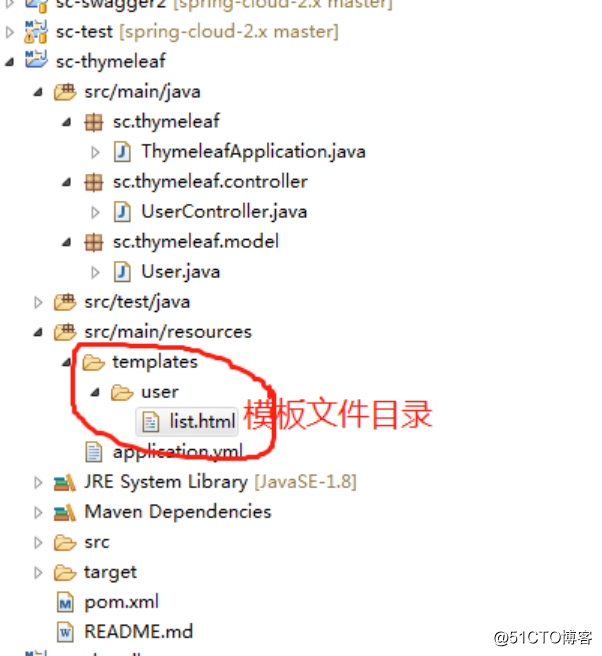
说明:Thymeleaf默认模板路径在classpath:/templates/下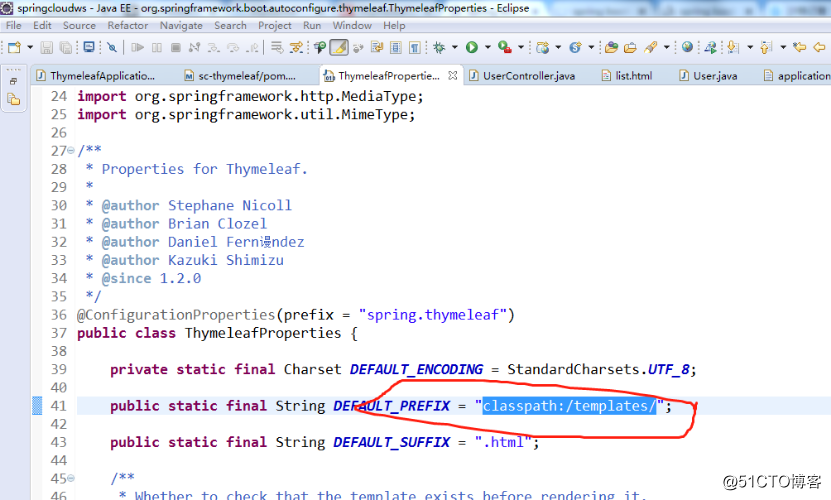
6、运行ThymeleafApplication.java类,启动项目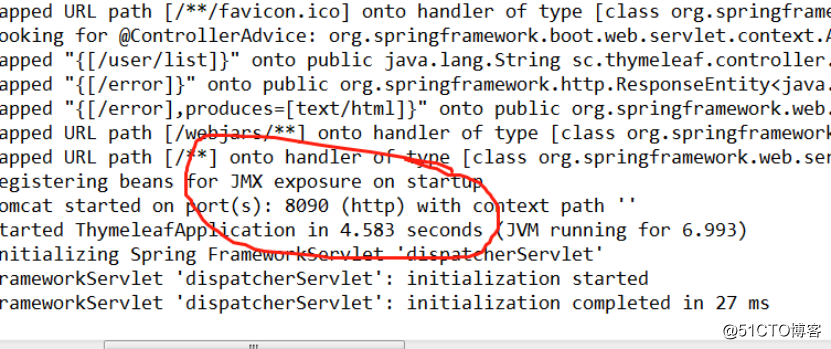
7、在浏览器输入http://127.0.0.1:8090/user/list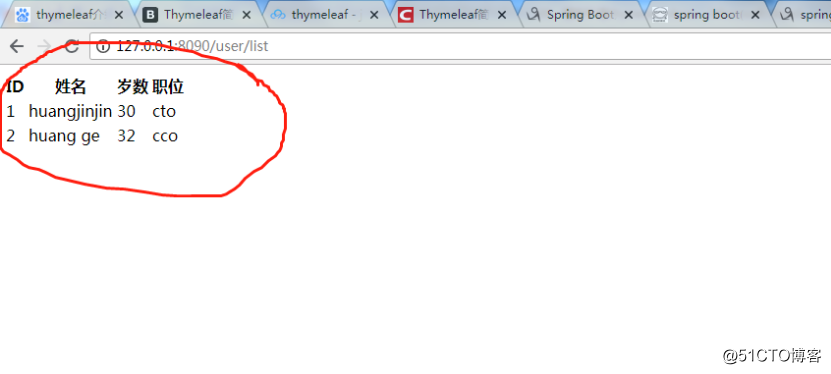
这里不深入讲解Thymeleaf模板引擎的语法,如果想学习Thymeleaf的基本语法可以参考https://www.cnblogs.com/ityouknow/p/5833560.html或者自行找些资料学习