什么是计算图?
基于TensorFlow这个编程系统中的每一个计算都是计算图上的一个节点,而节点与节点之间的连线则代表计算之间的依赖关系。
以一个最简化的计算图来说明:

上图中,a,b代表一个节点,add也是一个节点,只是它参与了计算的工作。而这个简单的运算,我们需要在一个图中运行,而要想使用这张图,我们就要用到熟悉的sess.run()会话操作来运行。
参考:https://www.jianshu.com/p/b5a383d54645
下面这张图表示了Tensorflow运行的流程:

1、图的创建
其实tensorflow中有自带的一张默认的图,平时我们并不需要创建,如下:
    a = tf.constant(1.0)
    b = tf.constant(2.0)
    c = tf.constant(3.0)
    result = tf.multiply(tf.add(a, b), c)  # (a+b)*c
    with tf.Session() as sess:
        print("result=",sess.run(result))
结果:

其实当我们sess.run()的时候就已经运行了这张默认的图。
那么,如果想要在别的图中计算别的内容,怎么做?我们可以自己创建一张图来进行计算,这里使用tf.Graph()来创建一张新的图:
graph1 = tf.Graph()  # 创建图
graph2 = tf.Graph()  # 创建图
现在我们在新创建的2张图中定义同样的a,b,c,不过内容不一样:
    with graph1.as_default():  #在graph1中定义相关op
        a = tf.constant(2.0)
        b = tf.constant(3.0)
        c = tf.constant(4.0)
        result1 = tf.multiply(tf.add(a, b), c)  # (a+b)*c
       # 只在graph1中运行上述op

    with graph2.as_default():  #在graph2中定义相关op
        a = tf.constant(3.0)
        b = tf.constant(4.0)
        c = tf.constant(5.0)
        result2 = tf.multiply(tf.add(a, b), c)  # (a+b)*c
          # 只在graph2中运行上述op
然后在对应的图中使用session会话操作,打印结果,比较默认、graph1,graph2的结果:
    with tf.Session(graph=graph1) as sess:  #运行graph1
        print("result1_graph1=",sess.run(result1))

    with tf.Session(graph=graph2) as sess:   #运行graph2
        print("result2_graph2=",sess.run(result2))

可以看到,虽然变量一样,内容不一样,也没有出现赋值替换的现象,它们只是各算各的。至于上图中为什么会出现红色字段,因为我是用GPU跑的,这就更能说明tensorflow是一张图一张图的单独计算,所以会一次一次调用GPU,而不是一次性计算所有图。
下面放上上述所讲的这一模块的代码:
import tensorflow as tf
from tensorflow.python.platform import gfile  # 计算图


def graph_demo():
    a = tf.constant(1.0)
    b = tf.constant(2.0)
    c = tf.constant(3.0)
    result = tf.multiply(tf.add(a, b), c)  # (a+b)*c
    with tf.Session() as sess:

        print("result=", sess.run(result))
    graph1 = tf.Graph()  # 创建图
    graph2 = tf.Graph()  # 创建图

    '''----------------------------------------------'''
    with graph1.as_default():  #在graph1中定义相关op
        a = tf.constant(2.0)
        b = tf.constant(3.0)
        c = tf.constant(4.0)
        result1 = tf.multiply(tf.add(a, b), c)  # (a+b)*c
    # 只在graph1中运行上述op
    with tf.Session(graph=graph1) as sess:  #运行graph1

        print("result1_graph1=",sess.run(result1))

    '''----------------------------------------------'''

    with graph2.as_default():  #在graph2中定义相关op
        a = tf.constant(3.0)
        b = tf.constant(4.0)
        c = tf.constant(5.0)
        result2 = tf.multiply(tf.add(a, b), c)  # (a+b)*c
    # 只在graph2中运行上述op
    with tf.Session(graph=graph2) as sess:   #运行graph2

        print("result2_graph2=",sess.run(result2))
    '''----------------------------------------------'''


if __name__ == "__main__":
    graph_demo()
2、图的保存
每一张图的计算,训练都可以保存为一个.pb文件,在使用的时候我们可以直接调用这张图,比如一个年龄预测的文件,它是一个.pb的模型,而如果换了一台计算机,就得重新计算、训练,那么真的就很浪费时间。所以,保存成一种文件,使用的时候直接用就非常省事,而且很安全,因为.pb文件基本不太可能打开。
在tensorflow中使用一条语句就可以保存所要的图了:
tf.train.write_graph(graph1.as_graph_def(),".",name="graph1.pb",as_text=False) #.pb文件的保存位置和保存名,是否是文本默认False
运行结果:

3、pb模型使用
这里调用图1生成的pb文件,看看结果是否等于20:
    with tf.gfile.FastGFile("./graph1.pb", 'rb') as f:
        graph_def = tf.GraphDef()
        graph_def.ParseFromString(f.read())
        tf.import_graph_def(graph_def, name='')
    # 会话调用默认图
    with tf.Session() as sess:
        result1_tensor = sess.graph.get_tensor_by_name("result1:0") #读取第一个索引
        ret1=sess.run(result1_tensor)
        print(ret1)
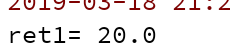
运行结果:
可以看到,结果一致。
下面附上本节所有源代码:
import tensorflow as tf


def graph_demo():
    a = tf.constant(1.0)
    b = tf.constant(2.0)
    c = tf.constant(3.0)
    result = tf.multiply(tf.add(a, b), c)  # (a+b)*c
    with tf.Session() as sess:

        print("result=", sess.run(result))
    graph1 = tf.Graph()  # 创建图
    graph2 = tf.Graph()  # 创建图

    '''----------------------------------------------'''
    with graph1.as_default():  # 在graph1中定义相关op
        a = tf.constant(2.0)
        b = tf.constant(3.0)
        c = tf.constant(4.0)
        result1 = tf.multiply(tf.add(a, b), c,name="result1")  # (a+b)*c
    # 只在graph1中运行上述op
    with tf.Session(graph=graph1) as sess:  # 运行graph1

        print("result1_graph1=", sess.run(result1))

    '''----------------------------------------------'''

    with graph2.as_default():  # 在graph2中定义相关op
        a = tf.constant(3.0)
        b = tf.constant(4.0)
        c = tf.constant(5.0)
        result2 = tf.multiply(tf.add(a, b), c,name="result2")  # (a+b)*c
    # 只在graph2中运行上述op
    with tf.Session(graph=graph2) as sess:  # 运行graph2

        print("result2_graph2=", sess.run(result2))
    '''----------------------------------------------'''

    '''----------------图的保存(生成.pb文件)----------------------'''
    tf.train.write_graph(graph1.as_graph_def(), ".", name="graph1.pb", as_text=False)  # .pb文件的保存位置和保存名,是否是文本默认False
    tf.train.write_graph(graph2.as_graph_def(), ".", name="graph2.pb", as_text=False)  # .pb文件的保存位置和保存名,是否是文本默认False


    '''----------------pb文件读取--------------------'''
    with tf.gfile.FastGFile("./graph1.pb", 'rb') as f:
        graph_def = tf.GraphDef()
        graph_def.ParseFromString(f.read())
        tf.import_graph_def(graph_def, name='')
    # 会话调用默认图
    with tf.Session() as sess:
        result1_tensor = sess.graph.get_tensor_by_name("result1:0") #读取第一个索引
        ret1=sess.run(result1_tensor)
        print("ret1=",ret1)


if __name__ == "__main__":
    graph_demo()
运行结果:

