-
Scrapy是一个用于抓取web站点和提取结构化数据的应用程序框架,可用于广泛的应用程序,如数据挖掘,信息处理或历史存档
-
尽管scrapy最初是为了web抓取而设计的但它也可以使用api(如Amazon Associates Web Services) 或通用web爬虫程序来提取数据
linux 下安装scrapy
apt-get install python3 python3-devapt-get install python3-pippip install scrapy
这里之所以用python3是因为2020年以后python2已经停止更新,未来的舞台是属于python3的测试是否安装成功
root@kali:~/Desktop/tencent/tencent# ipython3
Python 3.7.6 (default, Dec 19 2019, 09:25:23)
Type "copyright", "credits" or "license" for more information.

In [1]: import scrapy
In [2]: scrapy.version_info
Out[2]: (1, 8, 0)
>scrapy -h 查看命令行帮助信息
>scrapy options -h 		#查看模块帮助信息,这里的options为模块名
>scrapy startproject 工程名 存放路径  #scrapy在指定目录下创建指定工程,不加路径默认在当前目录
>scrapy startproject test1 		#创建名为test1的爬虫工程
root@kali:~/Desktop# scrapy -h
Scrapy 1.8.0 - no active project
Usage:
scrapy <command> [options] [args]
Available commands:
bench Run quick benchmark test
fetch Fetch a URL using the Scrapy downloader
genspider Generate new spider using pre-defined templates
runspider Run a self-contained spider (without creating a project)
settings Get settings values
shell Interactive scraping console
startproject Create new project
version Print Scrapy version
view Open URL in browser, as seen by Scrapy
[ more ] More commands available when run from project directory
Use "scrapy <command> -h" to see more info about a command
root@kali:~/Desktop# scrapy startproject -h
Usage
=====
scrapy startproject <project_name> [project_dir]
Create new project
Options
=======
--help, -h show this help message and exit
Global Options
--------------
--logfile=FILE log file. if omitted stderr will be used
--loglevel=LEVEL, -L LEVEL
log level (default: DEBUG)
--nolog disable logging completely
--profile=FILE write python cProfile stats to FILE
--pidfile=FILE write process ID to FILE
--set=NAME=VALUE, -s NAME=VALUE
set/override setting (may be repeated)
--pdb enable pdb on failure
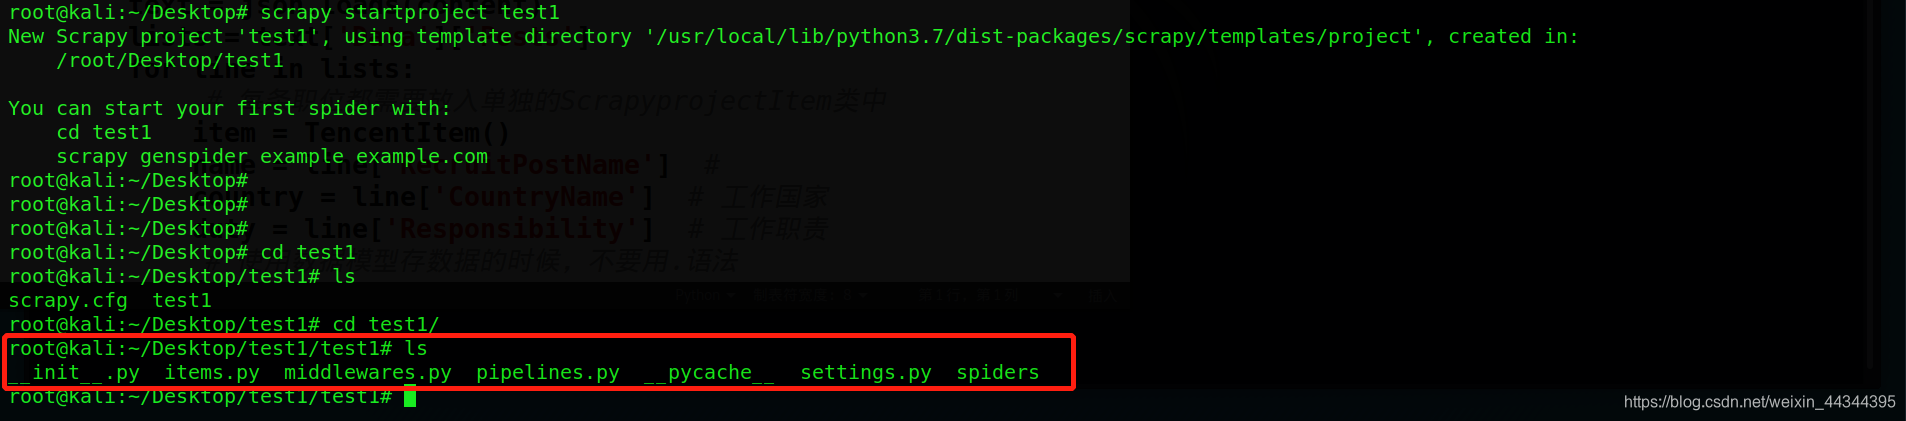
root@kali:~/Desktop# scrapy startproject test1
New Scrapy project 'test1', using template directory '/usr/local/lib/python3.7/dist-packages/scrapy/templates/project', created in:
/root/Desktop/test1
You can start your first spider with:
cd test1
scrapy genspider example example.com
可以看到创建完成了就会有一个提示,如何创建一个爬虫项目

按照提示进入test1,可以看到已经创建了工程文件及目录
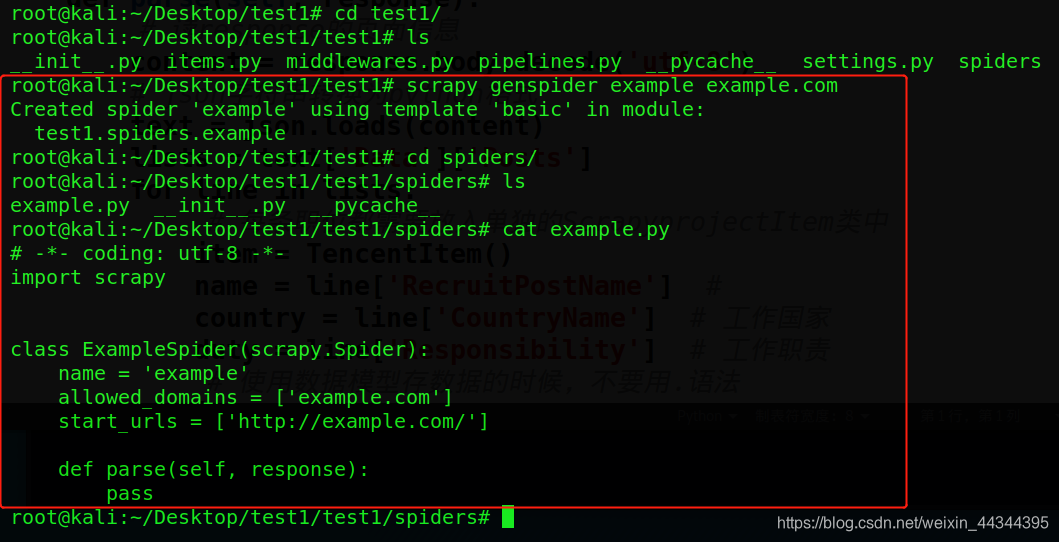
按照提示,来操作一遍(当然实际的情况下需要修改具体的内容)
scrapy genspider example example.com
可以看到spider目录下已经生成了example.py爬虫框架
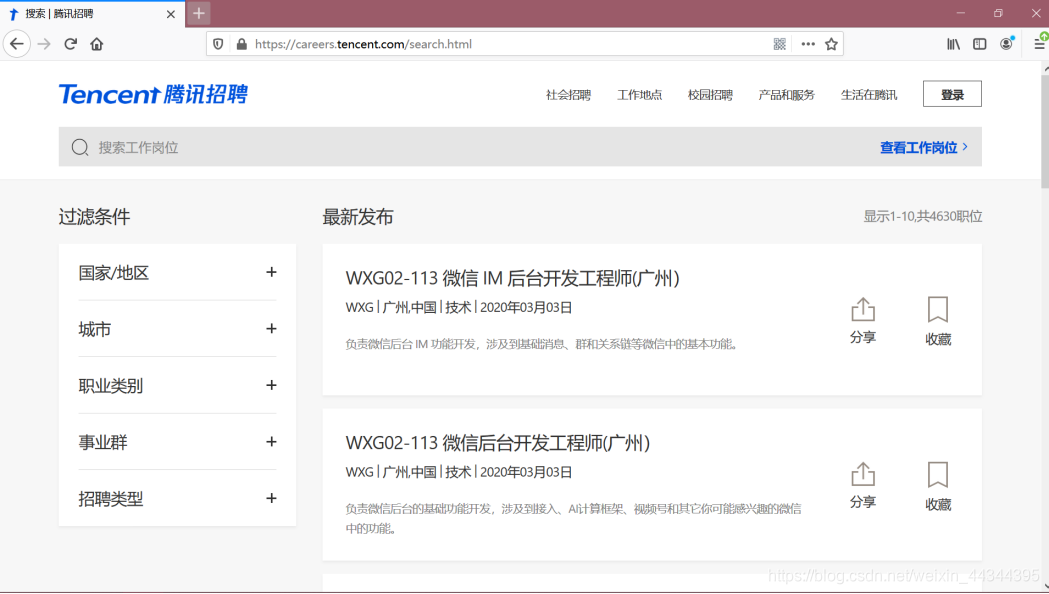
尝试爬取腾讯招聘信息
root@kali:~/Desktop# scrapy startproject tencent
New Scrapy project 'tencent', using template directory '/usr/local/lib/python3.7/dist-packages/scrapy/templates/project', created in:
    /root/Desktop/tencent

You can start your first spider with:
    cd tencent
    scrapy genspider example example.com
root@kali:~/Desktop# cd tencent
root@kali:~/Desktop/tencent# scrapy genspider tencents hr.tencent.com		#其中tencents为爬虫名hr.tencent.com为爬虫范围
Created spider 'tencents' using template 'basic' in module:
  tencent.spiders.tencents
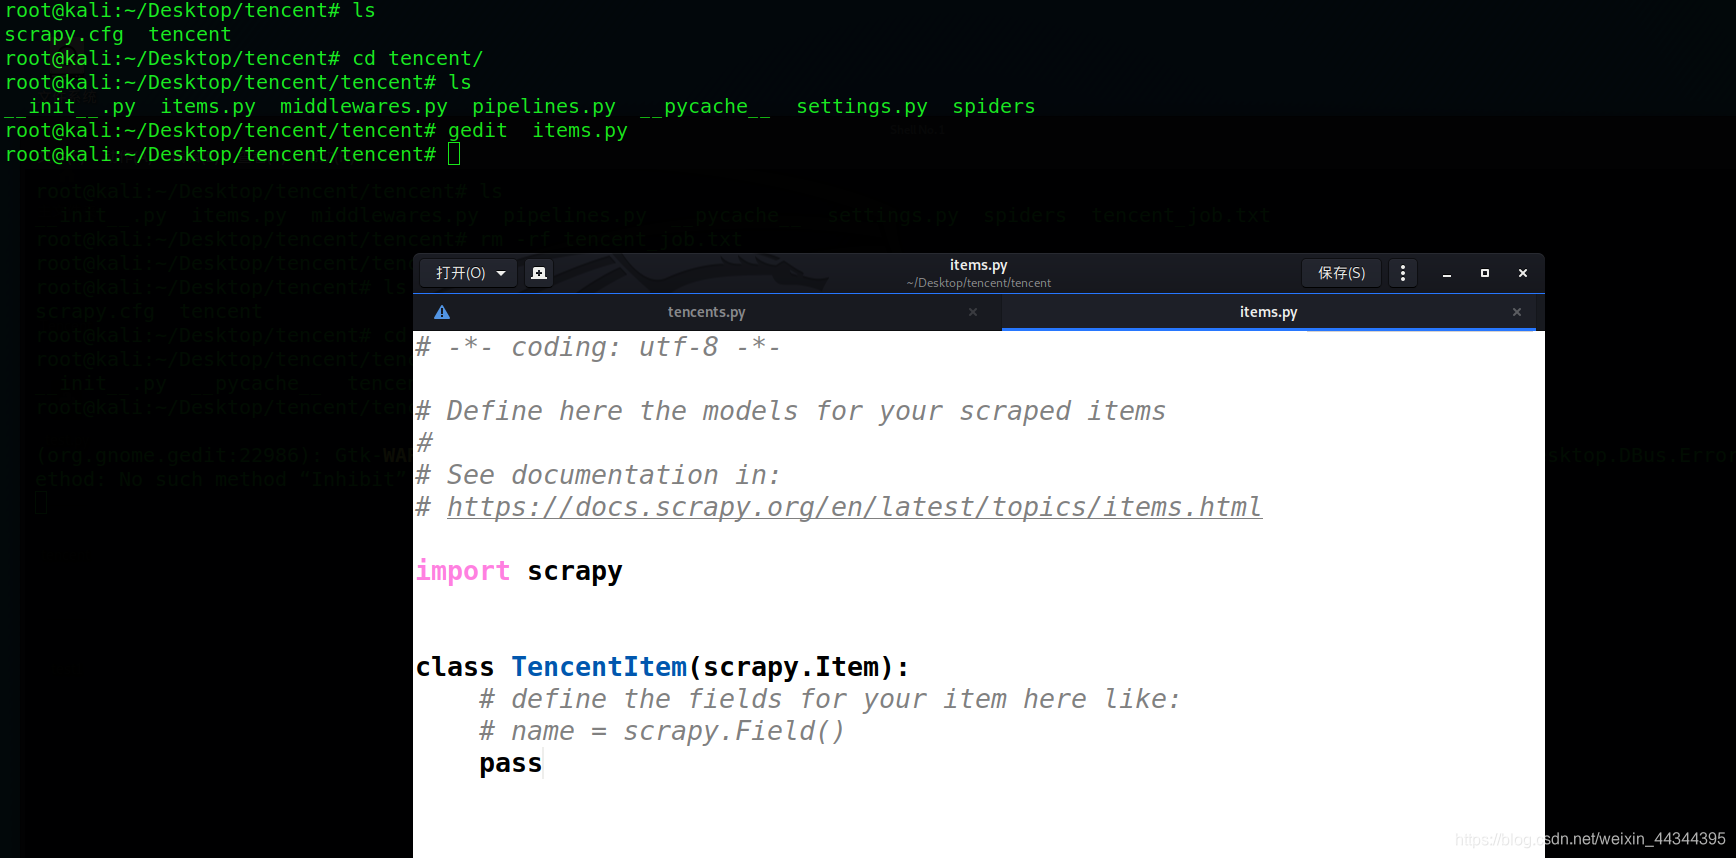
> 接下来就是items.py添加爬取字段 这里将使用一个类来表示
爬取字段,以取名为 classTencentItem(scrapy.ltem),这个类
一定要继承scrapy.ltem 否则无效
> 使用scrapy.Field()来添加,表示它是一个爬取字段
使用gedit对items.py文件进行编辑
# -*- coding: utf-8 -*-

# Define here the models for your scraped items
#
# See documentation in:
# https://doc.scrapy.org/en/latest/topics/items.html

import scrapy


# 声明字段的
class ScrapyprojectItem(scrapy.Item):
    # define the fields for your item here like:
    # 定义需要的字段
    name = scrapy.Field()
    duty = scrapy.Field()
    country=scrapy.Field()
接下来就是编写正式的爬虫代码
  初始化url,总共有80页,
  使用for循环来进行遍历,保证每一页都可以获取到
for i in range(1, 80):
        url = 'https://hr.tencent.com/tencentcareer/api/post/Query?keyword=python&pageIndex=%s&pageSize=10' % i
        start_urls.append(url)
下一步就是读取页面信息,并且将读取到的二进制信息转换格式
def parse(self, response):
        # 读页面信息
        content = response.body.decode('utf-8')
        # json字符串转换为python格式
        text = json.loads(content)
        lists = text['Data']['Posts']
        for line in lists:
            # 每条职位都需要放入单独的类TencentItem里
            item = TencentItem()
            name = line['RecruitPostName']	# 工作名称
            duty = line['Responsibility']   # 岗位职责
            country = line['CountryName']  	# 工作地点
        	item['name'] = name
            item['duty'] = duty
            item['country'] = country

            yield item  # 每生成一条数据后就自动挂起,传给piplines.py
结合起来完整的爬虫文件代码为
import scrapy
import json
from tencent.items import TencentItem


class TencentSpider(scrapy.Spider):
    name = 'tencents'
    allowed_domains = ['hr.tencent.com']
    start_urls = []
    for page in range(1, 80):
        url = 'https://hr.tencent.com/tencentcareer/api/post/Query?keyword=python&pageIndex=%s&pageSize=10' % page
        start_urls.append(url)

    def parse(self, response):
        content = response.body.decode('utf-8')
        text = json.loads(content)
        lists = text['Data']['Posts']
        for line in lists:
            item = TencentItem()
            name = line['RecruitPostName']
            duty = line['Responsibility']
            country = line['CountryName']

            item['name'] = name
            item['duty'] = duty
            item['country'] = country
            yield item
剩下的就是保存数据了,保存数据该编辑的是piplines.py
import json
class TencentPipeline(object):
    def process_item(self, item, spider):
        filename = open('hr_tencent.txt', 'w',encoding='utf-8')
        text = json.dump(dict(item), filename, ensure_ascii=False)+'\n' #在写入的使用调用json.dump将数据转化为字典格式
        return itemga
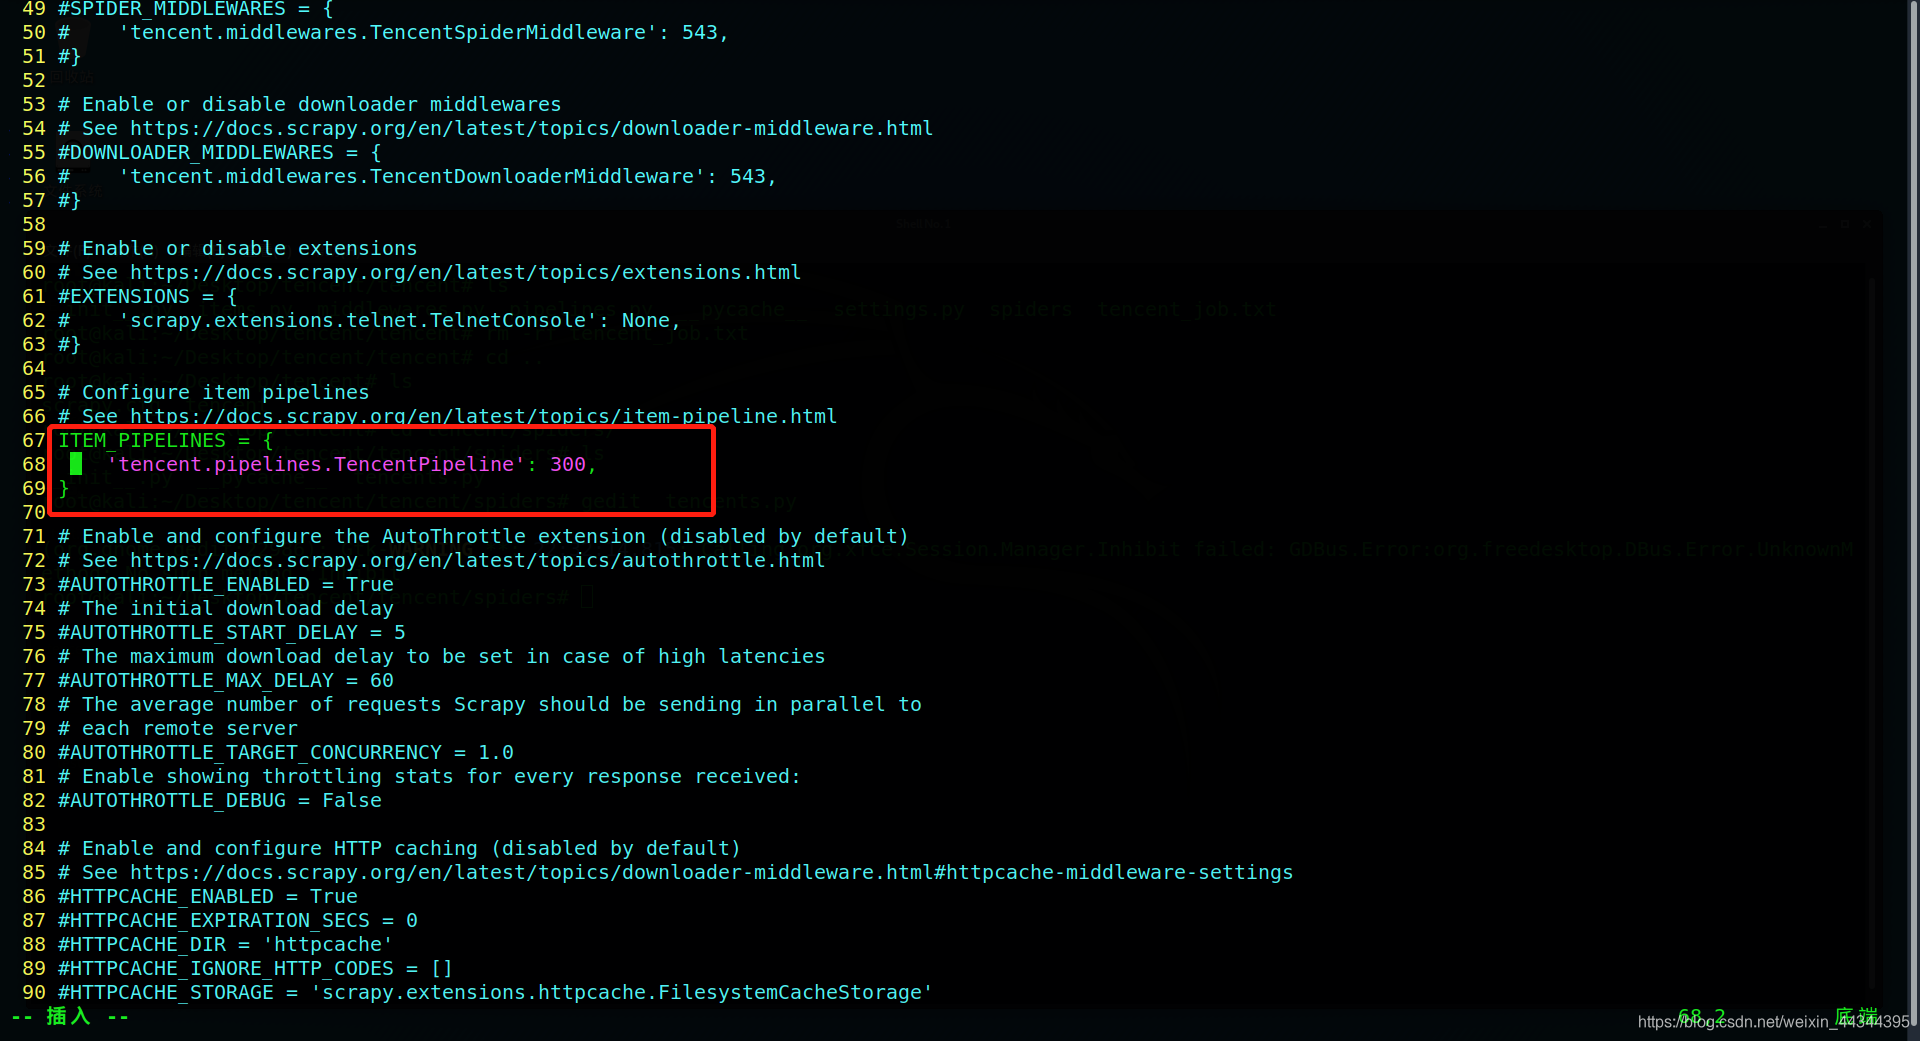
  最后一步就是打开setting.py里的爬虫管道了,
  将67-79行的注释去掉就行了
所有的文件都准备好后,开始运行
scrapy crawl tencents
运行效果
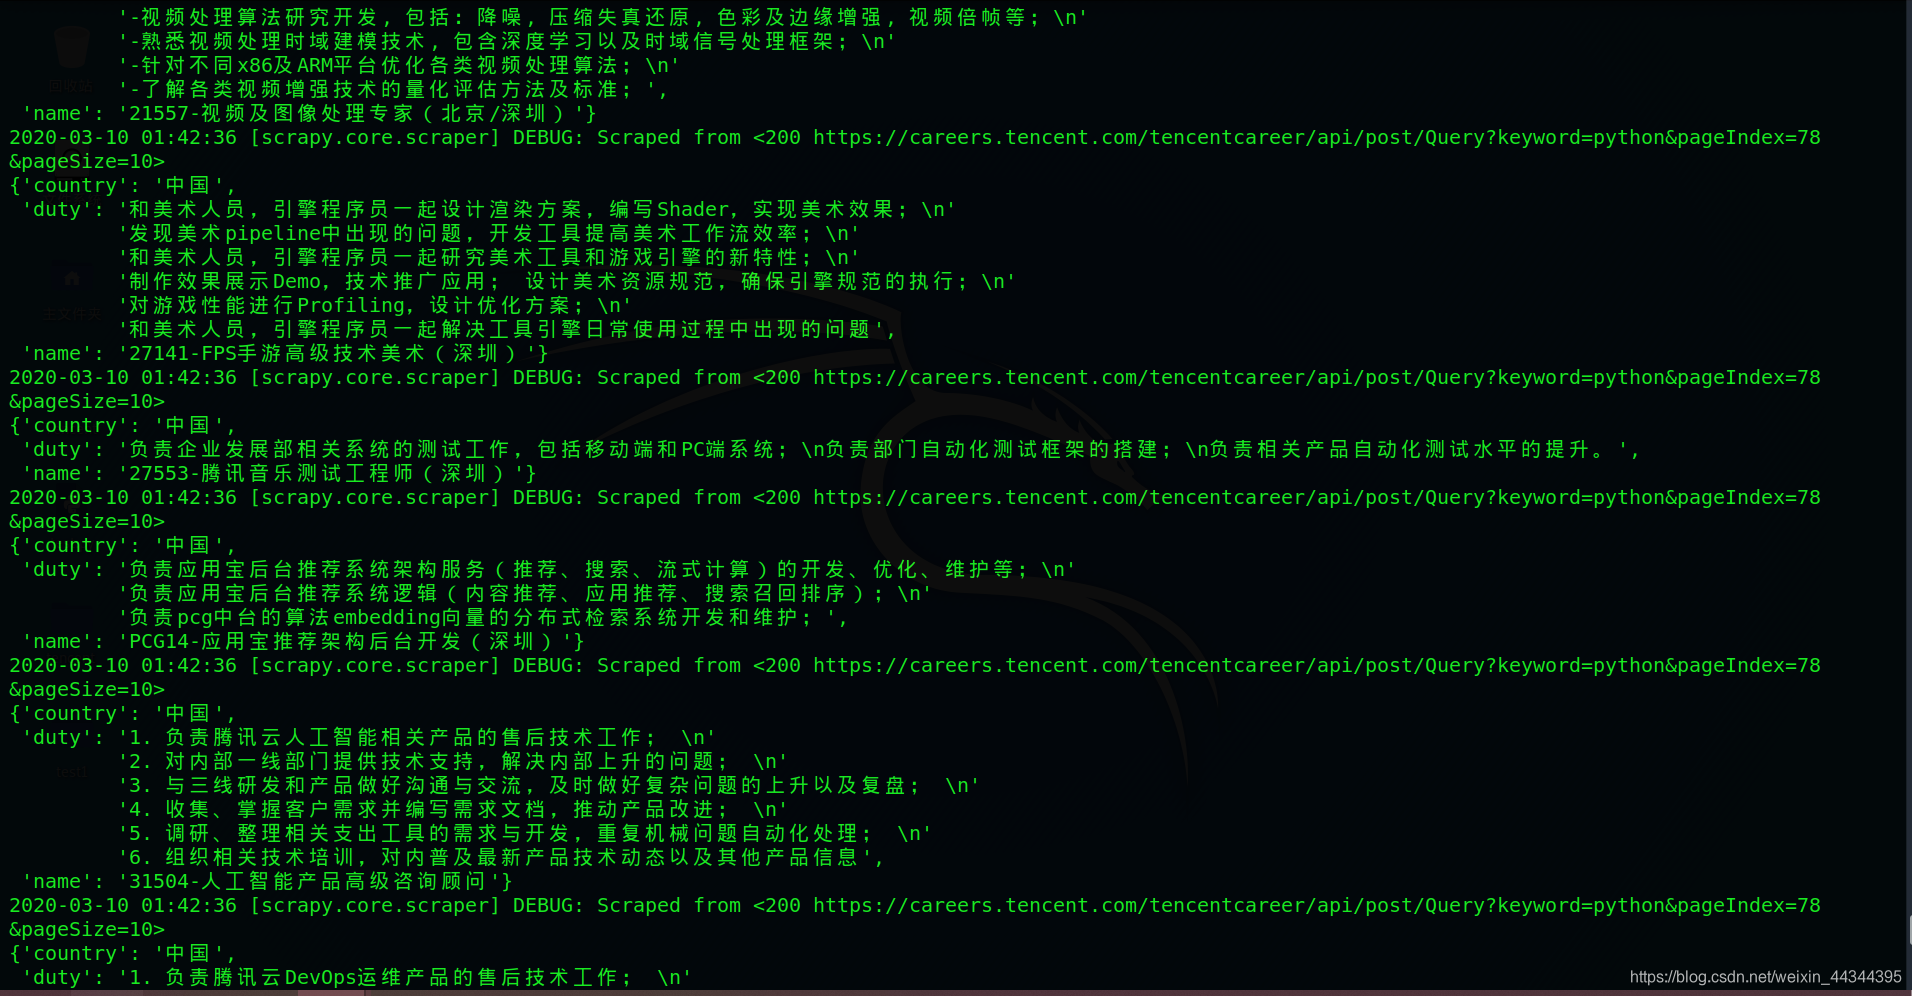
运行完成之后在当前目录下生成了一个hr_tencent.txt文件里面就保存了爬取的数据了

