实验题目:
编程实现彩色图像的平移、旋转、缩放、镜像操作,使用双线性插值确定非整数位置的像素值。要求可以任意输入平移数值、旋转角度、缩放比例。实验图像可从提供的实验图像集中选取。
源码:
平移
function ping(x1,x2,y1,y2)
image = imread('color.jpg'); % 读取图像
[W, H, ~] = size(image); % 获取图像大小
image_r=image(:,:,1);
image_g=image(:,:,2);
image_b=image(:,:,3);%获取图像的RGB值
res = zeros(W, H, 3); % 构造结果矩阵。每个像素点默认初始化为0(黑色)
Y = y2-y1; % 平移量X
X = x1-x2; % 平移量Y
tras = [1 0 Y; 0 1 X; 0 0 1]; % 平移的变换矩阵
  for i = 1 : W
     for j = 1 : H
        temp = [i; j; 1];
        temp = tras * temp; % 矩阵乘法
        x = temp(1, 1);
        y = temp(2, 1);%x、y分别为通过矩阵乘法得到后的平移位置的横纵坐标值
        % 变换后的位置判断是否越界
        if (x <= W) && (y <= H)&&(x >= 1) && (y >= 1)
            res(x,y,1) = image_r(i, j);
            res(x,y,2) = image_g(i, j);
            res(x,y,3) = image_b(i, j);%将新的RGB值赋予在背景上
        end
     end
  end
figure('toolbar','none','menubar','none');
imshow(uint8(res)); % 显示图像
end
旋转
function rotate(x)
image = imread('color.jpg'); % 读取图像
[W, H, G] = size(image); % 获取图像大小
image_r=image(:,:,1);
image_g=image(:,:,2);
image_b=image(:,:,3);%获取图像的RGB值
X = x; % 偏移角度,角度可以自己换
Y = pi/180*X; %偏转弧度,由于matlab里面的三角函数的参数是弧度,需进行角度转弧度处理
tras = [cos(Y) -sin(Y) 0; sin(Y) cos(Y) 0; 0 0 1]; % 平移的变换矩阵
res = zeros(W, H, 3); % 构造结果矩阵。每个像素点默认初始化为0(黑色)
  for i = 1 : W
     for j = 1 : H
        temp = [i; j; 1];
        temp = tras * temp; % 矩阵乘法
        x = round(uint16(temp(1, 1)));
        y = round(uint16(temp(2, 1)));%x、y分别为通过矩阵乘法得到后的平移位置的横纵坐标值
        % 变换后的位置判断是否越界
        if (x <= W) && (y <= H)&&(x >= 1) && (y >= 1)
            res(x,y,1) = image_r(i, j);
            res(x,y,2) = image_g(i, j);
            res(x,y,3) = image_b(i, j);%将新的RGB值赋予在背景上
        end
     end
  end

  %插值处理,由于算法问题(小数取整),旋转后并不是每一个像素点都有值,因此需要在没有值的像素点再填充像素点
  for a =2 : (W - 1)
      for b=2 :( H - 1)
          for c=1 : 3
          if res(a,b,c)==0&&res(a,b-1,c)~=0&&res(a,b+1,c)~=0
              res(a,b,c)=res(a,b-1,c);
          end
          end
      end
  end
figure('toolbar','none','menubar','none');
imshow(uint8(res)); % 显示图像
end
放缩
function zoom(p)
image = imread('color.jpg');
ratio = p;%p是放大倍数
[W, H, G] = size(image);
W = round(ratio * W);
H = round(ratio * H);
% 生成新的图片
res = zeros(W, H, G, class(image));
for i = 1 : W
    for j = 1 : H
        x = i / ratio;
        y = j / ratio;
        x1 = ceil(x);         % 向上取整
        y1 = ceil(y);
        x2 = ceil(x) + 1;
        y2 = ceil(y) + 1;
        if x2 >= size(image, 1)           % 溢出检查
            x2 = x2 - 1;
        end
        if y2 >= size(image, 2)
            y2 = x2 - 1;
        end
        du = (x+1) - x1;
        dv = (y+1) - y1;
        res(i, j, :) = (1-du)*(1-dv)*image(x1, y1, :) + (1-du)*dv*image(x1, y2, :) + du*(1-dv)*image(x2, y1, :) + du*dv*image(x2, y2, :);
    end
end
figure('toolbar','none','menubar','none');
imshow(image)
figure('toolbar','none','menubar','none');
imshow(res)
垂直镜像/上下对称
function mirror2()
image = imread('color.jpg'); % 读取图像
[W, H, G] = size(image); % 获取图像大小
image_r=image(:,:,1);
image_g=image(:,:,2);
image_b=image(:,:,3);%获取图像的RGB值
res = zeros(W, H, 3); % 构造结果矩阵。每个像素点默认初始化为0(黑色)
  for i = 1 : W
     for j = 1 : H
        x = W-i+1;
        y = j;%上下对称
            res(x,y,1) = image_r(i, j);
            res(x,y,2) = image_g(i, j);
            res(x,y,3) = image_b(i, j);%将新的RGB值赋予在背景上
     end
  end
figure('toolbar','none','menubar','none');
imshow(uint8(res)); % 显示图像
end
左右镜像/左右对称
%镜像左右对称
function mirror
image = imread('color.jpg'); % 读取图像
[W, H, ~] = size(image); % 获取图像大小
image_r=image(:,:,1);
image_g=image(:,:,2);
image_b=image(:,:,3);%获取图像的RGB值
res = zeros(W, H, 3); % 构造结果矩阵。每个像素点默认初始化为0(黑色)
  for i = 1 : W
     for j = 1 : H
        x = i;
        y = H-j+1;%左右对称
            res(x,y,1) = image_r(i, j);
            res(x,y,2) = image_g(i, j);
            res(x,y,3) = image_b(i, j);%将新的RGB值赋予在背景上
     end
  end
figure('toolbar','none','menubar','none');
imshow(uint8(res)); % 显示图像
end
交互面板
function varargout = task3(varargin)
% TASK3 MATLAB code for task3.fig
%      TASK3, by itself, creates a new TASK3 or raises the existing
%      singleton*.
%
%      H = TASK3 returns the handle to a new TASK3 or the handle to
%      the existing singleton*.
%
%      TASK3('CALLBACK',hObject,eventData,handles,...) calls the local
%      function named CALLBACK in TASK3.M with the given input arguments.
%
%      TASK3('Property','Value',...) creates a new TASK3 or raises the
%      existing singleton*.  Starting from the left, property value pairs are
%      applied to the GUI before task3_OpeningFcn gets called.  An
%      unrecognized property name or invalid value makes property application
%      stop.  All inputs are passed to task3_OpeningFcn via varargin.
%
%      *See GUI Options on GUIDE's Tools menu.  Choose "GUI allows only one
%      instance to run (singleton)".
%
% See also: GUIDE, GUIDATA, GUIHANDLES

% Edit the above text to modify the response to help task3

% Last Modified by GUIDE v2.5 30-Mar-2020 22:12:39

% Begin initialization code - DO NOT EDIT
gui_Singleton = 1;
gui_State = struct('gui_Name',       mfilename, ...
                   'gui_Singleton',  gui_Singleton, ...
                   'gui_OpeningFcn', @task3_OpeningFcn, ...
                   'gui_OutputFcn',  @task3_OutputFcn, ...
                   'gui_LayoutFcn',  [] , ...
                   'gui_Callback',   []);
if nargin && ischar(varargin{1})
    gui_State.gui_Callback = str2func(varargin{1});
end

if nargout
    [varargout{1:nargout}] = gui_mainfcn(gui_State, varargin{:});
else
    gui_mainfcn(gui_State, varargin{:});
end
% End initialization code - DO NOT EDIT


% --- Executes just before task3 is made visible.
function task3_OpeningFcn(hObject, eventdata, handles, varargin)
% This function has no output args, see OutputFcn.
% hObject    handle to figure
% eventdata  reserved - to be defined in a future version of MATLAB
% handles    structure with handles and user data (see GUIDATA)
% varargin   command line arguments to task3 (see VARARGIN)

% Choose default command line output for task3
handles.output = hObject;

% Update handles structure
guidata(hObject, handles);

% UIWAIT makes task3 wait for user response (see UIRESUME)
% uiwait(handles.figure1);


% --- Outputs from this function are returned to the command line.
function varargout = task3_OutputFcn(hObject, eventdata, handles)
% varargout  cell array for returning output args (see VARARGOUT);
% hObject    handle to figure
% eventdata  reserved - to be defined in a future version of MATLAB
% handles    structure with handles and user data (see GUIDATA)

% Get default command line output from handles structure
varargout{1} = handles.output;


function rotate_Callback(hObject, eventdata, handles)
% hObject    handle to rotate (see GCBO)
% eventdata  reserved - to be defined in a future version of MATLAB
% handles    structure with handles and user data (see GUIDATA)

% Hints: get(hObject,'String') returns contents of rotate as text
%        str2double(get(hObject,'String')) returns contents of rotate as a double


% --- Executes during object creation, after setting all properties.
function rotate_CreateFcn(hObject, eventdata, handles)
% hObject    handle to rotate (see GCBO)
% eventdata  reserved - to be defined in a future version of MATLAB
% handles    empty - handles not created until after all CreateFcns called

% Hint: edit controls usually have a white background on Windows.
%       See ISPC and COMPUTER.
if ispc && isequal(get(hObject,'BackgroundColor'), get(0,'defaultUicontrolBackgroundColor'))
    set(hObject,'BackgroundColor','white');
end


function zoom_Callback(hObject, eventdata, handles)
% hObject    handle to zoom (see GCBO)
% eventdata  reserved - to be defined in a future version of MATLAB
% handles    structure with handles and user data (see GUIDATA)

% Hints: get(hObject,'String') returns contents of zoom as text
%        str2double(get(hObject,'String')) returns contents of zoom as a double


% --- Executes during object creation, after setting all properties.
function zoom_CreateFcn(hObject, eventdata, handles)
% hObject    handle to zoom (see GCBO)
% eventdata  reserved - to be defined in a future version of MATLAB
% handles    empty - handles not created until after all CreateFcns called

% Hint: edit controls usually have a white background on Windows.
%       See ISPC and COMPUTER.
if ispc && isequal(get(hObject,'BackgroundColor'), get(0,'defaultUicontrolBackgroundColor'))
    set(hObject,'BackgroundColor','white');
end


% ---镜像处理.
function pushbutton1_Callback(hObject, eventdata, handles)


% --- 平移
function pushbutton2_Callback(hObject, eventdata, handles)
x1 = str2double(char(get(handles.right, 'String')));
x2 = str2double(char(get(handles.left, 'String')));
y1 = str2double(char(get(handles.up, 'String')));
y2 = str2double(char(get(handles.down, 'String')));
ping(x1,x2,y1,y2);

% --- Executes on button press in m1.
function m1_Callback(hObject, eventdata, handles)
clear;
mirror();

% --- Executes on button press in m2.
function m2_Callback(hObject, eventdata, handles)
clear all;
mirror2();


% --- Executes on button press in pushbutton6.
function pushbutton6_Callback(hObject, eventdata, handles)
m = str2double(char(get(handles.rotate, 'String')));
rotate(m);


% --- Executes on button press in pushbutton7.
function pushbutton7_Callback(hObject, eventdata, handles)
q = str2double(char(get(handles.zoom, 'String')));
zoom(q);


% --- Executes on button press in pushbutton8.
function pushbutton8_Callback(hObject, eventdata, handles)
imNew=im2double(imread('color.jpg'));
figure('toolbar','none','menubar','none');
imshow(imNew);


% --- Executes on button press in pushbutton10.
function pushbutton10_Callback(hObject, eventdata, handles)
% hObject    handle to pushbutton10 (see GCBO)
% eventdata  reserved - to be defined in a future version of MATLAB
% handles    structure with handles and user data (see GUIDATA)
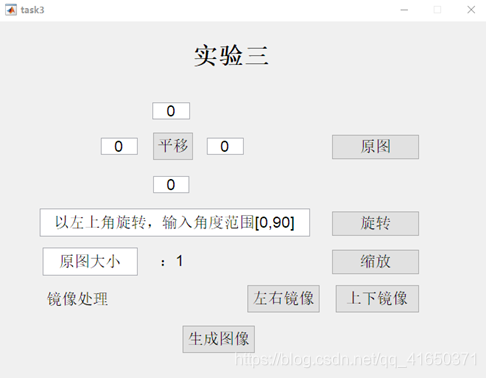
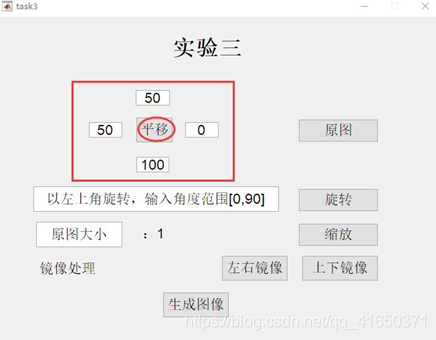
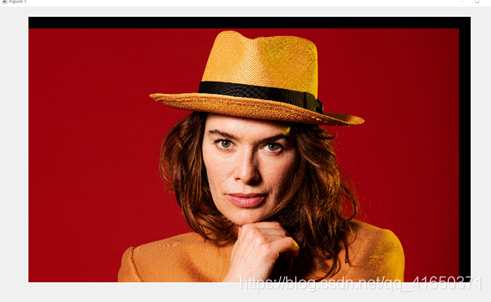
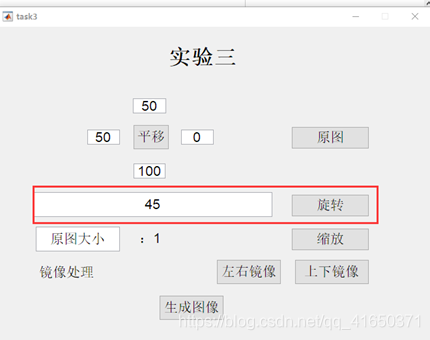
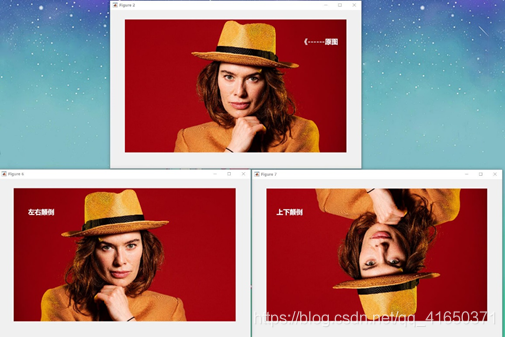
实验效果
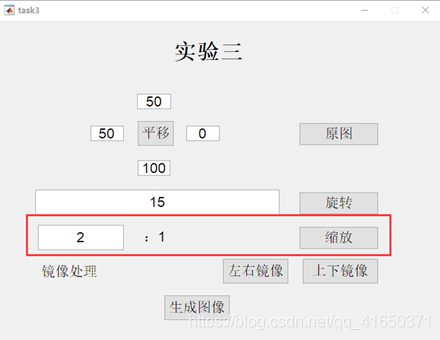
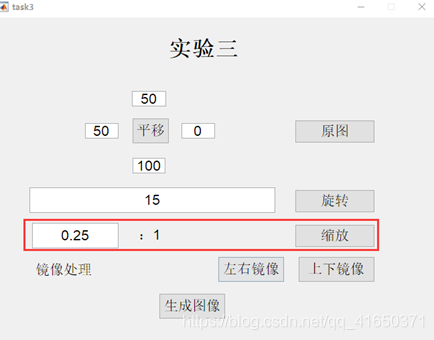
交互面板
平移实现
旋转实现
可以输入范围是(-90,90),超出范围就会不在视野中
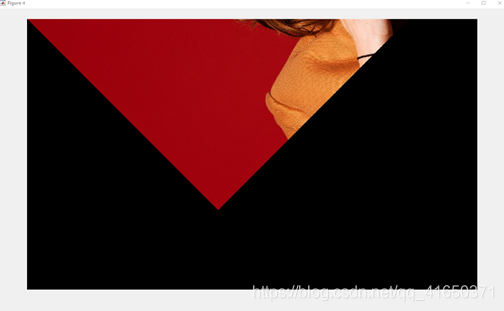
缩放实现
放大显示的结果还是两个原图大小的窗口,但是不同的是,图像的矩阵大小发生了倍数的变化,显示大小虽然一样,但是显示比例也是成两倍的关系,所以是发生了放大。
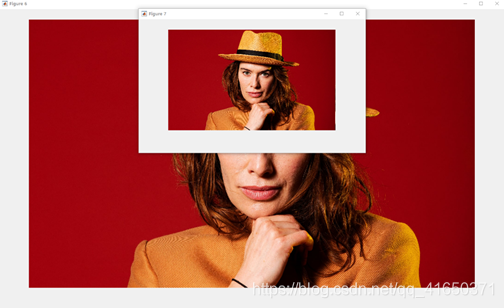
最后一个是镜像效果,做了两种,一个是上下,一个是左右对称。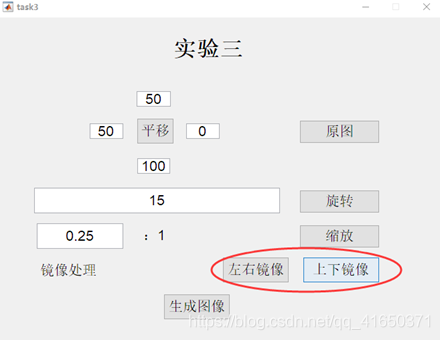
最后有一点是,我的功能是分着实现的。如果题目要求多种变换一次实现的话,可以把这个过程中的变化矩阵挨个相乘,最后得到想要的图像。通过这次实验,再一次认识到双线性插值的处理方法,理解了图像变换的背后逻辑,知道这些变化,组合起来就可以满足多样的图片处理要求。
