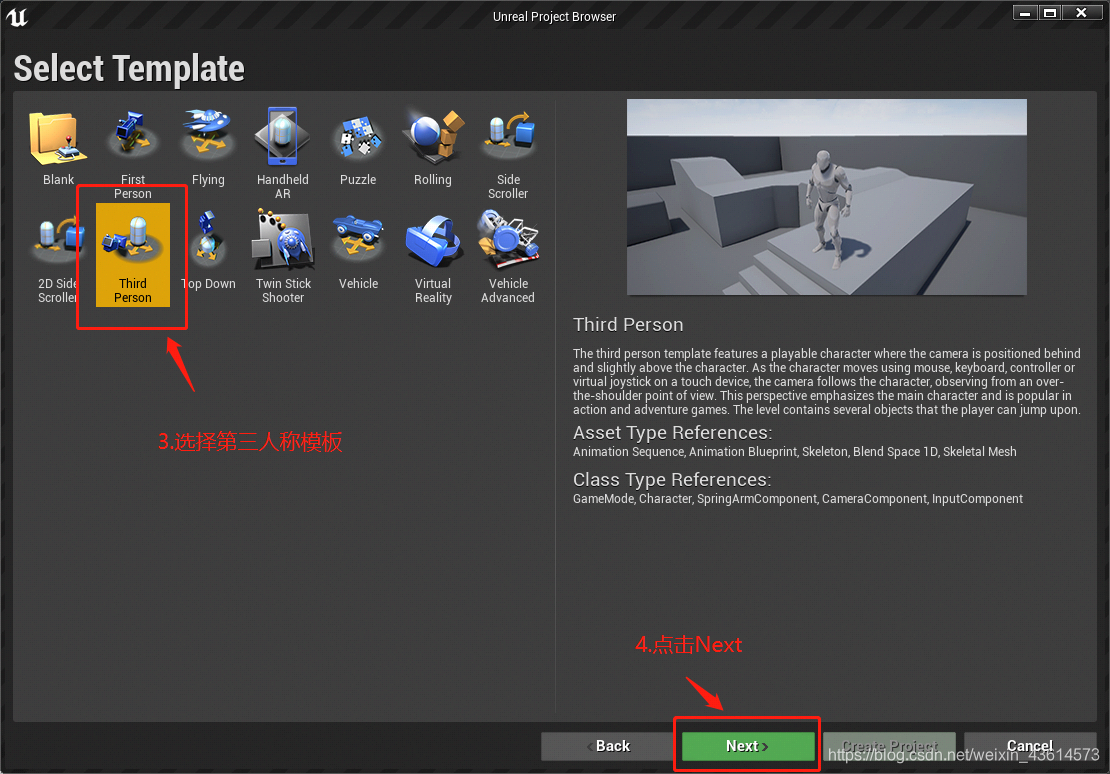
1.蓝图制作
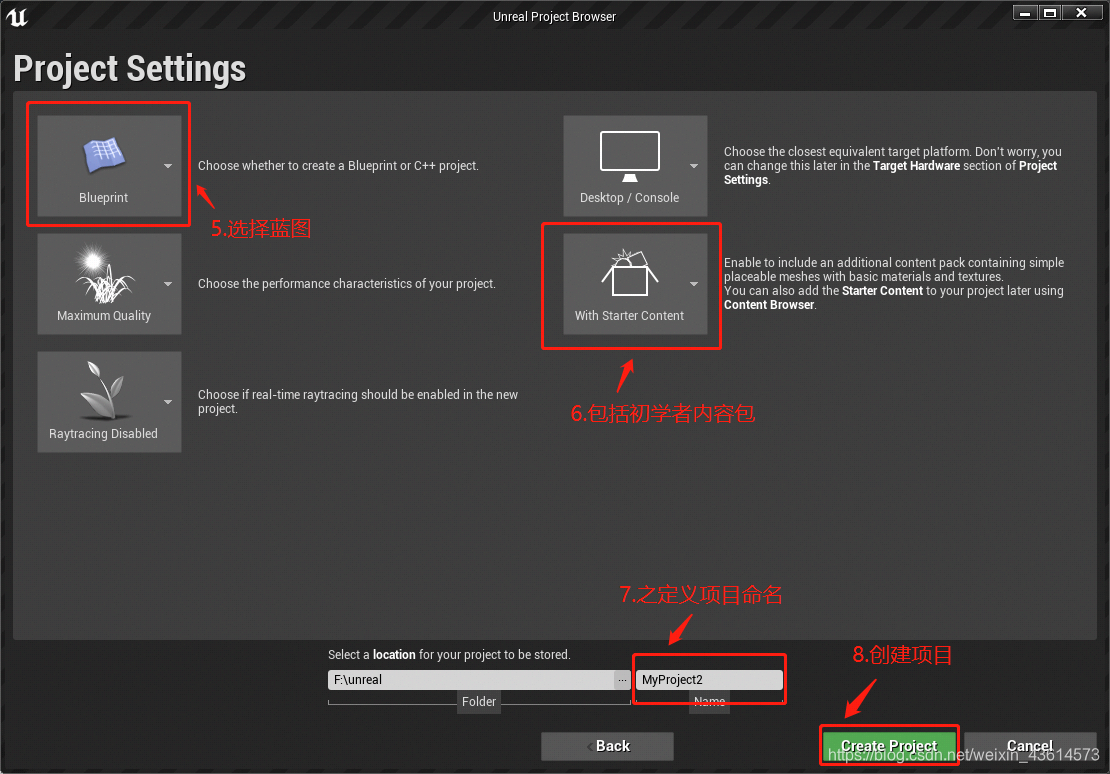
1)创建蓝图项目

项目打开后会打开默认场景,可以使用默认的,也可以自己新建场景。
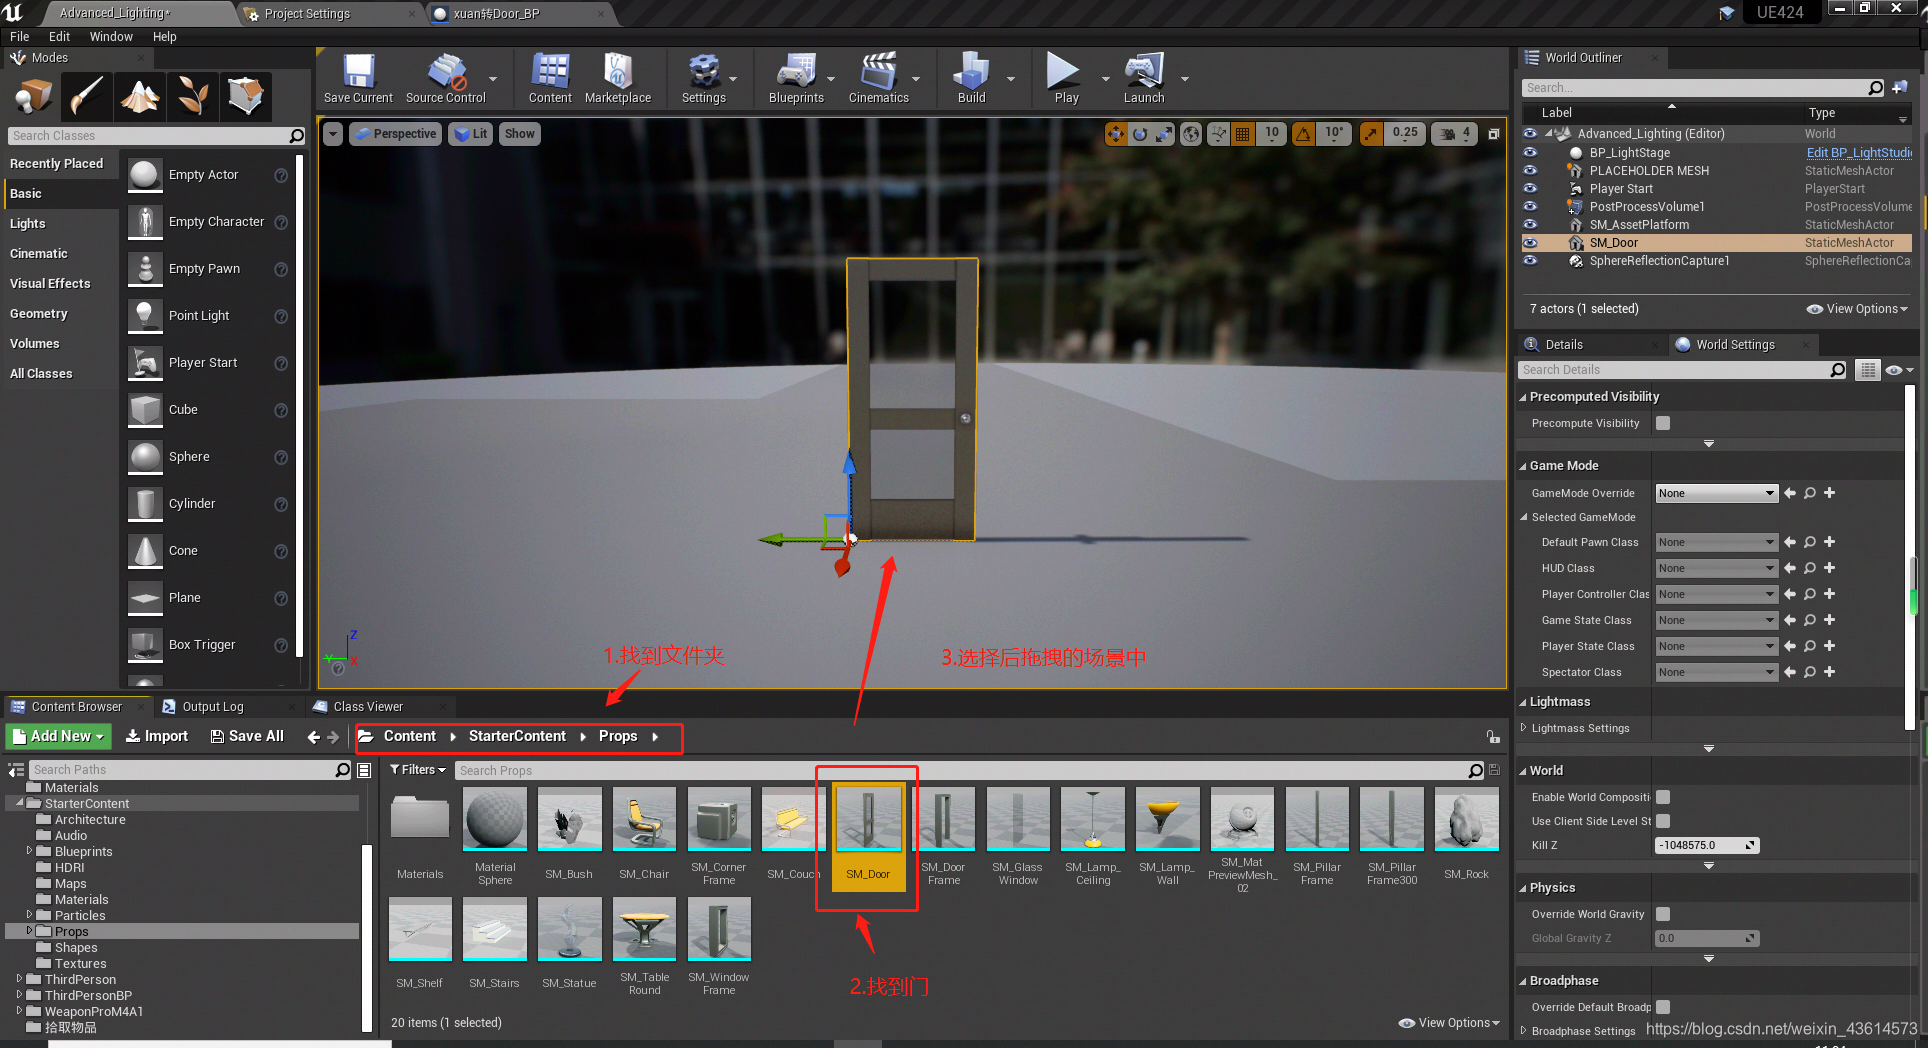
2)找到初学者资源包打开Content/StartConent/Props文件夹找到我们需要的门SM_Door
3) 添加碰撞体
作用是阻挡角色直接闯过门
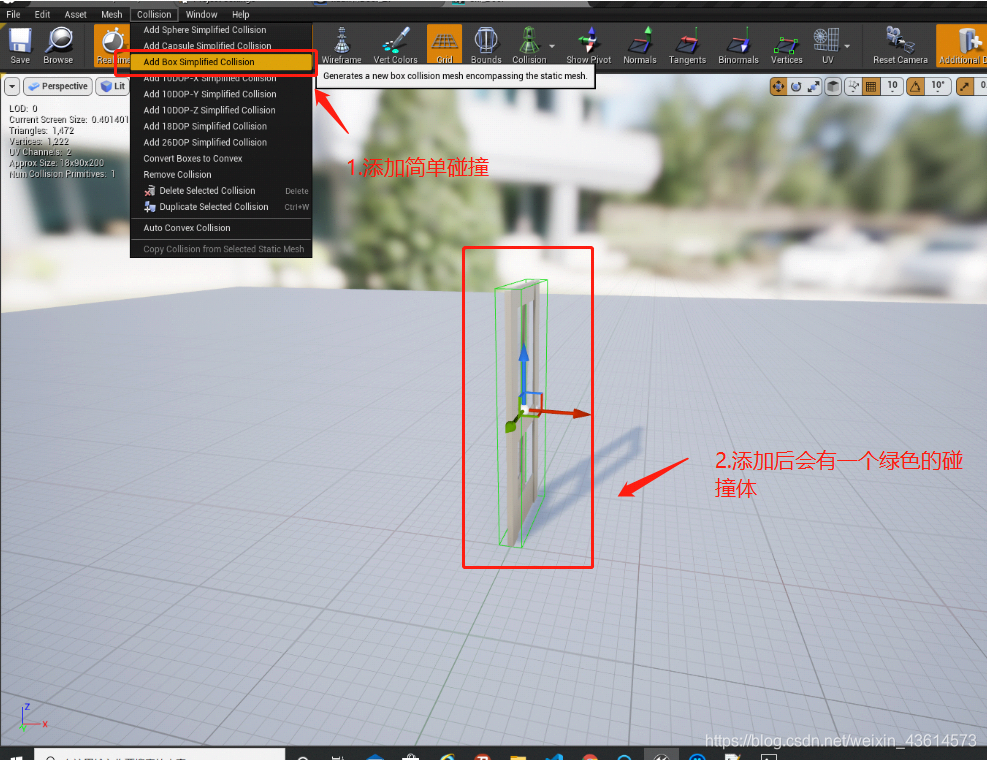
最新版本的引擎自带的有碰撞,所以如果使用的是最新版此步跳过即可
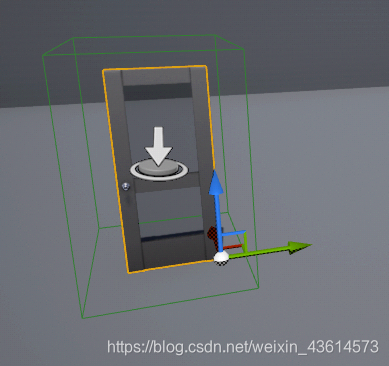
4) 添加盒体触发器(Sphere Trigger)
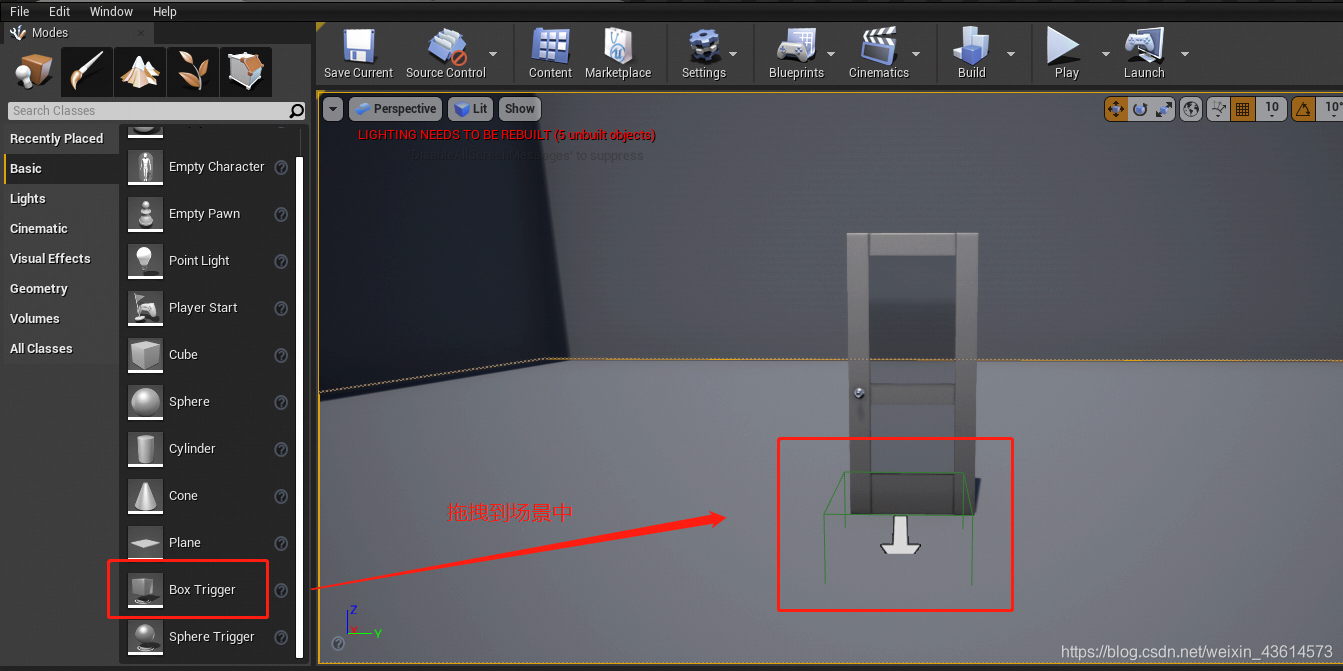
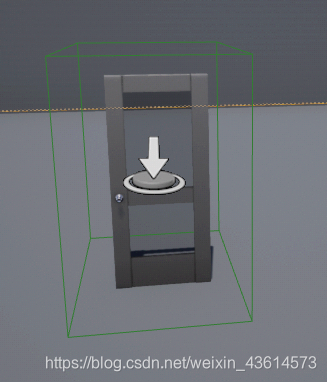
调整适当大小
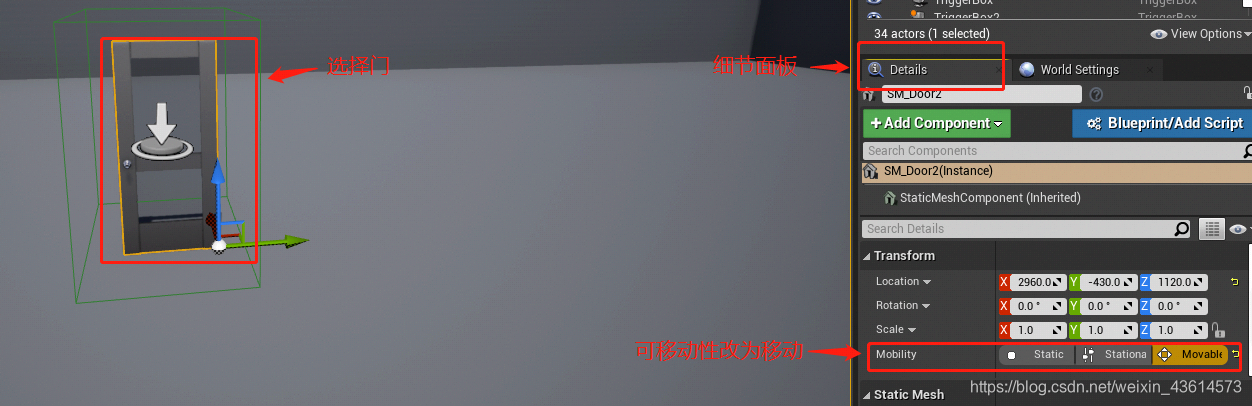
5) 设置移动性
选择门,把细节面板(Details)----变换(Transform)----移动性(Mobility)----改为,可移动(Moveable)
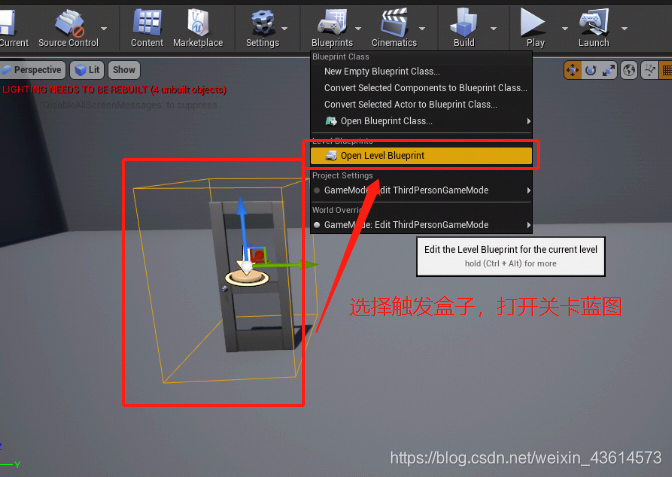
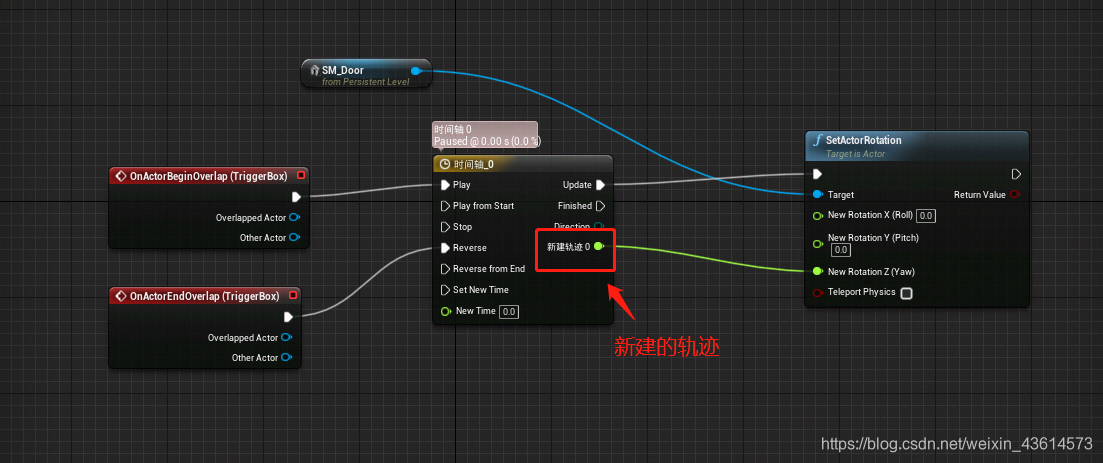
6)打开关卡蓝图
选择触发盒子,选择 蓝图(Blueprints)----打开关卡蓝图(Open Level Blueprint)
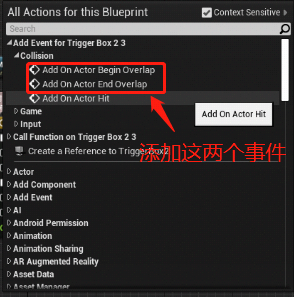
7)编写触发事件
打开关卡蓝图,写触发事件。
添加两个事件:
右键----触发盒子添加事件(Add Event for Trigger Box)----碰撞(Collision)----添加角色开始触发事件(Add On Actor Begin Overlap)、添加角色结束触发事件(Add On Actor End Overlap)
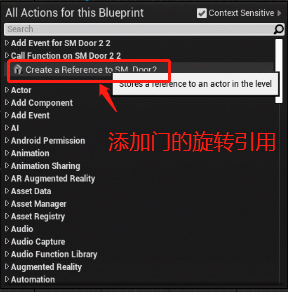
8) 给门添加旋转
到场景选中门,然后到关卡蓝图中给门添加旋转引用(Create a Reference to SM_Door)
9) 引出旋转节点(SetActorRotation)
通过这个旋转引用,引出旋转节点(SetActorRotation)。门的旋转是Z轴旋转,所以需要把旋转节点的Z轴数值修改为需要的数值,如:90度。
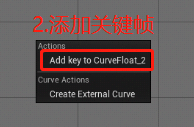
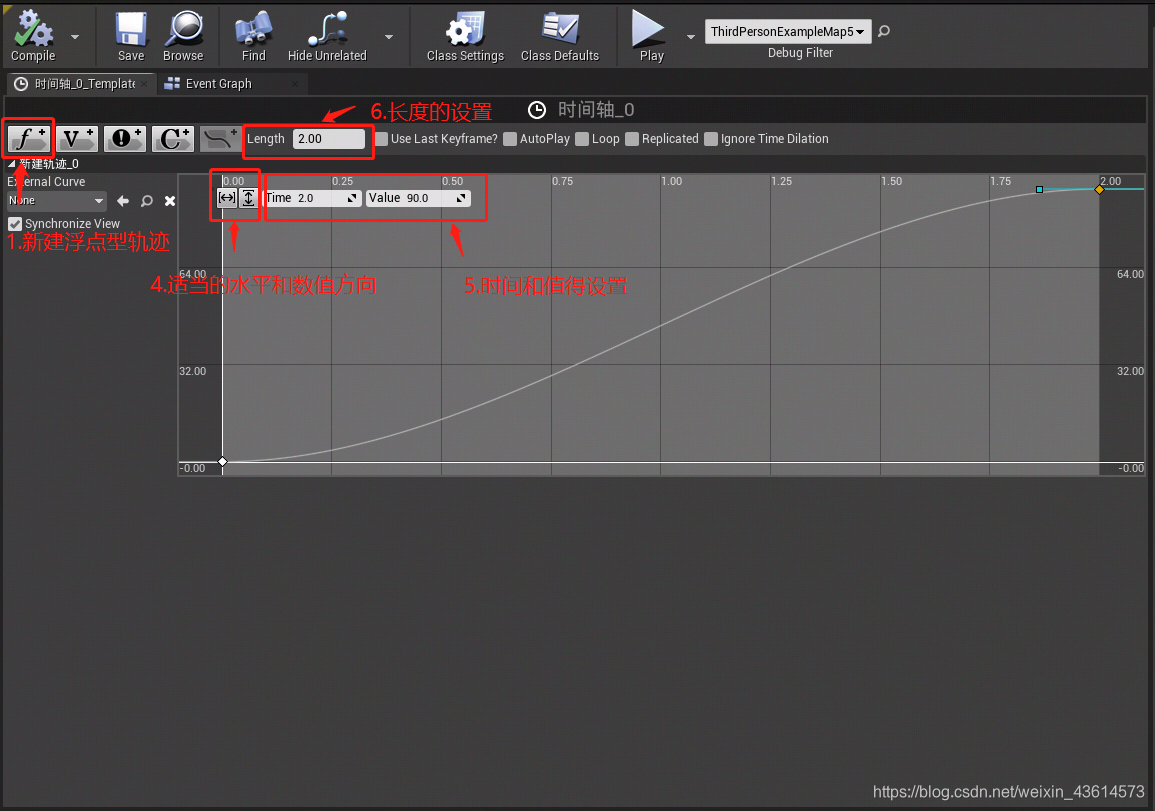
10) 添加时间轴(Timeline)
时间轴是让开门的过程更加自然。
双击打开时间轴,新建一个浮点型的轨迹(float)----右键添加两个关键帧(Add Key to CurveFloat)----分别设置关键帧的 时间、值,如:(0,0),(2,90)。
适当以缩放适合水平和竖直方向尺寸,来适应我们的视觉窗口。
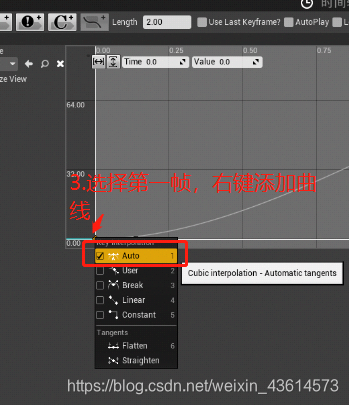
点击第一个关键帧,添加一个自动曲线(Auto),作用是让开门过程由慢而快。
把时间轴的长度,设置为最后一个关键帧的时间长度。
11) 最后回到关卡蓝图把对应节点连接好即可
2.C++制作
1)首先创建一个C++项目,创建步骤类似蓝图,只是在选择的时候选择C++即可
2)代码
TE.H
// Fill out your copyright notice in the Description page of Project Settings.

#pragma once

#include "CoreMinimal.h"
#include "GameFramework/Actor.h"
#include "Components/TimelineComponent.h"
#include "AutoDoor.generated.h"

UCLASS()
class PROC_API AAutoDoor : public AActor
{
	GENERATED_BODY()

public:
	// Sets default values for this actor's properties
	AAutoDoor();

	UPROPERTY(EditAnywhere, BlueprintReadWrite)
		class UBoxComponent * HitBoxComp;

	UPROPERTY(EditAnywhere, BlueprintReadWrite)
		class UStaticMeshComponent * DoorMeshComp;

	UPROPERTY(EditAnywhere, BlueprintReadWrite)
		class UCurveFloat * TimelineCurve;

	FTimeline MyTimeline;

	UPROPERTY(EditAnywhere, BlueprintReadWrite)
		FVector CurrentDoorLocation;

	UPROPERTY(EditAnywhere, BlueprintReadWrite)
		FVector EndDoorLocation;

protected:
	// Called when the game starts or when spawned
	virtual void BeginPlay() override;

public:
	// Called every frame
	virtual void Tick(float DeltaTime) override;

	UFUNCTION()
		void UpdateDoorLocation(float Volume);

	UFUNCTION()
		void HitBegin( UPrimitiveComponent* OverlappedComponent, AActor* OtherActor, UPrimitiveComponent* OtherComp, int32 OtherBodyIndex, bool bFromSweep, const FHitResult & SweepResult);
};
TE.cpp
// Fill out your copyright notice in the Description page of Project Settings.


#include "AutoDoor.h"
#include "Components/BoxComponent.h"
#include "Components/StaticMeshComponent.h"


// Sets default values
AAutoDoor::AAutoDoor()
{
 	// Set this actor to call Tick() every frame.  You can turn this off to improve performance if you don't need it.
	PrimaryActorTick.bCanEverTick = true;

	//初始化
	HitBoxComp = CreateDefaultSubobject<UBoxComponent>(TEXT("HitBox"));
	DoorMeshComp = CreateDefaultSubobject<UStaticMeshComponent>(TEXT("DoorMesh"));
	DoorMeshComp->SetupAttachment(HitBoxComp);

	CurrentDoorLocation = DoorMeshComp->GetRelativeTransform().GetLocation();
	HitBoxComp->OnComponentBeginOverlap.AddDynamic(this, &AAutoDoor::HitBegin);  //对HitBegin函数的绑定
}

// Called when the game starts or when spawned
void AAutoDoor::BeginPlay()
{
	Super::BeginPlay();

	FOnTimelineFloatStatic TimelineCallBack;   //让UpdateDoorLocation函数对timeline进行绑定
	TimelineCallBack.BindUFunction(this, TEXT("UpdateDoorLocation"));
	MyTimeline.AddInterpFloat(TimelineCurve, TimelineCallBack);

}

// Called every frame
void AAutoDoor::Tick(float DeltaTime)
{
	Super::Tick(DeltaTime);
	MyTimeline.TickTimeline(DeltaTime);  //对timeline类进行绑定

}

void AAutoDoor::UpdateDoorLocation(float Volume)
{
	FVector NewLocation(0,0,0);
	NewLocation.X = FMath::Lerp(CurrentDoorLocation.X, EndDoorLocation.X, Volume);
	DoorMeshComp->AddRelativeLocation(NewLocation);
}

void AAutoDoor::HitBegin(UPrimitiveComponent * OverlappedComponent, AActor * OtherActor, UPrimitiveComponent * OtherComp, int32 OtherBodyIndex, bool bFromSweep, const FHitResult & SweepResult)
{
	//检查碰撞到的是不是指定的Actor
	if (OtherActor)
	{
		MyTimeline.PlayFromStart();
		//MyTimeline.ReverseFromEnd();
}
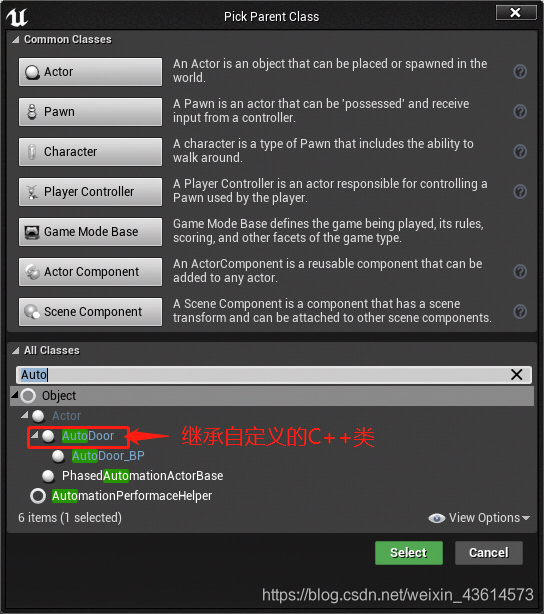
3)继承C++类
新建一个蓝图类,继承自定义的C++类
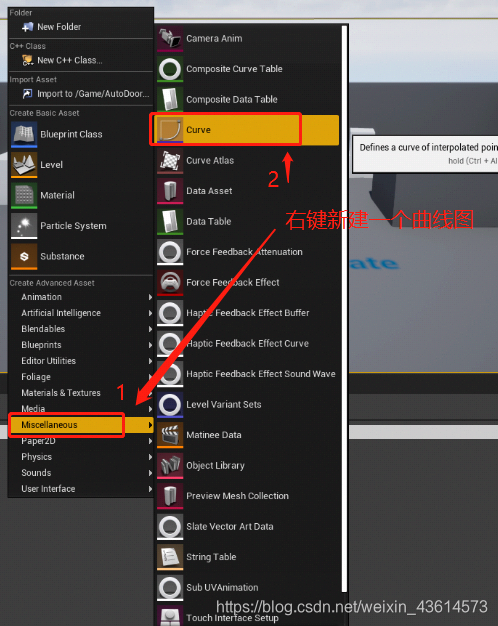
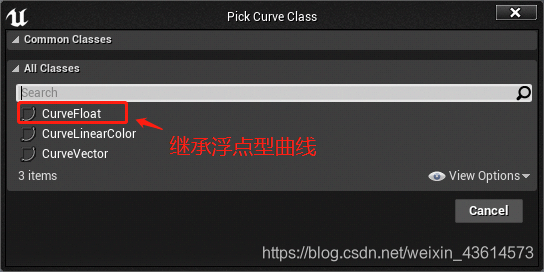
4)新建曲线图
右键,新建一个曲线图,并双击打开,继承浮点型曲线(CurveFloat)
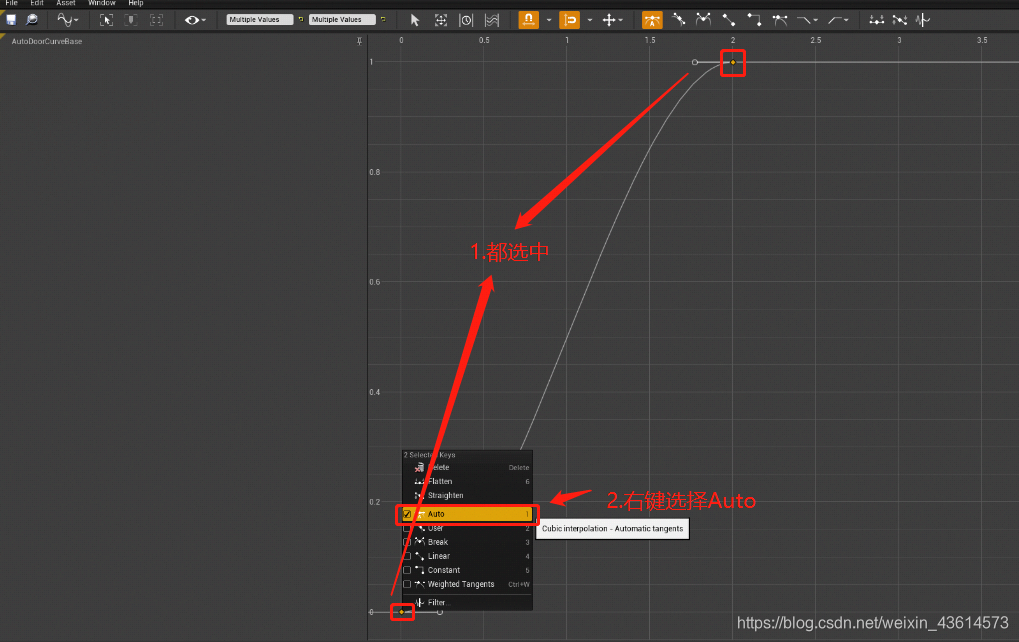
打开曲线图后,添加两个关键帧,方法和蓝图时间轴添加关键帧一样。
注意:曲线平滑的选择,需要同时选中两个关键帧,右键选择Auto方可生效。
5)设置曲线
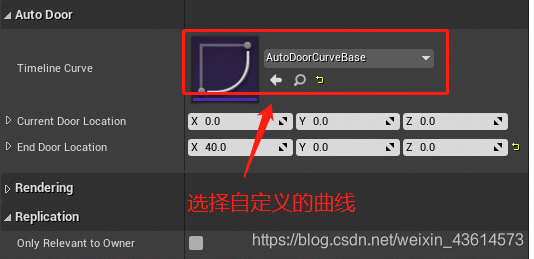
蓝图中,选中蓝图,设置指定的曲线(即自定义的曲线)
6)指定模型
选中静态模型门,给门指定一个模型,这里就依照自己喜好自由发挥

7)修改碰撞盒子
修改碰撞盒子的大小,一定要比门大。碰撞盒子的Collsion Presets指定为OverlapAll
