After the windows install a virtual machine installed Ubuntu system configuration java environment
Because jvm to compile, and debug on Linux OpenJDK better, so I want to run in a virtual machine on a Windows system and then install Ubuntu on a virtual machine, configure the environment for debugging java jvm
- Windows environment: Windows10
- Virtual Box:VirtualBox-6.0.2-128162-Win
- Ubuntu version: ubuntu-18.04.2-desktop-amd64.iso
- JDK:jdk-12_linux-x64_bin.tar.gz
**
A: VirtualBox virtual machine installation
**
** 1: ** There are many online virtual machine types to choose from, you can search on their own, attached hereto installation package links the virtual machine (because the document can not be directly attached installation package)
VirtualBox_v6.0.2.rar:
Links : https://pan.baidu.com/s/1Op5M-1goFWaZ3unaHTilYA
extraction code: 93ez
installation interface is as follows:
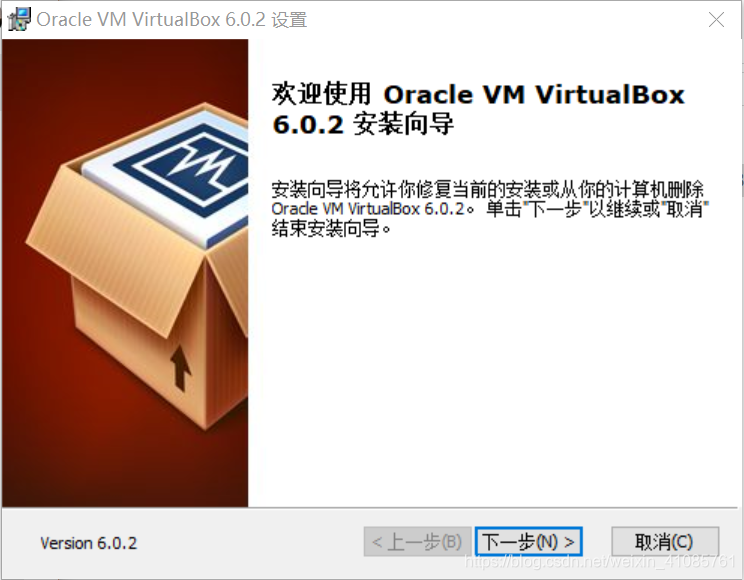
the installation instructions to complete the installation Virtual Box,
* 2: ** open the need to enter the product key after installation : UG5J2-0ME12-M89WY-NPWXX-WQH88 , there are many online VMware Workstation can be found to the key, if this key is invalid, then
** 3: ** compatibility issues that may arise
bcdedit / set hypervisorlaunchtype off Access Denied
VMware Workstation and Device / Credential Guard incompatibility (windows home edition), the solution: Open the Windows Services, stop the HV hosting
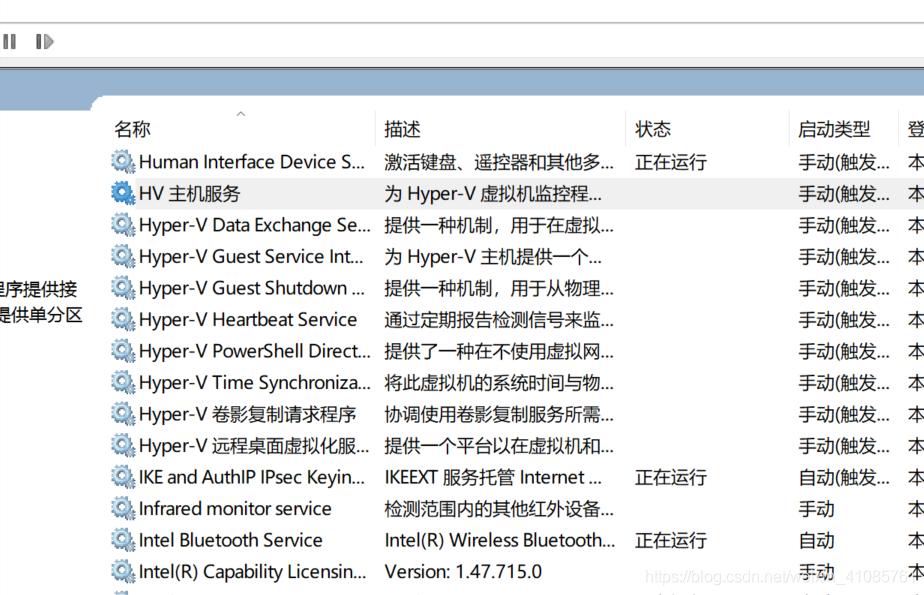
open WIndows PowerShell

Run with administrator privileges command: bcdedit / set hypervisorlaunchtype off, restart the computer, which I will not repeat them
**
Two: Install Ubuntu system on a virtual machine
1 **: ** can go to the official website to download the Ubuntu ISO image file: https://www.ubuntu.com/download/desktop
share this ubuntu-18.04.2-desktop-amd64.iso version, you can choose their own needs Ubuntu version.
Links: https://pan.baidu.com/s/1ie0K4OXA59fhqOObTNgdTA
extraction code: 2d8h
copy the contents of this open Baidu network disk phone App, the operation more convenient oh
**
Open Virtual Box click on File -> New -> New Virtual Machine
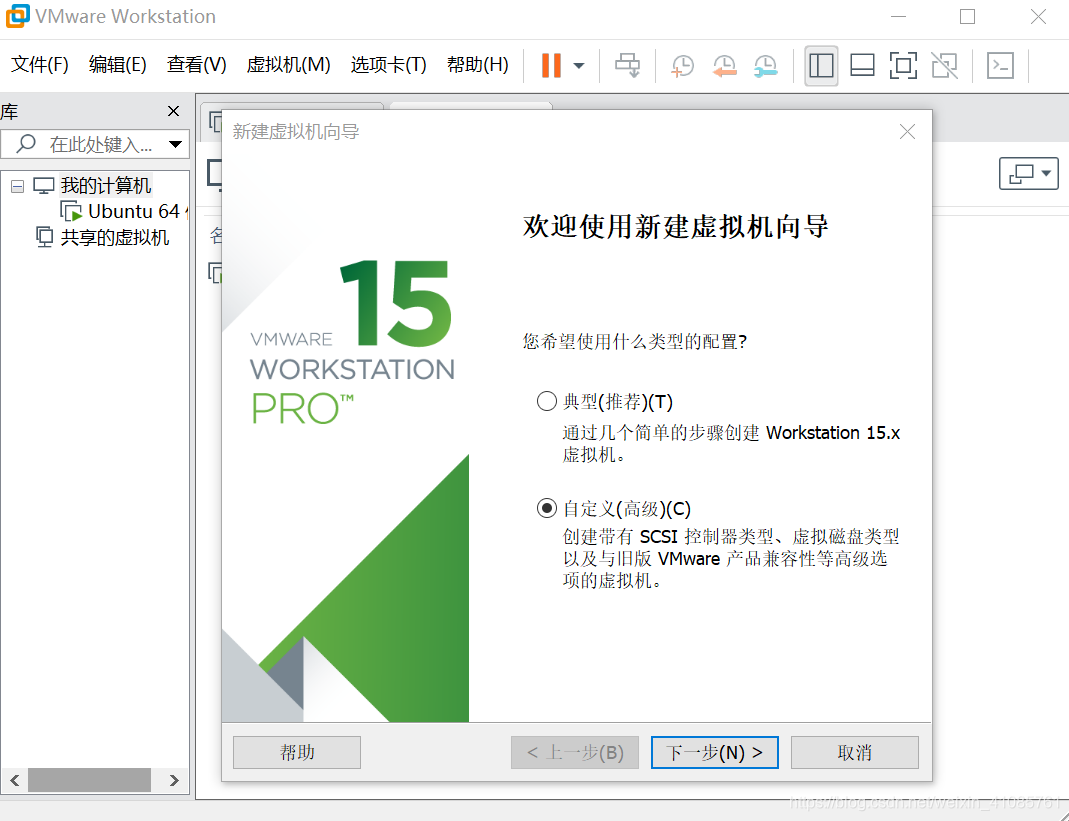
When select Custom and click Next
**
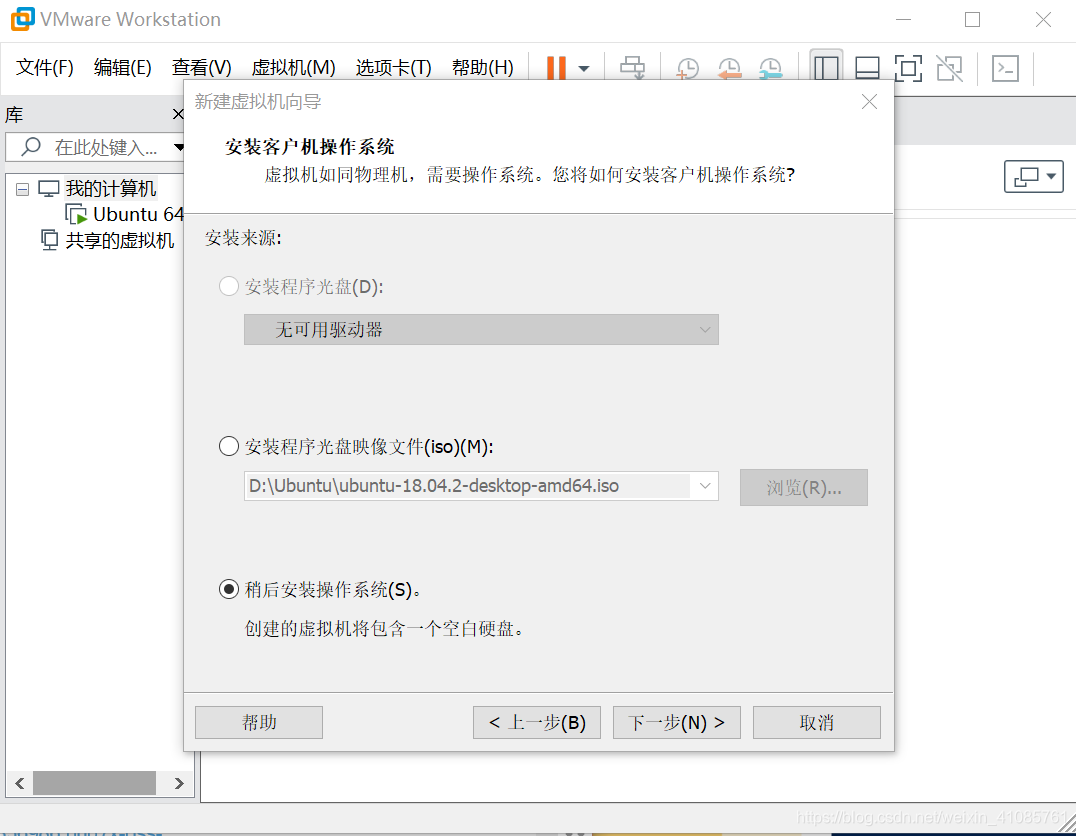
When you select to install the operating system later and click Next
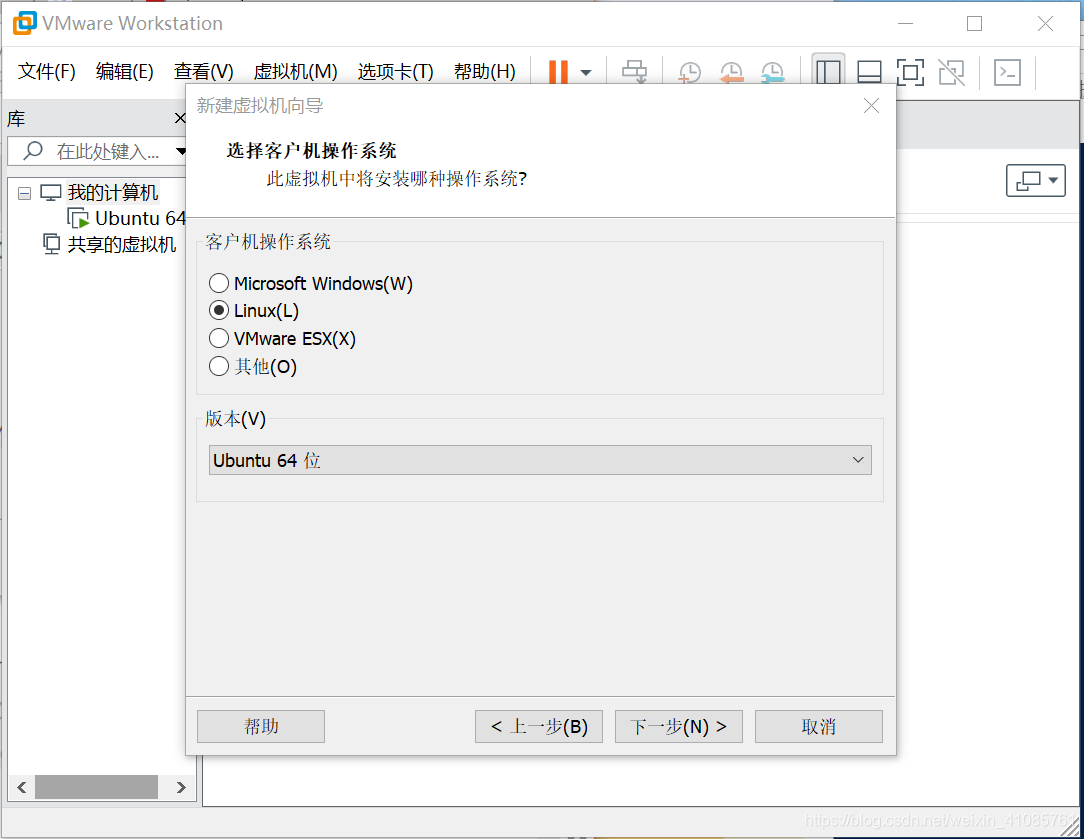
After selecting Linux Click Next
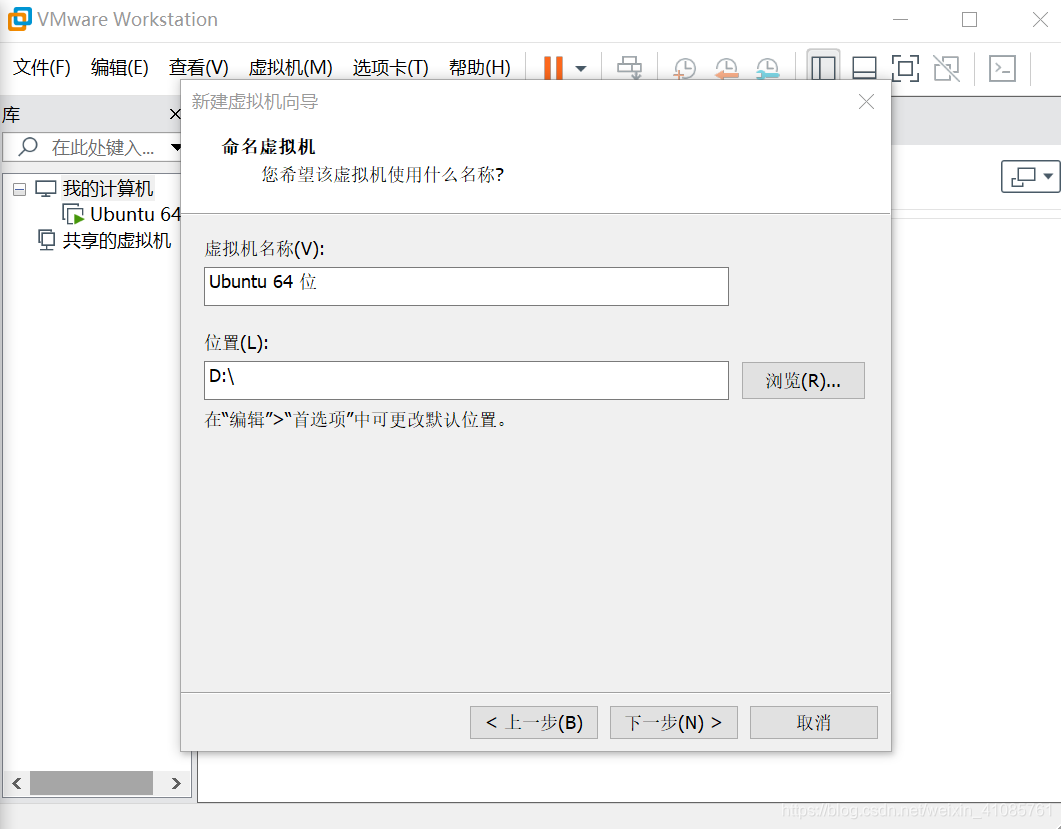
After populated virtual machine name, and select the installation location and click Next
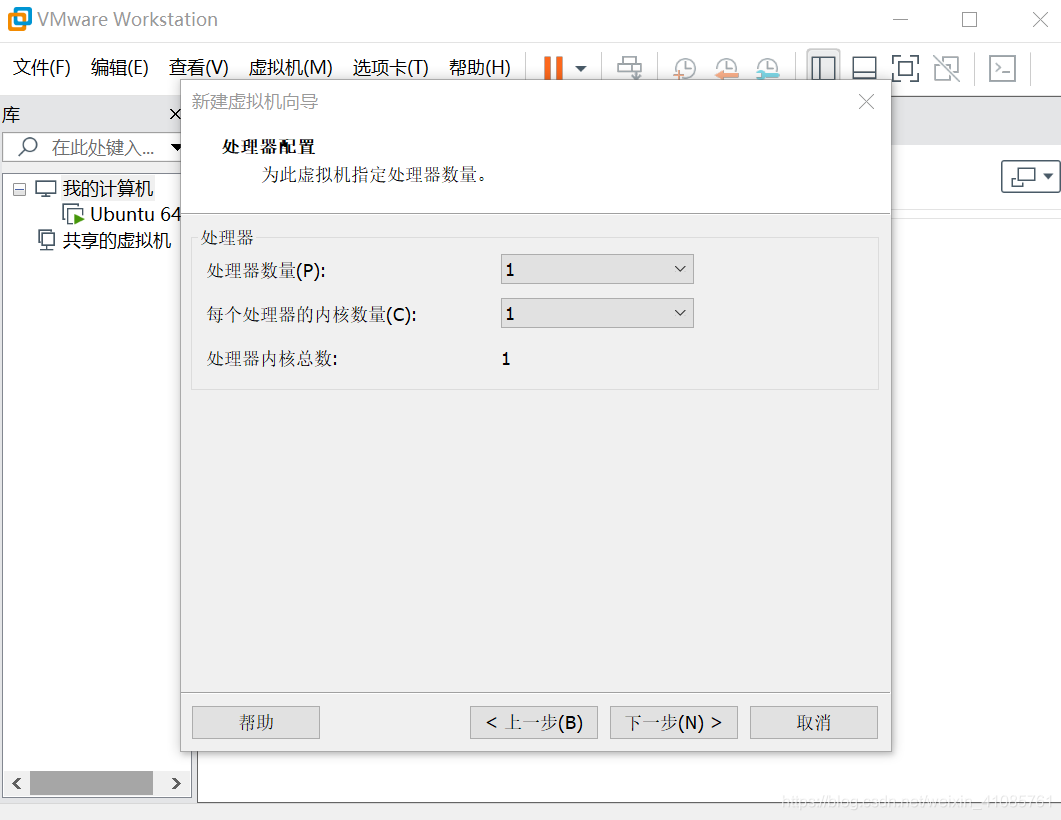
Configuring the number of processors and cores
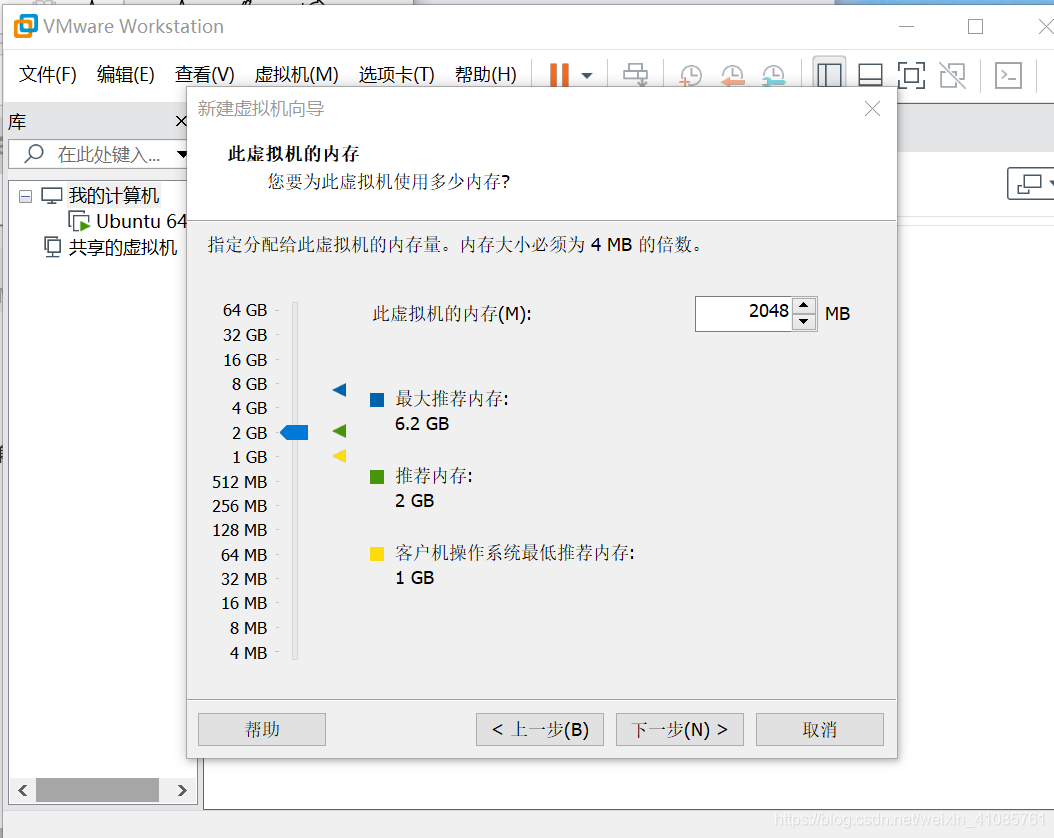
Select Memory
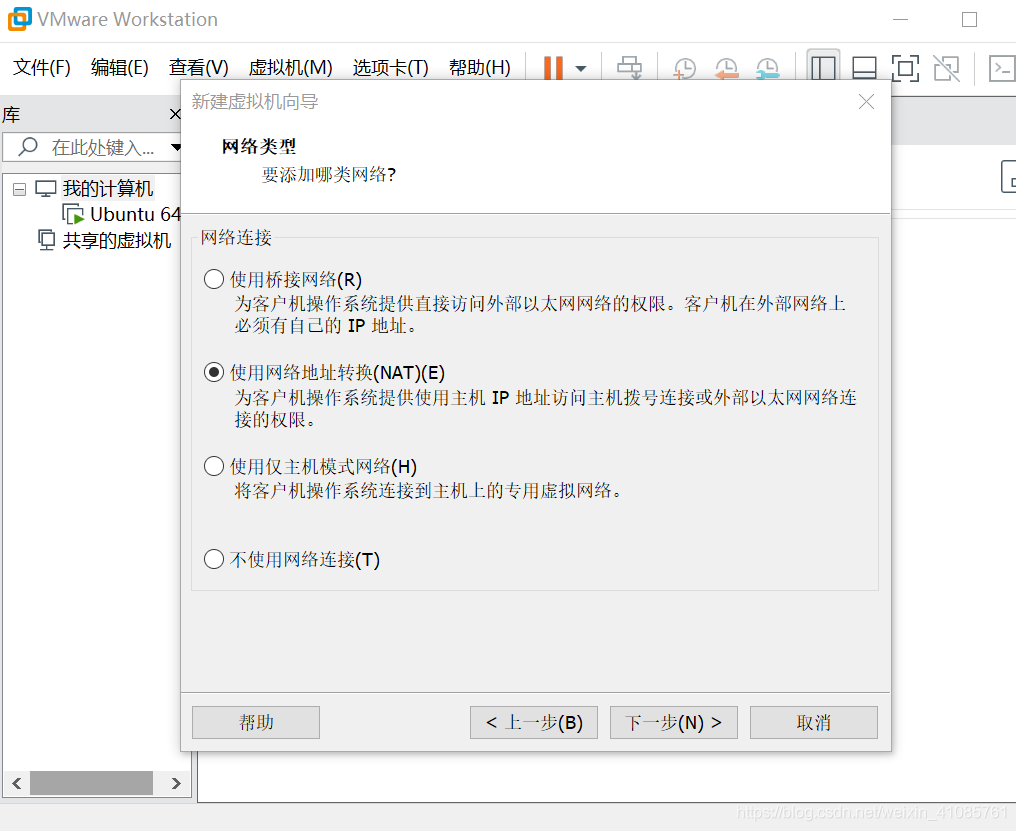
Select the type of network
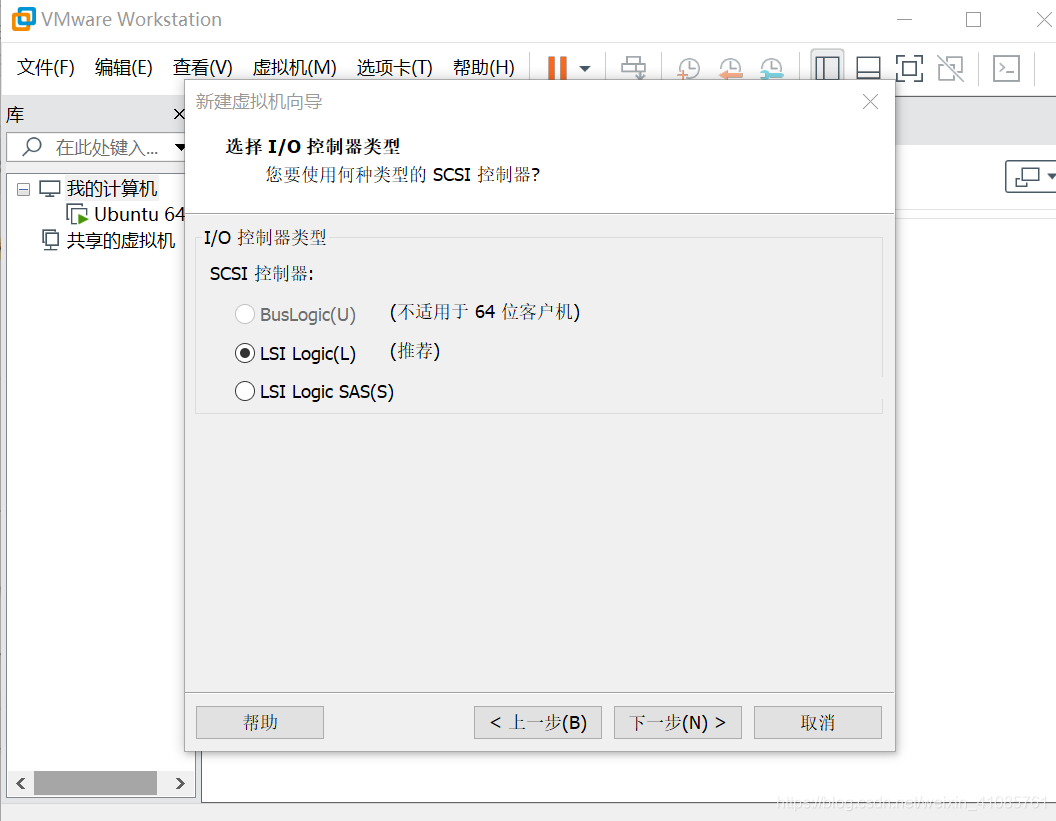
Select the I / O controller
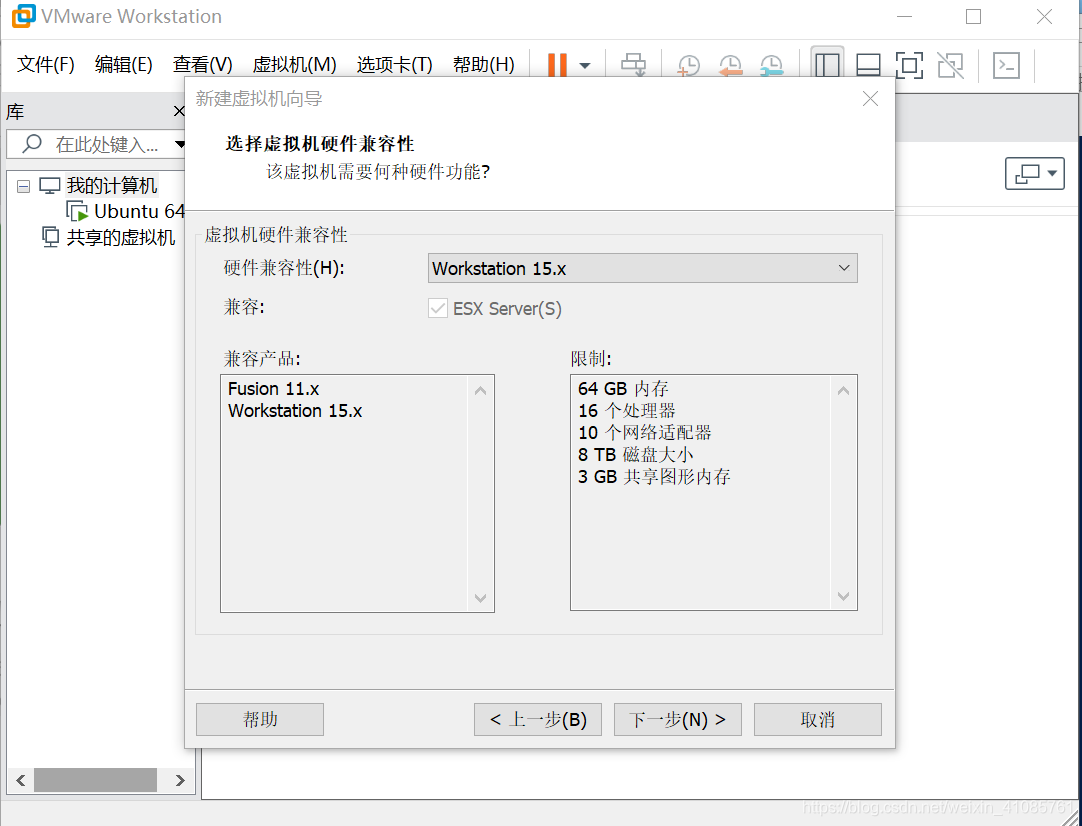
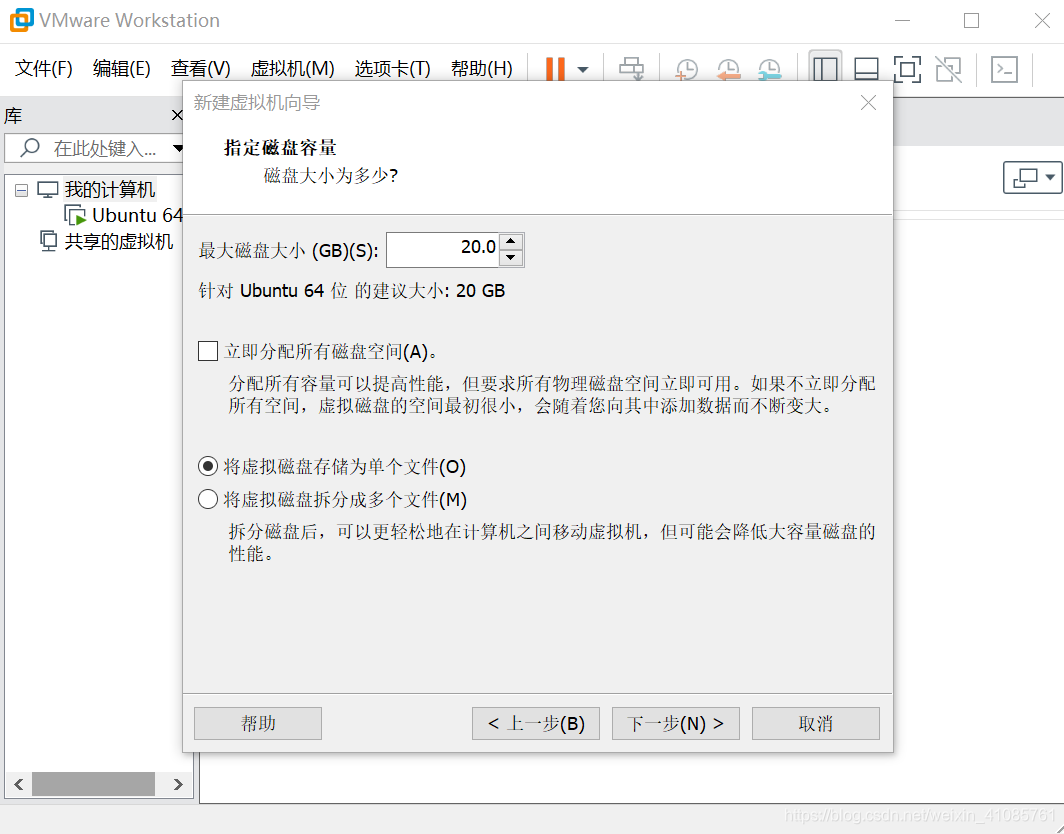
click Next, select the type of virtual disk SCSI (recommended), create a new virtual disk Click Next, click Next to
select the file and click Next after single virtual disk storage to
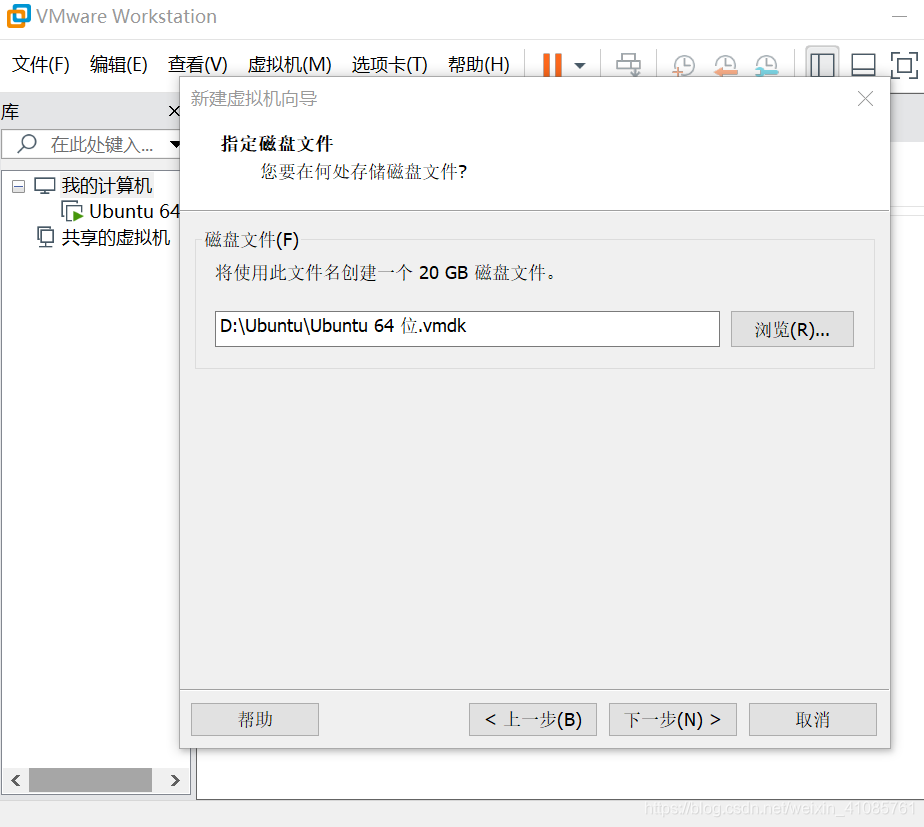
click on the next after a specified disk file step
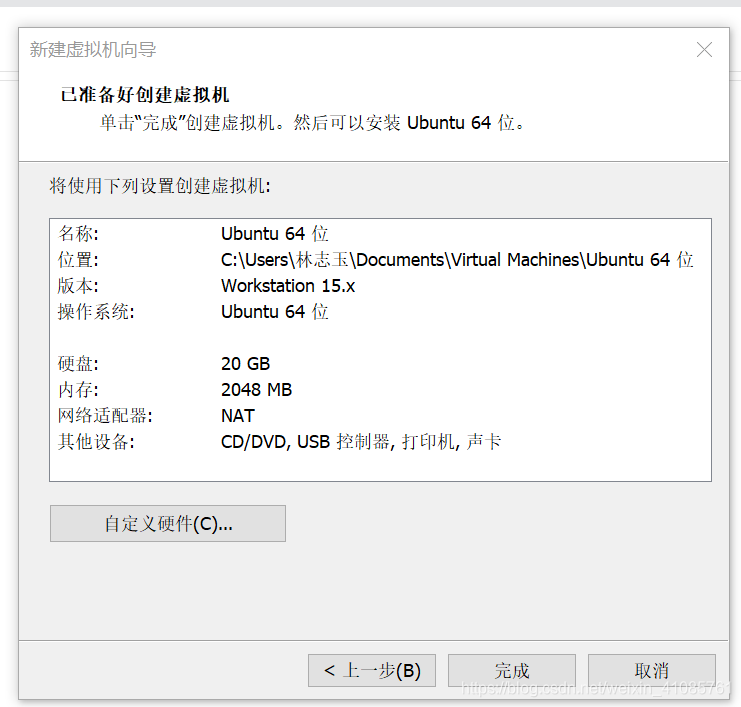
select custom hardware
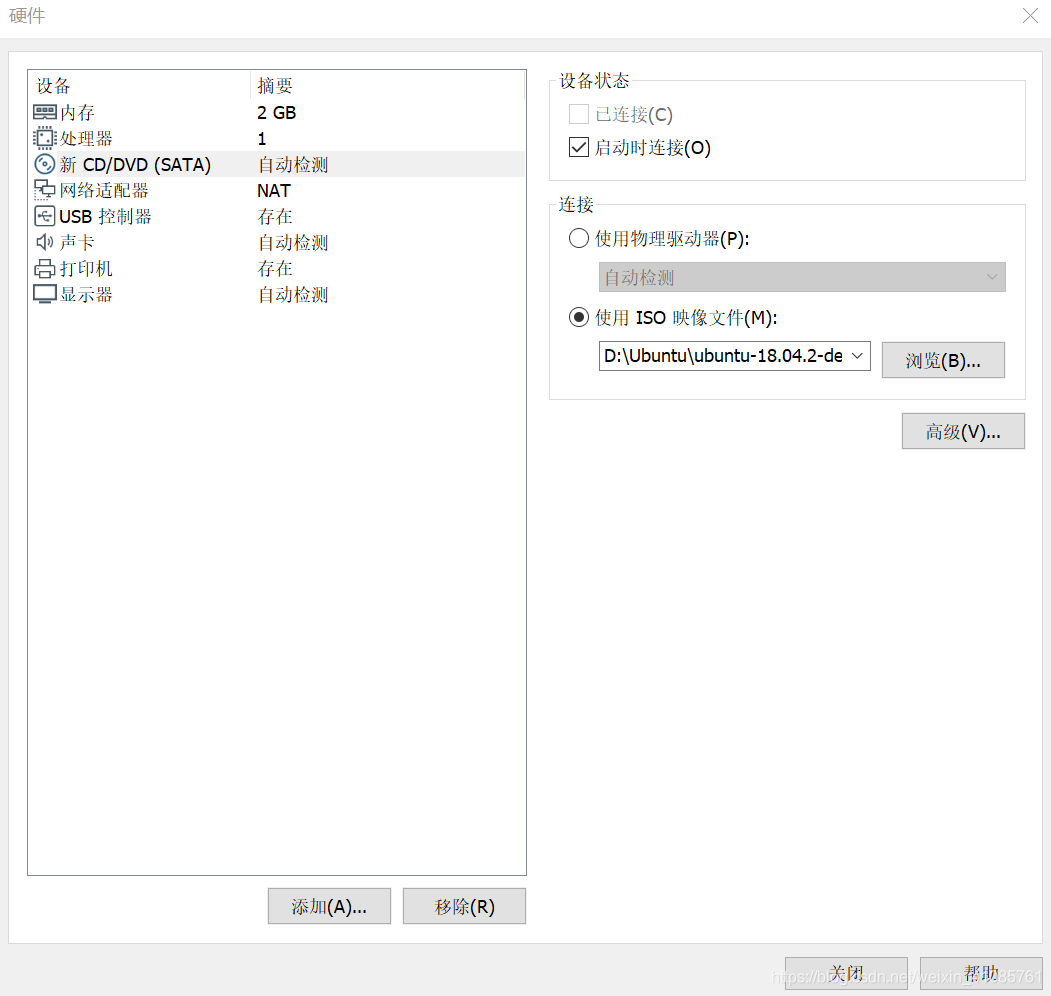
Click on the new CD / DVD, ISO image file selection after use iso image in a local directory Click Finish
 **
**
Three: Configure java system environment on Ubuntu
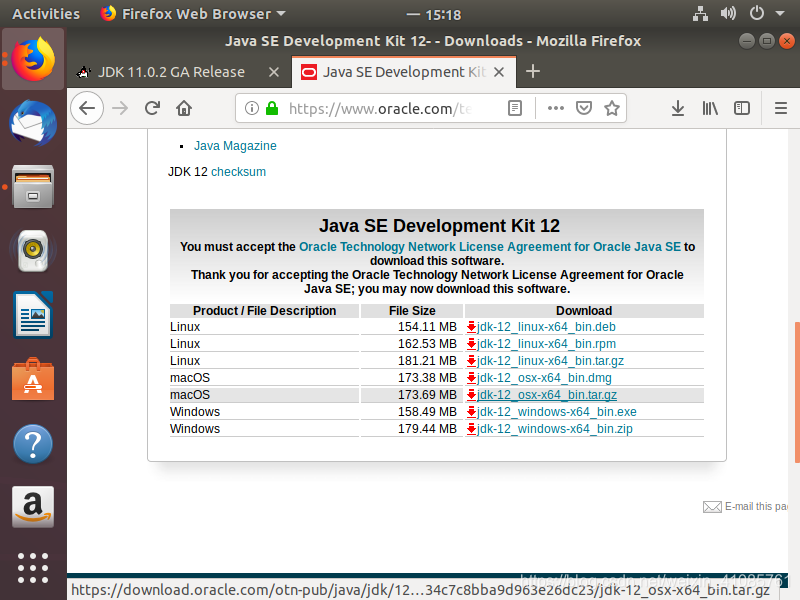
1 **: ** Open FireFoxliu browser in Ubuntu system, open Oracle's official website: https://www.oracle.com/technetwork/java/javase/downloads/index.html
May need to download version of jdk, download this article is jdk_12_linux-x64_bin.tar.gz
** will be able to copy the file to the download folder
 - cd /home/linzhiyu/Desktop                            *打开bin.tar.gz所在文件夹
 - tar -zxvf jdk-12_linux_x64_bin.tar.gz            *将文件解压到当前目录
 - mkdir /home/linzhiyu/Desktop/java               *在当前文件夹下创建Java文件夹,用以安装java
 - mv /home/linzhiyu/Desktop/jdk-12 /home/linzhiyu/Desktop/java   *将解压后的 jdk-12_linux_x64_bin.tar.gz文件拷贝至Java的安装路径
 - sudo apt install vim
 - sudo vim /etc/profile
 -
Enter the system password
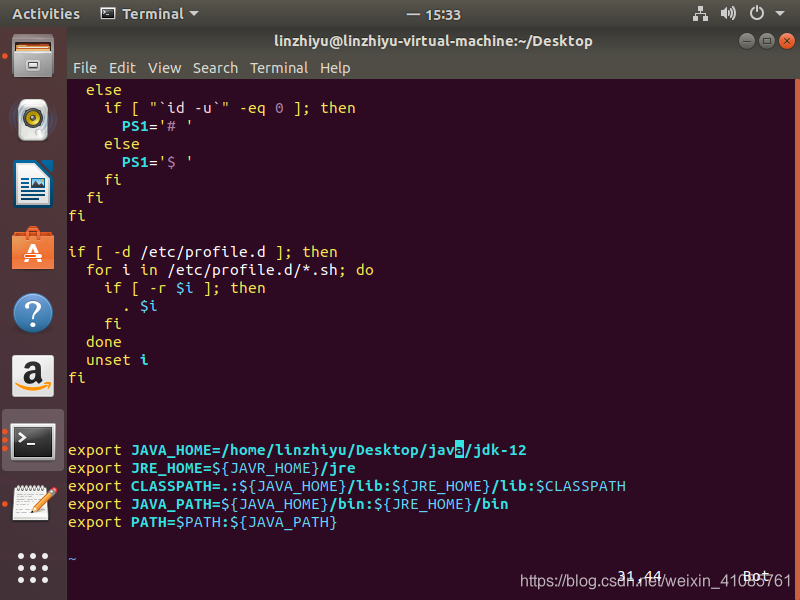
After opening the file click on the Insert button, configure JAVA environment variables at the end of file-
  export JAVA_HOME=/home/linzhiyu/Desktop/java/jdk-12
  export JRE_HOME=${JAVA_HOME}/jre
  export CLASSPATH=.:${JAVA_HOME}/lib:${JRE_HOME}/lib:$CLASSPATH
  export JAVA_PATH=${JAVA_HOME}/bin:${JRE_HOME}/bin
  export PATH=$PATH:${JAVA_PATH}
After the addition is complete, press the ESC key to exit, enter:! Wq to
enter the terminal in Terminal: source / etc / profile
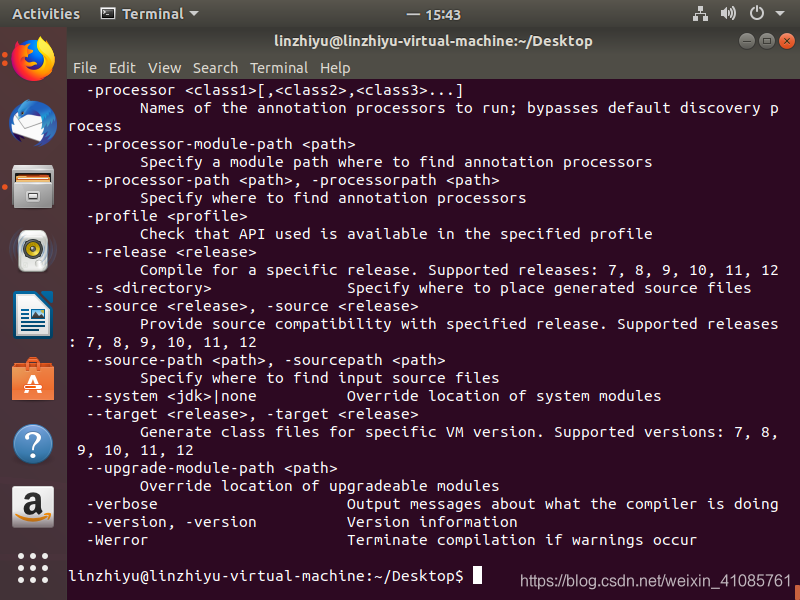
input Javac will not prompt Command not found then the installation was successful:
Enter: java -version
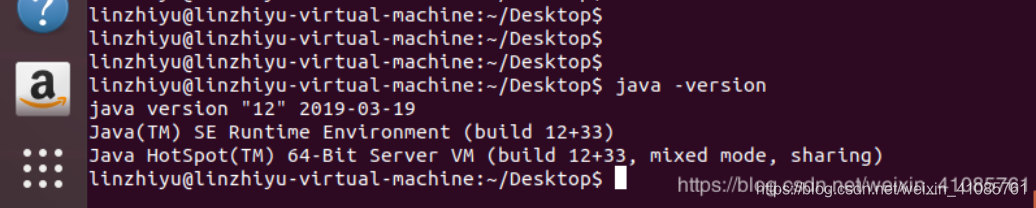
Ubuntu successfully on system configuration Java environment
[. 1]: https://blog.csdn.net/felix__h/article/details/82853501 VM activation key
[2]: https://blog.csdn.net/qq_23599965/article/details/80395396 Hyper and Virtual Box compatibility issues
[3]: https://www.cnblogs.com/fengliu-/p/7867673.html Ubuntu installation
[4]: https://www.cnblogs.com/xuliangxing/p/7066913.html Linux Configuring the Java environment