1. Download the Oracle 11g database installation package
1. Official download address You
need to log in to the Oracle account to download from the official website.
2. Baidu cloud link: https://pan.baidu.com/s/1Byvmcsr9k-XlJt8OmuYqDg
extraction code: mxsr
Two, install Oracle 11g
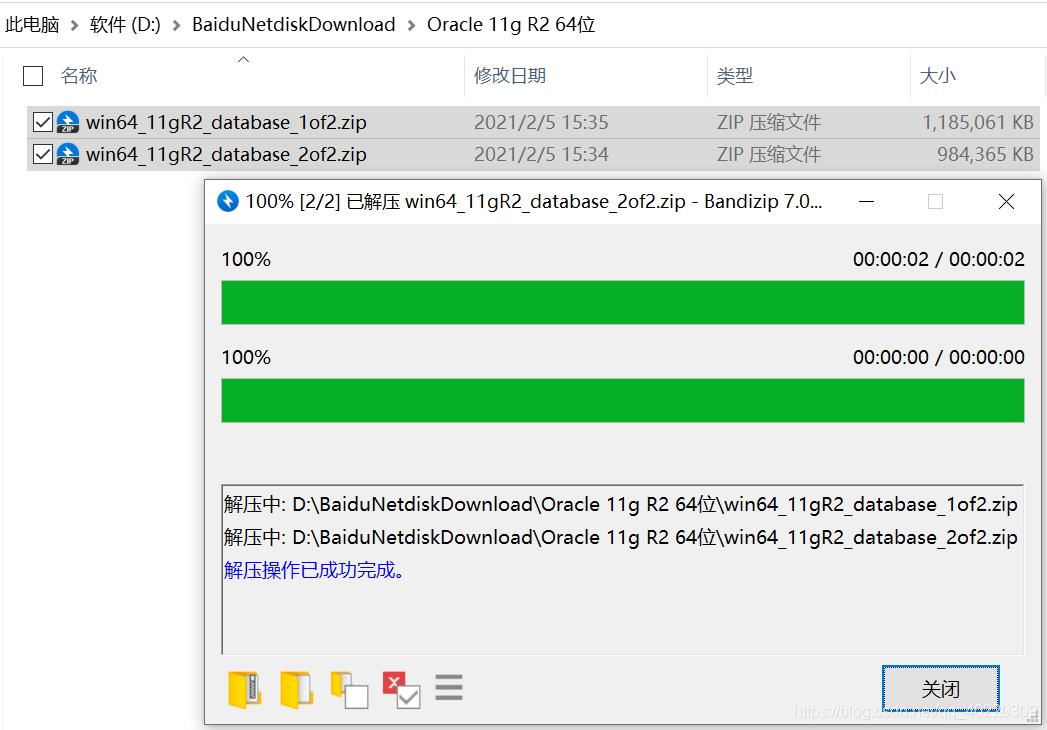
Downloaded should be two compressed packages like the following picture:

1. Decompress the two compressed packages to the same folder (remember that the path file must not contain Chinese, spaces and irregular characters.):
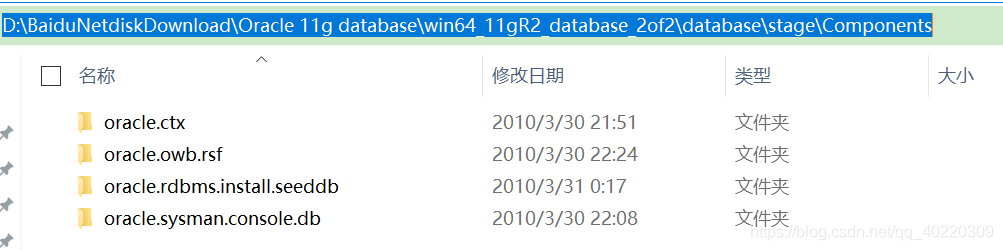
2. Copy all the files under win64_11gR2_database_2of2\database\stage\Components to win64_11gR2_database_1of2\database\stage\Components directory to prevent subsequent installation errors:
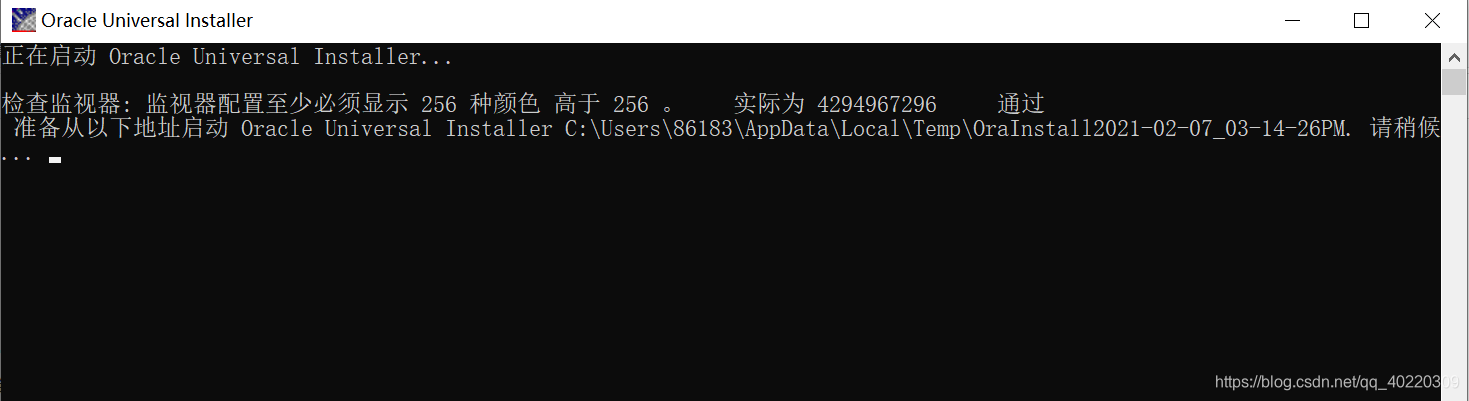
3. Start the installation, go to the path of \win64_11gR2_database_1of2\database\, find the executable installation file [setup.exe ], double-click to install, and wait for the installation interface to appear after the doc window appears:

The following picture will appear at this time, this is Oracle is checking whether the file is complete:
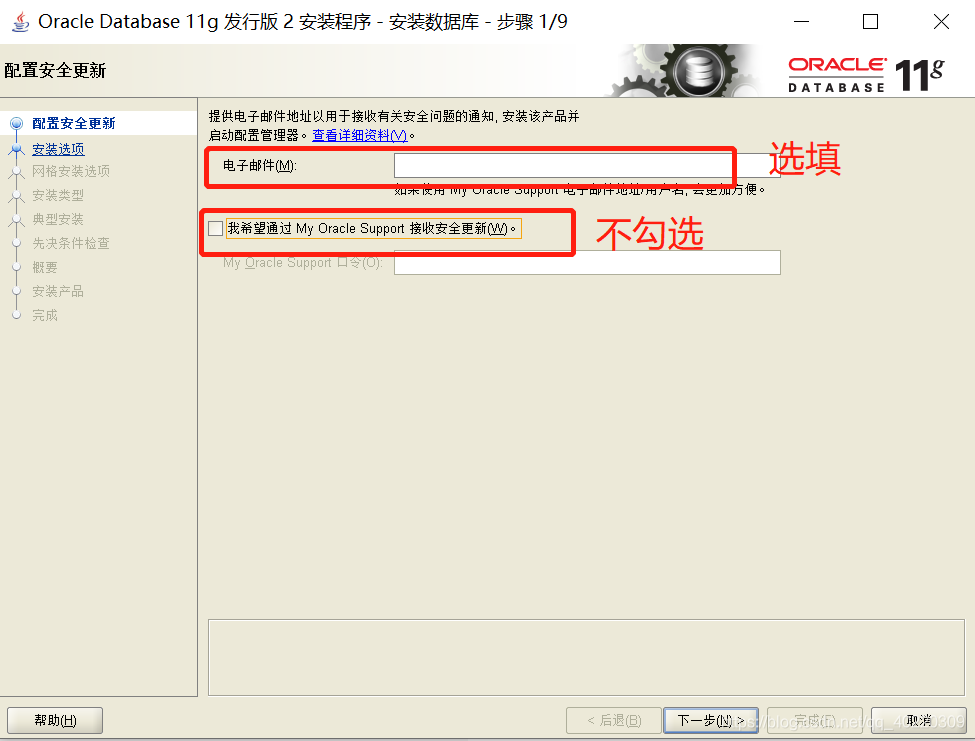
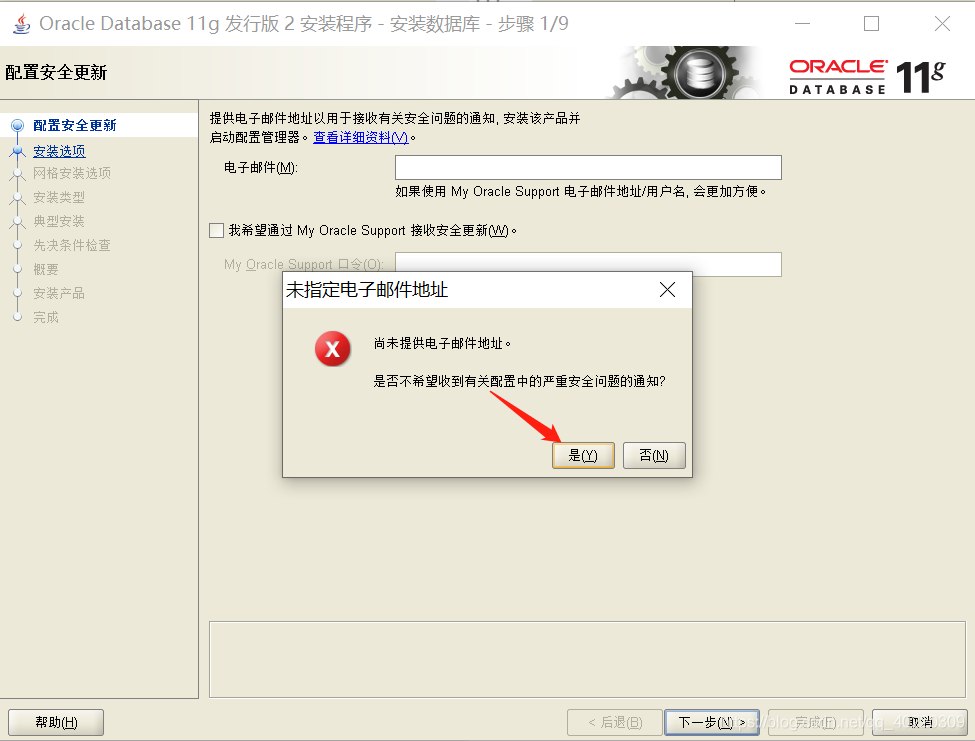
4. Configure the security update. In this step, the email address is optional, cancel the "I want to accept security updates through My Oracle Support (W)", click "Next", you will be prompted that no email address is provided, click "Yes" :
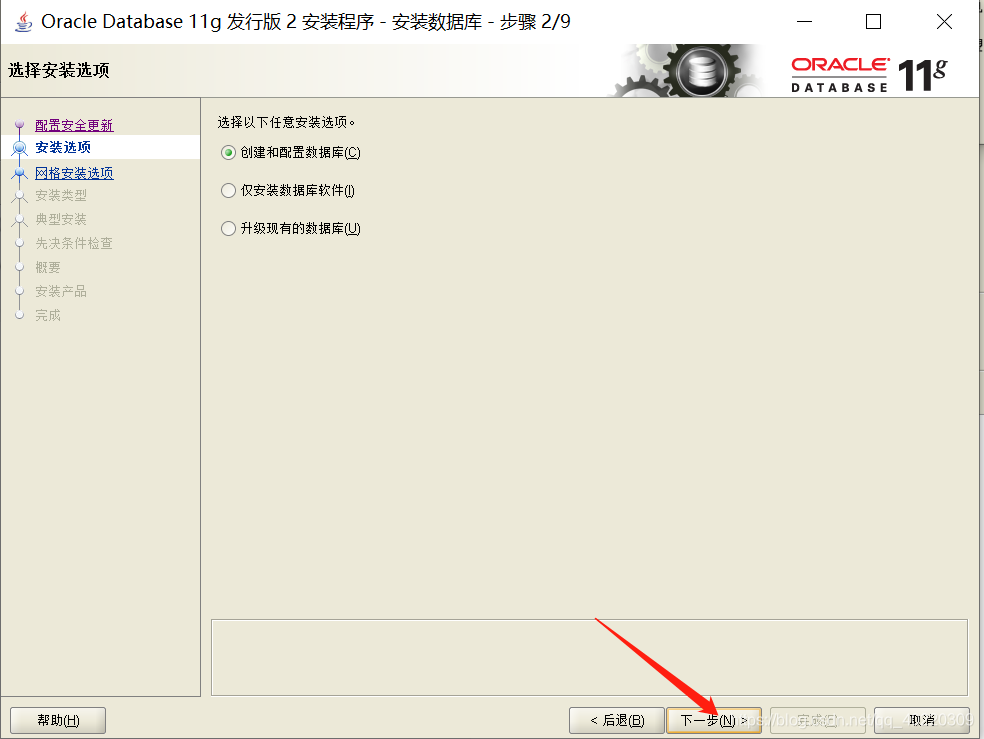
5. Select installation options, select the first item "Create and configure a database", and then click Next:
创建和配置数据库:创建数据库并自动配置相关数据
仅安装数据库软件:字面意思,只安装Oracle软件
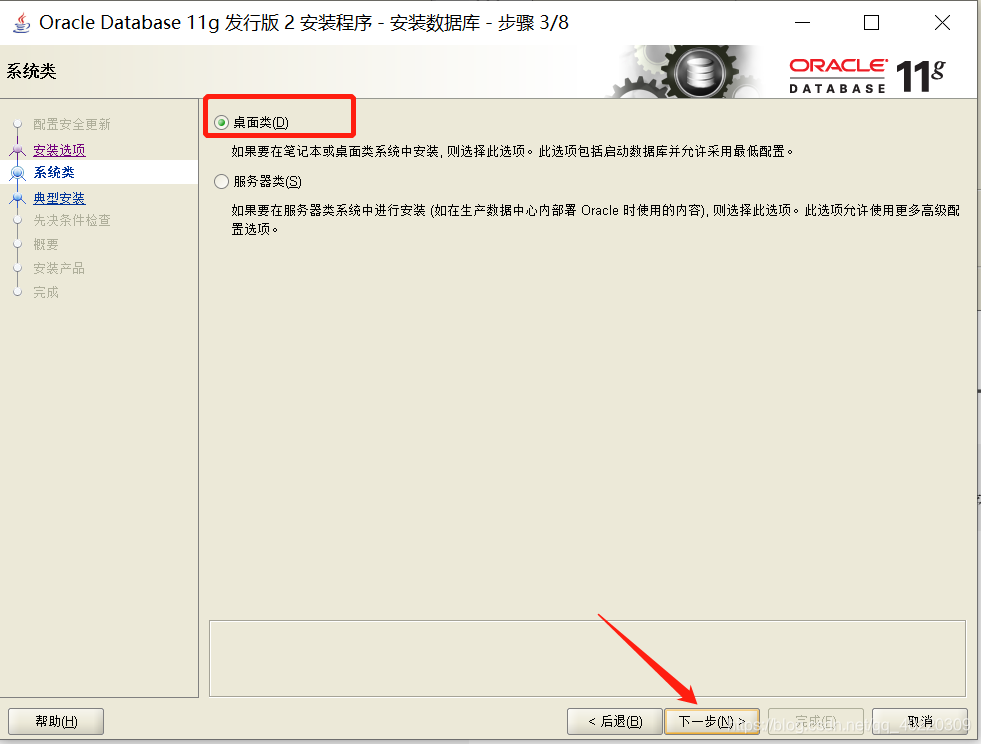
6. Select the system category, select the first desktop category, and click Next:
桌面类:适用于笔记本和台式机,限个人使用,他人不能远程访问,其配置需求最低。
服务器类:适用于服务器,支持企业级应用程序和一些服务。
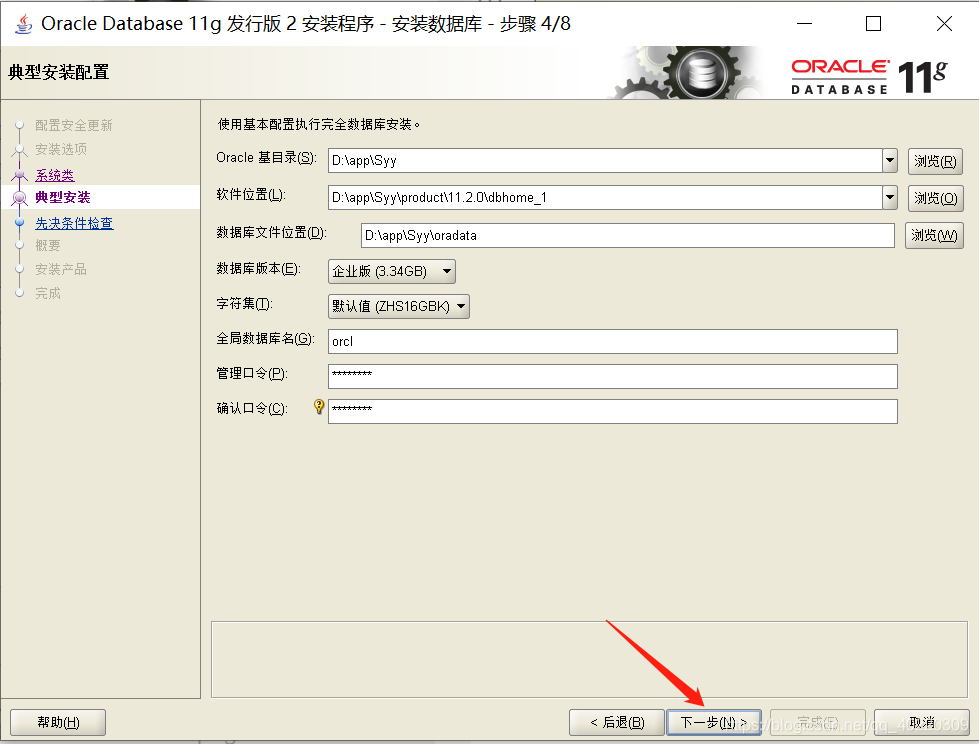
7. Typical installation, important steps. The database name can be the default, but the password and password must be kept in mind. Then click Next:
Oracle基目录:可选择默认显示路径,也可根据自己需求更改路径
全局数据库名:可选择默认,也可更改
口令:即安装成功后,登录system账户的密码
密码要求:至少包含一个大写字母、一个小写字母、一个数字,且长度至少为8个字符。
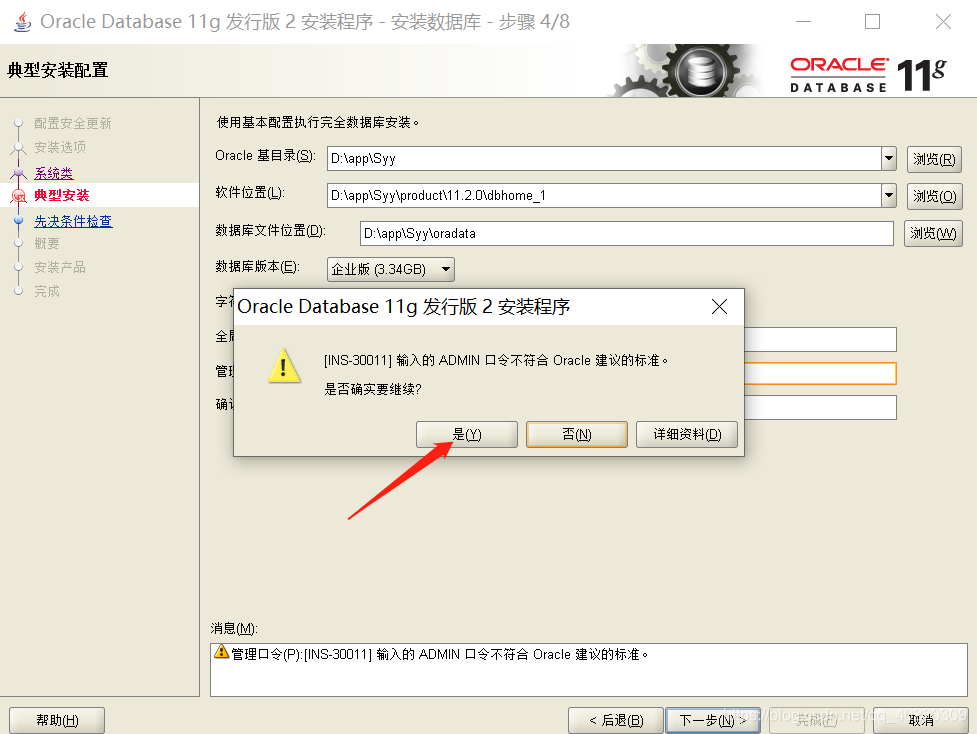
If the entered password is short and simple, the following prompt will appear during installation. Click "Yes" directly to continue the installation:
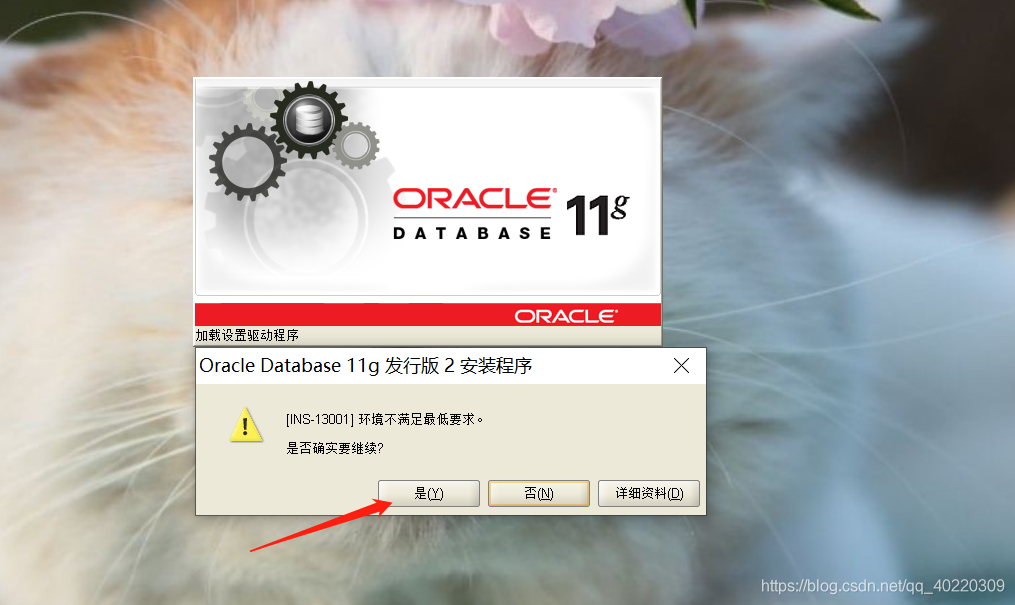
8. Prerequisite check. The installation program will check whether the software and hardware systems meet the minimum requirements for installing this Oracle version, and the next step is OK.
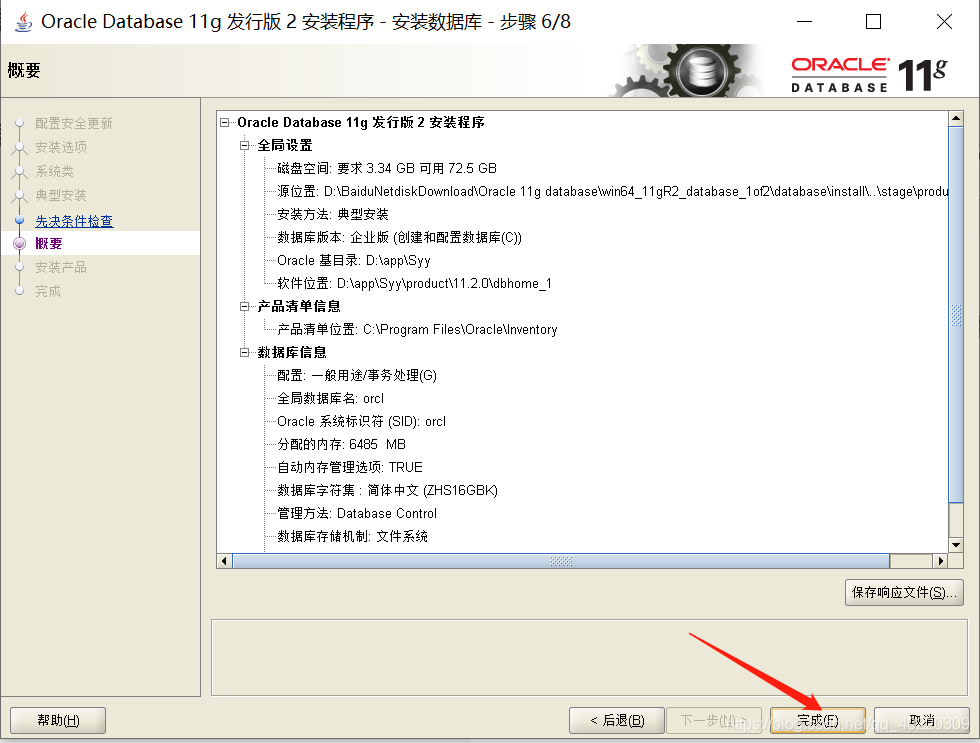
9. Summary, some related selection and configuration information before installation, can be saved as a file or just click Finish without saving the file:
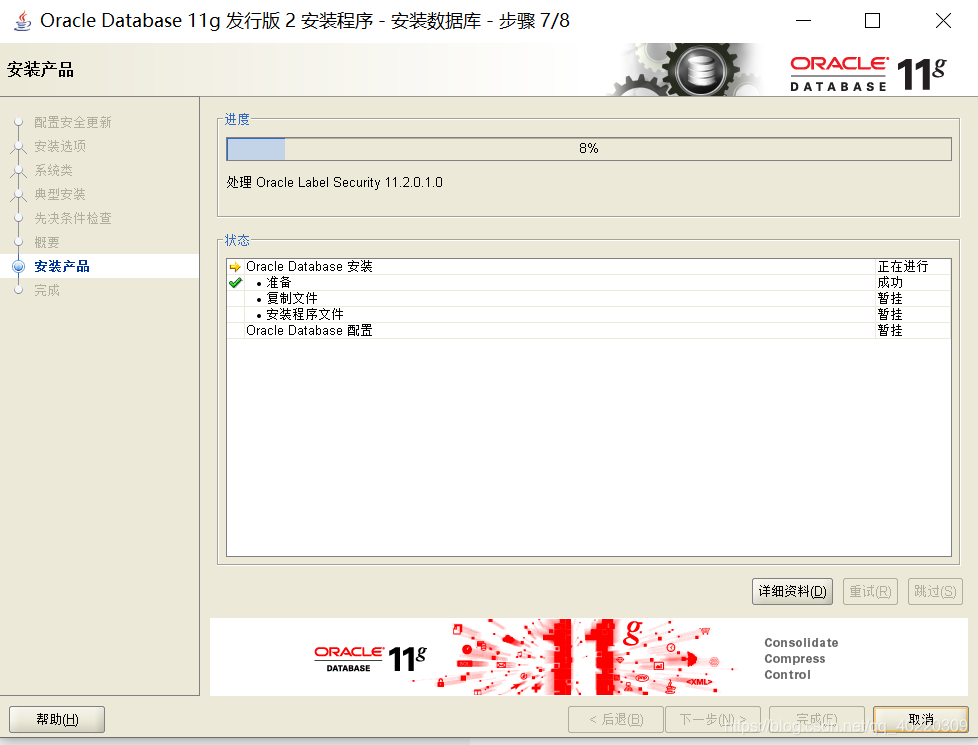
10. Install the product automatically, don’t care:

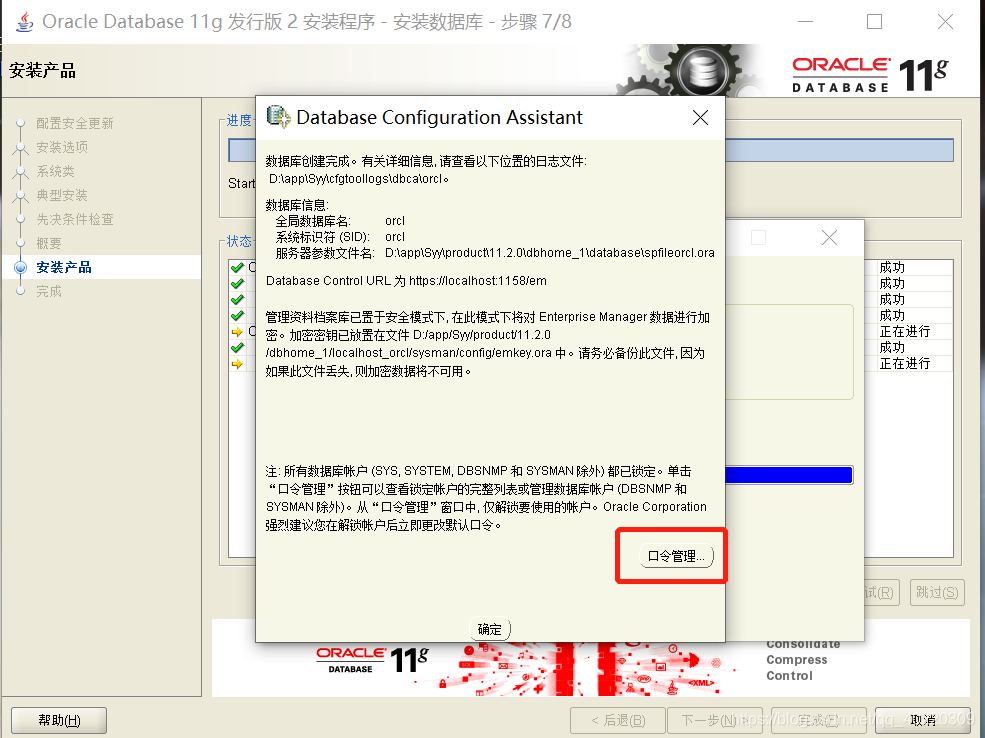
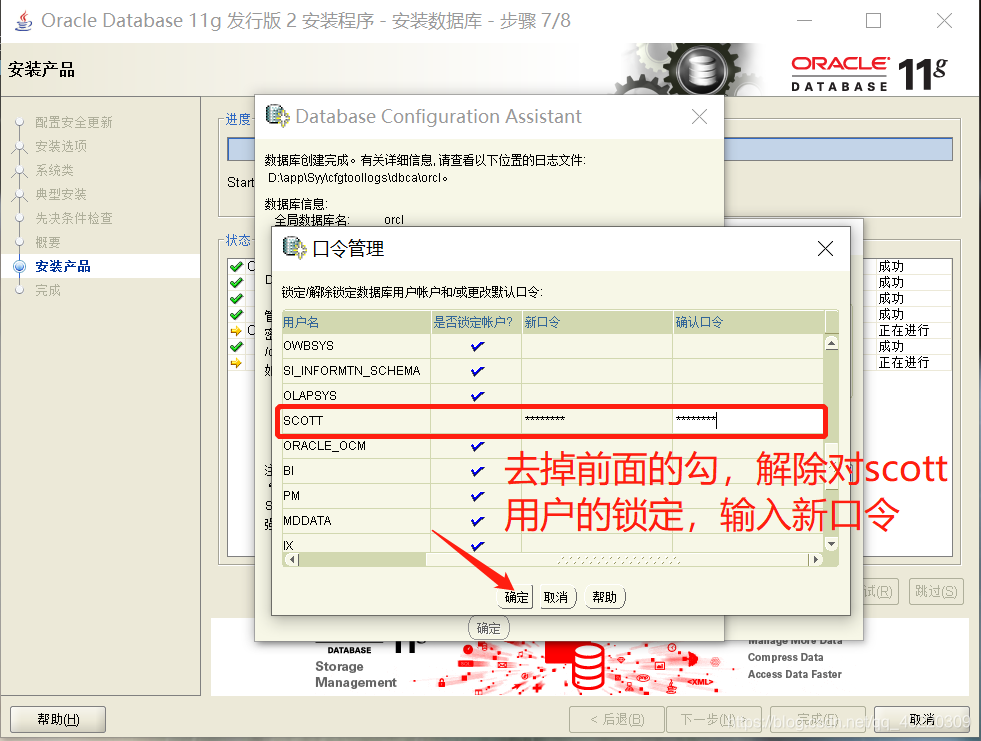
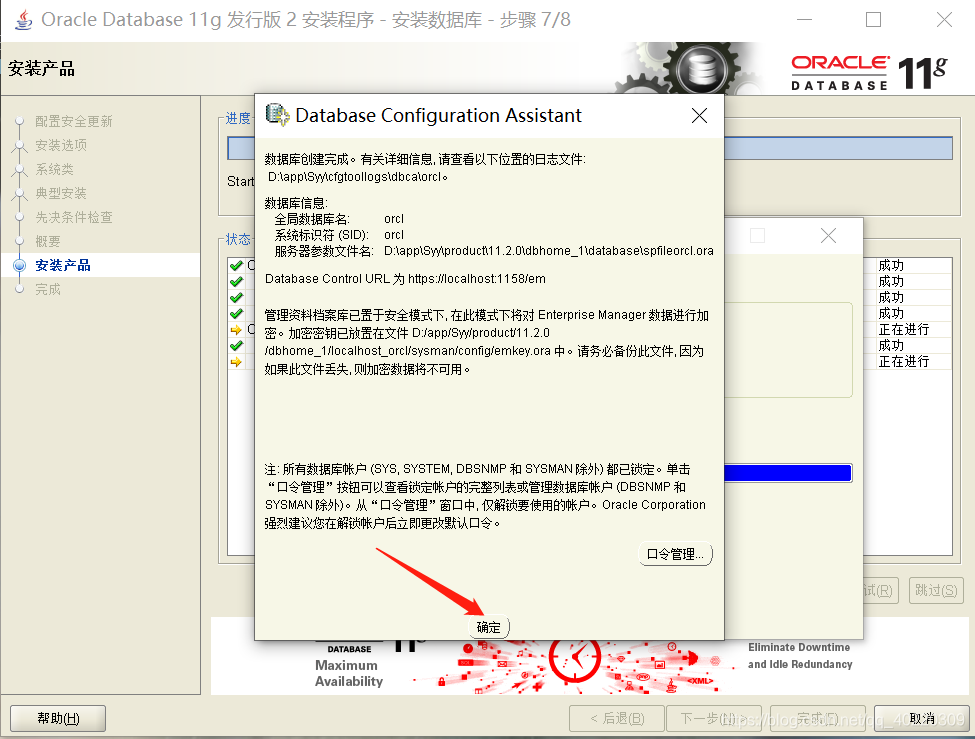
11. After the database instance is created, the system defaults to lock all accounts unavailable (except for the sys and system accounts). Click the password management on the right to unlock the commonly used scott account and enter the password. After the modification is completed, click Click OK:
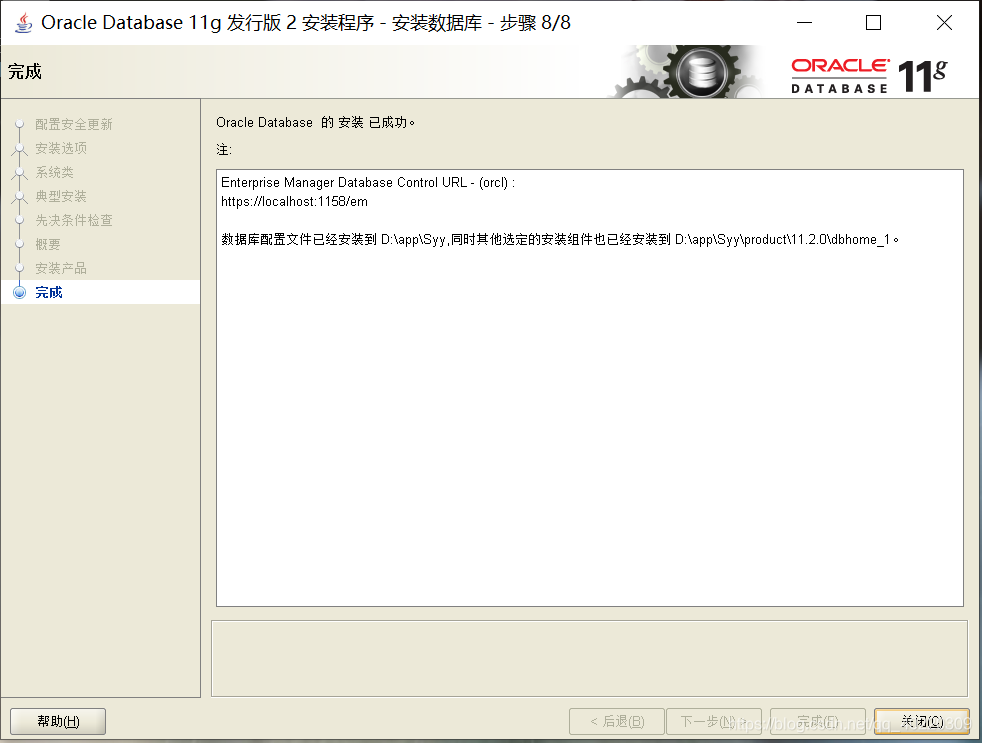
12. At this point, the Oracle 11g database installation is complete. In the "Finish" window, click "Close":
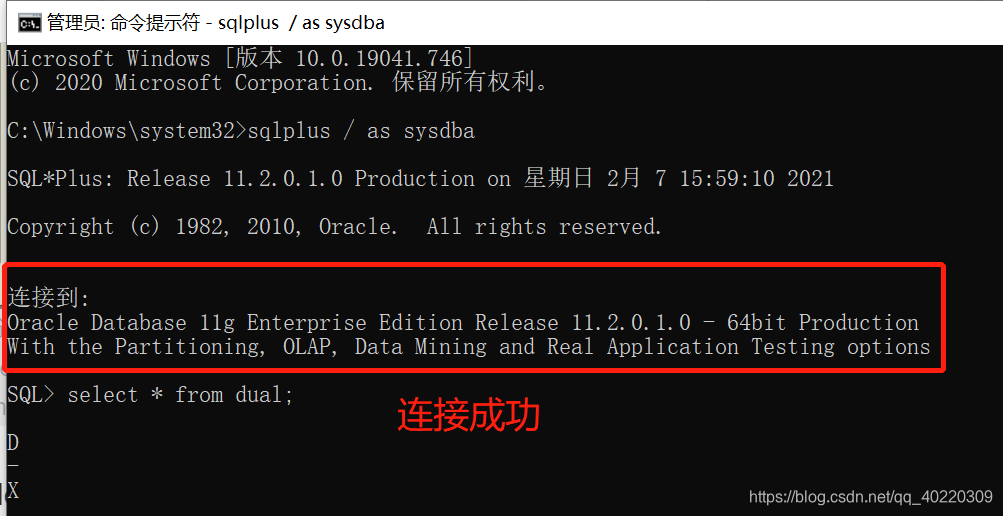
3. After Oracle 11g is installed, test the login and verification of the Oracle database:
1. Open the doc command line window and test by sqlplus / as sysdba and select * from dual;
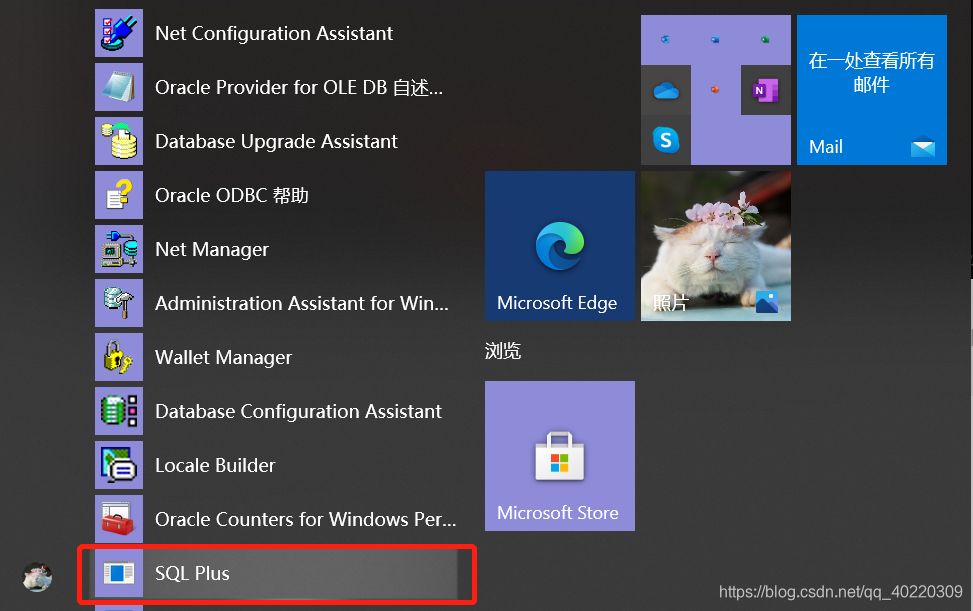
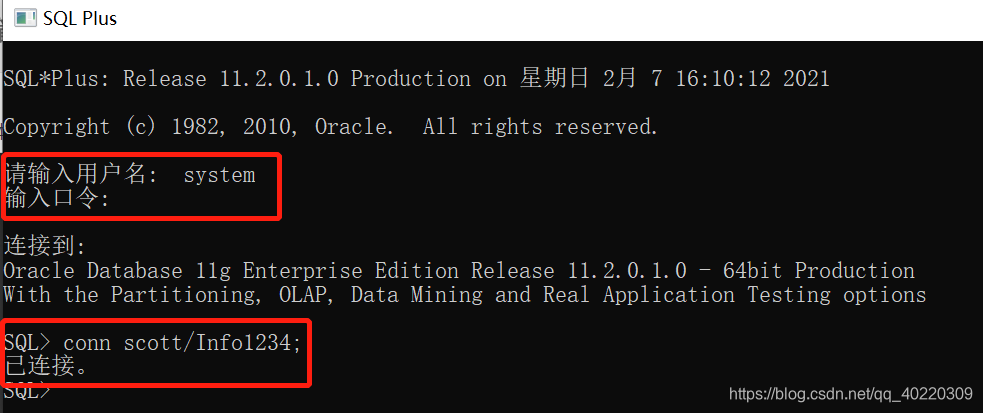
2. Find the installed Oracle in the start menu, then open SQL Plus, log in to the normal administrator account system, and the password is the previous typical installation The password set in the above has unlocked the ordinary user scott, and the test is switched to the scott user to perform database-related operations. To exit the database, enter exit in SQL Plus: