1. Install Ubuntu
1. When the Install Ubuntu button is turned on, the following graphical interface showing the logo will appear. At this time, you can not operate by default, and you will directly enter the language selection interface in step 2 below. 
2. If you need other special operations, you can quickly press F5 on the above interface, and a language selection interface will appear. Press the ESC key and the installation selection interface for Ubuntu will appear as follows. You can make other choices in this interface, or press F1-F6 to perform related operations. There is no special requirement for this step. 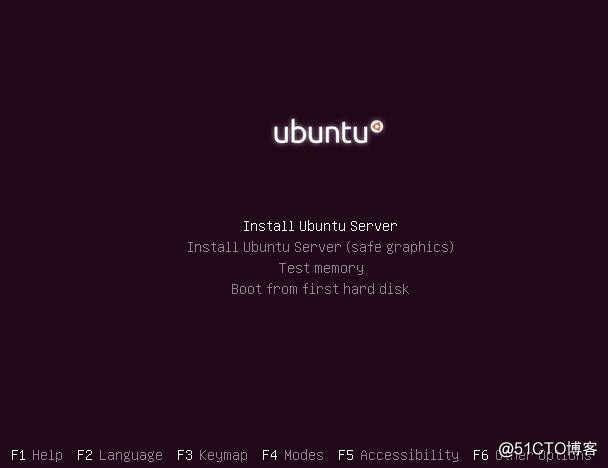
3. Select the language (default English and press Enter) 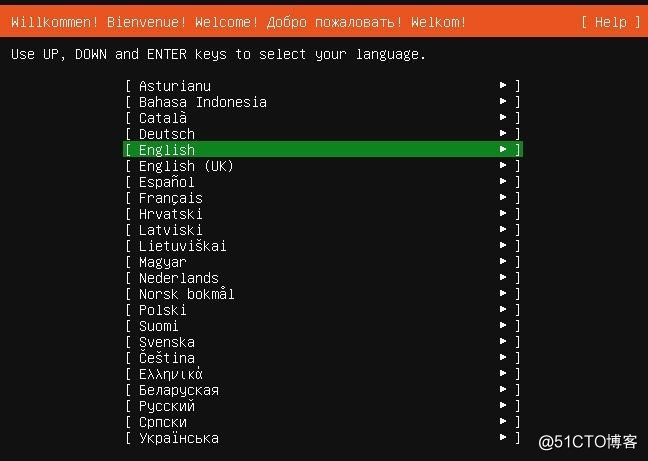
4. Keyboard language selection (default is OK) 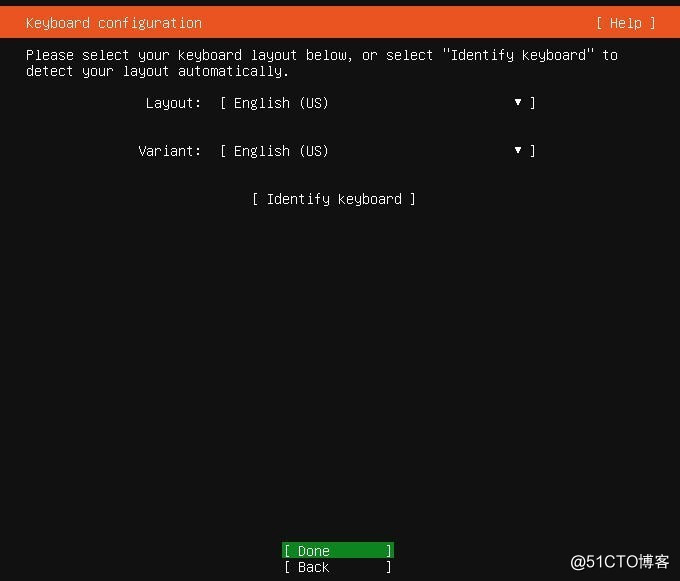
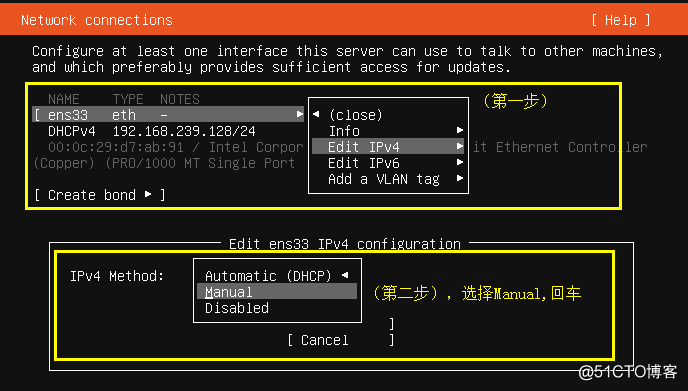
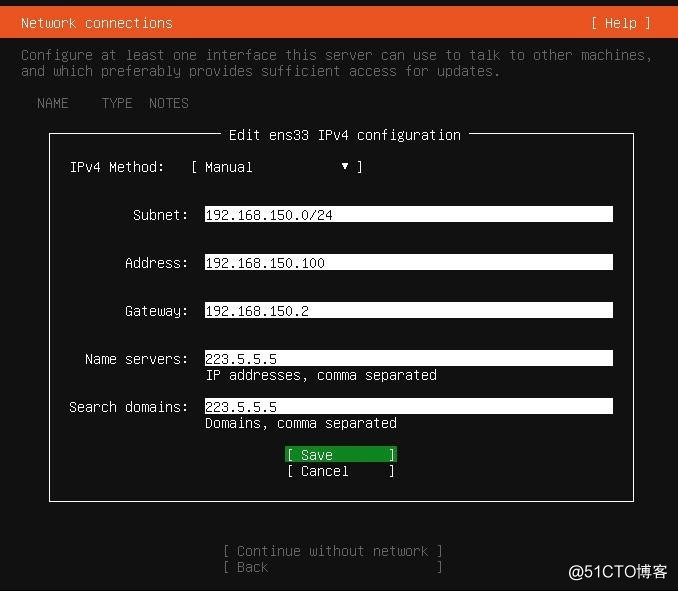
5. Configure the network manually (it can be automatically installed and then configured, the configuration file is in /etc/netplan/***. yaml is different from the Centos configuration file vi /etc/sysconfig/network-scripts/ifcfg-ens32) 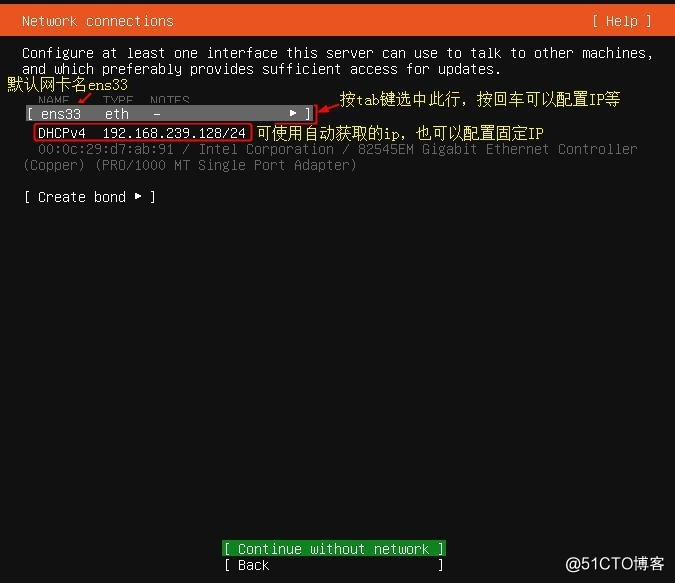
6. Select proxy (no proxy here is not filled) 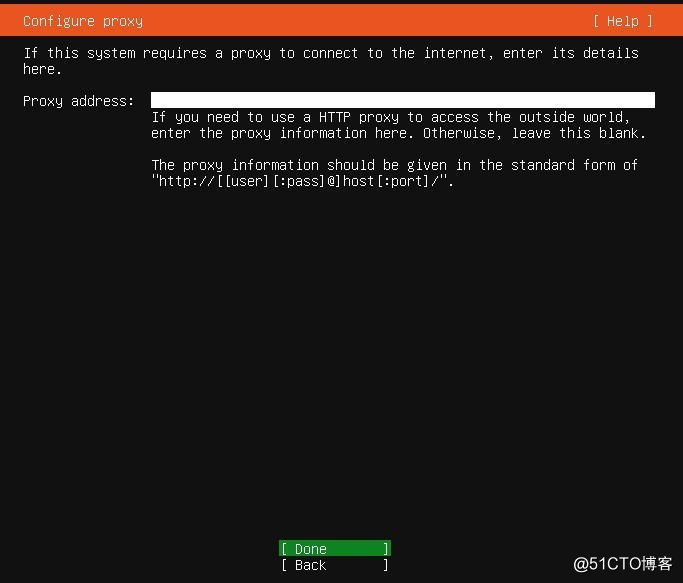
7. Configure software source (configuration file is in /etc/apt/sources.list) Configure Tsinghua Park here 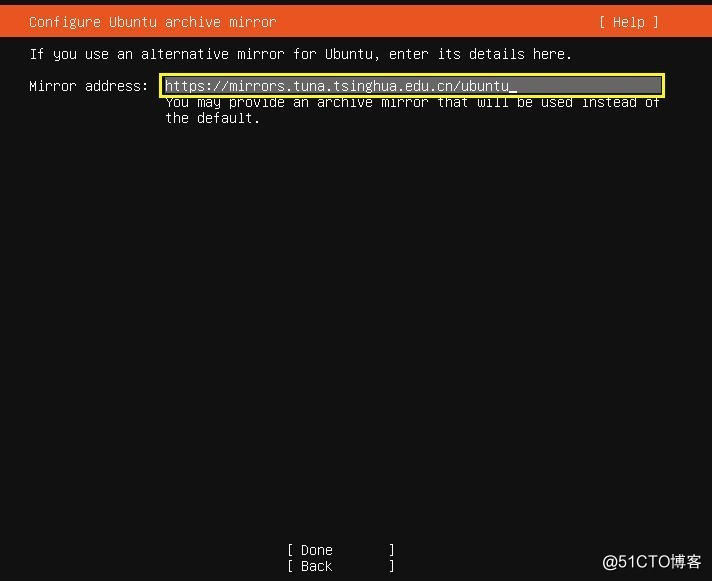
8. Select the default, use a whole disk for automatic partitioning, and use lvm (custom partitioning is also available) 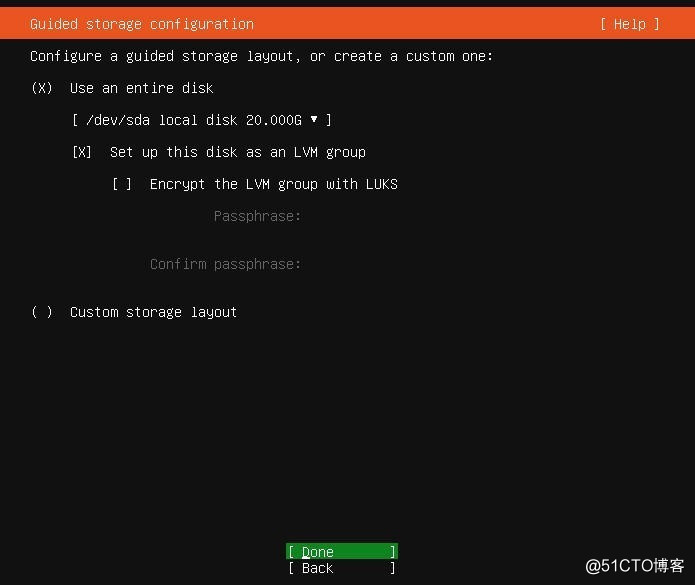
9. After the disk is selected, select continue. 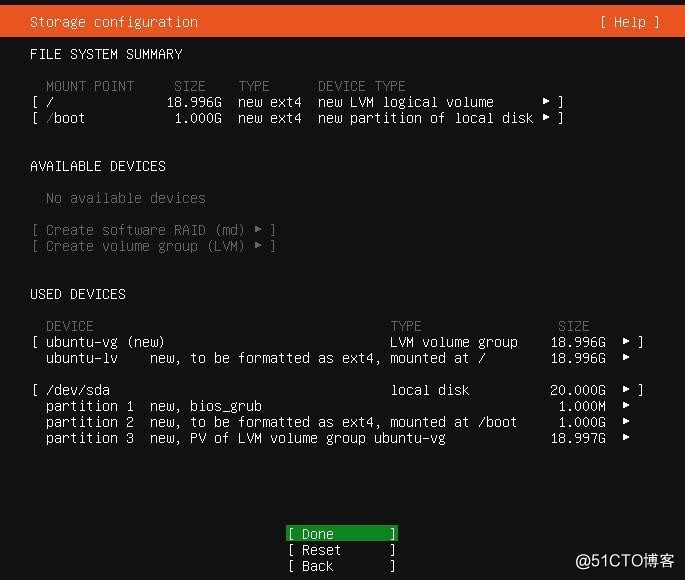
10. Configure system information (set according to your own ideas) 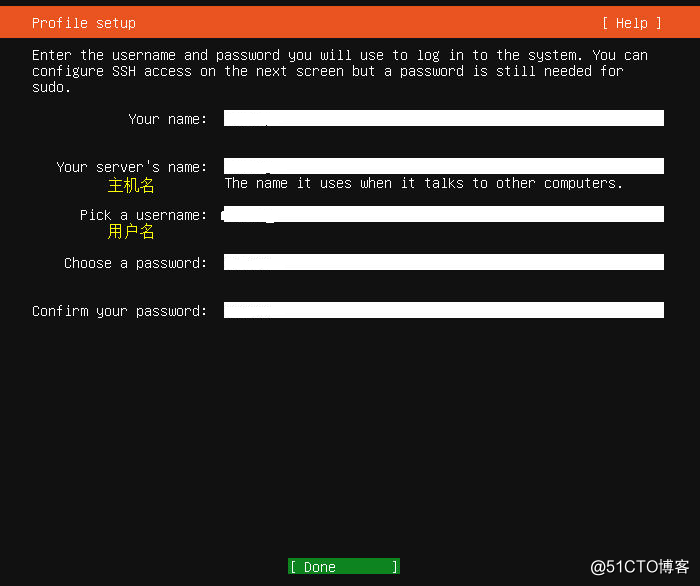
11. Install the openssh remote connection tool (if you are not connected to the network, press the space to remove the symbol cross, and connect to the network after installation is installed) 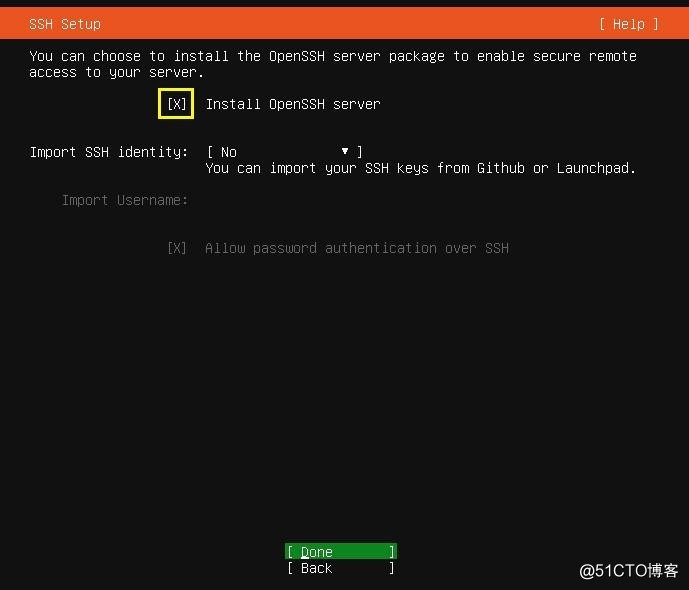
12.
Restart after installation 13. After restarting, log in to confirm that the network connection is normal and update the software source (execute sudo apt update) 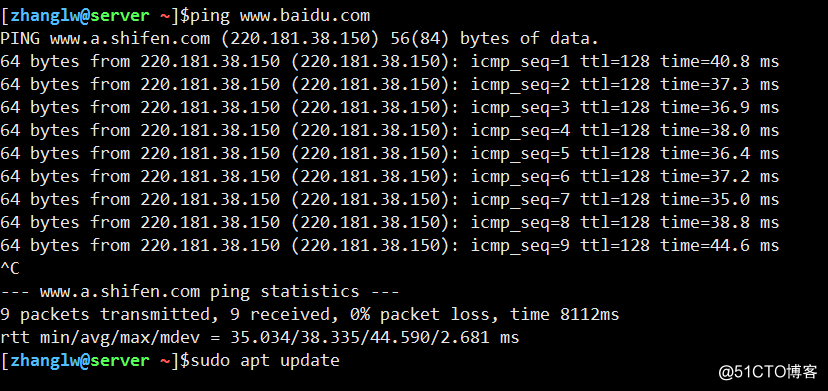
14. Install tools according to your own needs
#sudo apt install openssh-server net-tools lrzsz nmap lsof htop iftop iotop -y
Ubuntu 20.04 LTS installation
Guess you like
Origin blog.51cto.com/7175088/2602378
Recommended
Ranking