一. MVVM理解
1. 先创建一个简单的WPF样例,并逐步将它重构成为MVVM模式。
这个Demo需求是:在界面上放置文本框用来显示定义的类Student中的名字,放置Button来修改Student的名字。
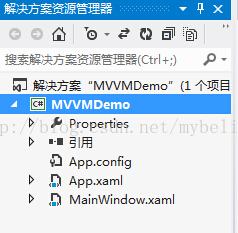
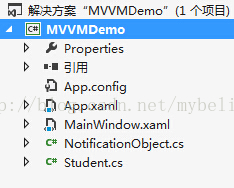
刚创建好的样例工程文档如下图:
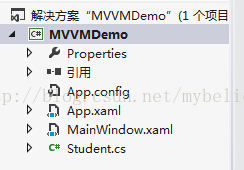
紧接着添加一个Student类,
using System;
using System.Collections.Generic;
using System.ComponentModel;
using System.Linq;
using System.Text;
using System.Threading.Tasks;

namespace MVVMDemo
{
    public class Student : INotifyPropertyChanged
    {
        string firstName;
        public string FirstName
        {
            get
            {
                return firstName;
            }
            set
            {
                firstName = value;
                OnPropertyChanged("FirstName");
            }
        }

        string lastName;
        public string LastName
        {
            get
            {
                return lastName;
            }
            set
            {
                lastName = value;
                OnPropertyChanged("LastName");
            }
        }

        public Student(string firstName, string lastName)
        {
            this.firstName = firstName;
            this.lastName = lastName;
        }


        void OnPropertyChanged(string propName)
        {
            if (PropertyChanged != null)
            {
                PropertyChanged(this, new PropertyChangedEventArgs(propName));
            }
        }

        #region INotifyPropertyChanged Members
        public event PropertyChangedEventHandler PropertyChanged;
        #endregion
    }
}
此时工程结构图如下图
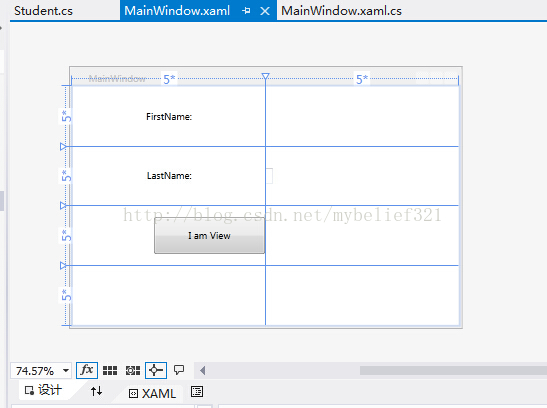
然后修改 MainWindow.xaml,内容如下
<Window x:Class="MVVMDemo.MainWindow"
        xmlns="http://schemas.microsoft.com/winfx/2006/xaml/presentation"
        xmlns:x="http://schemas.microsoft.com/winfx/2006/xaml"
        Title="MainWindow" Height="350" Width="525">
    <Grid x:Name="gridLayout">
        <Grid.ColumnDefinitions>
            <ColumnDefinition Width="5*" />
            <ColumnDefinition Width="5*" />
        </Grid.ColumnDefinitions>
        <Grid.RowDefinitions>
            <RowDefinition Height="5*" />
            <RowDefinition Height="5*" />
            <RowDefinition Height="5*" />
            <RowDefinition Height="5*" />
        </Grid.RowDefinitions>

        <TextBlock Text="FirstName:" Grid.Row="0" Grid.Column="0" VerticalAlignment="Center" HorizontalAlignment="Center"/>
        <TextBlock Text="{Binding Path=FirstName,Mode=TwoWay}" Grid.Row="0" Grid.Column="1" VerticalAlignment="Center" HorizontalAlignment="Left"/>
        <TextBlock Text="LastName:" Grid.Row="1" Grid.Column="0" VerticalAlignment="Center" HorizontalAlignment="Center"/>
        <TextBox Text="{Binding Path=LastName,Mode=TwoWay}" Grid.Row="1" Grid.Column="1" VerticalAlignment="Center" HorizontalAlignment="Left"/>
        <Button x:Name="BtnView" Content="I am View" Grid.Row="2" Grid.Column="0" Width="150" Height="50" VerticalAlignment="Center" HorizontalAlignment="Right"/>
    </Grid>
</Window>
下图为MainWindow视图
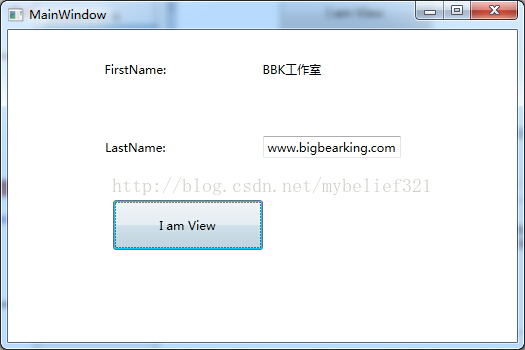
紧接着,在MainWindow.cs添加如下内容
        public MainWindow()
        {
            InitializeComponent();
            Student student = new Student("Wang", "WenSong");
            gridLayout.DataContext = student;
            BtnView.Click += new RoutedEventHandler(delegate(object sender, RoutedEventArgs e)
                {
                    student.FirstName = "BBK工作室";
                    student.LastName = "www.bigbearking.com";
                });
        }
此时运行程序,如下图

点击按钮BtnView,此时界面如下
上述代码工程,点此下载
2.问题来了
如果我们需要让页面的值和Student实例的值保持一致,则必须要让类型继承自INotifyPropertyChanged接口,并像下面这样编码:
public class Student : INotifyPropertyChanged
    {
        string firstName;
        public string FirstName
        {
            get
            {
                return firstName;
            }
            set
            {
                firstName = value;
                OnPropertyChanged("FirstName");
            }
        }

        string lastName;
        public string LastName
        {
            get
            {
                return lastName;
            }
            set
            {
                lastName = value;
                OnPropertyChanged("LastName");
            }
        }

        public Student(string firstName, string lastName)
        {
            this.firstName = firstName;
            this.lastName = lastName;
        }


        void OnPropertyChanged(string propName)
        {
            if (PropertyChanged != null)
            {
                PropertyChanged(this, new PropertyChangedEventArgs(propName));
            }
        }

        #region INotifyPropertyChanged Members
        public event PropertyChangedEventHandler PropertyChanged;
        #endregion
}如果应用程序中存在多个这样的类型,比如还有Teacher类,则每个类都要实现自己的OnPropertyChanged方法,这显然是不合理的。所以,需要一个超类来包装这种需求,当然这个超类继承自INotifyPropertyChanged。
3.下面,在工程中添加这个超类NotificationObject,如下结构图
这个超类的代码为
    public abstract class NotificationObject : INotifyPropertyChanged
    {
        public event PropertyChangedEventHandler PropertyChanged;

        protected virtual void RaisePropertyChanged(string propertyName)
        {
            PropertyChangedEventHandler handler = this.PropertyChanged;
            if (handler != null)
            {
                handler(this, new PropertyChangedEventArgs(propertyName));
            }
        }

        protected void RaisePropertyChanged(params string[] propertyNames)
        {
            if (propertyNames == null) throw new ArgumentNullException("propertyNames");

            foreach (var name in propertyNames)
            {
                this.RaisePropertyChanged(name);
            }
        }

        protected void RaisePropertyChanged<T>(Expression<Func<T>> propertyExpression)
        {
            var propertyName = ExtractPropertyName(propertyExpression);
            this.RaisePropertyChanged(propertyName);
        }

        public static string ExtractPropertyName<T>(Expression<Func<T>> propertyExpression)
        {
            if (propertyExpression == null)
            {
                throw new ArgumentNullException("propertyExpression");
            }

            var memberExpression = propertyExpression.Body as MemberExpression;
            if (memberExpression == null)
            {
                throw new ArgumentException("PropertySupport_NotMemberAccessExpression_Exception", "propertyExpression");
            }

            var property = memberExpression.Member as PropertyInfo;
            if (property == null)
            {
                throw new ArgumentException("PropertySupport_ExpressionNotProperty_Exception", "propertyExpression");
            }

            var getMethod = property.GetGetMethod(true);
            if (getMethod.IsStatic)
            {
                throw new ArgumentException("PropertySupport_StaticExpression_Exception", "propertyExpression");
            }

            return memberExpression.Member.Name;
        }

    }
相应的,将Student类型修改为:
    public class Student : NotificationObject
    {
        string firstName;
        public string FirstName
        {
            get
            {
                return firstName;
            }
            set
            {
                firstName = value;
                //OnPropertyChanged("FirstName");
                this.RaisePropertyChanged("FirstName");
            }
        }

        string lastName;
        public string LastName
        {
            get
            {
                return lastName;
            }
            set
            {
                lastName = value;
                //OnPropertyChanged("LastName");
                this.RaisePropertyChanged("LastName");
            }
        }

        public Student(string firstName, string lastName)
        {
            this.firstName = firstName;
            this.lastName = lastName;
        }


        void OnPropertyChanged(string propName)
        {
            if (PropertyChanged != null)
            {
                PropertyChanged(this, new PropertyChangedEventArgs(propName));
            }
        }

        #region INotifyPropertyChanged Members
        public event PropertyChangedEventHandler PropertyChanged;
        #endregion
}这部分代码,点此下载
4.问题再次出现,经过修改后的Student类型,是什么?
是实体Model,领域Model,还是别的什么?实际上,因为没有采用任何架构模式,当前的Student类型什么也不是,揉杂了很多功能。它既要负责提供属性,也要负责控制。
在MVVM架构模式中,和MVC称谓不同的地方,就是VM(ViewModel)部分。VM负责:接受View请求并决定调用哪个模型构件去处理请求,同时它还负责将数据返回给View进行显示。也就是说,VM完成的角色可以理解为MVC中的Control。(另外需要注意的一点是,在MVC中有一个概念叫做表现模型,所谓表现模型是领域模型的一个扁平化投影,不应和MVVM中的VIEW MODEL相混淆)。
所以,我们现在要明确这些概念。首先,将Student类型的功能细分化,VM的部分,我们跟页面名称对应起来应该叫做MainViewModel。实际项目中,功能页面会相应名为StudentView.xaml,则对应的VM名便称之为StudentViewModel.cs。我们继续重构上面的代码。
二.建立MVVM的各个部分
现在重构代码,工程的结构变化比较大,我会把这部分代码也传上去的。
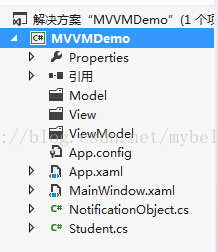
首先,在原有的工程上建立三个文件夹 Model、View、ViewModel,如下图
1. 领域模型DomainModel部分
然后将Student.cs移到Model文件夹内,并修改Student.cs里的代码,修改后的Student.cs内容如下(注意命名空间的变化)
using System;
using System.Collections.Generic;
using System.ComponentModel;
using System.Linq;
using System.Text;
using System.Threading.Tasks;

namespace MVVMDemo.Model
{
    public class Student
    {
        string firstName;
        public string FirstName
        {
            get
            {
                return firstName;
            }
            set
            {
                firstName = value;
            }
        }

        string lastName;
        public string LastName
        {
            get
            {
                return lastName;
            }
            set
            {
                lastName = value;
            }
        }

        public Student()
        {
            //模拟获取数据
            //这里为什么会有模拟数据一说呢?我是这样认为的,有时候类的属性会存在数据库或者本地文件系统等上面,
            //我们需要读取操作将这些数据加载到咱们定义的类里。
            Mock();
        }

        public void Mock()
        {
            FirstName = "firstName:" + DateTime.Now.ToString();
            LastName = "lastName:" + DateTime.Now.ToString();
        }


    }
}

2.ViewModel部分
接着,在ViewModel文件夹右击添加一个StudentViewModel类,内容如下
using System;
using System.Collections.Generic;
using System.Linq;
using System.Text;
using System.Threading.Tasks;
using MVVMDemo.Model;

namespace MVVMDemo.ViewModel
{
    public class StudentViewModel:NotificationObject
    {
        private Student student;
        public Student Student
        {
            get
            {
                return this.student;
            }
            set
            {
                this.student = value;
                //下面这一句话的用法以后再拿出一章具体介绍
                this.RaisePropertyChanged(() => this.student);
            }
        }

        public StudentViewModel()
        {
            student = new Student();
        }

    }
}
此时文件工程结构为下图

3.View部分
再接着在View文件夹下添加一个用户控件,命名为StudentView,它的XAML代码为下
<UserControl x:Class="MVVMDemo.View.StudentView"
             xmlns="http://schemas.microsoft.com/winfx/2006/xaml/presentation"
             xmlns:x="http://schemas.microsoft.com/winfx/2006/xaml"
             xmlns:mc="http://schemas.openxmlformats.org/markup-compatibility/2006"
             xmlns:d="http://schemas.microsoft.com/expression/blend/2008"
             xmlns:vm="clr-namespace:MVVMDemo.ViewModel"
             mc:Ignorable="d"
             d:DesignHeight="300" d:DesignWidth="400">
    <Grid x:Name="gridLayout">
        <Grid.DataContext>
            <vm:StudentViewModel />
        </Grid.DataContext>
        <Grid.ColumnDefinitions>
            <ColumnDefinition Width="5*" />
            <ColumnDefinition Width="5*" />
        </Grid.ColumnDefinitions>
        <Grid.RowDefinitions>
            <RowDefinition Height="5*" />
            <RowDefinition Height="5*" />
            <RowDefinition Height="5*" />
            <RowDefinition Height="5*" />
        </Grid.RowDefinitions>

        <TextBlock Text="FirstName:" Grid.Row="0" Grid.Column="0" VerticalAlignment="Center" HorizontalAlignment="Center"/>
        <TextBlock Text="{Binding Path=Student.FirstName,Mode=Default}" Grid.Row="0" Grid.Column="1" VerticalAlignment="Center" HorizontalAlignment="Left"/>
        <TextBlock Text="LastName:" Grid.Row="1" Grid.Column="0" VerticalAlignment="Center" HorizontalAlignment="Center"/>
        <TextBox Text="{Binding Path=Student.LastName,Mode=TwoWay}" Grid.Row="1" Grid.Column="1" VerticalAlignment="Center" HorizontalAlignment="Left"/>
        <Button x:Name="BtnView" Content="I am View" Grid.Row="2" Grid.Column="0" Width="150" Height="50" VerticalAlignment="Center" HorizontalAlignment="Right"/>
    </Grid>
</UserControl>
此时文件工程结构图为下图

然后在MainWindow里需要引用这个控件,修改MainWindow.xaml的代码,内容如下
<Window x:Class="MVVMDemo.MainWindow"
        xmlns="http://schemas.microsoft.com/winfx/2006/xaml/presentation"
        xmlns:x="http://schemas.microsoft.com/winfx/2006/xaml"
        xmlns:view="clr-namespace:MVVMDemo.View"
        Title="MainWindow" Height="350" Width="525">
    <Grid >
        <view:StudentView />
    </Grid>
</Window>
再将MainWindow.cs里之前添加的代码删掉,修改后的内容如下
using System;
using System.Collections.Generic;
using System.Linq;
using System.Text;
using System.Threading.Tasks;
using System.Windows;
using System.Windows.Controls;
using System.Windows.Data;
using System.Windows.Documents;
using System.Windows.Input;
using System.Windows.Media;
using System.Windows.Media.Imaging;
using System.Windows.Navigation;
using System.Windows.Shapes;

namespace MVVMDemo
{
    /// <summary>
    /// MainWindow.xaml 的交互逻辑
    /// </summary>
    public partial class MainWindow : Window
    {
        public MainWindow()
        {
            InitializeComponent();

        }
    }
}
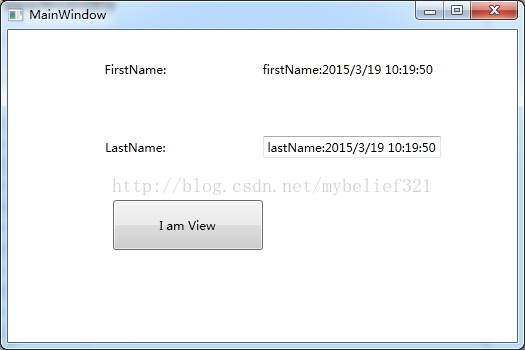
编译工程,运行,效果如图
该部分的代码,点此下载
4.若干解释
在上述的工程Demo中,领域模型Student负责获取数据,而数据来源于何处不是我们关心的重点(可能是数据库,也可能是配置文件,等等),所以,我们直接在Student中模拟了获取数据的过程,即Mock方法。这相当于完成了一次OneWay的过程,即把后台数据推送到前台进行显示,这只能算是完成跟UI交互的一部分功能。UI交互还需要包括从UI中将数据持久化(如保存到数据库)。而UI跟后台的交互,就需要通过命令绑定的机制去实现了。
5.命令绑定
在接下来的工程里,我们演示两类命令,一类是属性类命令绑定,一类是事件类命令绑定 。
首先,我们知道,VM负责UI和领域模型的联系,所以,绑定所支持的方法一定是在VM中,于是,我们在StudentViewModel中定义一个属性CanSubmit,及一个方法Submit
        public bool CanSubmit
        {
            get
            {
                return true;
            }
        }

        public void Submit()
        {
            student.Mock();
        }
此时StudentViewModel的内容如下
using System;
using System.Collections.Generic;
using System.Linq;
using System.Text;
using System.Threading.Tasks;
using MVVMDemo.Model;

namespace MVVMDemo.ViewModel
{
    public class StudentViewModel:NotificationObject
    {
        private Student student;
        public Student Student
        {
            get
            {
                return this.student;
            }
            set
            {
                this.student = value;
                //下面这一句话的用法以后再拿出一章具体介绍
                this.RaisePropertyChanged(() => this.student);
            }
        }

        public StudentViewModel()
        {
            student = new Student();
        }

        public bool CanSubmit
        {
            get
            {
                return true;
            }
        }

        public void Submit()
        {
            student.Mock();
        }

    }
}
注意,上述Submit方法中为了简单起见,使用了模拟方法。由于Mock方法中仍然可能涉及到UI的变动(如随数据库的某些具体的值变动而变动),故领域模型Student可能也会需要继承NotificationObject,在本例中,Student改变如下
using System;
using System.Collections.Generic;
using System.ComponentModel;
using System.Linq;
using System.Text;
using System.Threading.Tasks;

namespace MVVMDemo.Model
{
    public class Student : NotificationObject
    {
        string firstName;
        public string FirstName
        {
            get
            {
                return firstName;
            }
            set
            {
                firstName = value;
                this.RaisePropertyChanged("FirstName");
            }
        }

        string lastName;
        public string LastName
        {
            get
            {
                return lastName;
            }
            set
            {
                lastName = value;
                this.RaisePropertyChanged("LastName");
            }
        }

        public Student()
        {
            //模拟获取数据
            //这里为什么会有模拟数据一说呢?我是这样认为的,有时候类的属性会存在数据库或者本地文件系统等上面,
            //我们需要读取操作将这些数据加载到咱们定义的类里。
            Mock();
        }

        public void Mock()
        {
            FirstName = "firstName:" + DateTime.Now.ToString();
            LastName = "lastName:" + DateTime.Now.ToString();
        }
    }
}
其次,需要改变StudentView,由于该VIEW用到命令和属性绑定,所以需要添加两个引用
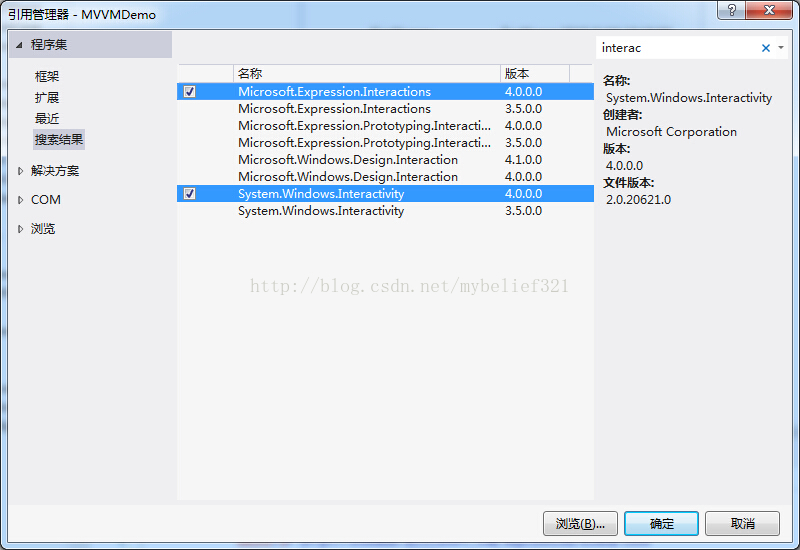
添加完上述两个引用后,修改StudentView.xaml的内容如下:
<UserControl x:Class="MVVMDemo.View.StudentView"
             xmlns="http://schemas.microsoft.com/winfx/2006/xaml/presentation"
             xmlns:x="http://schemas.microsoft.com/winfx/2006/xaml"
             xmlns:mc="http://schemas.openxmlformats.org/markup-compatibility/2006"
             xmlns:d="http://schemas.microsoft.com/expression/blend/2008"
             xmlns:i="http://schemas.microsoft.com/expression/2010/interactivity"
             xmlns:ei="http://schemas.microsoft.com/expression/2010/interactions"
             xmlns:vm="clr-namespace:MVVMDemo.ViewModel"
             mc:Ignorable="d"
             d:DesignHeight="300" d:DesignWidth="400">
    <Grid x:Name="gridLayout">
        <Grid.DataContext>
            <vm:StudentViewModel />
        </Grid.DataContext>
        <Grid.ColumnDefinitions>
            <ColumnDefinition Width="5*" />
            <ColumnDefinition Width="5*" />
        </Grid.ColumnDefinitions>
        <Grid.RowDefinitions>
            <RowDefinition Height="5*" />
            <RowDefinition Height="5*" />
            <RowDefinition Height="5*" />
            <RowDefinition Height="5*" />
        </Grid.RowDefinitions>

        <TextBlock Text="FirstName:" Grid.Row="0" Grid.Column="0" VerticalAlignment="Center" HorizontalAlignment="Center"/>
        <TextBlock Text="{Binding Path=Student.FirstName,Mode=Default}" Grid.Row="0" Grid.Column="1" VerticalAlignment="Center" HorizontalAlignment="Left"/>
        <TextBlock Text="LastName:" Grid.Row="1" Grid.Column="0" VerticalAlignment="Center" HorizontalAlignment="Center"/>
        <TextBox Text="{Binding Path=Student.LastName,Mode=TwoWay}" Grid.Row="1" Grid.Column="1" VerticalAlignment="Center" HorizontalAlignment="Left"/>
        <Button x:Name="BtnView" Content="I am View"  IsEnabled="{Binding CanSubmit}"  Grid.Row="2" Grid.Column="0" Width="150" Height="50" VerticalAlignment="Center" HorizontalAlignment="Right">
            <i:Interaction.Triggers>
                <i:EventTrigger EventName="Click">
                    <ei:CallMethodAction TargetObject="{Binding}" MethodName="Submit"/>
                </i:EventTrigger>
            </i:Interaction.Triggers>
        </Button>
    </Grid>
</UserControl>
编译运行,点击按钮BtnView,可以看到现实内容更新。
上述工程代码,点此下载
6.后言
经过这一次的重构之后,基本满足了一个简单的MVVM模型的需要,我也对MVVM大概有了认识,但是学习的过程中还设计到一些问题,我需要继续探究,比如类NotificationObject里的Lambda表达式,还有命令绑定。本学习笔记系列还没有结束,一步一步来吧。
本片文章绝大数来源于此:http://www.cnblogs.com/luminji/archive/2011/05/27/2060127.html,对作者表示感谢!!! 之所以挂着个原创的标志,是因为自己一行行的敲出了字,再掺杂一些自己的想法,也算是对自己的鼓励吧。
