下载pytorch_wavelets:
git clone https://github.com/fbcotter/pytorch_wavelets
然后安装:
cd pytorch_wavelets
pip install .
返回:
Successfully built pytorch-wavelets
Installing collected packages: pytorch-wavelets
Successfully installed pytorch-wavelets-1.2.2
查看你能够使用的变换方法:
>>> import pywt
>>> pywt.wavelist('haar')
['haar']
>>> pywt.wavelist('db')
['db1', 'db2', 'db3', 'db4', 'db5', 'db6', 'db7', 'db8', 'db9', 'db10', 'db11', 'db12', 'db13', 'db14', 'db15', 'db16', 'db17', 'db18', 'db19', 'db20', 'db21', 'db22', 'db23', 'db24', 'db25', 'db26', 'db27', 'db28', 'db29', 'db30', 'db31', 'db32', 'db33', 'db34', 'db35', 'db36', 'db37', 'db38']
详情可见:
https://pywavelets.readthedocs.io/en/latest/ref/wavelets.html
从pytorch_wavelets的源码https://github.com/fbcotter/pytorch_wavelets/blob/master/pytorch_wavelets/dwt/transform2d.py中可见其wave参数使用的是pywt.Wavelet:
class DWTForward(nn.Module):
    """ Performs a 2d DWT Forward decomposition of an image
    Args:
        J (int): Number of levels of decomposition
        wave (str or pywt.Wavelet): Which wavelet to use. Can be a string to
            pass to pywt.Wavelet constructor, can also be a pywt.Wavelet class,
            or can be a two tuple of array-like objects for the analysis low and
            high pass filters.
        mode (str): 'zero', 'symmetric', 'reflect' or 'periodization'. The
            padding scheme
        separable (bool): whether to do the filtering separably or not (the
            naive implementation can be faster on a gpu).
        """
    def __init__(self, J=1, wave='db1', mode='zero'):
        super().__init__()
        if isinstance(wave, str):
            wave = pywt.Wavelet(wave)
        if isinstance(wave, pywt.Wavelet):
            h0_col, h1_col = wave.dec_lo, wave.dec_hi
            h0_row, h1_row = h0_col, h1_col
...
举例说明:
#coding:utf-8
import torch.nn as nn
import torch

import os, torchvision
from PIL import Image
from torchvision import transforms as trans

def test3():
    from pytorch_wavelets import DWTForward, DWTInverse # (or import DWT, IDWT)
    #J为分解的层次数,wave表示使用的变换方法
    xfm = DWTForward(J=1, mode='zero', wave='haar')  # Accepts all wave types available to PyWavelets
    ifm = DWTInverse(mode='zero', wave='haar')

    img = Image.open('./1.jpg')
    transform = trans.Compose([
        trans.ToTensor()
    ])
    img = transform(img).unsqueeze(0)
    Yl, Yh = xfm(img)
    print(Yl.shape)
    print(len(Yh))
    # print(Yh[0].shape)

    for i in range(len(Yh)):
        print(Yh[i].shape)
        if i == len(Yh)-1:
            h = torch.zeros([4,3,Yh[i].size(3),Yh[i].size(3)]).float()
            h[0,:,:,:] = Yl
        else:
            h = torch.zeros([3,3,Yh[i].size(3),Yh[i].size(3)]).float()
        for j in range(3):
            if i == len(Yh)-1:
                h[j+1,:,:,:] = Yh[i][:,:,j,:,:]
            else:
                h[j,:,:,:] = Yh[i][:,:,j,:,:]
        if i == len(Yh)-1:
            img_grid = torchvision.utils.make_grid(h, 2) #一行2张图片
        else:
            img_grid = torchvision.utils.make_grid(h, 3)
        torchvision.utils.save_image(img_grid, 'img_grid_{}.jpg'.format(i))

if __name__ == '__main__':
    test3()
返回:
(deeplearning) bogon:learning user$ python delete.py
torch.Size([1, 3, 56, 56])
1
torch.Size([1, 3, 3, 56, 56])
效果如下:
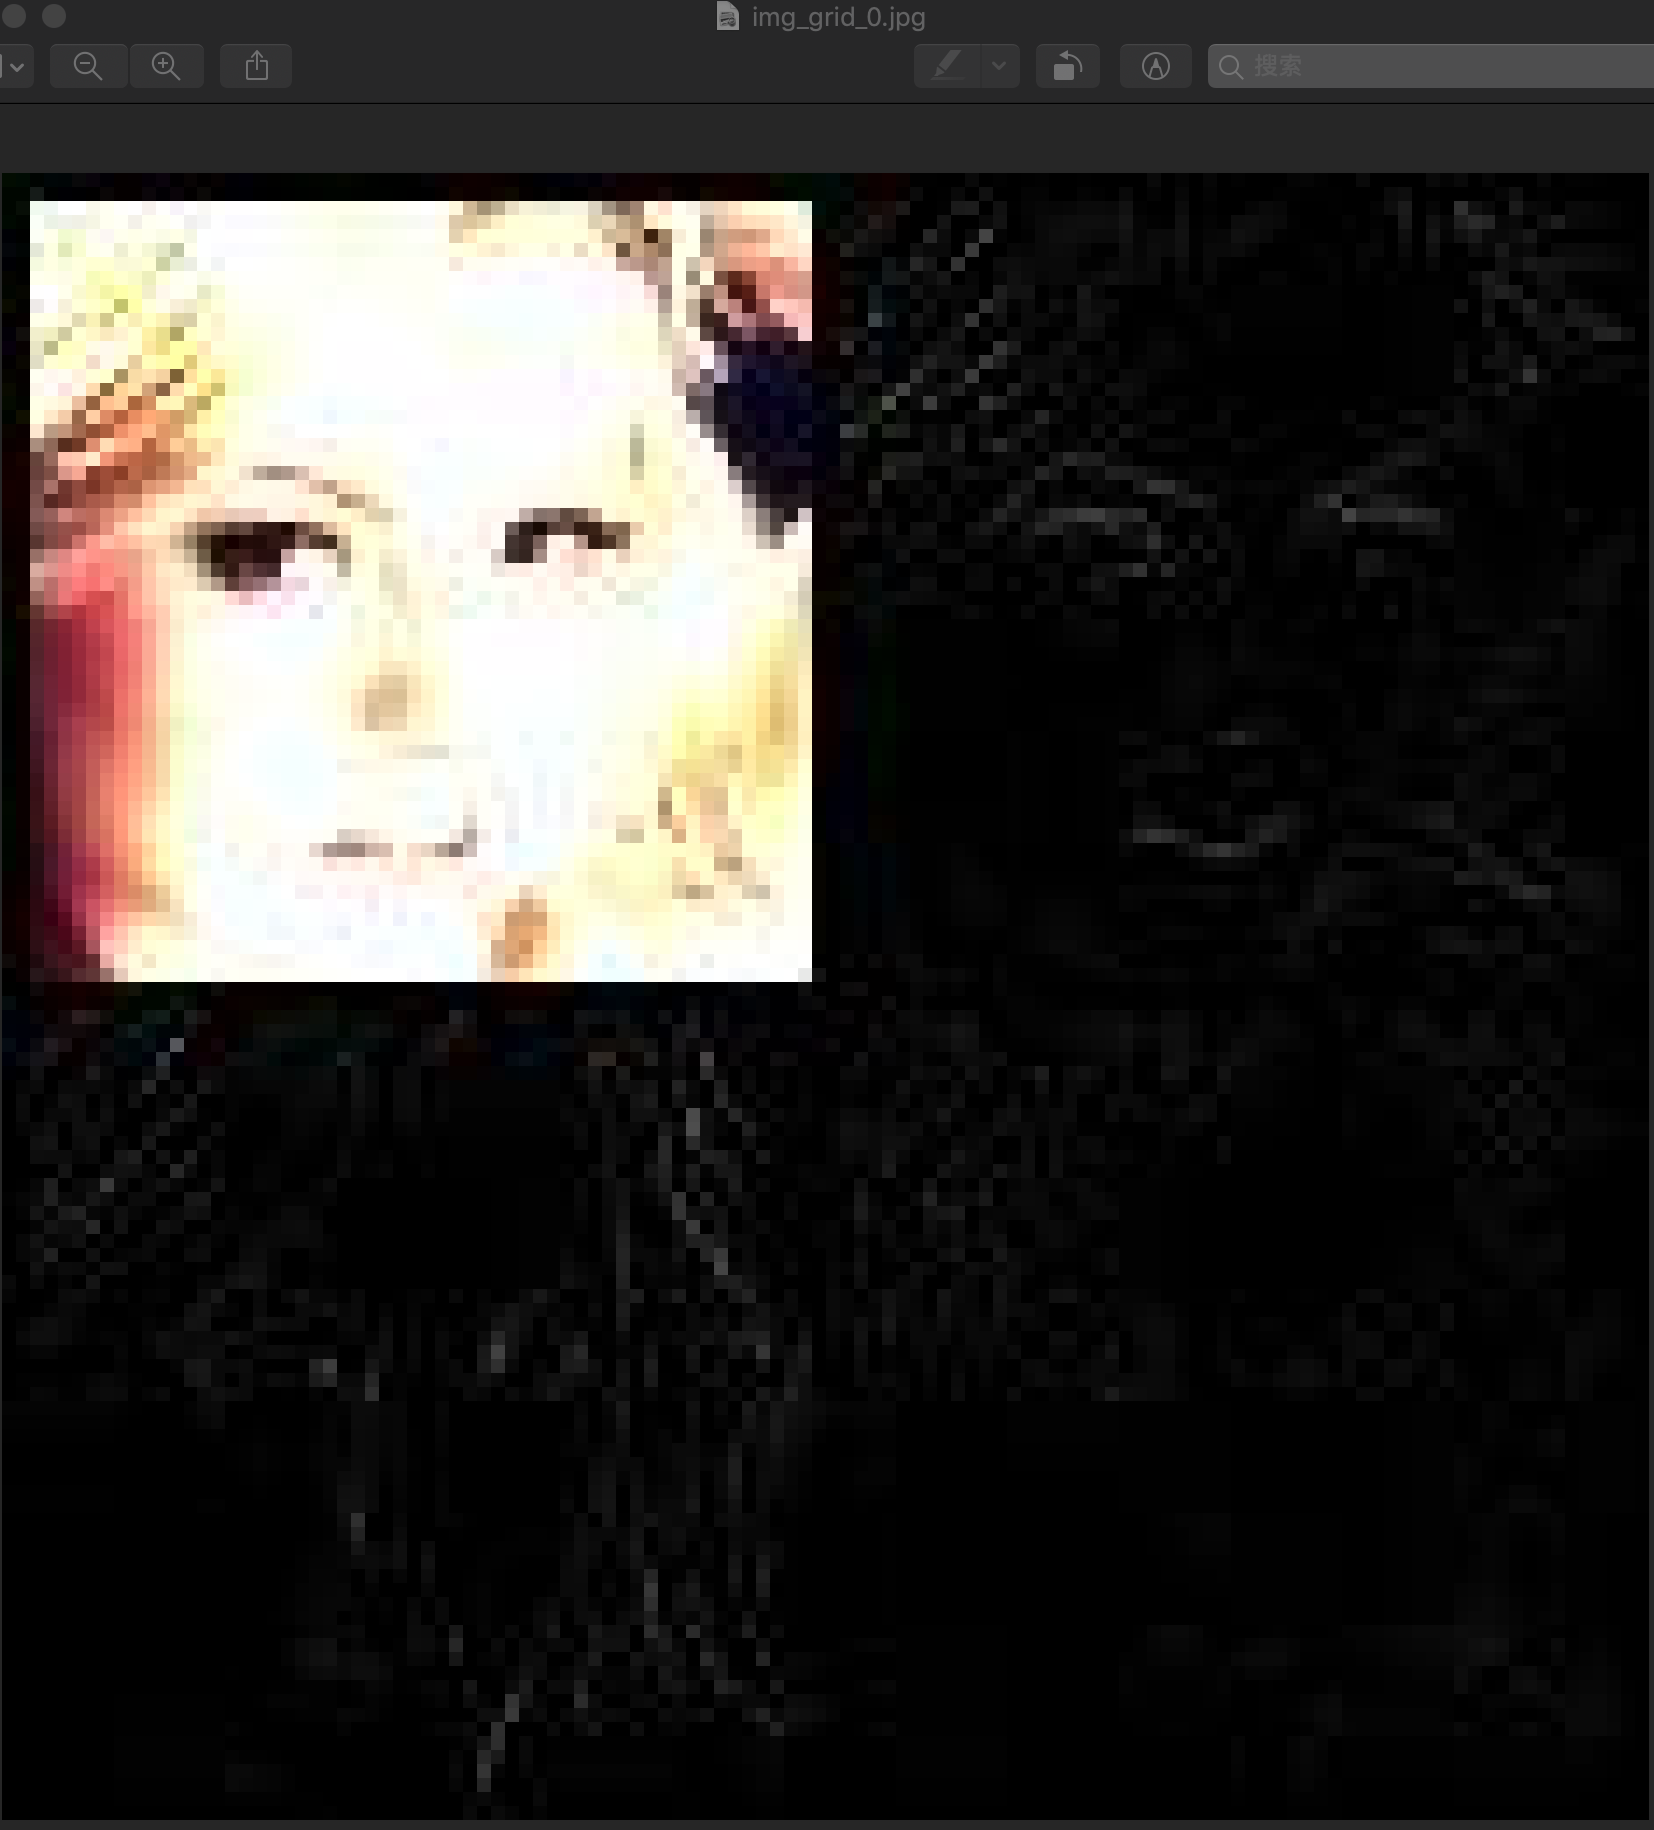
从这个结果上看和MWCNN中使用的haar小波变换 pytorch 的差不多
输出Yl的大小为(N,Cin,Hin′,Win′),即Hin′和Win′即最后一次小波变换输出的LL,比如输入大小为112*112,进行一层小波变换后Hin′和Win′即56*56;两层即28*28;三层为14*14
Yh的大小为list(N,Cin,3,Hin″,Win″),这个list的大小即进行的小波变换的次数,Yh[0]即一层小波变换的HL、LH和HH,Yh[1]即二层小波变换的HL、LH和HH,Yh[3]即三层小波变换的HL、LH和HH
(N,Cin,3,Hin″,Win″)中的3表示的是HL、LH和HH
详细内容可见https://pytorch-wavelets.readthedocs.io/en/latest/dwt.html
如果进行的是三层小波,J=3:
返回:
(deeplearning) bogon:learning user$ python delete.py
torch.Size([1, 3, 14, 14])
3
torch.Size([1, 3, 3, 56, 56])
torch.Size([1, 3, 3, 28, 28])
torch.Size([1, 3, 3, 14, 14])
效果:


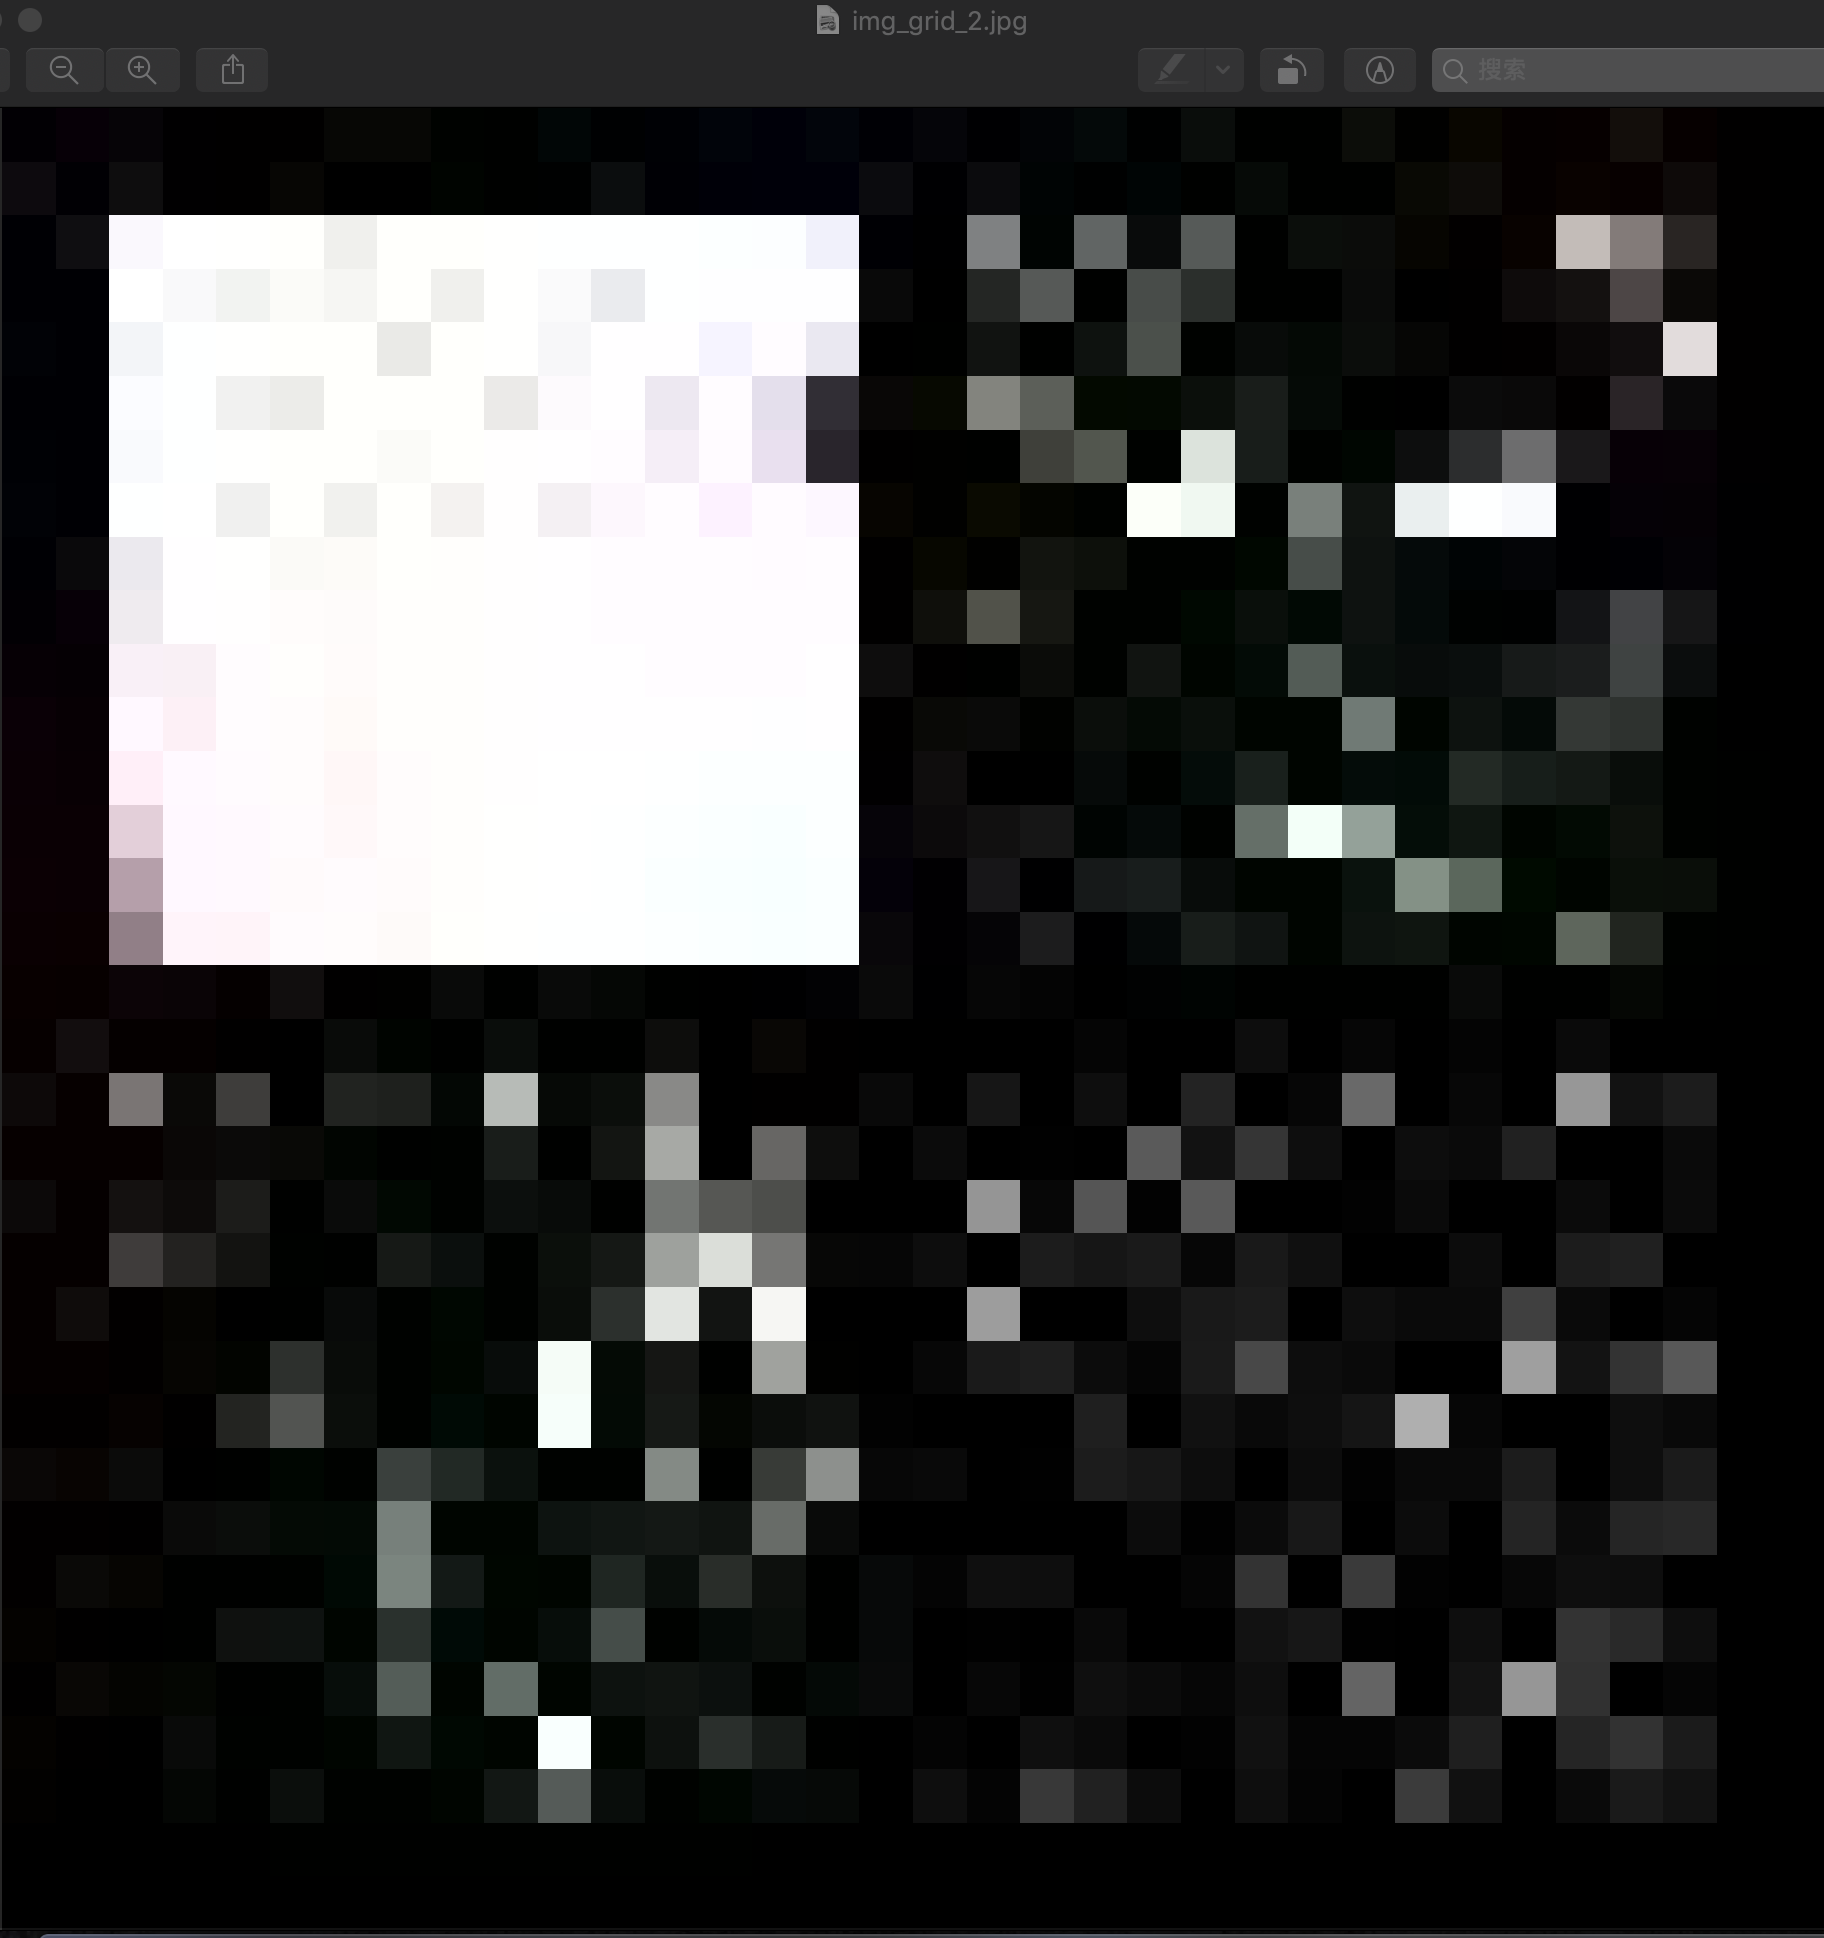
如果J=2,是两层,返回:
(deeplearning) bogon:learning user$ python delete.py
torch.Size([1, 3, 28, 28])
2
torch.Size([1, 3, 3, 56, 56])
torch.Size([1, 3, 3, 28, 28])
效果:

