说下思路,ant自己的a-upload组件,不好套拖拽,因为我们需要拖拽的是fileList,所以我就把组件自己的fileList搞成空了,自己写了一个‘fileList’,这样我们用数据自己循环出来的filelist就可以进行很多操作了。
1.我是把a-upload写成了一个组件,
在组件里用了vue-draggable进行拖拽
先安装 npm install vuedraggable
新建组件文件,路径:src/components/UploadImage/UploadImage.vue
组件见代码
<template>
  <div class="myFileList">
    <a-spin :spinning="confirmLoading">
      <a-upload
      listType="picture"
      class="upload-list-inline"
      :fileList="[]"
      :customRequest="uploadImage"
      :beforeUpload="beforeUpload"
      :multiple="true"
    >
      <a-button>
        <a-icon type="upload" /> 上传附件
      </a-button>
    </a-upload>
      <div class="ant-upload-list ant-upload-list-picture">
        <draggable
          class="syllable_ul"
          element="ul"
          :list="fileList"
          :options="{group:'title', animation:150}"
          :no-transition-on-drag="true"
          @change="change"
        >
          <transition-group type="transition"  :name="!drag? 'syll_li' : null" :css="true">
           <div class="ant-upload-list-item ant-upload-list-item-done" v-for="(item, index) in fileList" :key="index">
          <div class="ant-upload-list-item-info">
            <span><a :href="item.url" target="_blank" rel="noopener noreferrer" class="ant-upload-list-item-thumbnail"><img :src="item.url" alt="4.jpg"></a><a target="_blank" rel="noopener noreferrer" title="4.jpg" :href="item.url" class="ant-upload-list-item-name">{{item.name}}</a></span>
          </div>
          <i aria-label="图标: close" tabindex="-1" class="anticon anticon-close" @click="removeCoupon(item.uid)" ><svg viewBox="64 64 896 896" data-icon="close" width="1em" height="1em" fill="currentColor"><path d="M563.8 512l262.5-312.9c4.4-5.2.7-13.1-6.1-13.1h-79.8c-4.7 0-9.2 2.1-12.3 5.7L511.6 449.8 295.1 191.7c-3-3.6-7.5-5.7-12.3-5.7H203c-6.8 0-10.5 7.9-6.1 13.1L459.4 512 196.9 824.9A7.95 7.95 0 0 0 203 838h79.8c4.7 0 9.2-2.1 12.3-5.7l216.5-258.1 216.5 258.1c3 3.6 7.5 5.7 12.3 5.7h79.8c6.8 0 10.5-7.9 6.1-13.1L563.8 512z"></path></svg></i>
        </div>
          </transition-group>
        </draggable>
      </div>
    </a-spin>
  </div>
</template>
<script>
import { axios } from '@/utils/request'
import draggable from 'vuedraggable'
export default {
  name: 'UploadImage',
  props: {
    multiple: {
      type: Number,
      default: 1
    },
    img: {
      type: Array,
      default: function () {
        return []
      }
    }
  },
  data () {
    return {
      fileList: [],
      imageId: [],
      files: [],
      a: [],
      confirmLoading: false,
      drag: false
    }
  },
  components: {
    draggable
  },
  methods: {
    change (evt) {
    },
    beforeUpload (file) {
      const isJPG = file.type === 'image/jpeg' || file.type === 'image/jpg' || file.type === 'image/png' || file.type === 'image/bmp'
      if (!isJPG) {
        this.$notification['error']({
          message: '请上传图片文件'
        })
      }
      // const isLt2M = file.size / 1024 < 200 && file.size / 1024 > 10;
      // if (!isLt2M) {
      //   this.$message.error('文件大小应在10KB~20KB之间');
      // }
      // return isJPG && isLt2M
      return isJPG
    },
    removeCoupon: function (file) {
      this.fileList.forEach((val, key) => {
        if (file === val.uid) {
          this.fileList.splice(key, 1)
          this.$emit('delimageId', key)
        }
      })
    },
    // 图片预览
    uploadImg: function (e) {
      let _this = this
      if (!e || !window.FileReader) return
      let reader = new FileReader()
      reader.readAsDataURL(e.file)
      reader.onloadend = function () {
        _this.uploadImage()
      }
    },
    uploadImage: function (e) {
      this.confirmLoading = true
      let formdata = new FormData()
      formdata.append('file', e.file)
      axios({
        url: '/api/file/upload',
        method: 'post',
        data: formdata
      }).then((res) => {
        this.confirmLoading = false
        if (this.multiple === 1) {
          this.fileList = [{
            uid: '-1', // 文件唯一标识,建议设置为负数,防止和内部产生的 id 冲突
            name: e.file.name, // 文件名
            status: 'done', // 状态有:uploading done error removed
            url: this.GLOBAL.imgUrl + res.result.fileId
          }]
        } else {
          if (this.fileList.length < this.multiple) {
            this.fileList.push({
              uid: '-' + (this.fileList.length + 1), // 文件唯一标识,建议设置为负数,防止和内部产生的 id 冲突
              name: e.file.name, // 文件名
              status: 'done', // 状态有:uploading done error removed
              url: this.GLOBAL.imgUrl + res.result.fileId
            })
          }
        }
        this.$emit('getImageId', res.result.fileId)
      })
    }
  },
  mounted () {
    if (this.img.length > 0) {
      this.img.forEach((val, key) => {
        this.fileList.push({
          uid: '-' + key, // 文件唯一标识,建议设置为负数,防止和内部产生的 id 冲突
          name: '' + val.name, // 文件名
          status: 'done', // 状态有:uploading done error removed
          url: '' + val.url
        })
      })
    }
  }
}
</script>
<style>
  ul{
    padding: 0;
  }
</style>
2.使用
import UploadImage from ‘…/…/…/components/UploadImage/UploadImage’
components: {
UploadImage
},
(1)添加页面,不需要图片回显
<upload-image @getImageId="getImageId" @delimageId="delimageId" :multiple="1"></upload-image>
// 看到multiple了吗,后面的数字为改组件允许最多传多少张,如果不限制图片张数的话,写999就可以了
   // 产品封面图片预览
    getImageId: function (val) {
      this.imageId.push(val)
    },
    // 删除产品封面图片
    delimageId: function (index) {
      this.imageId.forEach((val, key) => {
        if (index === key) {
          this.imageId.splice(key, 1)
        }
      })
    },
    // 这里两个方法获取的imageId,是我晚点要传给后台的数据
(2)编辑页面,需要回显图片
单张回显:
<upload-image @getImageId="getImageId" @delimageId="delimageId" :multiple="1" :img="[{name: proDel.title, url: imgUrl}]" v-if="lock"></upload-image>
    // 图片预览
    getImageId: function (val) {
      this.imageId = []
      this.imageId.push(val)
    },
    // 删除图片
    delimageId: function (index) {
      this.imageId.forEach((val, key) => {
        if (index === key) {
          this.imageId.splice(key, 1)
        }
      })
    },
多张回显:
 <upload-image @getImageId="getDelImageId" @delimageId="delDelimageId" :multiple="99" :img="showContent" v-if="lock"></upload-image>
 if (!res.result.content) {
            this.showContent = []
          } else {
            var ss = res.result.content.split(',')
            this.showContent = ss.map(item => ({ name: res.result.title, url: this.GLOBAL.imgUrl + item }))
          }
//res.result.content 是我从接口获取的数据,把数据拼接一下,搞成我们需要的格式

    // 产品详情图片预览
    getDelImageId: function (val) {
      this.imageDelId.push(val)
    },
    // 删除产品详情封面图片
    delDelimageId: function (index) {
      this.imageDelId.forEach((val, key) => {
        if (index === key) {
          this.imageDelId.splice(key, 1)
        }
      })
    },
// 上面两个使用,组件里都有一个v-if="lock"看到没,这个lock,初始为false,等到我们从接口把数据都获取了,再设置为true
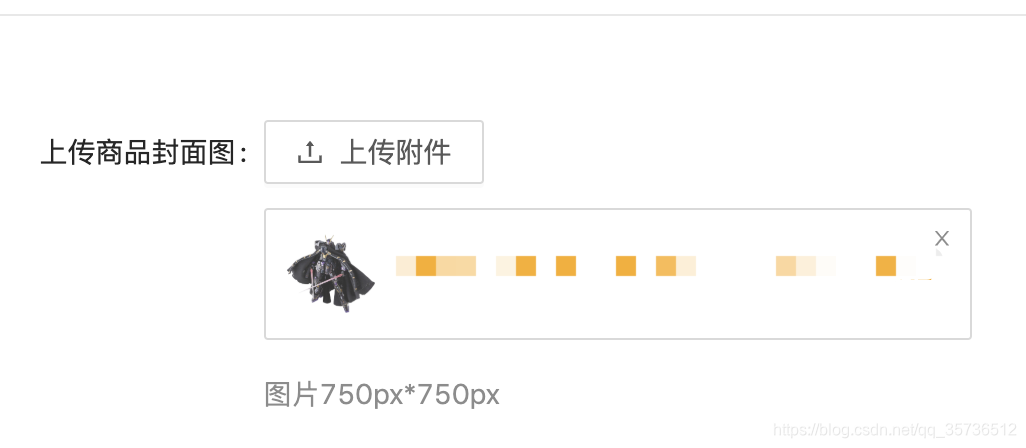
最后,我有一个问题,window下,这个组件的图片偶尔会出不来,刷新就又好了,就是下面这个图,我用mac,就没有碰到过,所以不知道这个怎么解决哦