市面上大概有3种常用的授权和认证方法,①,shiro,②,oauth,③,spring-security;
而spring-security 能与springboot进行无缝整合,可以说是官方推荐,但比较复杂,shiro简单而易用,个人也很喜欢。oauth暂时还没接触到
1,配置
①,pom.xml
<parent>
	<groupId>org.springframework.boot</groupId>
	<artifactId>spring-boot-starter-parent</artifactId>
	<version>2.0.2.RELEASE</version>
</parent>

<dependencies>
	<!-- 引入thymeleaf 的shiro命名空间 -->
	<dependency>
		<groupId>org.thymeleaf.extras</groupId>
		<artifactId>thymeleaf-extras-springsecurity4</artifactId>
	</dependency>
	<!--引入spring-security -->
	<dependency>
		<groupId>org.springframework.boot</groupId>
		<artifactId>spring-boot-starter-security</artifactId>
	</dependency>
	<dependency>
		<groupId>org.springframework.boot</groupId>
		<artifactId>spring-boot-starter-thymeleaf</artifactId>
	</dependency>
	<dependency>
		<groupId>org.springframework.boot</groupId>
		<artifactId>spring-boot-starter-web</artifactId>
	</dependency>
<dependencies>
②,application.properties 配置
#禁用thymeleaf缓存,这样在页面按下ctrl+f9(重新编译),便能实时更新页面
spring.thymeleaf.cache=false
2,spring-security 在java代码的配置
import org.springframework.context.annotation.Bean;
import org.springframework.security.config.annotation.authentication.builders.AuthenticationManagerBuilder;
import org.springframework.security.config.annotation.web.builders.HttpSecurity;
import org.springframework.security.config.annotation.web.configuration.EnableWebSecurity;
import org.springframework.security.config.annotation.web.configuration.WebSecurityConfigurerAdapter;
import org.springframework.security.crypto.bcrypt.BCryptPasswordEncoder;
import org.springframework.security.crypto.password.NoOpPasswordEncoder;
import org.springframework.security.crypto.password.PasswordEncoder;

@EnableWebSecurity
public class SecurityConfig extends WebSecurityConfigurerAdapter {

    /**
     * 配置授权信息
     * @param http
     * @throws Exception
     */
    @Override
    protected void configure(HttpSecurity http) throws Exception {
        http.authorizeRequests().antMatchers("/").permitAll()//允许访问首页
                    .antMatchers("/level1/*").hasRole("vip1")
                    .antMatchers("/level2/*").hasRole("vip2")
                    .antMatchers("/level3/*").hasRole("vip3");
//        自定义登录页面
        http.formLogin().loginPage("/userlogin")//这个/必须加上,配置登录url
                .usernameParameter("user")//指定进行认证的参数名
                .passwordParameter("pwd");

        http.logout().logoutSuccessUrl("/");//开启注销功能,并配置退出成功后重定向的的url
        http.rememberMe().rememberMeParameter("remeber");//开启记住我功能,默认会记住14天
    }

    /**
     * 配置认证规则
     * @param auth
     * @throws Exception
     */
    @Override
    protected void configure(AuthenticationManagerBuilder auth) throws Exception {
        //内存配置
        auth.inMemoryAuthentication()
                .withUser("xiaosu").password("123").roles("vip1")//xiaosu的角色是vip1
                .and()
                .withUser("小苏").password("123").roles("vip2")//小苏的角色是vip1
                .and()
                .withUser("翛苏").password("123").roles("vip3");//翛苏的角色是vip1
    }
    /*  如果不配置PasswordEncoder 会报如下错误
        java.lang.IllegalArgumentException: There is no PasswordEncoder mapped for the id "null"
    */
    @Bean
    public PasswordEncoder passwordEncoder() {
        //虽然已经过时,但这里不对密码进行加密
        return NoOpPasswordEncoder.getInstance();
    }
}
3,地址映射
①,controller层映射页面地址
import org.springframework.stereotype.Controller;
import org.springframework.web.bind.annotation.PathVariable;
import org.springframework.web.bind.annotation.RequestMapping;
import org.springframework.web.servlet.ModelAndView;

@Controller
public class SercurityController {

    @RequestMapping("level{level}/{page}")
    public ModelAndView toPage(@PathVariable("level")String level,@PathVariable("page")String page){
        ModelAndView view=new ModelAndView(String.format("pages/level%s/%s",level,page));
        return view;
    }
}
②,配置登录以及首页映射
import org.springframework.context.annotation.Configuration;
import org.springframework.web.servlet.config.annotation.ViewControllerRegistry;
import org.springframework.web.servlet.config.annotation.WebMvcConfigurer;

@Configuration
public class MvcConfig implements WebMvcConfigurer {
    @Override
    public void addViewControllers(ViewControllerRegistry registry) {
        registry.addViewController("/").setViewName("welcome");
        registry.addViewController("/userlogin").setViewName("pages/login");
    }
}
4,页面代码
①,welcome.html
<!DOCTYPE html>
<html xmlns:th="http://www.thymeleaf.org"
	  xmlns:sec="http://www.thymeleaf.org/thymeleaf-extras-springsecurity4"><!--引入thymeleaf的shiro命名空间-->
<head>
<meta http-equiv="Content-Type" content="text/html; charset=UTF-8">
<title>Insert title here</title>
</head>
<body>
<h1 align="center">欢迎光临武林秘籍管理系统</h1>
<!--没有认证信息,显示这个-->
<div sec:authorize="!isAuthenticated()">
	<h2 align="center">游客您好,如果想查看武林秘籍 <a th:href="@{/userlogin}">请登录</a></h2>
</div>
<!--认证后,显示这个-->
<div sec:authorize="isAuthenticated()">
	<!--显示认证信息-->
	<div>您好:<span sec:authentication="name"></span>,
		<!--显示角色信息-->
		roles: <span sec:authentication="principal.authorities"></span>
	</div>
	<!--退出链接,注意这里必须是post请求-->
	<form th:action="@{/logout}" method="post">
		<input type="submit" value="退出">
	</form>
</div>


<hr>
<!--用户有角色vip1 时显示-->
<div sec:authorize="hasRole('vip1')">
	<h3>普通武功秘籍</h3>
	<ul>
		<li><a th:href="@{/level1/1}">罗汉拳</a></li>
		<li><a th:href="@{/level1/2}">武当长拳</a></li>
		<li><a th:href="@{/level1/3}">全真剑法</a></li>
	</ul>
</div>
<!--用户有角色vip2 时显示-->
<div sec:authorize="hasRole('vip2')">
	<h3>高级武功秘籍</h3>
	<ul>
		<li><a th:href="@{/level2/1}">太极拳</a></li>
		<li><a th:href="@{/level2/2}">七伤拳</a></li>
		<li><a th:href="@{/level2/3}">梯云纵</a></li>
	</ul>
</div>
<!--用户有角色vip3 时显示-->
<div sec:authorize="hasRole('vip3')">
	<h3>绝世武功秘籍</h3>
	<ul>
		<li><a th:href="@{/level3/1}">葵花宝典</a></li>
		<li><a th:href="@{/level3/2}">龟派气功</a></li>
		<li><a th:href="@{/level3/3}">独孤九剑</a></li>
	</ul>
</div>


</body>
</html>
②,level2下的3.html页面如下,其余相似
<!DOCTYPE html>
<html xmlns:th="http://www.thymeleaf.org">
<head>
<meta http-equiv="Content-Type" content="text/html; charset=UTF-8">
<title>Insert title here</title>
</head>
<body>
	<a th:href="@{/}">返回</a>
	<h1>梯云纵</h1>
	<p>踩自己的脚往上跳</p>
</body>
</html>
③,login.html
<!DOCTYPE html>
<html xmlns:th="http://www.thymeleaf.org">
<head>
<meta charset="UTF-8">
<title>Insert title here</title>
</head>
<body>
<h1 align="center">欢迎登陆武林秘籍管理系统</h1>
<hr>
<div align="center">
<form th:action="@{/userlogin}" method="post">
用户名:<input name="user"/><br>
密码:<input name="pwd"><br/>
<input type="checkbox" name="remeber"> 记住我<br/>
<input type="submit" value="登陆">
</form>
</div>
</body>
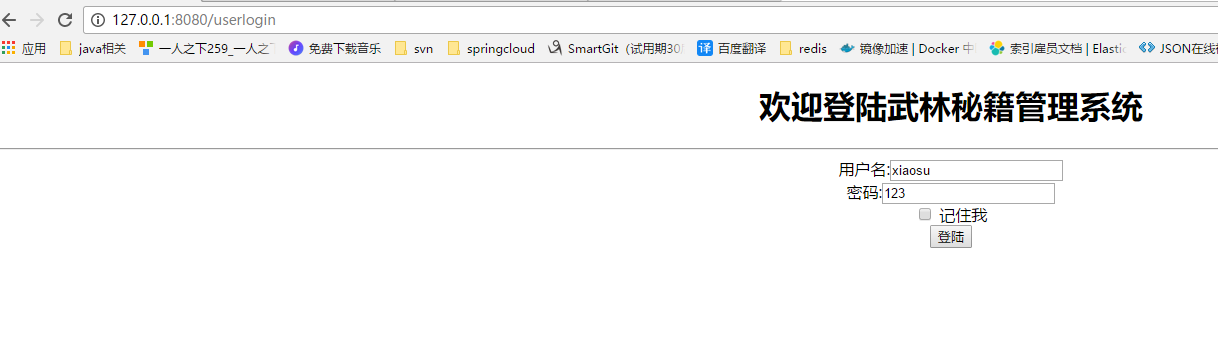
</html>5,启动项目,进行测试
①,用xiaosu进行登录
扫描二维码关注公众号,回复:
949664 查看本文章

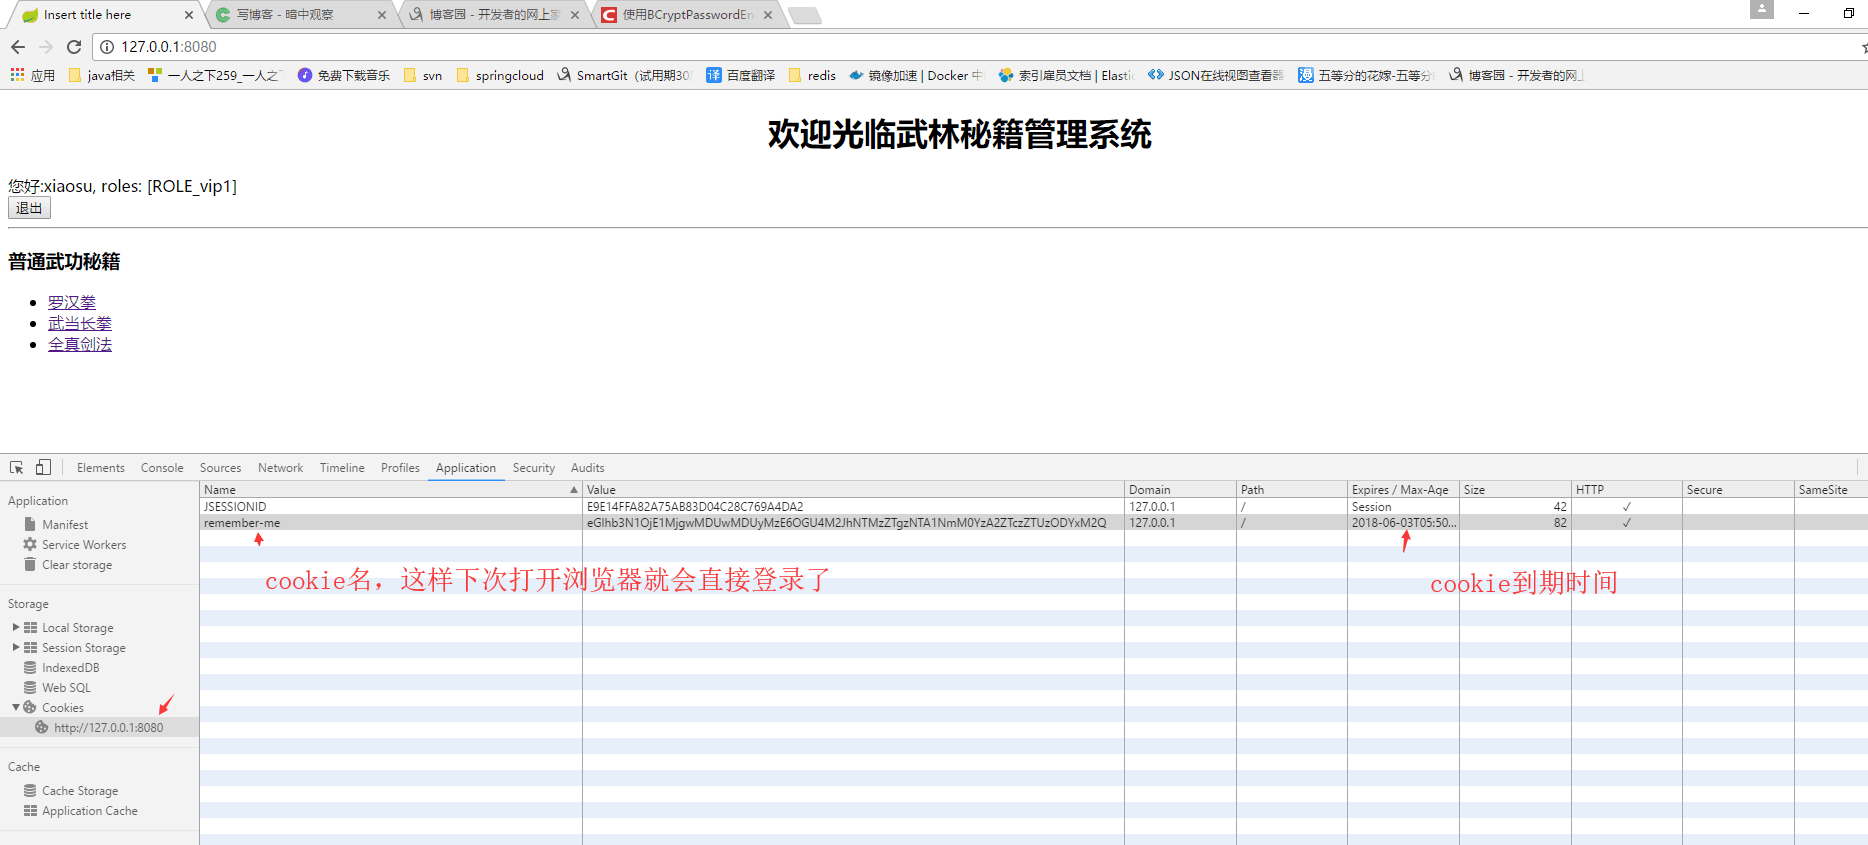
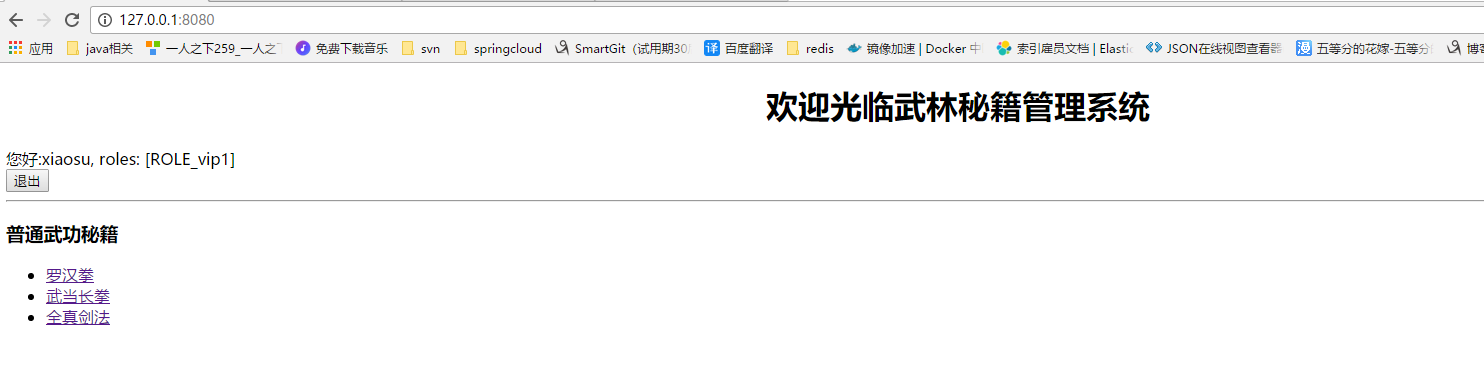
②,登录成功,显示如下
③,在登录时勾选记住我的话,会往cookie存储如下信息