作者平台:
| CSDN:blog.csdn.net/qq_41153943
| 知乎:www.zhihu.com/people/1024…
| GitHub:github.com/JiangXia-10…
| 微信公众号:1024笔记
本文大约2230字,预计阅读时长15分钟
一、Spring Security介绍
1、框架介绍
Spring 是一个非常流行和成功的 Java 应用开发框架。Spring Security 基于 Spring 框架,提供了一套 Web 应用安全性的完整解决方案。一般来说,Web 应用的安全性包括用户认证(Authentication*)和用户授权(Authorization) 两个部分。
(1)用户认证指的是:验证某个用户是否为系统中的合法主体,也就是说用户能否访问该系统。用户认证一般要求用户提供用户名和密码。系统通过校验用户名和密码来完成认证过程。
(2)用户授权指的是验证某个用户是否有权限执行某个操作。在一个系统中,不同用户所具有的权限是不同的。比如对一个文件来说,有的用户只能进行读取,而有的用户可以进行修改。一般来说,系统会为不同的用户分配不同的角色,而每个角色则对应一系列的权限。
Spring Security其实就是用filter,多请求的路径进行过滤。
(1)如果是基于Session,那么Spring-security会对cookie里的sessionid进行解析,找到服务器存储的sesion信息,然后判断当前用户是否符合请求的要求。
(2)如果是token,则是解析出token,然后将当前请求加入到Spring-security管理的权限信息中去
2、认证与授权实现思路
如果系统的模块众多,每个模块都需要就行授权与认证,所以我们选择基于token的形式进行授权与认证,用户根据用户名密码认证成功,然后获取当前用户角色的一系列权限值,并以用户名为key,权限列表为value的形式存入redis缓存中,根据用户名相关信息生成token返回,浏览器将token记录到cookie中,每次调用api接口都默认将token携带到header请求头中,Spring-security解析header头获取token信息,解析token获取当前用户名,根据用户名就可以从redis中获取权限列表,这样Spring-security就能够判断当前请求是否有权限访问
二、整合Spring Security
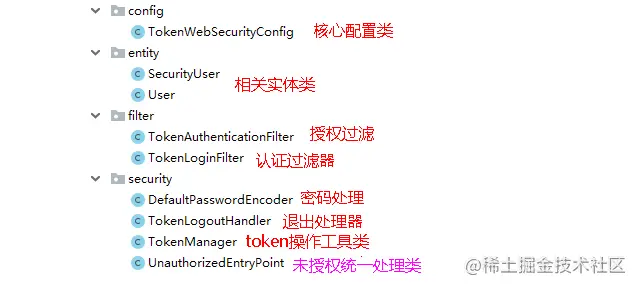
1、首先创建Spring Security相关的模块以及代码架构
2、在spring_security引入相关依赖
<dependencies>
    <dependency>
        <groupId>com.jiangxia</groupId>
        <artifactId>common_utils</artifactId>
        <version>0.0.1-SNAPSHOT</version>
    </dependency>
    <!-- Spring Security依赖 -->

    <dependency>
        <groupId>org.springframework.boot</groupId>
        <artifactId>spring-boot-starter-security</artifactId>
    </dependency>
    <dependency>
        <groupId>io.jsonwebtoken</groupId>
        <artifactId>jjwt</artifactId>
    </dependency>
</dependencies>
复制代码
3、在需要使用spring_security的模块中引入spring_security依赖
<dependency>
    <groupId>com.atguigu</groupId>
    <artifactId>spring_security</artifactId>
    <version>0.0.1-SNAPSHOT</version>
</dependency>
复制代码
4、核心代码说明
Spring Security的核心配置就是继承WebSecurityConfigurerAdapter并注解@EnableWebSecurity的配置。 这个配置指明了用户名密码的处理方式、请求路径的开合、登录登出控制等和安全相关的配置。主要代码如下:
@Configuration
@EnableWebSecurity
@EnableGlobalMethodSecurity(prePostEnabled = true)
public class TokenWebSecurityConfig extends WebSecurityConfigurerAdapter {
    private UserDetailsService userDetailsService;
    private TokenManager tokenManager;
    private DefaultPasswordEncoder defaultPasswordEncoder;
    private RedisTemplate redisTemplate;
    @Autowired
    public TokenWebSecurityConfig(UserDetailsService userDetailsService, DefaultPasswordEncoder defaultPasswordEncoder,TokenManager tokenManager, RedisTemplate redisTemplate) {
        this.userDetailsService = userDetailsService;
        this.defaultPasswordEncoder = defaultPasswordEncoder;
        this.tokenManager = tokenManager;
        this.redisTemplate = redisTemplate;
    }

    /**
     * 配置设置
     * @param http
     * @throws Exception
     */
    @Override
    protected void configure(HttpSecurity http) throws Exception {
        http.exceptionHandling()
                .authenticationEntryPoint(new UnauthorizedEntryPoint())
                .and().csrf().disable()
                .authorizeRequests()
                .anyRequest().authenticated()
                .and().logout().logoutUrl("/admin/acl/index/logout")
                .addLogoutHandler(new TokenLogoutHandler(tokenManager,redisTemplate)).and().addFilter(new TokenLoginFilter(authenticationManager(), tokenManager, redisTemplate)).addFilter(new TokenAuthenticationFilter(authenticationManager(), tokenManager, redisTemplate)).httpBasic();
    }
    /**
     * 密码处理
     * @param auth
     * @throws Exception
     */
    @Override
    public void configure(AuthenticationManagerBuilder auth) throws Exception {
        auth.userDetailsService(userDetailsService).passwordEncoder(defaultPasswordEncoder);
    }
    //配置哪些请求不拦截
    @Override
    public void configure(WebSecurity web) throws Exception {
        web.ignoring().antMatchers("/api/**",
                "/swagger-resources/**", "/webjars/**", "/v2/**", "/swagger-ui.html/**"
               );
    }
}
复制代码
创建认证授权相关的工具类:
1、密码处理的方法
@Component
public class DefaultPasswordEncoder implements PasswordEncoder {
    public DefaultPasswordEncoder() {
        this(-1);
    }
    /**
     * @param strength
     *            the log rounds to use, between 4 and 31
     */
    public DefaultPasswordEncoder(int strength) {
    }
    public String encode(CharSequence rawPassword) {
        return MD5.encrypt(rawPassword.toString());
    }
    public boolean matches(CharSequence rawPassword, String encodedPassword) {
        return encodedPassword.equals(MD5.encrypt(rawPassword.toString()));
    }
}
复制代码
2、token操作的工具类
@Component
public class TokenManager {
    private long tokenExpiration = 24*60*60*1000;
    private String tokenSignKey = "123456";
    public String createToken(String username) {
        String token = Jwts.builder().setSubject(username)
                .setExpiration(new Date(System.currentTimeMillis() + tokenExpiration))
                .signWith(SignatureAlgorithm.HS512, tokenSignKey).compressWith(CompressionCodecs.GZIP).compact();
        return token;
    }
    public String getUserFromToken(String token) {
        String user = Jwts.parser().setSigningKey(tokenSignKey).parseClaimsJws(token).getBody().getSubject();
        return user;
    }
    public void removeToken(String token) {
        //jwttoken无需删除,客户端扔掉即可。
    }
}
复制代码
3、退出登录实现类
/**
 *
 * 登出业务逻辑类
 *
 */
public class TokenLogoutHandler implements LogoutHandler {
    private TokenManager tokenManager;
    private RedisTemplate redisTemplate;
    public TokenLogoutHandler(TokenManager tokenManager, RedisTemplate redisTemplate) {
        this.tokenManager = tokenManager;
        this.redisTemplate = redisTemplate;
    }
    @Override
    public void logout(HttpServletRequest request, HttpServletResponse response, Authentication authentication) {
        String token = request.getHeader("token");
        if (token != null) {
            tokenManager.removeToken(token);
            //清空当前用户缓存中的权限数据
            String userName = tokenManager.getUserFromToken(token);
            redisTemplate.delete(userName);
        }
        ResponseUtil.out(response, R.ok());
    }
}
复制代码
4、针对未授权的统一处理方式
public class UnauthorizedEntryPoint implements AuthenticationEntryPoint {
    @Override
    public void commence(HttpServletRequest request, HttpServletResponse response,
                         AuthenticationException authException) throws IOException, ServletException {
        ResponseUtil.out(response, R.error());
    }
}
复制代码
5、创建认证和授权的filter
/**
 *
 * 登录过滤器,继承UsernamePasswordAuthenticationFilter,对用户名密码进行登录校验,认证
 *
 */
public class TokenLoginFilter extends UsernamePasswordAuthenticationFilter {
    private AuthenticationManager authenticationManager;
    private TokenManager tokenManager;
    private RedisTemplate redisTemplate;
    public TokenLoginFilter(AuthenticationManager authenticationManager, TokenManager tokenManager, RedisTemplate redisTemplate) {
        this.authenticationManager = authenticationManager;
        this.tokenManager = tokenManager;
        this.redisTemplate = redisTemplate;
        this.setPostOnly(false);
        this.setRequiresAuthenticationRequestMatcher(new AntPathRequestMatcher("/admin/acl/login","POST"));
    }
    @Override
    public Authentication attemptAuthentication(HttpServletRequest req, HttpServletResponse res)
            throws AuthenticationException {
        try {
            User user = new ObjectMapper().readValue(req.getInputStream(), User.class);
            return authenticationManager.authenticate(new UsernamePasswordAuthenticationToken(user.getUsername(), user.getPassword(), new ArrayList<>()));
        } catch (IOException e) {
            throw new RuntimeException(e);
        }
    }
    /**
     * 登录成功
     * @param req
     * @param res
     * @param chain
     * @param auth
     * @throws IOException
     * @throws ServletException
     */
    @Override
    protected void successfulAuthentication(HttpServletRequest req, HttpServletResponse res, FilterChain chain,
                            Authentication auth) throws IOException, ServletException {
        SecurityUser user = (SecurityUser) auth.getPrincipal();
        String token = tokenManager.createToken(user.getCurrentUserInfo().getUsername());
        redisTemplate.opsForValue().set(user.getCurrentUserInfo().getUsername(), user.getPermissionValueList());
        ResponseUtil.out(res, R.ok().data("token", token));
    }
    /**
     * 登录失败
     * @param request
     * @param response
     * @param e
     * @throws IOException
     * @throws ServletException
     */
    @Override
    protected void unsuccessfulAuthentication(HttpServletRequest request, HttpServletResponse response,
                                              AuthenticationException e) throws IOException, ServletException {
        ResponseUtil.out(response, R.error());
    }
}
复制代码
/**
 * 访问过滤器:授权filter
 *
 */
public class TokenAuthenticationFilter extends BasicAuthenticationFilter {
    private TokenManager tokenManager;
    private RedisTemplate redisTemplate;
    public TokenAuthenticationFilter(AuthenticationManager authManager, TokenManager tokenManager,RedisTemplate redisTemplate) {
        super(authManager);
        this.tokenManager = tokenManager;
        this.redisTemplate = redisTemplate;
    }
    @Override
    protected void doFilterInternal(HttpServletRequest req, HttpServletResponse res, FilterChain chain)
            throws IOException, ServletException {
        logger.info("================="+req.getRequestURI());
        if(req.getRequestURI().indexOf("admin") == -1) {
            chain.doFilter(req, res);
            return;
        }
        UsernamePasswordAuthenticationToken authentication = null;
        try {
            authentication = getAuthentication(req);
        } catch (Exception e) {
            ResponseUtil.out(res, R.error());
        }
        if (authentication != null) {
            SecurityContextHolder.getContext().setAuthentication(authentication);
        } else {
            ResponseUtil.out(res, R.error());
        }
        chain.doFilter(req, res);
    }
    private UsernamePasswordAuthenticationToken getAuthentication(HttpServletRequest request) {
        // token置于header里
        String token = request.getHeader("token");
        if (token != null && !"".equals(token.trim())) {
            String userName = tokenManager.getUserFromToken(token);
            List<String> permissionValueList = (List<String>) redisTemplate.opsForValue().get(userName);
            Collection<GrantedAuthority> authorities = new ArrayList<>();
            for(String permissionValue : permissionValueList) {
                if(StringUtils.isEmpty(permissionValue)) continue;
                SimpleGrantedAuthority authority = new SimpleGrantedAuthority(permissionValue);
                authorities.add(authority);
            }
            if (!StringUtils.isEmpty(userName)) {
                return new UsernamePasswordAuthenticationToken(userName, token, authorities);
            }
            return null;
        }
        return null;
    }
}
复制代码
总结
以上就是关于在springboot中进行spring security的相关逻辑。spring security授权和认证的流程大致其实跟自定义拦截器进行权限拦截是一样的。认证的过程就是客户端用户登录,然后服务端将用户登录信息缓存起来,最后服务端将用户信息(基本信息、权限、token等)返回给客户端。授权的过程,首先客户端发起请求,携带token,服务端解析token,判断用户是否登录,再从缓存中查询用户的菜单,判断用户是否有权限请求菜单,最后返回数据给客户端。