es分为站内搜索和浏览器搜索,一般是logstash,但是要是实时的更新就要用到了mq发消息进行更新。
倒排索引,一个词条对应一个文档。
es是被优化的。
es可以实时但是solr是不能实时的,任意阻塞。
其实用的最多的还是这两个:

redis是缓存数据库。
mongodb是非关系数据库最像数据库的。
接口安全:cookie和session能对应上。
logstash:吃资源的。
----------------------------------------------------01-----------------------------------------------
内容介绍无用。
----------------------------------------------------02-----------------------------------------------
使用场景:异步处理 应用解耦 流量削峰 消息通信
----------------------------------------------------------------------------03-------------------------------------------------------------------------------------


--------------------------------------------------------------------------------04----------------------------------------------------------------------------------
win的安装。直接忽略。
--------------------------------------------------------------------------------05----------------------------------------------------------------------------------
docker安装部署rabbitmq。
docker run -di --name=tensquare_rabbitmq -p 5671:5671 -p 5672:5672 -p 4369:4369 -p 15671:15671 -p 15672:15672 -p 25672:25672 rabbitmq:management
访问:http://192.168.244.136:15672/ 用户密码:guest
--------------------------------------------------------------------------------06----------------------------------------------------------------------------------
Driect模式:
第一步:创建队列:


第二步:创建模块

第三步:导包
 <dependencies>
        <dependency>
            <groupId>org.springframework.boot</groupId>
            <artifactId>spring-boot-starter-amqp</artifactId>
        </dependency>
    </dependencies>
第四步:配置yml
server:
  port: 8099
spring:
  rabbitmq:
    host: 192.168.244.136
第五步:写启动类
第六步:写测试的生产者。
 测试类
测试类


消息的生产者:
@Test
    public void sendMsg(){
        rabbitTemplate.convertAndSend("itcast","test直接模式");
    }
消息的消费者:
@SpringBootApplication
@EnableRabbit
public class RabbitmqApplication {

    public static void main(String[] args) {
        SpringApplication.run(RabbitmqApplication.class,args);
    }
}
消费一次都消费完毕,不管是插入了几条。监听直接消费。
我插入了三条数据消费者一次就消费完毕了,厉害了。目前我只有一个消费者。
---
三个人等着拿消息, 本身有负载均衡的。轮流拿。
实验1的做法:直连模式三个都是。
实验2的做法,消息队列加入多个消息。

和实验1是一样的。

--------------------------------------------------------------------------------07----------------------------------------------------------------------------------
Fanout模式:
分裂模式:消息发给交换器,交换器绑定我的rountingKey。


第一步:搭架子,多个队列。


往交换器发消息,就往三个绑定的队列里面发送,业务场景就是一个消息发送短信,邮件,微信。
第二步:测试
 /**
     * 分裂模式,使用交换机
     */
    @Test
    public void sendMsg2(){
        rabbitTemplate.convertAndSend("chuanzhi","","分裂模式消息");
    }
监控就是监控队列。主题是分列模式的加强版。
--------------------------------------------------------------------------------08----------------------------------------------------------------------------------
主题模式:匹配规则.就是直接和分列的结合。
 /**
     * 主题模式
     */
    @Test
    public void sendMsg3(){
        rabbitTemplate.convertAndSend("topic84","good.abc","主题模式消息2");
    }
测试:第一步:

第二步:
 /**
     * 主题模式
     */
    @Test
    public void sendMsg3(){
        rabbitTemplate.convertAndSend("topic84","good.abc","主题模式消息2");
    }
术语解释:
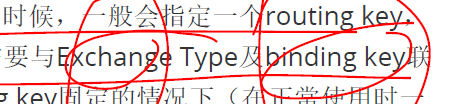
交换机的类型。
队列的key。
--------------------------------------------------------------------------------09----------10------------------------------------------------------------------------
普通用户和后台用户的区别:

--------------------------------------------------------------------------------11------------------------------------------------------------------------
新建模块:

--------------------------------------------------------------------------------12------------------------------------------------------------------------

redist用于验证。
mq用于发送消息。
注册的手机验证码:
第一步:
	/**
	 * 发送短信验证码
	 * @return
	 */
	@PostMapping("/sendsms/{mobile}")
	public Result sendSms(@PathVariable String mobile){
		userService.sendSms(mobile);
		return new Result(true,StatusCode.OK,"发送成功");

	}
第二步:
导入long3的包。
  <dependency>
		  <groupId>org.apache.commons</groupId>
		  <artifactId>commons-lang3</artifactId>
		  <version>3.9</version>
	  </dependency>
public void sendSms(String mobile) {
//生成六位随机数字
String code = RandomStringUtils.randomNumeric(6);
//向缓存中放一份
redisTemplate.opsForValue().set("tensquare_checkCode_"+mobile,code,6, TimeUnit.MINUTES);
Map<String,String>map=new HashMap<>();
map.put("mobile",mobile);
map.put("checkcode",code);
//给用户发一份
rabbitTemplate.convertAndSend("sms",map);
//在控制台显示一份
System.out.println("验证码为"+code);
}第三步:加redis
    <dependency>
            <groupId>org.springframework.boot</groupId>
            <artifactId>spring-boot-starter-data-redis</artifactId>
        </dependency>
第四步:导入mq的包
第五步:测试:
localhost:9007/user/sendsms/15854132997--------------------------------------------------------------------------------13------------------------------------------------------------------------
注册:
第一步:
	/**
	 * 验证码
	 * @param mobile
	 */
	public void sendSms(String mobile) {
		//生成六位随机数字验证码
		String code = RandomStringUtils.randomNumeric(6);
		//向缓存中放一份 判断填的对不对的 指定删除时间6小时
		redisTemplate.opsForValue().set("tensquare_checkCode_"+mobile,code,6, TimeUnit.HOURS);
		Map<String,String>map=new HashMap<>();
		map.put("mobile",mobile);
		map.put("checkcode",code);
		//给用户发一份 不需要等 直接的模式发送的 消息队列里面的数据直接发送给了运营商。
		rabbitTemplate.convertAndSend("sms",map);
		//在控制台显示一份
		System.out.println("验证码为"+code);
	}
第二步:
完善基本信息
	/**
	 * 增加
	 * @param user
	 */
	public void add(User user) {
		user.setId( idWorker.nextId()+"" );
		//密码加密
		user.setPassword(user.getPassword());
		user.setFollowcount(0);//关注数
		user.setFanscount(0);//粉丝数
		user.setOnline(0L);//在线时长//
		user.setRegdate(new Date());//注册日期
		user.setUpdatedate(new Date());//更新日期
		user.setLastdate(new Date());//最后登陆日期
		userDao.save(user);
	}
--------------------------------------------------------------------------------14------------------------------------------------------------------------
消费者环境的搭建:
第一步:新建模块。导包。
 只发短信。
只发短信。
第二步:yml
server:
  port: 9008
spring:
  application:
    name: tensquare-sms
  rabbitmq:
    host: 192.168.244.136
第三步:
步骤i的详解:验证码发送的消息队列,马上就消费掉发送给运营商。
@Component
@RabbitListener(queues = "sms")
public class SmsListener {

//    @Autowired
//    private SmsUtil smsUtil;

//    @Value("${aliyun.sms.template_code}")
//    private String template_code;
//
//    @Value("${aliyun.sms.sign_name}")
    private String sign_name;
    @RabbitHandler
    public void executeSms(Map<String,String> map){
        String mobile=map.get("mobile");
        String checkcode=map.get("checkcode");
        System.out.println("手机号"+map.get("mobile"));
        System.out.println("验证码"+map.get("checkcode"));
//        try {
//            smsUtil.sendSms(mobile,template_code,sign_name,"{\"code\":\""+checkcode+"\"}");
//        } catch (ClientException e) {
//            e.printStackTrace();
//        }
    }
}
--------------------------------------------------------------------------------15------------------------------------------------------------------------
短信服务:
第一步:充值,获得用户的AccessKey
第二步:下载代码(旧版),导入阿里云的包。
第四步:写代码。改yml。

第五步:写监听器。
流程:输入电话号点击确定,发送验证码,一个存redis,一个存消息队列,消息消费者马上监听消费,调用阿里短信,给这个手机号发送短信,注册,短信的code和redis的code比对即可。
	@PostMapping("/register/{code}")
	public Result register(@PathVariable String code,@RequestBody User user){
		//得到缓存中的验证码
		String checkcodeRedis=(String)redisTemplate.opsForValue().get("tensquare_checkCode_"+user.getMobile());
		if(StringUtils.isEmpty(checkcodeRedis)){
			return new Result(false,StatusCode.ERROR,"请先获取手机验证码");
		}
		if(!checkcodeRedis.equals(code)){
			return new Result(false,StatusCode.ERROR,"请输入正确的验证码");
		}
		userService.add(user);
		return new Result(true,StatusCode.OK,"注册成功");
	}
注册的完整代码。
--------------------------------------------------------------------------------16-------17-----------------------------------------------------------------
