随着深度学习越来越热门,一些深度学习框架也应运而生,这方面比较典型的代表有:Tensorflow和Pytorch。
对于计算机视觉来说,主要处理的对象是一些结构化的数据,如图像,视频等。对于图像而言,我们可以运行各种成熟的图像处理库很方便的去对图片进行各种操作,使其能够满足框架输入的格式要求。接下来将对每个python图像处理库做一个简短的总结,后面有时间会持续性更新。
一、读入
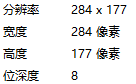
对于单通道的黑白图片,其属性如下:
1. matplotlib
import matplotlib.pyplot as plt
img_path = r'pic.jpg'
plt_img = plt.imread(img_path)
print(f"image shape: {plt_img.shape}")  # image shape: (177, 284, 3)
print(f"image dtype: {plt_img.dtype}")  # image dtype: 8bit图像为float32,24bit图像为uint8
print(f"image type: {type(plt_img)}")   # image type: <class 'numpy.ndarray'>
matplotlib对于黑白二值单通道图像的读取顺序是HWC(高度宽度通道数),图像的数值类型为float32,数值范围为[0, 1],数据格式为numpy的ndarray数组格式。如果是读入RGB的真彩色图像,则返回的图像数值类型为uint8,数值范围为[0, 255]。matplotlib一般用途为plt显示绘图,它支持多种数据格式的显示输出。
(2)scikit-image
from skimage import io
img_path = r'pic.jpg'
sk_img = io.imread(img_path)
print(f"image shape: {sk_img.shape}")  # image shape: (177, 284)
print(f"image dtype: {sk_img.dtype}")  # image dtype: uint8
print(f"image type: {type(sk_img)}")   # image type: <class 'numpy.ndarray'>
skimage对于黑白二值单通道图像的读取顺序是HW(注意不是HWC),图像的数值类型为uint8,数值范围为[0, 255],数据格式为numpy的ndarray数组格式。对于灰度图像(区分二值图像)来说,读入的是float的数值类型,数值范围为[0, 1]。这个库读入彩色图像的是uint8的数值类型,数值范围是[0, 255],可是一旦你进行了图像操作,比如调用resize,它就变成了float64的数值类型,数值范围是[0, 1]。
from skimage import io, transform
img_path = r'image.jpg'
sk_img = io.imread(img_path)
print(f"image dtype: {sk_img.dtype}")  # image dtype: uint8
print(sk_img[69][93]) 				   # [118  92 117]
sk_img = transform.resize(sk_img, (256, 256))
print(f"image dtype: {sk_img.dtype}")  # image dtype: float64
print(sk_img[69][93])				   # [0.77347005 0.49980469 0.41182119]
skimage读入图像整体较慢,它是基于scipy.ndimage的进一步封装,鉴于其变幻莫测,个人不建议使用。
(3)opencv-python
import cv2
img_path = r'pic.jpg'
cv2_img = cv2.imread(img_path)
print(f"image shape: {cv2_img.shape}")  # image shape: (177, 284, 3)
print(f"image dtype: {cv2_img.dtype}")  # image dtype: uint8
print(f"image type: {type(cv2_img)}")   # image type: <class 'numpy.ndarray'>
cv2_img = cv2.resize(cv2_img, (100, 200))  # 注意它的resize尺寸是按照(宽度,高度)来的
print(f"image shape: {cv2_img.shape}")  # image shape: (200, 100, 3),显示是按(高度,宽度)来的
cv2读入图像都是统一将其转换成===【3通道的图像,图像的数值类型为uint8,数值范围为[0, 255],数据格式为numpy的ndarray数组格式】。需要注意的是,cv2读入的彩色通道顺序是BGR而不是RGB,所以一般如果我们用cv2.imshow去显示的话,色彩还原便是正常。而如果用其他库区操作,显示出来的图像色彩就跟我们正常看到的不一样了。这个库一般用于数据的保存和读入,还有就是给图像加上文字,画矩形框等(比如目标检测为图像添加矩形框并备注标签和置信度)。
备注:cv2由于没有license权限,所以它目前暂不支持.gif等图像的读取,而且格外注意cv2要求输入图片路径中不得有中文,否则会读入后不会报错,但是会返回Nonetype,即读空。【虽然可以解决但麻烦~~】
(4)pillow
from PIL import Image
img_path = r'pic.jpg'
pil_img = Image.open(img_path)
print(f"image shape: ({pil_img.size[0]}, {pil_img.size[1]}, {pil_img.mode}, {len(pil_img.split())})")  # image shape: (284, 177, 'P', 1)
print(f"image dtype: {pil_img.getpixel((152, 115))}")  # image dtype: uint8
print(f"image type: {type(pil_img)}")   # image type: <class 'PIL.PngImagePlugin.PngImageFile'>
备注: L:8位的黑白像素;P:8位像素,可映射到其他模式;RGB:24位的真彩色图像
PIL的图像读取顺序是WH(宽度高度通道数),图像的数值类型为uint8,数值范围为[0, 255]。
读入二值图像的话显示的维度是(width, height);读入彩色图像的话则是(width, height, channel)。
特别注意,它这里读入的顺序是宽度优先,其他库都是高度优先。而且返回的数据类型不是ndarray数组。
对于Pytorch框架来说,底层的图像处理库是基于PIL的。这里讲一下一些注意的地方
img = Image.open("image.jpg")  # (w, h, c)
img = img.resize((w1, h1), Image.NEAREST)  # resize操作也是按宽高的顺序
# 这里Image.NEAREST(最近邻插值)一般用于语义分割,而目标检测一般用的插值方法为:BILINEAR(双线性插值,计算成本低),BICUBIC(三线性插值,可以有效的减少边缘的锯齿)
img = np.array(img)  # 数值类型变为uint8
img = np.array(img, dtype=np.float32)  # 指定类型位float32
print(img.shape)  # (h, w, c)  注意这里变回了(h, w, c)
Pytorch中,封装了一个图像处理库在torchvision里面(torchvision.transforms)。当我们调用torchvision.transforms.ToTense()时,它接收的参数是PIL Image或者numpy.ndarray格式。
它会将(h, w, c)–uint8–[0, 255]自动转换为(c, h, w)–float32–[0.0, 1.0]
注意:这里并不支持所有的格式!numpy的ndarray格式必须为np.uint8类型,PIL的Image格式必须为(L,LA,P,I, F, RGB, YCbCr,RGBA,CMYK,1),其他格式一律不会自动转换!所以你输入直接训练的时候很大概率会出现loss为负增长的现象,然后一直收敛不了。

