这里是一个学习过程笔记的汇总:Spring Boot学习汇总
日常开发中,我们会接触到各种的任务,在之前的公司也接触到了当当网的作业调度框架,不过那个比较复杂,而今天学习的Spring Boot整合的任务就要相对简单很多。如下:
首先创建一个Spring Boot项目,只需要导入web模块即可。

1、异步任务
创建一个service
package com.example.task.service;

import org.springframework.scheduling.annotation.Async;
import org.springframework.stereotype.Service;

/**
 * @author pavel
 * @date 2018/12/17 0017
 */
@Service
public class AsyncService {

    @Async
    public void  hello () {
        try {
            // 等待3秒
            Thread.sleep(3000);
        } catch (InterruptedException e) {
            e.printStackTrace();
        }
    }
}
创建controller
package com.example.task.controller;
import com.example.task.service.AsyncService;
import org.springframework.beans.factory.annotation.Autowired;
import org.springframework.web.bind.annotation.GetMapping;
import org.springframework.web.bind.annotation.RestController;
/**
* @author pavel
* @date 2018/12/18 0018
*/
@RestController
public class AsyncController {
@Autowired
private AsyncService asyncService;
@GetMapping("/sayHello")
public String sayHello () {
Long startDate = System.currentTimeMillis();
asyncService.hello();
Long endDate = System.currentTimeMillis();
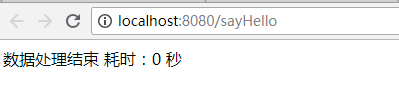
return "数据处理结束 耗时:" + (endDate - startDate) / 1000 + " 秒";
}
}
启动项目,先测试一下同步任务执行:

在service上加上注解@Async,
基于@Async标注的方法,称之为异步方法;这些方法将在执行的时候,将会在独立的线程中被执行,调用者无需等待它的完成,即可继续其他的操作。(@Async修饰的方法不要定义为static,否则异步调用不会生效)

然后再启动类上添加@EnableAsync,开启异步调用

启动项目,再次访问:
2、定时任务
开发中我们用到定时任务的场景可能会多一些,比如说最近开发的商城系统,定时凌晨清算用户积分,定时计算用户购物分润...
定时任务操作也很简单,需要用到一个cron表达式,不了解的可以参考:cron表达式详解
创建一个service,添加上@Scheduled注解,表明这个方法时一个定时执行方法,cron表达式的值就是这个定时方法的执行时间,这里配置的是每5秒执行:
package com.example.task.service;

import org.springframework.scheduling.annotation.Scheduled;
import org.springframework.stereotype.Service;

/**
 * @author pavel
 * @date 2018/12/18 0018
 */
@Service
public class ScheduledService {

    @Scheduled(cron = "0/5 * * * * ?")   // 每5秒执行
    public void hello() {
        SimpleDateFormat sdf = new SimpleDateFormat("yyyy-MM-dd HH:mm:ss");
        System.out.println("定时执行..." + sdf.format(new Date()));
    }
}
在启动类上添加注解@EnableScheduling,开启基于注解的定时任务

启动项目,看控制台:

cron表达式的时间可以自己设置成其他的然后测试一下。
3、邮件任务
邮件任务也会用到,SpringBoot也帮我们集成了,下面来操作一下:
3.1、pom文件先引入邮件相关依赖:
        <!-- 邮件相关依赖 -->
        <dependency>
            <groupId>org.springframework.boot</groupId>
            <artifactId>spring-boot-starter-mail</artifactId>
        </dependency>
可见导入了javax.mail,发送邮件的包:

邮件的发送过程如下,比如zhangsan给lisi发邮件([email protected] --> [email protected]):

并不是从[email protected]直接发送到[email protected],而是zhangsan先将邮件发送到qq邮箱服务器(这个时候就需要zhangsan的qq邮箱和密码),然后qq邮箱服务器再将这个邮件发送到163邮箱服务器,当lisi登陆163邮箱后,再从163邮箱服务器中获取邮件。
看下邮件的自动配置:
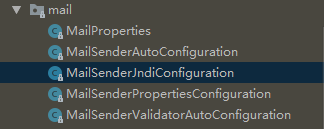
MailProperties类就是所有邮件操作相关的属性:

MailSenderJndiConfiguration类:

3.2、配置邮件发送相关属性(使用qq邮箱发送到163邮箱):
这里说一下,使用邮箱发送时,我们填写的发送者邮箱密码并不是真实的qq登陆密码,而是一个第三方登陆时的授权码,这个需要在个人邮箱的 设置-账号 中生成一下,这个授权码就是password。如下:

还有一个发件者邮箱服务器地址,SMTP服务,可以点击查看一下:

![]()
即host为smtp.qq.com
配置相关属性:

3.3、测试
package com.example.task;

import org.junit.Test;
import org.junit.runner.RunWith;
import org.springframework.beans.factory.annotation.Autowired;
import org.springframework.boot.test.context.SpringBootTest;
import org.springframework.mail.SimpleMailMessage;
import org.springframework.mail.javamail.JavaMailSenderImpl;
import org.springframework.test.context.junit4.SpringRunner;

@RunWith(SpringRunner.class)
@SpringBootTest
public class TaskApplicationTests {

    // 引入邮件发送的组件
    @Autowired
    private JavaMailSenderImpl mailSender;

    @Test
    public void contextLoads() {
        SimpleMailMessage message = new SimpleMailMessage();
        // 邮件设置
        message.setSubject("通知-今晚开会");   // 标题
        message.setText("今晚7:30,大会议室开会!");    // 内容
        message.setTo("[email protected]");         // 收件人
        message.setFrom("[email protected]");       // 发件人(一定要和主配置文件中的发送账号一致)
        mailSender.send(message);
        System.out.println("发送完成");
    }
}
运行,控制台没报错:

分别看一下发件箱:

以上是发送简单邮件,下面来测试发送带附件和html样式的复杂邮件:
    @Test
    public void testSendMail() {
        try {
            // 创建一个复杂的邮件消息
            MimeMessage mimeMessage = mailSender.createMimeMessage();
            MimeMessageHelper messageHelper = new MimeMessageHelper(mimeMessage, true);
            // 标题
            messageHelper.setSubject("通知~今晚开会");
            // 内容:第二个参数html,默认是false,即默认html不生效
            messageHelper.setText("<b style='color:red'>今天7:30,在大会议室开会,请准时到场!</b>", true);
            messageHelper.setTo("[email protected]");
            messageHelper.setFrom("[email protected]");
            // 发送附件
            messageHelper.addAttachment("iverson.jpg", new File("C:\\Users\\Administrator\\Pictures\\Saved Pictures\\iverson.jpg"));
            messageHelper.addAttachment("girl.jpg", new File("C:\\Users\\Administrator\\Pictures\\Saved Pictures\\girl.jpg"));
            mailSender.send(mimeMessage);
        } catch (MessagingException e) {
            e.printStackTrace();
        }
    }
运行,控制台无报错,看163收件箱,红色加粗字体,附件两张图片:

好了 关于任务的相关操作就这么多, 异步任务,定时任务,邮件任务。
