你画我猜中的画板功能
本节我们来做一个画板,该画板一共有三个小功能:
- 调节笔刷大小
- 改变笔刷颜色
- 橡皮擦
运行效果如下:
Cocos Creator版本:2.2.0
后台回复"画板",获取该项目完整文件:

创建节点
笔者在层级管理器中创建了以下节点:

1. bg为画板背景,颜色为白色。
2. brush为笔刷节点,我们在该节点上添加了Graphics组件和自定义脚本Brush.js:

注:读者可以去官方文档上了解下Graphics组件的各个属性。
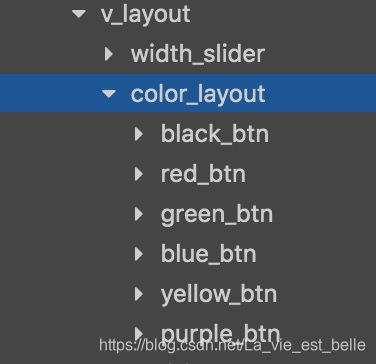
3. v_layout为一个垂直布局节点,它有三个子节点:width_slider,color_layout和tool_layout。
width_slider是引擎中默认的Slider控件,这里用来更改笔刷的粗细或者橡皮擦的大小。我们这里要为该节点上的Slider组件添加一个事件监听函数,之后会详细讲解函数内容。

color_layout是一个垂直布局节点,它一共有六个按钮子节点,每个按钮分别表示一种颜色。当玩家按下某个按钮后,笔刷颜色也作相应改变。
在初始状态,黑色按钮透明度不变,为255,其他按钮透明度为100。当玩家按下某个按钮后,该按钮透明度变为255,其余颜色按钮透明度变为100。这样做可以起到更好的提示作用。
我们也给各个按钮加上了事件监听函数:

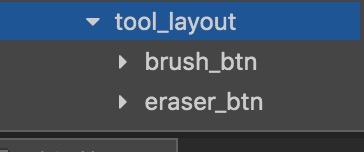
tool_layout也是一个垂直节点,它一共有两个按钮子节点,一个为笔刷按钮,一个为橡皮擦按钮。当玩家按下笔刷按钮后,可以在画板上画画,而按下橡皮擦按钮后则可以进行擦除操作。按钮的透明度设置同上。
接着对节点进行适当布局后,效果如下:
完成脚本
在该项目中,笔者一共创建了两个脚本:Game.js和Brush.js。前者挂在Canvas上,后者挂在brush节点上。
我们首先来看下Brush.js:
// Brush.js
cc.Class({
    extends: cc.Component,

    properties: {

    },

    // LIFE-CYCLE CALLBACKS:

    onLoad () {
        this.ctx = this.node.getComponent(cc.Graphics);
    },

    setBrushPos (x, y) {
        // 设置笔刷起始位置
        this.ctx.moveTo(x, y);
    },

    setBrushLineWidth(lineWidth) {
        // 设置笔刷粗细
        this.ctx.lineWidth = lineWidth;
    },

    setBrushColor(color) {
        // 设置笔刷颜色(包括边框颜色和填充颜色)
        this.ctx.strokeColor = color;
        this.ctx.fillColor = color;
    },

    drawTo (x, y) {
        // 从起始位置一直画到目标位置
        this.ctx.lineTo(x, y);
        this.ctx.stroke();
        this.ctx.moveTo(x, y);
    }
});
1. 首先在onLoad方法中获取Graphics组件,保存到变量ctx中,方便我们之后修改笔刷属性。
2. 在setBrushPos方法中我们调用Graphics组件的moveTo()接口,用来设置笔刷的起始位置(画东西肯定要个起始点)。
3. 在setBrushLineWidth中我们直接通过修改Graphics的lineWidth属性来改变笔刷粗细。
4. setBrushColor方法用来修改笔刷颜色,strokeColor属性表示线的轮廓颜色,而fillColor属性表示线的填充颜色。
5. 在drawTo方法中,我们调用Graphics组件的lineTo接口来指定线的终点位置,再调用stroke方法来绘制出路径。其实最后的 this.ctx.moveTo(x, y);代码没有必要写,但是如果不加的话在Cocos Creator模拟器上画画会有问题,不方便开发阶段调试(官方回复说模拟器可能存在问题),希望在之后的版本中能修复。当然不用Cocos Creator模拟器调试的话不会有问题,笔者在手机上已测试。具体可以看下这个链接。
接下来是Game.js。
我们在properties中添加了如下属性:
// Brush.js
properties: {
    brush: cc.Node,
    widthSlider: cc.Node,
    colorLayout: cc.Node,
    toolLayout: cc.Node
},
onLoad方法编写如下:
// Game.js
onLoad () {
    // 去掉模拟器上的FPS信息
    cc.debug.setDisplayStats(false);

    this.lineWidth = 1;                     // 笔刷粗细(默认1)
    this.eraserWidth = 10;                  // 橡皮擦大小(特殊笔刷,默认10)
    this.color = cc.Color.BLACK;            // 笔刷颜色(默认黑色)
    this.tool = 'BRUSH';                    // 当前工具(默认笔刷)

    this.node.on('touchstart', this.onTouchStart, this);
    this.node.on('touchmove', this.onTouchMove, this);
},
1. lineWidth和eraserWidth变量分别用来保存笔刷和橡皮擦的大小,color变量用来保存笔刷颜色。
2. 我们会用tool变量来判断当前玩家所使用的工具,如果是笔刷则为'BRUSH',橡皮擦则为'ERASER'。
3. 给整个Canvas画布添加触摸监听。
监听函数编写如下:
// Game.js
onTouchStart(event) {
    // 设置笔刷起始位置
    let pos = this.node.convertToNodeSpaceAR(event.getLocation());
    this.brush.getComponent('Brush').setBrushPos(pos.x, pos.y);
},

onTouchMove(event) {
    let pos = this.node.convertToNodeSpaceAR(event.getLocation());
    this.brush.getComponent('Brush').drawTo(pos.x, pos.y);
},
在onTouchStart中,我们通过event.getLocation获取到世界坐标并转换成Canvas上的坐标,接着调用setBrushPos方法设置笔刷起始位置。onTouchMove编写逻辑同理。
接下来我们就是编写滑动条Slider和各个按钮的事件监听函数了。
首先是滑动条:
// Game.js
sliderEvent(slider) {
    // 调整笔刷粗细
    if (this.tool == 'BRUSH') {
        this.lineWidth = 1 + slider.progress * 5;
        this.brush.getComponent('Brush').setBrushLineWidth(this.lineWidth);
    }
    else if (this.tool == 'ERASER') {
        this.eraserWidth = 10 + slider.progress * 50;
        this.brush.getComponent('Brush').setBrushLineWidth(this.eraserWidth);
    }
},
很简单,我们其实就是通过滑动条的progress值来设置笔刷和橡皮擦的大小。
接下来是六个颜色按钮:
// Game.js
blackBtnEvent() {
    if (this.tool == 'BRUSH') {
        this.color = cc.Color.BLACK;
        this.brush.getComponent('Brush').setBrushColor(this.color);

        for (let i=0; i<this.colorLayout.children.length; i++) {
            if (i==0)
                {this.colorLayout.children[i].opacity = 255;}
            else
                {this.colorLayout.children[i].opacity = 100;}
        }
    }
},

redBtnEvent() {
    if (this.tool == 'BRUSH') {
        this.color = cc.Color.RED;
        this.brush.getComponent('Brush').setBrushColor(this.color);

        for (let i=0; i<this.colorLayout.children.length; i++) {
            if (i==1)
                {this.colorLayout.children[i].opacity = 255;}
            else
                {this.colorLayout.children[i].opacity = 100;}
        }
    }
},

greenBtnEvent() {
    if (this.tool == 'BRUSH') {
        this.color = cc.Color.GREEN;
        this.brush.getComponent('Brush').setBrushColor(this.color);

        for (let i=0; i<this.colorLayout.children.length; i++) {
            if (i==2)
                {this.colorLayout.children[i].opacity = 255;}
            else
                {this.colorLayout.children[i].opacity = 100;}
        }
    }
},

blueBtnEvent() {
    if (this.tool == 'BRUSH') {
        this.color = cc.Color.BLUE;
        this.brush.getComponent('Brush').setBrushColor(this.color);

        for (let i=0; i<this.colorLayout.children.length; i++) {
            if (i==3)
                {this.colorLayout.children[i].opacity = 255;}
            else
                {this.colorLayout.children[i].opacity = 100;}
        }
    }
},

yellowBtnEvent() {
    if (this.tool == 'BRUSH') {
        this.color = cc.Color.YELLOW;
        this.brush.getComponent('Brush').setBrushColor(this.color);

        for (let i=0; i<this.colorLayout.children.length; i++) {
            if (i==4)
                {this.colorLayout.children[i].opacity = 255;}
            else
                {this.colorLayout.children[i].opacity = 100;}
        }
    }
},

purpleBtnEvent() {
    if (this.tool == 'BRUSH') {
        this.color = new cc.Color(255, 0, 255);
        this.brush.getComponent('Brush').setBrushColor(this.color);

        for (let i=0; i<this.colorLayout.children.length; i++) {
            if (i==5)
                {this.colorLayout.children[i].opacity = 255;}
            else
                {this.colorLayout.children[i].opacity = 100;}
        }
    }
},
玩家点击哪个按钮,我们就把笔刷颜色设置成对应的,当然别忘了要修改下各自的透明度。
最后是两个工具按钮:
// Game.js
brushBtnEvent() {
    // 设置笔刷为普通画笔
    this.tool = 'BRUSH';
    this.toolLayout.children[0].opacity = 255;
    this.toolLayout.children[1].opacity = 100;
    this.brush.getComponent('Brush').setBrushColor(this.color);
    this.brush.getComponent('Brush').setBrushLineWidth(this.lineWidth);

    // 设置slider上的handle位置
    this.widthSlider.getComponent(cc.Slider).progress = (this.lineWidth-1) / 5;
},

eraserBtnEvent() {
    // 设置笔刷为橡皮擦(特殊笔刷)
    this.tool = 'ERASER';
    this.toolLayout.children[0].opacity = 100;
    this.toolLayout.children[1].opacity = 255;
    this.brush.getComponent('Brush').setBrushColor(cc.Color.WHITE);
    this.brush.getComponent('Brush').setBrushLineWidth(this.eraserWidth);

    // 设置slider上的handle位置
    this.widthSlider.getComponent(cc.Slider).progress = (this.eraserWidth-10) / 50;
}
1. 当玩家点击笔刷按钮后,我们设置tool变量值为'BRUSH',更改透明度,并设置笔刷颜色和粗细,最后复原滑动条上的按钮位置(让玩家知道之前在设置笔刷粗细时,滑动条上按钮的位置)。
2. 当玩家点击橡皮擦按钮后,我们设置tool变量值为'ERASER',更改透明度,并设置橡皮擦颜色和粗细(颜色同背景颜色相同,都为白色),最后复原滑动条上的按钮位置(让玩家知道之前在设置橡皮擦大小时,滑动条上按钮的位置)。
好,讲到这就结束啦,希望大家有所收获!

