Javaweb——Spring Boot 系列(7)广播式套接字编程
其他
2020-02-08 18:23:15
阅读次数: 0
一、何为套接字
- 套接字(socket)是一个抽象层,应用程序可以通过它发送或接收数据,可对其进行像对文件一样的打开、读写和关闭等操作。套接字允许应用程序将I/O插入到网络中,并与网络中的其他应用程序进行通信。网络套接字是IP地址与端口的组合。——百度百科·套接字
- 这里的套接字主要指的是 WebSocket。
1、WebSocket
- WebSocket 为浏览器和服务端提供了双工异步通信的功能,即浏览器可以向服务器发送消息,服务端也可以向浏览器发送消息。
- Spring Boot 对 WebSocket 提供了支持。
- 由于直接使用 WebSocket 来开发程序步骤繁琐,因此通常使用它的子协议 STOMP 来开发;STOMP 是一个更高级别的协议,基于帧(frame)的格式来定义消息。
- WebSocket 有两种信息传输模式,一种是广播模式,此种模式下只要成功连接服务器且正常运行的客户端浏览器都能够收到消息;另一种是点对点模式,只有目的端浏览器才能收到消息。
二、WebSocket 简单项目
1、广播式
1.1、POM 文件准备
1.2、deploy WebSocket
1.3、消息类
- 建立两个消息类,一个用于浏览器向服务器发送消息,一个用于服务器向浏览器发送消息。
	public class WiselyMessage {
    private String name;

    public String getName() {
        return name;
    }
}
	public class WiselyResponse {
    private String responseMessage;

    public WiselyResponse(String responseMessage){
        this.responseMessage=responseMessage;
    }

    public String getResponseMessage() {
        return responseMessage;
    }
}
1.4、Controller
- 需要一个控制器来控制消息的发送和接收,代码如下:
import com.wisely.ch5_2_3.domain.WiselyMessage;
import com.wisely.ch5_2_3.domain.WiselyResponse;
import org.springframework.messaging.handler.annotation.MessageMapping;
import org.springframework.messaging.handler.annotation.SendTo;
import org.springframework.stereotype.Controller;

@Controller
public class WsController {
    @MessageMapping("/welcome")
    @SendTo("/topic/getResponse")
    public WiselyResponse say(@org.jetbrains.annotations.NotNull WiselyMessage message) throws Exception{
        Thread.sleep(300);
        return new WiselyResponse("Welcome,"+message.getName()+"!");
    }
}
- @MessageMapping 的作用就相当于 @RequestMapping,当浏览器对服务端请求时,便会映射到 /welcome 路径
- @SendTo 这个注解,正如其名,是用于服务器向浏览器发送消息的。
1.7 JS 脚本
- 这里用到了三个 JS 脚本,分别为 stomp.min.js、sockjs.min.js 和 jquery.js,由于文件代码量大,这里不贴出来,需要的找我。
1.8、View
- 准备一个前端视图,代码如下:
<!DOCTYPE html>
<html xmlns:th="http://www.thymeleaf.org">
<head>
<meta charset="UTF-8" />
<title>Spring Boot+WebSocket+广播式</title>
</head>
<body onload="disconnect()">
<noscript><h2 style="color: #ff0000">貌似你的浏览器不支持websocket</h2></noscript>
<div>
<div>
<button id="connect" onclick="connect();">连接</button>
<button id="disconnect" disabled="disabled" onclick="disconnect();">断开连接</button>
</div>
<div id="conversationDiv">
<label>输入你的名字</label><input type="text" id="account" name="account" />
<button id="sendName" onclick="sendName();">发送</button>
<p id="response"></p>
</div>
</div>
<script th:src="@{sockjs.min.js}"></script>
<script th:src="@{stomp.min.js}"></script>
<script th:src="@{jquery.js}"></script>
<script type="text/javascript">
var stompClient = null;
function setConnected(connected) {
document.getElementById('connect').disabled = connected;
document.getElementById('disconnect').disabled = !connected;
document.getElementById('conversationDiv').style.visibility = connected ? 'visible' : 'hidden';
$('#response').html();
}
function connect() {
var socket = new SockJS('/endpointWisely');
stompClient = Stomp.over(socket);
stompClient.connect({}, function(frame) {
setConnected(true);
console.log('Connected: ' + frame);
stompClient.subscribe('/topic/getResponse', function(respnose){
showResponse(JSON.parse(respnose.body).responseMessage);
});
});
}
function disconnect() {
if (stompClient != null) {
stompClient.disconnect();
}
setConnected(false);
console.log("Disconnected");
}
function sendName() {
var name = $('#account').val();
stompClient.send("/welcome", {}, JSON.stringify({ 'name': name }));
}
function showResponse(message) {
var response = $("#response");
response.html(message);
}
</script>
</body>
</html>
1.9、视图控制层
- 在 MVC 模型中,视图需要一个控制器来控制。
- 代码如下:
import com.wisely.ch5_2_3.domain.WiselyMessage;
import com.wisely.ch5_2_3.domain.WiselyResponse;
import org.springframework.messaging.handler.annotation.MessageMapping;
import org.springframework.messaging.handler.annotation.SendTo;
import org.springframework.stereotype.Controller;

@Controller
public class WsController {
    @MessageMapping("/welcome")
    @SendTo("/topic/getResponse")
    public WiselyResponse say(@org.jetbrains.annotations.NotNull WiselyMessage message) throws Exception{
        Thread.sleep(300);
        return new WiselyResponse("Welcome,"+message.getName()+"!");
    }
}
- 到这里所有的代码已经准备完毕,接下来就是运行检测。
1.10、运行测试
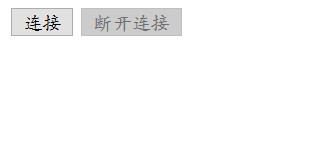
- 打开两个浏览器,访问项目地址,初始页面如下:
- 点击连接

- 在其中一个浏览器输入

- 另一个浏览器

上一篇
下一篇
发布了146 篇原创文章 ·
获赞 15 ·
访问量 1万+
转载自blog.csdn.net/qq_42896653/article/details/104185786
