1.Adding the Maven Dependency
As mentioned above, we will use the Springfox implementation of the Swagger specification.
To add it to our Maven project, we need a dependency in the
pom.xml
file.
<dependency>
<groupId>
io.springfox
</groupId>
<artifactId>
springfox-swagger2
</artifactId>
<version>
2.7.0
</version>
</dependency>
2.Integrating Swagger 2 into the Project
2.1.Java Configuration
The configuration of Swagger mainly centers around the
Docket
bean.

Swagger 2 is enabled through the
@EnableSwagger2
annotation.
After the
Docket
bean is defined, its
select()
method returns an instance of
ApiSelectorBuilder
, which provides a way to control the endpoints exposed by Swagger.
Predicates for selection of
RequestHandler
s can be configured with the help of
RequestHandlerSelectors
and
PathSelectors
. Using
any()
for both will make documentation for your entire API available through Swagger.
This configuration is enough to integrate Swagger 2 into existing Spring Boot project. For other Spring projects, some additional tuning is required.
2.2.Configuration Without Spring Boot
Without Spring Boot, you don’t have the luxury of auto-configuration of your resource handlers. Swagger UI adds a set of resources which you must configure as part of a class that extends
WebMvcConfigurerAdapter,
and is annotated with
@EnableWebMvc.

2.3.Verification
To verify that Springfox is working, you can visit the following URL in your browser:
http://localhost:8080/spring-security-rest/api/v2/api-docs
The result is a JSON response with a large number of key-value pairs, which is not very human-readable. Fortunately, Swagger provides
Swagger UI
for this purpose.
3.Swagger UI
Swagger UI is a built-in solution which makes user interaction with the Swagger-generated API documentation much easier.
3.1.Enabling Springfox’s Swagger UI
To use Swagger UI, one additional Maven dependency is required:

Now you can test it in your browser by visiting
http://localhost:8080/swagger-ui.html
In our case, by the way, the exact URL will be
:
http://localhost:8080/swagger-ui.html
The result should look something like this:

3.2.Exploring Swagger Documentation
Within Swagger’s response is a
list of all controllers
defined in your application. Clicking on any of them will list the valid HTTP methods (
DELETE
,
GET
,
HEAD
,
OPTIONS
,
PATCH
,
POST
,
PUT
).
Expanding each method provides additional useful data, such as response status, content-type, and a list of parameters. It is also possible to try each method using the UI.
Swagger’s ability to be synchronized with your code base is crucial. To demonstrate this, you can add a new controller to your application.
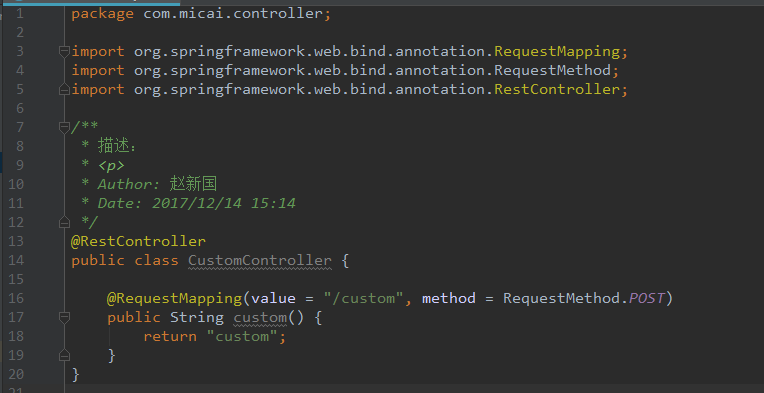
Now, if you refresh the Swagger documentation, you will see
custom-controller
in the list of controllers. As you know, there is only one method (
POST
) shown in Swagger’s response.
4.
Advanced Configuration
The
Docket
bean of your application can be configured to give you more control over the API documentation generation process.
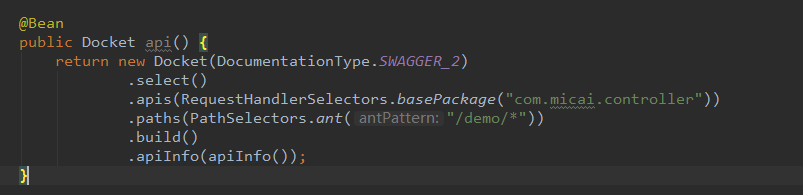
4.1.Filtering API for Swagger’s Response
It is not always desirable to expose the documentation for your entire API. You can restrict Swagger’s response by passing parameters to the
apis()
and
paths()
methods of the
Docket
class.
As seen above,
RequestHandlerSelectors
allows using the
any
or
none
predicates, but can also be used to filter the API according to the base package, class annotation, and method annotations.
PathSelectors
provides additional filtering with predicates which scan the request paths of your application. You can use
any()
,
none(), regex()
, or
ant()
.
In the example below, we will instruct Swagger to include only controllers from a particular package, with specific paths, using the
ant()
predicate.
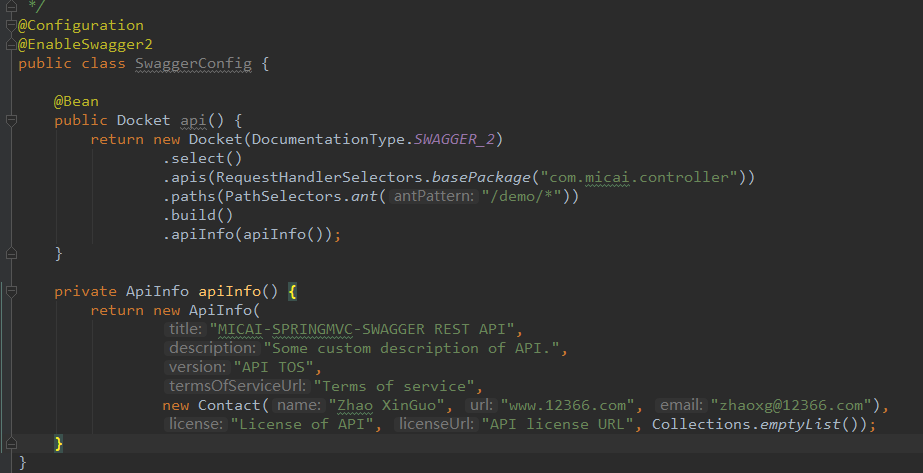
4.2.Custom Information
Swagger also provides some default values in its response which you can customize, such as “Api Documentation”, “Created by Contact Email”, “Apache 2.0”.
To change these values, you can use the
apiInfo(ApiInfo apiInfo)
method. The
ApiInfo
class that contains custom information about the API.
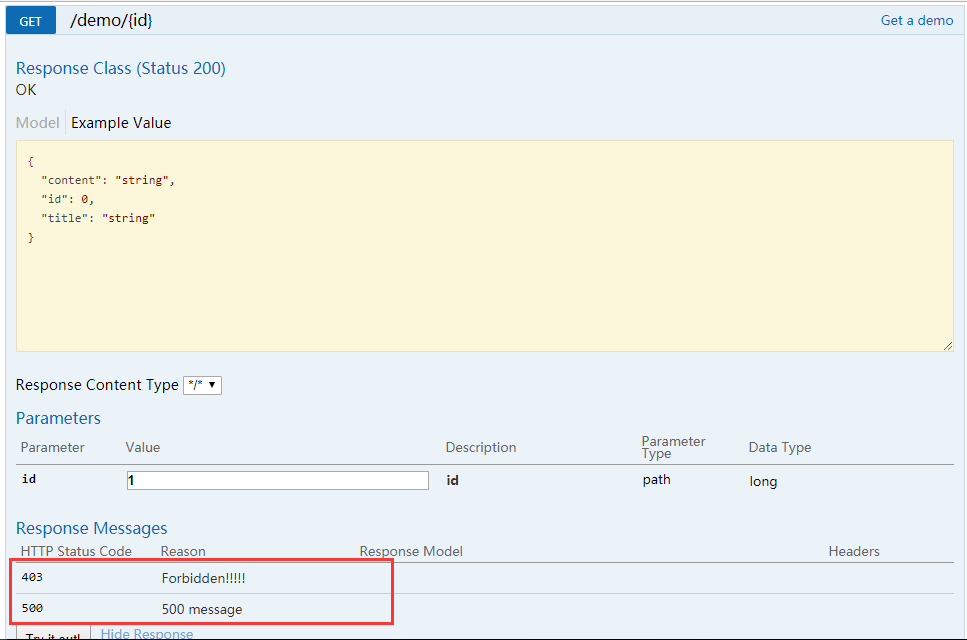
4.3.Custom Methods Response Messages
Swagger allows
globally overriding response messages of HTTP methods
through
Docket
’s
globalResponseMessage()
method. First, you must instruct Swagger not to use default response messages.
Suppose you wish to override
500
and
403
response messages for all
GET
methods. To achieve this, some code must be added to the
Docket
’s initialization block (original code is excluded for clarity):
5.Conclusion
In this tutorial, we set up Swagger 2 to generate documentation for a Spring REST API. We also have explored ways to visualize and customize Swagger’s output.
The
full implementation
of this tutorial can be found in
the Github project
– this is an Eclipse based project, so it should be easy to import and run as it is.
And, if you’re a student
of REST With Spring
, go to Lesson 1 from Module 7 for a deep-dive into setting up Swagger with Spring and Spring Boot.
6.The original address
http://www.baeldung.com/swagger-2-documentation-for-spring-rest-api
7.Source code download address