不久乘高铁出行,看见高铁火车站已经实现了“刷脸进站”,而且效率很高,很感兴趣,今天抽时间研究一下,其实没那么复杂。
我基本上是基于https://github.com/ageitgey/face_recognition上的资料和源码做一些尝试和试验。
首先,需要配置我们的python环境,我悬着的python27(比较稳定),具体过程不多说了。
然后,需要安装这次的主角face_recognition库,这个的安装花了我不少时间,需要注意一下几点(按照本人的环境):
1,首先,安装visual studio 2015,因为vs2015默认只安装c#相关组件,所以需要安装c++相关组件。
ps:vs2015安装c++相关组件的方法:在vs2015中新建c++项目,出现下面场景

选择第二项,确定后就会自动安装。
为什么需要安装c++,因为安装face_recognition时会先安装dlib,dlib是基于c++的一个库。
2,安装cmake(一个跨平台编译工具),然后需要将cmake的安装路径加入到系统环境变量path中去。
最后,就可以直接在dos中执行安装命令了(需要切换到python目录下的Script目录下):pip install face_recognition,命令会自动帮你安装好需要的dlib库。
到此为止,我们完成了face_recognition安装工作。
---------------------------------------------------------------分割线----------------------------------------------------------------------------------
下面给出几个实例来逐步了解“人脸识别”:
1.一行代码实现“人脸识别”
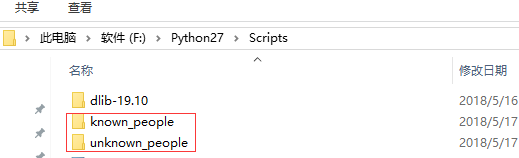
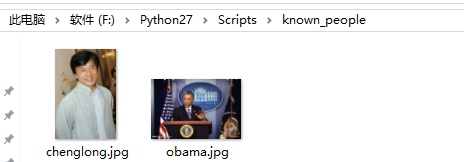
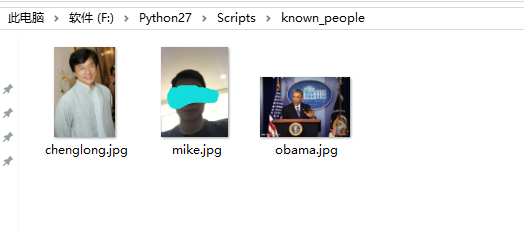
在Python目录中新建两个文件夹:分别表示“已知姓名的人”和“未知姓名的人”,图片以额、人名命名,如下:
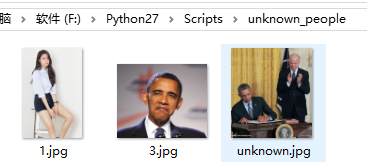
接下来,我们通过“认识的人”来识别“不认识的人”:

结果表明:1.jpg不认识,3.jpg是obama,unkown.jpg中有两个人,一个是obama,另一个不认识
结果还挺准确的!很给力!!
2.识别图片中所有的人脸,并显示出来


import Image
import face_recognition
image = face_recognition.load_image_file('F:/Python27/Scripts/all.jpg')
face_locations = face_recognition.face_locations(image)

#face_locations =face_recognition.

#face_locations(image,number_of_times_to_upsample=0,model='cnn')
print('i found {} face(s) in this photograph.'.format(len(face_locations)))
for face_location in face_locations:
    top,right,bottom,left = face_location
    print('A face is located at pixel location Top:{},Left:{},Bottom:{},Right:{}'.format(top,right,bottom,left))
    face_image = image[top:bottom,left:right]
    pil_image=Image.fromarray(face_image)
    pil_image.show()
避坑指南:import Image需要先安装PIL库,在pycharm中安装的时候会报错(因为pil没有64位的版本),这时我们安装Pillow-PIL就好了。
我们的all.jpg如下:

执行以下,看看结果:
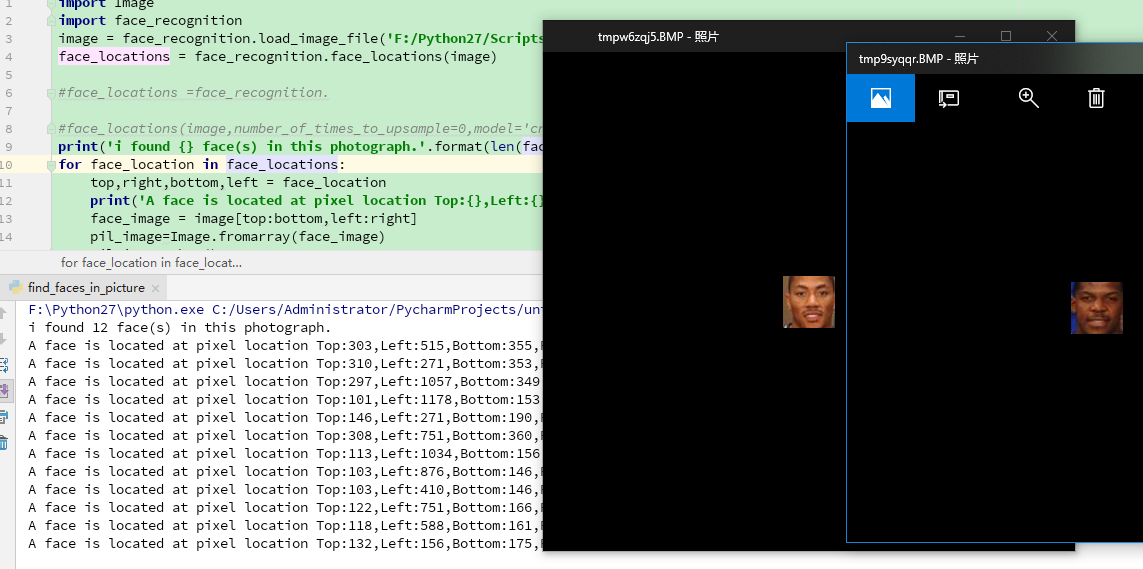
没有错,总共12个人脸都被识别出来了!!!
3.给照片“美颜”
face_recognition可以识别人像的下巴,眼睛,鼻子,嘴唇,眼球等区域,包含以下这些个特征:
facial_features = [ 'chin', 'left_eyebrow', 'right_eyebrow', 'nose_bridge', 'nose_tip', 'left_eye', 'right_eye', 'top_lip', 'bottom_lip' ]
利用这些特征属性,可以轻松的给人像“美颜”
from PIL import Image, ImageDraw
face_recognition
import face_recognition


image = face_recognition.load_image_file("F:/Python27/Scripts/known_people/obama.jpg")

#查找图像中所有面部的所有面部特征
face_landmarks_list = face_recognition.face_landmarks(image)

for face_landmarks in face_landmarks_list:
    pil_image = Image.fromarray(image)
    d = ImageDraw.Draw(pil_image, 'RGBA')

    #让眉毛变成了一场噩梦
    d.polygon(face_landmarks['left_eyebrow'], fill=(68, 54, 39, 128))
    d.polygon(face_landmarks['right_eyebrow'], fill=(68, 54, 39, 128))
    d.line(face_landmarks['left_eyebrow'], fill=(68, 54, 39, 150), width=5)
    d.line(face_landmarks['right_eyebrow'], fill=(68, 54, 39, 150), width=5)

    #光泽的嘴唇
    d.polygon(face_landmarks['top_lip'], fill=(150, 0, 0, 128))
    d.polygon(face_landmarks['bottom_lip'], fill=(150, 0, 0, 128))
    d.line(face_landmarks['top_lip'], fill=(150, 0, 0, 64), width=8)
    d.line(face_landmarks['bottom_lip'], fill=(150, 0, 0, 64), width=8)

    #闪耀眼睛
    d.polygon(face_landmarks['left_eye'], fill=(255, 255, 255, 30))
    d.polygon(face_landmarks['right_eye'], fill=(255, 255, 255, 30))

    #涂一些眼线
    d.line(face_landmarks['left_eye'] + [face_landmarks['left_eye'][0]], fill=(0, 0, 0, 110), width=6)
    d.line(face_landmarks['right_eye'] + [face_landmarks['right_eye'][0]], fill=(0, 0, 0, 110), width=6)

    pil_image.show()
执行下看看结果:
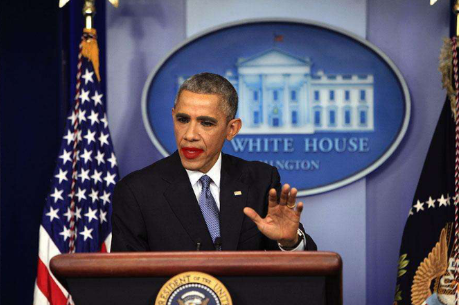
有点辣眼睛!!!!
4.利用笔记本摄像头识别人像
回到前面说的高铁站的“刷脸”,其实就是基于摄像头的“人像识别”。
这里要调用电脑的摄像头,而且涉及一些计算机视觉系统的计算,所以我们要先安装opencv库,
安装方法:
pip install --upgrade setuptools
pip install numpy Matplotlib
pip install opencv-python
ps:如果报错:EnvironmentError: [Errno 13] Permission denied: 在install后加上--user即可
小技巧:可以在python命令行中用 import site; site.getsitepackages()来确定当前的python环境的site-packages目录的位置
目的:这里我们需要用摄像头识别自己,那么首先需要有一张自己的照片,我将我的照片命名为mike.jpg,然后使用摄像头来识别我自己。
看看代码:
import face_recognition
import cv2

# This is a demo of running face recognition on live video from your webcam. It's a little more complicated than the
# other example, but it includes some basic performance tweaks to make things run a lot faster:
#   1. Process each video frame at 1/4 resolution (though still display it at full resolution)
#   2. Only detect faces in every other frame of video.

# PLEASE NOTE: This example requires OpenCV (the `cv2` library) to be installed only to read from your webcam.
# OpenCV is *not* required to use the face_recognition library. It's only required if you want to run this
# specific demo. If you have trouble installing it, try any of the other demos that don't require it instead.

# Get a reference to webcam #0 (the default one)
video_capture = cv2.VideoCapture(0)

# Load a sample picture and learn how to recognize it.
obama_image = face_recognition.load_image_file("F:/Python27/Scripts/known_people/obama.jpg")
obama_face_encoding = face_recognition.face_encodings(obama_image)[0]

# Load a second sample picture and learn how to recognize it.
biden_image = face_recognition.load_image_file("F:/Python27/Scripts/known_people/mike.jpg")
biden_face_encoding = face_recognition.face_encodings(biden_image)[0]

# Create arrays of known face encodings and their names
known_face_encodings = [
    obama_face_encoding,
    biden_face_encoding
]
known_face_names = [
    "Barack Obama",
    "mike"
]

# Initialize some variables
face_locations = []
face_encodings = []
face_names = []
process_this_frame = True

while True:
    # Grab a single frame of video
    ret, frame = video_capture.read()

    # Resize frame of video to 1/4 size for faster face recognition processing
    small_frame = cv2.resize(frame, (0, 0), fx=0.25, fy=0.25)

    # Convert the image from BGR color (which OpenCV uses) to RGB color (which face_recognition uses)
    rgb_small_frame = small_frame[:, :, ::-1]

    # Only process every other frame of video to save time
    if process_this_frame:
        # Find all the faces and face encodings in the current frame of video
        face_locations = face_recognition.face_locations(rgb_small_frame)
        face_encodings = face_recognition.face_encodings(rgb_small_frame, face_locations)

        face_names = []
        for face_encoding in face_encodings:
            # See if the face is a match for the known face(s)
            matches = face_recognition.compare_faces(known_face_encodings, face_encoding)
            name = "Unknown"

            # If a match was found in known_face_encodings, just use the first one.
            if True in matches:
                first_match_index = matches.index(True)
                name = known_face_names[first_match_index]

            face_names.append(name)

    process_this_frame = not process_this_frame


    # Display the results
    for (top, right, bottom, left), name in zip(face_locations, face_names):
        # Scale back up face locations since the frame we detected in was scaled to 1/4 size
        top *= 4
        right *= 4
        bottom *= 4
        left *= 4

        # Draw a box around the face
        cv2.rectangle(frame, (left, top), (right, bottom), (0, 0, 255), 2)

        # Draw a label with a name below the face
        cv2.rectangle(frame, (left, bottom - 35), (right, bottom), (0, 0, 255), cv2.FILLED)
        font = cv2.FONT_HERSHEY_DUPLEX
        cv2.putText(frame, name, (left + 6, bottom - 6), font, 1.0, (255, 255, 255), 1)

    # Display the resulting image
    cv2.imshow('Video', frame)

    # Hit 'q' on the keyboard to quit!
    if cv2.waitKey(1) & 0xFF == ord('q'):
        break

# Release handle to the webcam
video_capture.release()
cv2.destroyAllWindows()
只想看看结果:
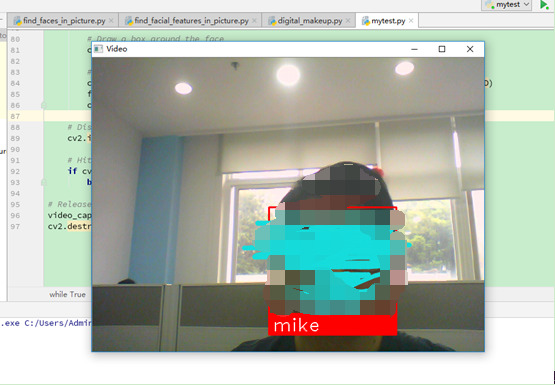
看来,我被识别成功了。看起来有点小激动呢。
通过上面四个小例子基本了解face_recognition的用法,这只是小试牛刀,具体在现实中的应用要复杂很多,
我们需要大量的人脸数据,会涉及到机器学习和数学算法等等,而且根据应用场景的不同也会出现很多不同的要求。
这里只是一起学习分享,期待后续关于"人工智能"的内容。