贪吃蛇平滑移动
在本教程中我们重点来学习下如何让贪吃蛇能够平滑移动。
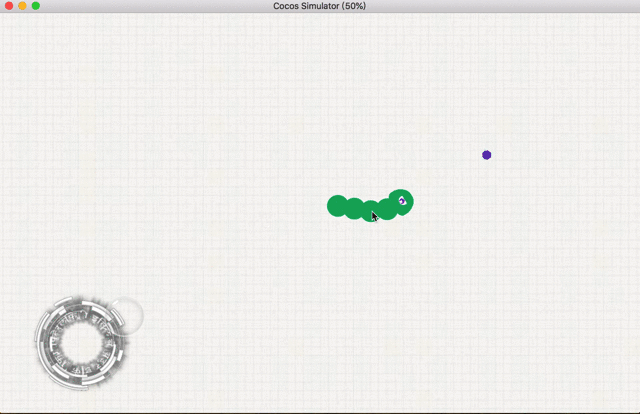
运行效果如下:
Cocos Creator版本:2.2.0
公众号后台回复"贪吃蛇",获取该教程完整代码下载地址:

初始化蛇头和蛇身
该项目刚开始的资源管理器内容显示如下:

- Head.js用于贪吃蛇的功能实现(贪吃蛇的重点就在蛇头,所以就直接命名为Head.js了)。
- bg是背景图片。
- body_food是一张全白的圆形图片,用于蛇身和食物的Sprite组件。
- eye和head合起来其实就是《摘星星》中的小怪物。笔者用PS处理了下,将它们分开,head颜色也是全白。
然后层级管理器内容显示如下:

- 让eye成为head的子节点,其他全部是Canvas的子节点。
- body就是将body_food拖入后重命名后的节点。
在上面笔者之所以将body_food和head弄成全白是为了实现贪吃蛇和食物随机颜色的功能。现在我们将Head.js挂到head节点上:
接着添加如下代码实现蛇头的随机颜色:
// Head.js
onLoad () {
    // set head's color
    this.node.color = this.randomColor();
},

randomColor () {
    // get random color
    let red = Math.round(Math.random()*255);
    let green = Math.round(Math.random()*255);
    let blue = Math.round(Math.random()*255);
    return new cc.Color(red, green, blue);
},
既然随机颜色实现了,我们也实现个随机位置:
// Head.js
onLoad () {
    // set head's color and position
    this.node.color = this.randomColor();
    this.node.setPosition(this.randomPos());
},

randomColor () {
    ...
},

randomPos () {
    // get random position
    let width = this.node.parent.width;
    let height = this.node.parent.height;
    let x = Math.round(Math.random()*width) - width/2;
    let y = Math.round(Math.random()*height) - height/2;
    return cc.v2(x, y);
},蛇身是跟着蛇头的(废话),所以在初始化时只要知道蛇头位置,蛇身位置自然也可以确定下来。我们首先将body节点拉入资源管理器的prefabs文件夹中,使其成为一个预制:

接着在properties中添加bodyPrefab,bodyNum,和sectionLen属性。第一个用于body预制,第二个用于决定生成的预制数量,第三个用于决定贪吃蛇每节的长度(即两个body预制之间的距离):
// Head.js
properties: {
    bodyPrefab: {
        default: null,
        type: cc.Prefab
    },

    // number of bodies at start
    bodyNum: 2

    // the length of each section(section between body prefabs)
    sectionLen: 25,
},
为控制贪吃蛇变长和移动,我们需要将蛇头和蛇身都放入一个数组中。笔者在onLoad中创建了snakeArray这个变量,并添加了蛇头:
onLoad () {
    // array for head and bodies
    this.snakeArray = [];
    this.snakeArray.push(this.node);

    // set head's color and position
    ...
},
接着我们编写getNewBody方法来初始化(或加长)蛇身:
// Head.js
getNewBody () {
    // initialize body or get longer fater eating food
    let newBody = cc.instantiate(this.bodyPrefab);

    // set new body's position
    if(this.snakeArray.length == 1) {
        let dir = this.node.position.normalize();
        newBody.setPosition(this.node.position.sub(dir.mul(this.sectionLen)));
    }
    else {
        let lastBody = this.snakeArray[this.snakeArray.length-1];
        let lastBOBody = this.snakeArray[this.snakeArray.length-2];
        let dir = lastBOBody.position.sub(lastBody.position).normalize();
        newBody.setPosition(lastBody.position.sub(dir.mul(this.sectionLen)));
    }

    // new body's color should be same as that of head
    newBody.color = this.node.color;

    // add to canvas and snakeArray
    this.node.parent.addChild(newBody);
    this.snakeArray.push(newBody);
}
这里的重点是如何确定body预制的位置:
- 如果snakeArray长度为1(即只有蛇头),那么我们就先获取蛇头坐标向量,求出方向,再在蛇头后面加一个蛇身,距离长度为sectionLen。
- 如果snakerArray长度大于1,那么我们根据当前倒数第一个和倒数第二个蛇身的坐标求出向量方向,然后再用最后一个蛇身的坐标求出新蛇身的坐标(lastBOBody指得是last but one body,即倒数第二个蛇身)。
接着让新蛇身颜色同蛇头颜色一样,最后再添加到画布和snakeArray数组中即可。
注:因为Canvas锚点固定为(0.5, 0.5),所以这里才根据倒数两个蛇身的坐标来确定新蛇身的坐标。
现在我们在onLoad中初始化蛇身:
// Head.js
onLoad () {
    ...

    // initialize bodies
    for (let i=1; i<=this.bodyNum; i++)
        this.getNewBody();
},然后再将body预制拖入属性检查器中:
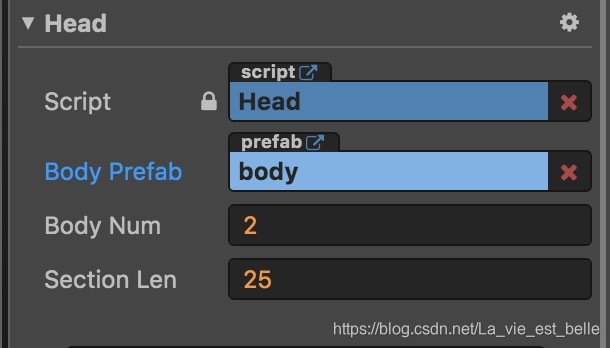
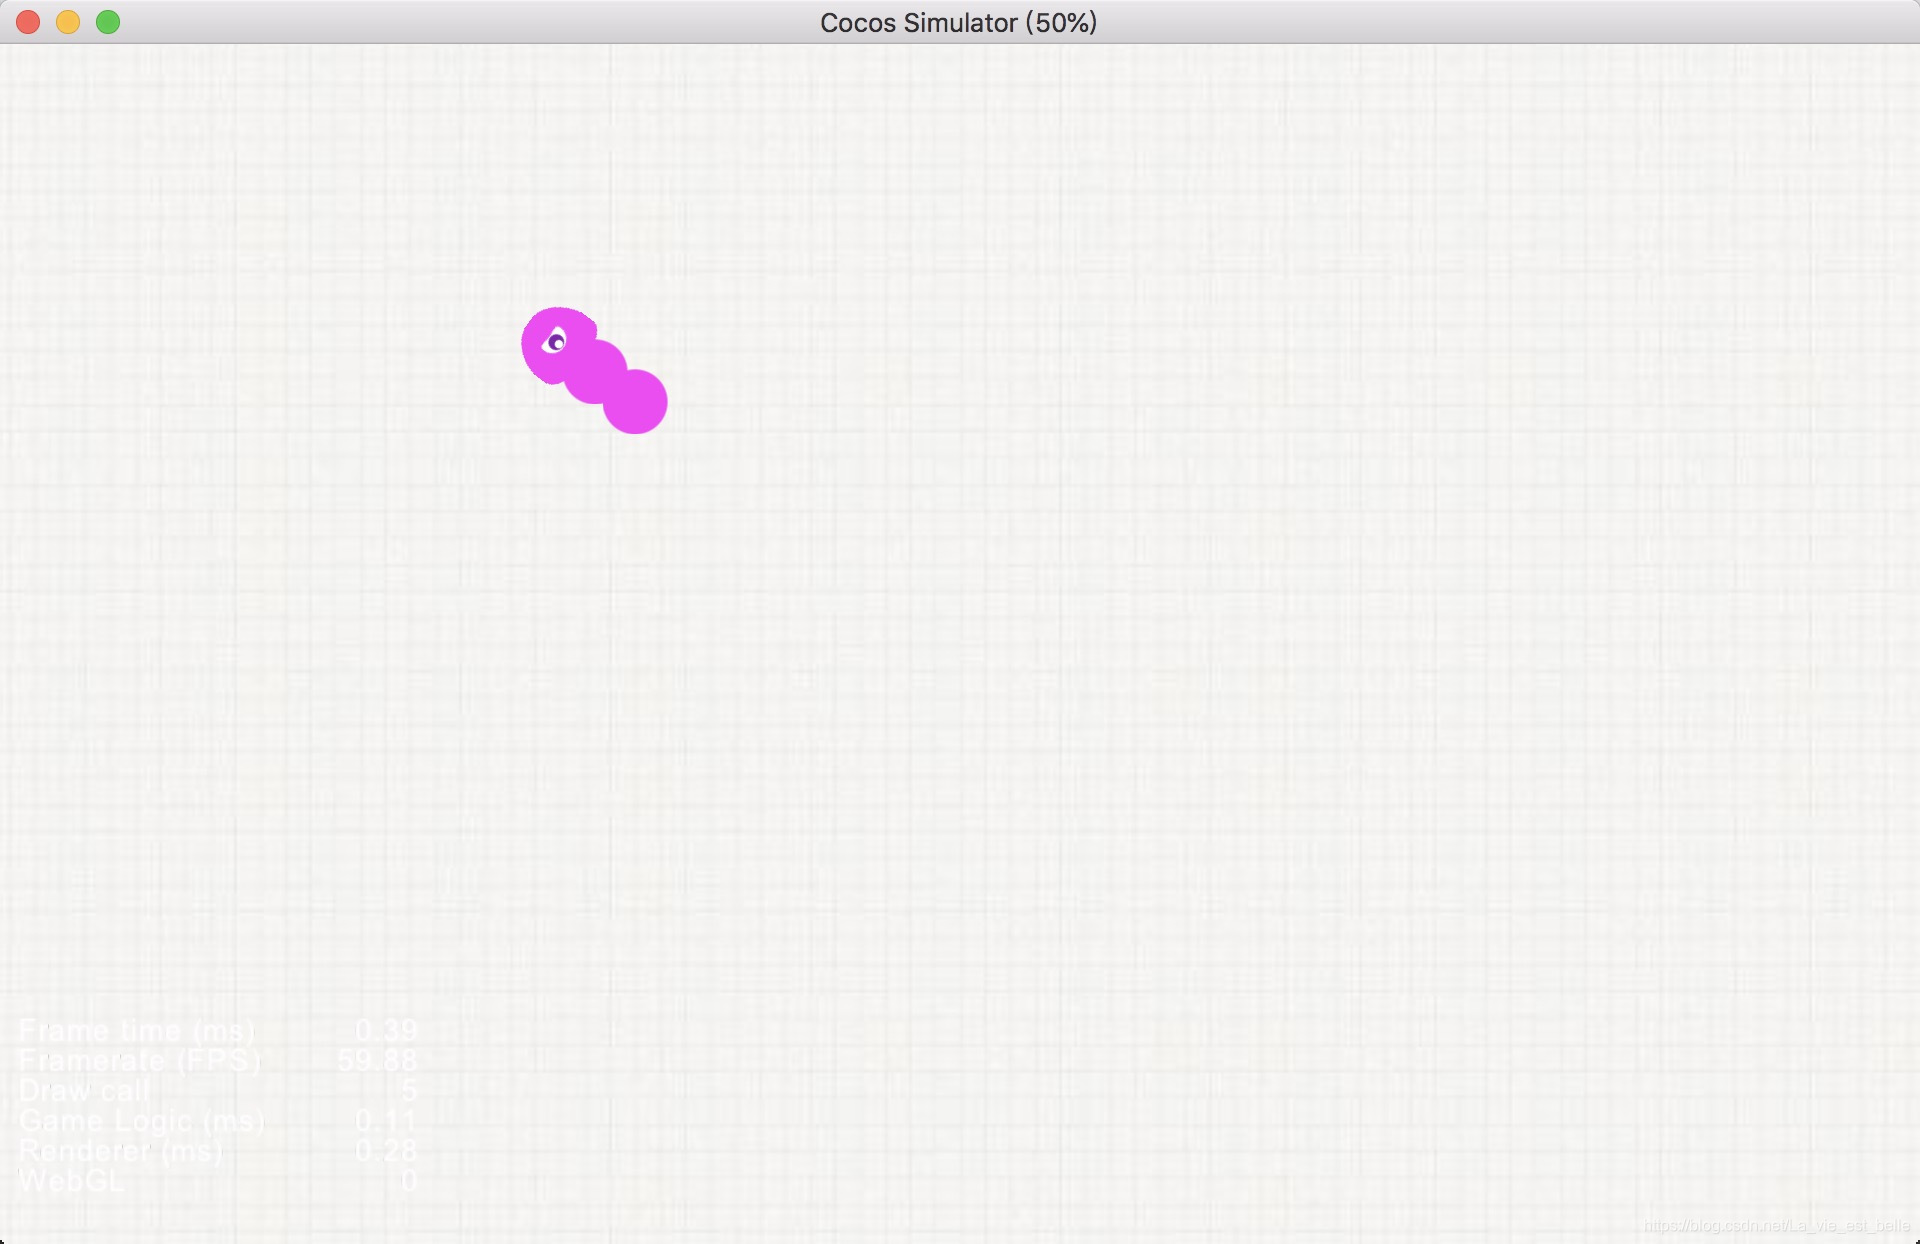
当蛇身数量(bodyNum)为2,每节长度为25时,运行游戏截图如下:

蛇身位置确定了,但很明显蛇头方向不对,所以我们需要调整下。
调整蛇头方向
我们编写一个rotateHead方法用于调整蛇头方向:
// Head.js
rotateHead (headPos) {
    // change head's direction
    let angle = cc.v2(1, 0).signAngle(headPos) * 180/Math.PI;
    this.node.angle = angle-90;
},
该方法根据蛇头坐标headPos求出其与cc.v2(1, 0)这个坐标的夹角angle,然后再对蛇头节点进行旋转,记得这里要减去90度才是正确的蛇头方向。主要原因是官方指定angle正值为逆时针方向旋转。

为方便理解,请看下图:

接着在onLoad中使用该方法即可:
// Head.js
onLoad () {
    ...

    // set head's color, position, and direction
    this.node.color = this.randomColor();
    this.node.setPosition(this.randomPos());
    this.rotateHead(this.node.position);

    ...
},
现在运行游戏,发现蛇头朝向正确:
贪吃蛇移动
贪吃蛇移动的重点在蛇头,蛇身其实就是走蛇头走过的坐标点。这里笔者将会用虚拟摇杆来控制贪吃蛇移动,大家可以先去看下一这篇教程:虚拟摇杆实现
笔者这里就不再赘述,直接将虚拟摇杆功能复制过来了(当然个别地方还需稍微修改下):

在这篇教程中,笔者只需要将摇杆的移动方向传给蛇头即可(摇杆移动方向即为蛇头移动方向):
// JoyStick.js
onTouchMove(event) {
    // constantly change joyStickBtn's position
    let posDelta = event.getDelta();
    this.joyStickBtn.setPosition(this.joyStickBtn.position.add(posDelta));

    // get direction
    let dir = this.joyStickBtn.position.normalize();
    this.head.getComponent('Head').dir = dir;
},
然后我们在Head.js的onLoad方法中创建一个变量用于接收dir:
// Head.js
onLoad () {
    ...

    // direction from joystick
    this.dir = null;
},
最后再在update中调用rotateHead方法来实时调整蛇头方向,注意传入的是dir:
// Head.js
update (dt) {
    if (this.dir) {
        // change head's direction
        this.rotateHead(this.dir);
    }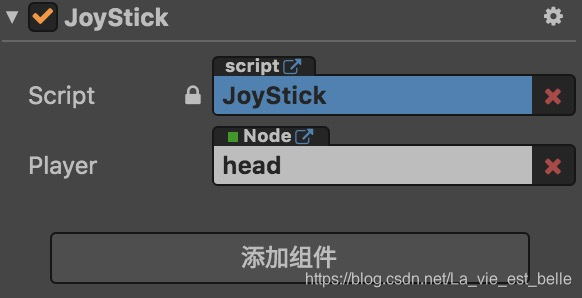
},将head节点拖入属性检查器中,运行后发现蛇头已经可以用摇杆来调整方向了:

接着我们来让蛇头移动起来。在properties中添加time属性(并不是真正的事件,只是用作速度调节):
// Head.js
properties: {
    ...

    // time needed to crawl one sectionLen(not based on real time)
    time: 5
},
在onLoad中得到速度speed(即单位时间内移动的距离):
// Head.js
onLoad () {
    ...

    // snake's speed
    this.speed = this.sectionLen / this.time;

    // initialize bodies
    for (let i=1; i<=this.bodyNum; i++)
        this.getNewBody();

    ...
},
当speed乘以dir时,我们其实就得到了朝某一方向上的一段位移,让蛇头当前坐标加上该位移其实就相当于让蛇头移动了。编写一个moveSnake方法:
// Head.js
moveSnake() {
    // move snake
    let dis = this.dir.mul(this.speed);
    this.node.setPosition(this.node.position.add(dis));
},
再添加到update方法中:
// Head.js
update (dt) {
    if (this.dir) {
        // change head's direction
        this.rotateHead(this.dir);

        // move snake
        this.moveSnake();
    }
},
此时运行游戏,蛇头已经可以被摇杆所控制了:

接下来就是要让蛇身跟着蛇头移动。之前说过蛇身其实就是走蛇头走过的坐标点,但在这之前必须要先走完节长,即蛇身离蛇头的长度。请看下图:
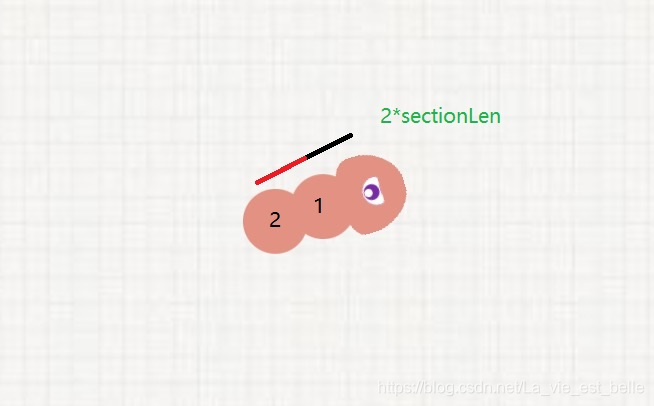
- 第一个蛇身必须先走过sectionLen的长度之后,才会走蛇头所经过的点。
- 第二个蛇身必须先走过2*sectionLen的长度之后,才会走蛇头所经过的点。
也就是说我们现在要做的就是获取每个蛇身移动到蛇头时所经过的坐标点,这很简单,我们只需要在每次生成新蛇身时把坐标也记录下来即可。首先在onLoad中创建一个pointsArray数组变量用于记录所有点:
// Head.js
onLoad () {
    ...

    // record all points
    this.pointsArray = [];

    // initialize bodies
    for (let i=1; i<=this.bodyNum; i++)
        this.getNewBody();

    ...
},
编写一个recordPoints方法用于获取两个蛇身之间的坐标点(蛇头可以看做特殊的蛇身):
recordPoints () {
    // record points between bodies (head is a special body)
    let len = 0;
    let index = 0;

    while(len < this.sectionLen) {
        len += this.speed;

        let lastBody = this.snakeArray[this.snakeArray.length-1];
        let lastBOBody = this.snakeArray[this.snakeArray.length-2];
        let dir = lastBOBody.position.sub(lastBody.position).normalize();

        let pos = lastBody.position.add(dir.mul(len));
        this.pointsArray.splice(index, 0, pos);
        index += 1;
    };
},
在该方法中,我们加入了一个while循环,每次循环,蛇身向前移动了len长度(相对于生成时的初始坐标),那将蛇身的初始坐标加上这段移动的长度,我们就知道了蛇身之后要走的坐标点。注意这里数组元素的添加方式为插入,
接着在getNewBody方法最后调用recordPoints方法:
// Head.js
getNewBody () {
    ...

    // record points
    this.recordPoints();
},
这样蛇身刚开始要走的坐标点已经确定了,接下来就是要往pointsArray数组中加入蛇头走过的点:
// Head.js
moveSnake() {
    // move snake
    let dis = this.dir.mul(this.speed);
    this.node.setPosition(this.node.position.add(dis));
    this.pointsArray.push(this.node.position);
},
现在pointsArray数组已经将所有要经过的点都确定好了,蛇头的移动(setPosition)也已经完成了,那么就剩蛇身移动了。现往onLoad方法中加入一个headPointsNum变量用于记录蛇头走过的点数量:
// Head.js
onLoad () {
    ...

    // the number of points head has passed
    this.headPointsNum = 0;
},
接着在getNewBody方法中给每一个body预制添加一个curIndex属性,并初始化为0:
// Head.js
getNewBody () {
    // initialize body or get longer fater eating food
    let newBody = cc.instantiate(this.bodyPrefab);

    newBody.curIndex = 0;

    ...
},
最后将moveSnake方法修改如下:
// Head.js
moveSnake() {
    // move snake
    let dis = this.dir.mul(this.speed);
    this.node.setPosition(this.node.position.add(dis));
    this.pointsArray.push(this.node.position);

    // plus one every time when head moves
    this.headPointsNum += 1;

    for(let i=1; i<this.snakeArray.length; i++) {
        let num = Math.floor((this.pointsArray.length-this.headPointsNum) / (this.snakeArray.length-1) * (this.snakeArray.length-1-i));
        this.snakeArray[i].setPosition(this.pointsArray[num+this.snakeArray[i].curIndex]);
        this.snakeArray[i].curIndex += 1;
    }
},
在moveSnake方法中加入的for循环用来处理每个蛇身的移动。
- num变量所在那行代码用来求出各个蛇身将要移动的第一个点坐标在pointsArray中的位置(相当于间接确定了各个蛇身的位置)。比如贪吃蛇最后一个蛇身,所要移动的第一个点坐标在pointsArray中的位置是0。注意这里一定要减去headPointsNum,因为各个蛇身所要移动的点是在recordPoints方法中获取的,pointsArray数组长度跟蛇身数量成正比。如果不减去headPointsNum,那么我们将无法确定各个蛇身相对应要移动的点。
- 每次移动我们都给各个蛇身的curIndex值加上1,不加的话那下次循环还是经过同样的点,相当于没动。
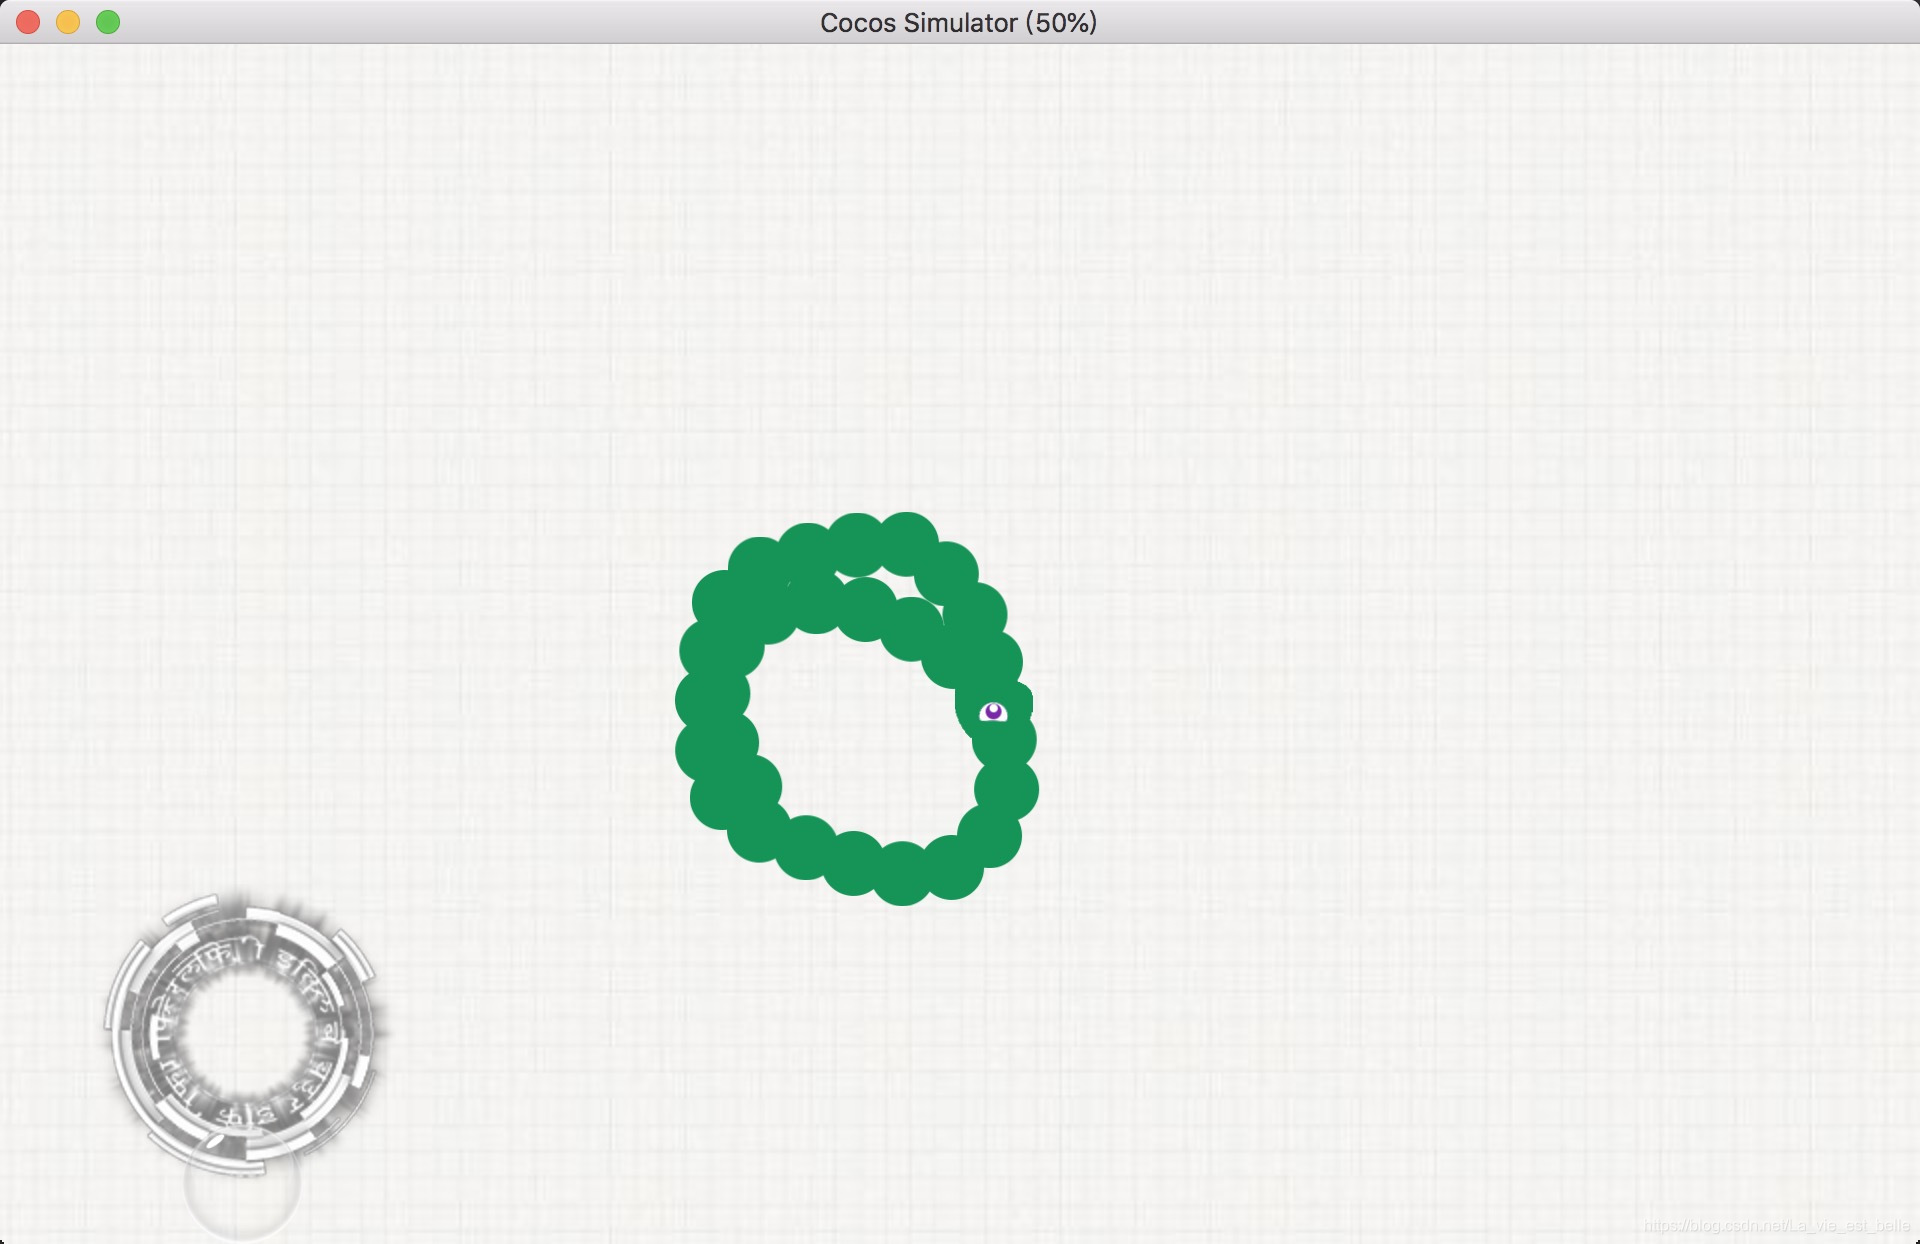
现在运行游戏,发现贪吃蛇已经可以移动了:

但其实还有个小问题。我们这里的蛇身长度是在游戏开始时就确定了的,但之后在游戏中会增加蛇身数量。如果此时新增的蛇身还是从pointsArray数组0的位置开始移动的话,就会出现脱节,显然不对:

所以在初始化之后新增加蛇身curIndex应该有所改变,要让它等于上一个蛇身的curIndex,这样才不会脱节:
// Head.js
getNewBody () {
    // initialize body or get longer fater eating food
    let newBody = cc.instantiate(this.bodyPrefab);

    if (this.snakeArray.length > this.bodyNum)
        newBody.curIndex = this.snakeArray[this.snakeArray.length-1].curIndex;
    else
        newBody.curIndex = 0;

    ...
},- 新增加了一个蛇身,那么pointsArray数组长度也就相应增加了。
- 之前的最后一个蛇身,现在成了上一个蛇身,那么它在pointsArray中的位置也相应地发生了改变。
- 之前存在的蛇身还是移动各自要移动的点,新增加的蛇身移动上一个蛇身所移动过的点。
蛇头和蛇身的节点顺序
我们移动贪吃蛇时,发现蛇头会被蛇身覆盖,这其实不符合实际情况。

正常来讲,蛇头应该是要在最上方的,而且每一个蛇身也应在后一个蛇身上方,蛇尾在最底层。
这里编写一个changeZIndex方法改变下节点顺序:
// Head.js
changeZIndex(){
    for (let i=0; i<this.snakeArray.length; i++) {
        this.snakeArray[i].zIndex = cc.macro.MAX_ZINDEX - i;
    }
},
然后在getNewBody方法中调用:
getNewBody () {
    ...

    this.changeZIndex();
},
这样移动就正常了:
添加食物
每当贪吃蛇吃到食物后,就变长增加一个蛇身。
首先将body_food图片拖入层级管理器中,重命名为food:

scale值设为0.2:

新建Food.js脚本并挂到food节点上,脚本内容如下:
// Food.js
cc.Class({
    extends: cc.Component,

    properties: {

    },

    // LIFE-CYCLE CALLBACKS:

    onLoad () {
        this.node.color = this.randomColor();
        this.node.setPosition(this.randomPos());
    },

    randomColor () {
        // get random color
        let red = Math.round(Math.random()*255);
        let green = Math.round(Math.random()*255);
        let blue = Math.round(Math.random()*255);

        return new cc.Color(red, green, blue);
    },

    randomPos () {
        let width = this.node.parent.width;
        let height = this.node.parent.height;
        let x = Math.round(Math.random()*width) - width/2;
        let y = Math.round(Math.random()*height) - height/2;
        return cc.v2(x, y);
    }
});
就是随机设置food节点颜色和位置,笔者不再赘述。
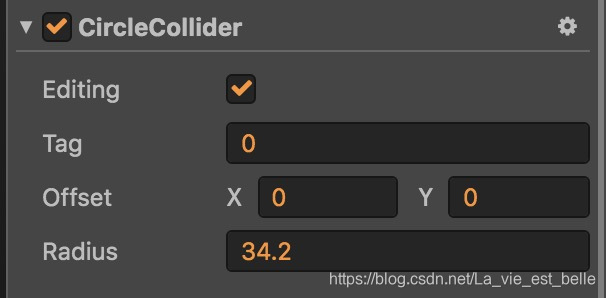
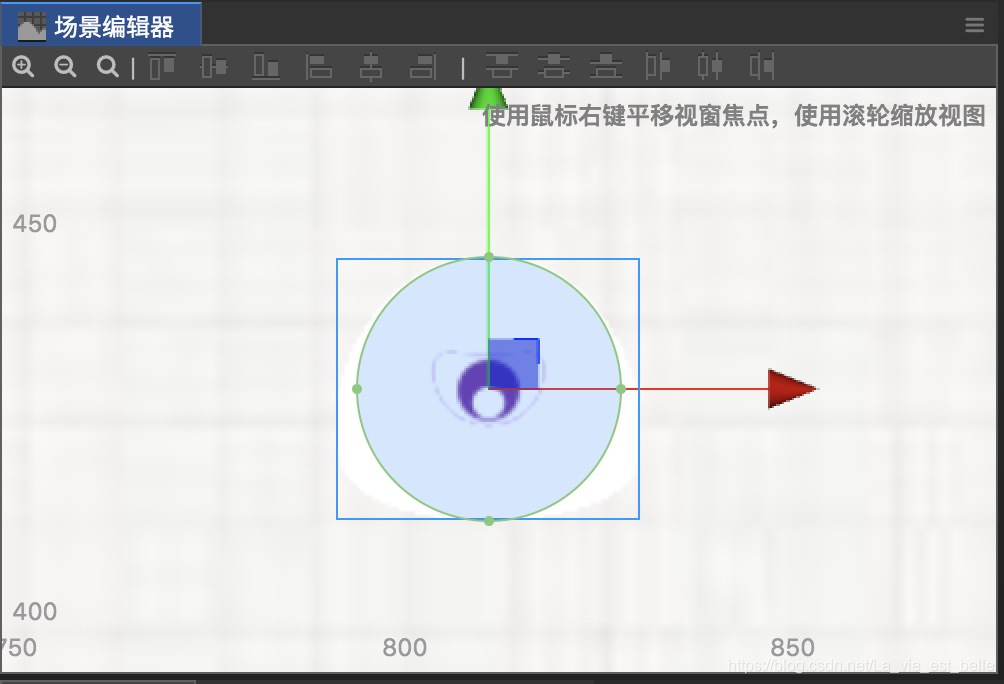
接着给food节点添加一个Circle Collider碰撞组件,并调整大小:


同样我们也给蛇头加一个Circle Collider碰撞组件,调整如下:
新建分组管理如下:
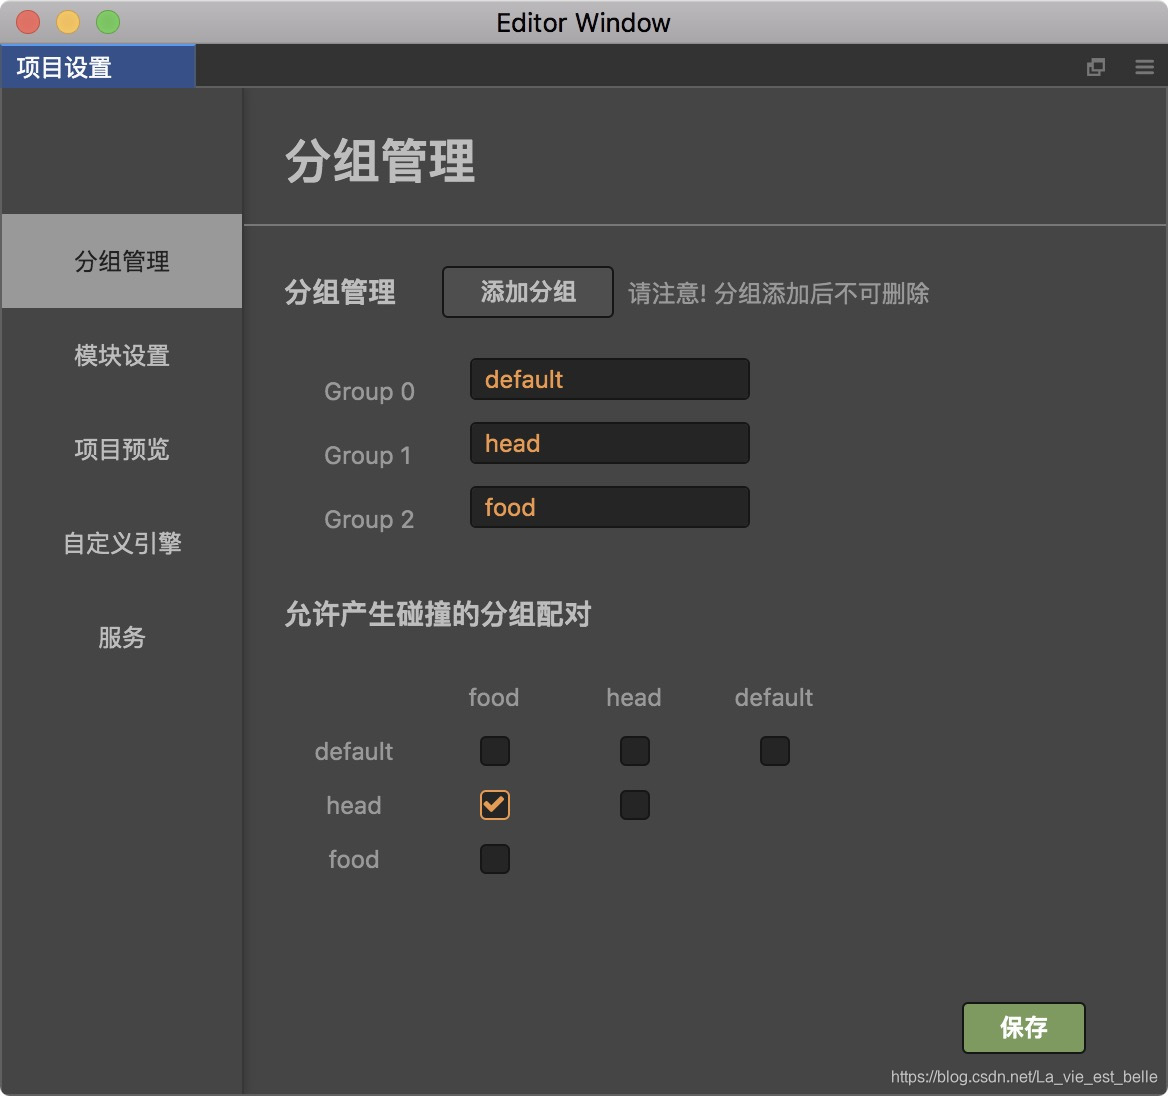
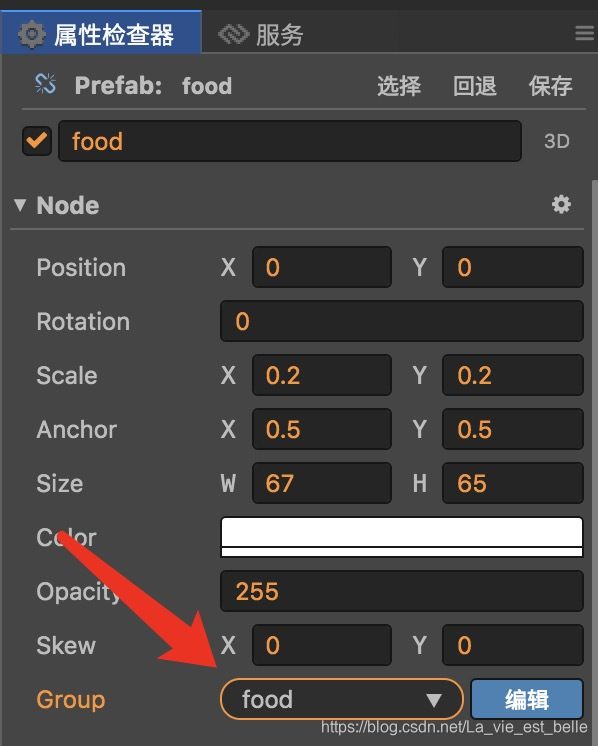
修改food和head节点的分组:

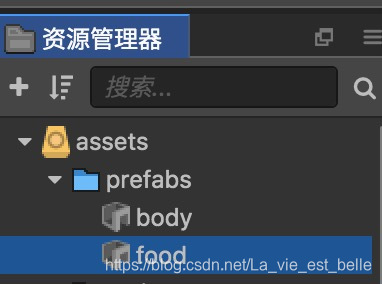
最后让food节点变成一个预制:
添加碰撞逻辑代码
我们就直接再Head.js中加入碰撞逻辑代码。首先加入foodPrefab属性:
// Head.js
properties: {
    ...

    foodPrefab: {
        default: null,
        type: cc.Prefab
    },

    ...
},
然后在onLoad方法中开始碰撞检测并生成一个食物:
// Head.js
onLoad () {
    ...

    // enable collision system
    let manager = cc.director.getCollisionManager();
    manager.enabled = true;

    // produce new food
    let newFood = cc.instantiate(this.foodPrefab);
    this.node.parent.addChild(newFood);
},
然后实现onCollisionEnter方法即可:
// Head.js
onCollisionEnter (other, self) {
    // remove current food
    other.node.removeFromParent();

    // produce new food
    let newFood = cc.instantiate(this.foodPrefab);
    this.node.parent.addChild(newFood);

    // generate new body
    this.getNewBody();
},
每当碰撞发生,我们删除被吃掉的food节点,并生成新的食物节点,然后让贪吃蛇变长。
那到这里就全部讲解结束了,希望大家有所收获!
欢迎关注我的微信公众号,发现更多有趣内容: