Spring注解驱动 属性赋值(二)
探寻 Spring 注解驱动中的属性赋值方法。本文的测试都在 SpringBoot 上进行。
@Value注解
先写一个Person类,用@Component标注为一个组件。
package com.example.demo.annotation;

import lombok.Data;

@Data
@Component
public class Person {
    public  String name;

    public  Integer age;

}
写个单元测试打印这个Person。
package com.example.demo;

import com.example.demo.annotation.Person;
import org.junit.jupiter.api.Test;
import org.junit.runner.RunWith;
import org.springframework.beans.factory.annotation.Autowired;
import org.springframework.boot.test.context.SpringBootTest;
import org.springframework.test.context.junit4.SpringRunner;

@RunWith(SpringRunner.class)
@SpringBootTest
class annotationTest {

    @Autowired
    Person person;

    @Test
    void contextLoads() {

        System.out.println(person);
    }
}
结果如下:

由于没有给name和age两个属性赋值,所以它们都是null。
下面使用@Value注解直接给属性赋值。
@Value("张三")
public  String name;

@Value("#{20}")
public  Integer age;
结果如下:

那么要读取出配置文件中的值怎么办呢?
首先在全局配置文件类路径下的 application.yml 文件中给属性赋值:
person:
  name: 李四
  age: 30
用 @Value注解取出全局配置文件中的值。
示例代码如下:
package com.example.demo.annotation;

import lombok.Data;
import org.springframework.beans.factory.annotation.Value;
import org.springframework.context.annotation.PropertySource;
import org.springframework.stereotype.Component;

@Data
@Component
public class Person {

    @Value("${person.name}")
    public  String name;

    @Value("${person.age}")
    public  Integer age;

}
结果如下:

@ConfigurationProperties注解
有时候属性太多了,一个一个赋值太麻烦。可以用 @ConfigurationProperties 注解将配置文件中的每一个属性的值映射到组件中。
package com.example.demo.annotation;

import lombok.Data;
import org.springframework.boot.context.properties.ConfigurationProperties;
import org.springframework.context.annotation.PropertySource;
import org.springframework.stereotype.Component;

@Data
@Component
@ConfigurationProperties(prefix = "person")
public class Person {

    public  String name;

    public  Integer age;

}
再次运行看结果:

发现这样就把配置文件中的值整个映射过来了。
@PropertySource注解
如果想要读取除默认全局配置文件外的其他文件的属性值怎么办呢?可以用 @PropertySource 注解指定自定义的配置文件。
下面在类路径下新建一个 person.properties 配置文件。为什么是 .properties 文件呢?因为截止到2020年1月底,@PropertySource注解仍然不支持 .yml 文件。
person.properties 配置文件:
person.name=王五
person.age=50
Person类:
package com.example.demo.annotation;

import lombok.Data;
import org.springframework.boot.context.properties.ConfigurationProperties;
import org.springframework.context.annotation.PropertySource;
import org.springframework.stereotype.Component;

@Data
@Component
@PropertySource(value = {"classpath:person.properties"})
@ConfigurationProperties(prefix = "person")
public class Person {

    public  String name;

    public  Integer age;

}
测试结果:

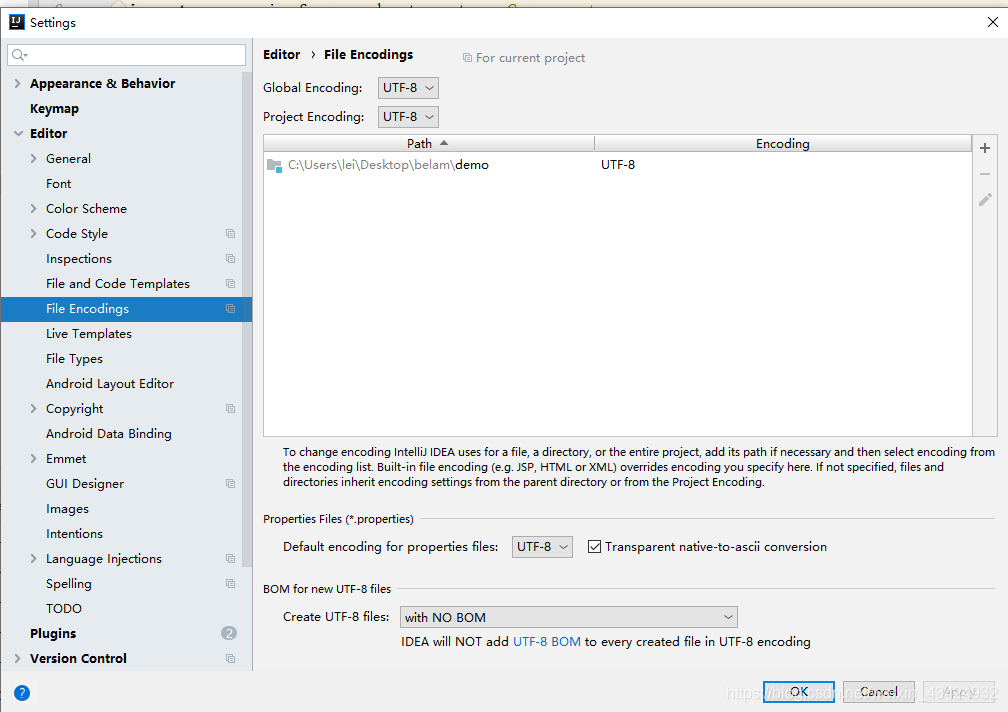
值得注意的是,在新建 .properties 配置文件之前要先把编码方式设置好,不然中文会出现乱码。
参考下面的设置: