本博客demo源码地址
https://github.com/suchahaerkang/spring-annotation.git
1 通过无参构造函数创建对象
首先我们写个配置类,将Person组件注册到容器中去
/**
 * @description:
 * @author: sukang
 * @date: 2020-03-07 11:00
 */
@Configuration
public class MainConfigOfPropertyValues {

    @Bean
    public Person person(){
        return new Person();
    }
}
Person组件
/**
 * @description:
 * @author: sukang
 * @date: 2020-03-04 12:06
 */
@Data
@ToString
@NoArgsConstructor
@AllArgsConstructor
public class Person {

    public Person(String name, int age) {
        this.name = name;
        this.age = age;
    }

    //姓名
    private String name;

    //年龄
    private int age;

    //昵称
    private String nikeName;
}
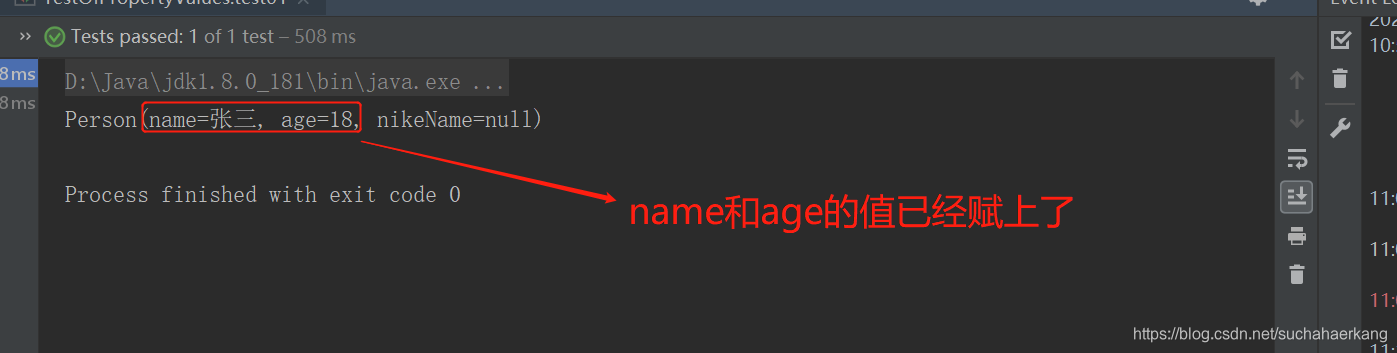
写个测试用例
 @Test
 public void test01(){
      //创建容器
      ApplicationContext applicationContext = new AnnotationConfigApplicationContext(MainConfigOfPropertyValues.class);
      //从容器中获取id为person的Person组件
      Person person = (Person) applicationContext.getBean("person");
      System.out.println(person);
  }
运行结果
 @Value("xxx"),直接加上想要赋的值
2) @Value("#{}") ,也可以通过spring提供的SPEL表达式来赋值
3) @Value("${}"),也可以通过注解@PrepertySource的方式将配置文件注入到运行环境中,然后通过${}的方式去获取
我们先测试方式1和方式2
/**
 * @description:
 * @author: sukang
 * @date: 2020-03-04 12:06
 */
@Data
@ToString
@NoArgsConstructor
@AllArgsConstructor
public class Person {

    public Person(String name, int age) {
        this.name = name;
        this.age = age;
    }

    //姓名
    @Value("张三")
    private String name;

    //年龄
    @Value("#{20-2}")
    private int age;

    //昵称
    private String nikeName;
}
运行结果
然后我们测试一下第三种方式
首先我们在classpath下面加上一个person.properties的配置文件
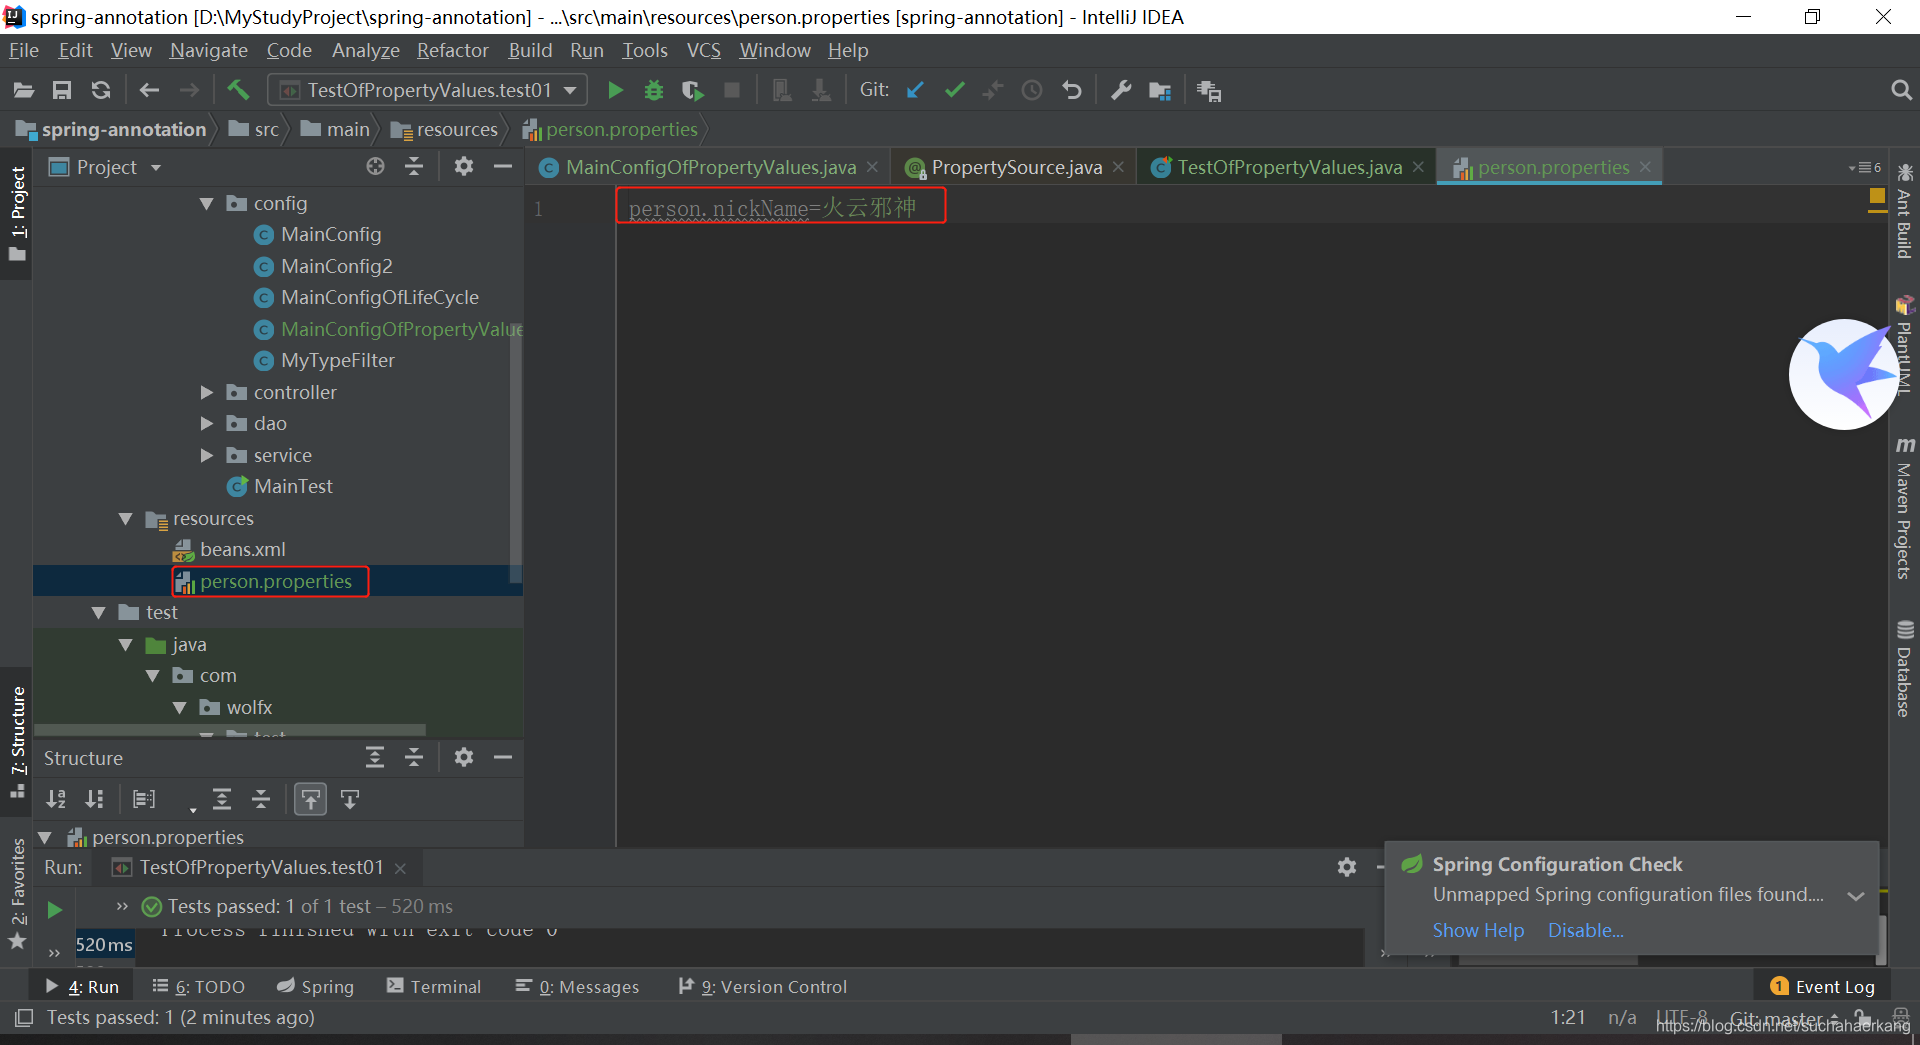
然后在配置文件上加上@PropertySource注解
/**
 * @description:
 * @author: sukang
 * @date: 2020-03-07 11:00
 */
@PropertySource(value={"classpath:/person.properties"},encoding = "utf-8")
@Configuration
public class MainConfigOfPropertyValues {

    @Bean
    public Person person(){
        return new Person();
    }
}
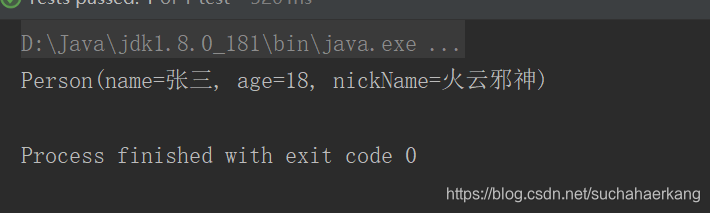
最后在Person组件中的nickName属性上面标注注解
//昵称
@Value("${person.nickName}")
private String nickName;
运行结果
2.2 @PropertySource
这个注解其实就是将指定的配置文件里面的key-value值注入到运行环境中去
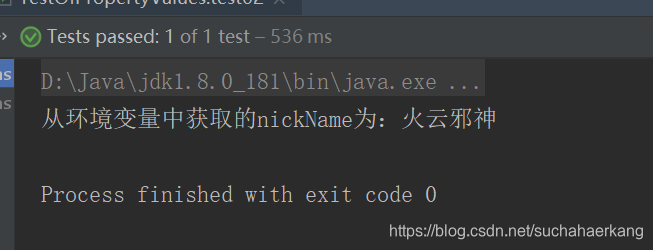
下面我们测试一下中环境变量中获取person.nickName这个值
写个测试用例
@Test
public void test02(){
	  //创建容器
	  ApplicationContext applicationContext = new AnnotationConfigApplicationContext(MainConfigOfPropertyValues.class);
	  //从容器中获取环境变量组件
	  Environment environment = applicationContext.getEnvironment();
	  //从环境变量中获取person.nickName值
	  String nickName = environment.getProperty("person.nickName");
	  System.out.println("从环境变量中获取的nickName为:" + nickName);
}
运行结果