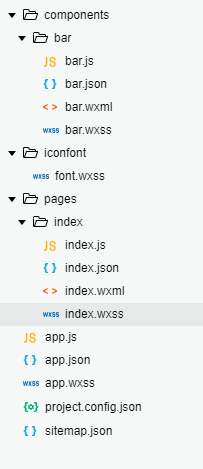
一、项目目录结构
说明:
1、components目录用于存放自定义组件,bar是一个自定义组件,封装了小程序顶部自定义导航栏。
1>由于顶部导航栏大多页面都需要,所以最好封装成一个组件,直接引入,这也就引发了第二个需求。
2>有时,在一个项目中,有些页面的导航栏可能不一样,所以此时我们应该尽可能的考虑到需求,然后封装,在页面更改值来达到不同的导航栏需求。
2、pages下存放页面。
3、小程序自定义组件中不能使用app.wxss中的样式,所以组件中共用的样式、iconfont图标单独放在一个wxss文件中,然后直接引入即可~
二、版本
此次会给出2个版本的自定义导航栏
1、微信小程序版本的 源码下载:https://github.com/Syleapn/wx-custom-navigation
2、uni-app版本的 源码下载:https://github.com/Syleapn/uni-app-custom-navigation-
其实两者差不多,只是写法上稍微有点区别,考虑到大多小伙伴初次对微信小程序熟悉,那本次就以微信小程序版本为例剖析,uni-app直接贴出代码或放到git上面下载!
三、分析
1、小程序自定义导航栏知识点补充
微信小程序导航栏:由状态栏与标题栏组成
除了状态栏与右上角胶囊外,其他区域都可由开发者控制,
状态栏高度:由系统信息获取:statusBarHeight
标题栏高度:ios:44px android:48px
得到状态栏与标题栏的高度后我们可以自定义微信小程序导航栏,从而达到项目需求。
2、图片展示

更多相关或微信小程序设计指南请点击这里:https://developers.weixin.qq.com/miniprogram/design/
四、实现过程分析
1、先进行自定义导航栏封装(bar文件)
bar.wxml
<!-- 微信小程序导航栏:由状态栏与标题栏组成
			除了状态栏与右上角胶囊外,其他区域都可由开发者控制,
			状态栏高度:由系统信息获取:statusBarHeight
			标题栏高度:ios:44px android:48px
			得到状态栏与标题栏的高度后我们可以自定义微信小程序导航栏,从而达到项目需求 -->


<!-- 说明:
1、第一种情况:为了便于说明导航栏的组成,添加了一个标签,“状态栏”所在的这个标签
在web前端开发中,通常情况下,当我们自定义顶部导航栏时,要进行fixed,这样会脱离标准流,导致后面的正文一部分覆盖在导航栏下面
,通常的做法是:
把正文距离顶部向下移动导航栏高度的距离。此处为了不向父组件传值,直接在子组件(自定义导航栏)中解决这个问题,采用另一种思路。
就是添加一个额外的标签,结合css样式达到相同的目的。这个额外的标签可以包裹在整个导航栏外面(像第一种与第三种情况),
也可以与导航栏平级(第二种情况)

2、终极情况:换繁为简,后续可以采用第二或第三种方案去实现自定义导航栏!
 -->


<!--第一种情况  -->
<!-- 额外标签 -->
<view style="height: {{titleBarHeight}};padding-top:{{statusBarHeight}}">
  <!--导航栏  -->
  <view class="bar-view">
    <!-- 状态栏 -->
    <view class="weight statuColumn" style="height: {{statusBarHeight}}">状态栏</view>
    <!-- 标题栏 -->
    <view class="titleColumn" style="height:{{titleBarHeight}};background-color: {{nav.bg}}">
      <text class="iconfont leftArrow titleColumn-back weight" style="border:{{nav.color}}" wx:if="{{nav.isdisPlayNavTitle}}" bindtap="back"></text>
      <view class="titleColumn-title weight">{{nav.navTitle}}</view>
    </view>
  </view>
</view>


<!-- 第二种情况 -->
<!-- 导航栏 -->
<view class="header" style="height:{{titleBarHeight}};padding-top:{{statusBarHeight}};background-color:{{nav.bg}}">
     <text class="iconfont leftArrow header-back weight" style="border:{{nav.color}}" wx-if="{{nav.isdisPlayNavTitle}}" bindtap="back"></text>
     <view class="header-title weight">{{nav.navTitle}}</view>
</view>
<!-- 额外标签 -->
<view style="height:{{titleBarHeight}};padding-top:{{statusBarHeight}}"></view>


<!-- 第三种情况 -->
<view  style="height:{{titleBarHeight}};padding-top:{{statusBarHeight}}">
  <view class="header" style="height:{{titleBarHeight}};padding-top:{{statusBarHeight}};background-color: {{nav.bg}}">
    <text class="iconfont leftArrow header-back weight" style="border:{{nav.color}}" wx:if="{{nav.isdisPlayNavTitle}}" bindtap="back"></text>
    <view class="header-title weight">{{nav.navTitle}}</view>
  </view>
</view>
bar.js
Component({
  properties:{
    nav:{
      type:Object
    }
  },
  data:{
    statusBarHeight: 0, //状态栏初始化
    titleBarHeight: 0, //标题栏初始化
  },

  onLoad: function () {
    var that = this;
    wx.getSystemInfo({
      success: function (res) {
        // model设备型号
        // iOS
        // 标题栏高度
        if (res.model.indexOf('iPhone') !== -1) {
          that.setData({
            titleBarHeight: 44 + 'px'
          })
        } else {
          // android
          that.setData({
            titleBarHeight: 48 + 'px'
          })
        }

        // 状态栏高度
        that.setData({
          statusBarHeight: res.statusBarHeight + 'px'
        })
      },

    })
  }
})注:要在页面初始化时就进行系统信息请求,不然等页面初始化等再请求时,数据存在延迟,导致顶部导航栏由0达到指定的高度,最终效果很不佳。
bar.wxss
  @import '/iconfont/font.wxss';

  /* ****************** 第一种情况样式 ******************* */
  .bar-view{
		width:750rpx;
		position: fixed;
		top:0;
		left:0;
		z-index:100;
		margin-bottom: 200px;
	}

/* 状态栏样式 */
	.statuColumn{
		width:100%;
		text-align: center;
		background-color: green;
		color:#fff;
	}

	/* 标题栏样式 */
	.titleColumn {
		display: flex;
		align-items: center;
		width: 100%;
		position: relative;
	}

	.titleColumn .titleColumn-title {
		position: absolute;
		left: 50%;
		font-size: 38upx;
		transform: translateX(-50%);
	}
	.titleColumn-back{
		position: absolute;
		left:15upx;
		font-size:30upx;
		padding: 10upx;
		border-radius: 50%;
	}

  /* ************** 第二种与第三种情况样式  ********************* */
  .header {
		display: flex;
		align-items: center;
		top: 0;
		position: fixed;
		width: 100%;
		z-index: 100;
		left:0;
	}

	.header .header-title {
		position: absolute;
		left: 50%;
		font-size: 38upx;
		transform: translateX(-50%);
	}
	.header-back{
		position: absolute;
		left:15upx;
		font-size:30upx;
		padding: 10upx;
		border-radius: 50%;
	}
2、引用文件
index.wxml
<bar nav="{{setNav}}"></bar>
<view class="" style="height:3000rpx;background-color:pink;">
			正文
</view>
index.js
Page({
  data:{
    setNav: {
      bg: 'yellow',  //背景色
      color: 'red',  //字体颜色
      isdisPlayNavTitle: true, //是否显示返回按钮,由于导航栏是共用的,把所有的东西封装好,
      // 然后有些页面不需要的东西通过条件控制进行显示与隐藏
      navTitle: '标题栏' //导航标题
    }
  }
})
五、第二与第三种情况结果展示
六、说明
关于组件传值可以看这里:https://blog.csdn.net/Syleapn/article/details/97286960
此处不再说明~
