1、Standalone部署
flink 安装包
- 解压后放在自定义的位置,看个人习惯选择配置环境变量
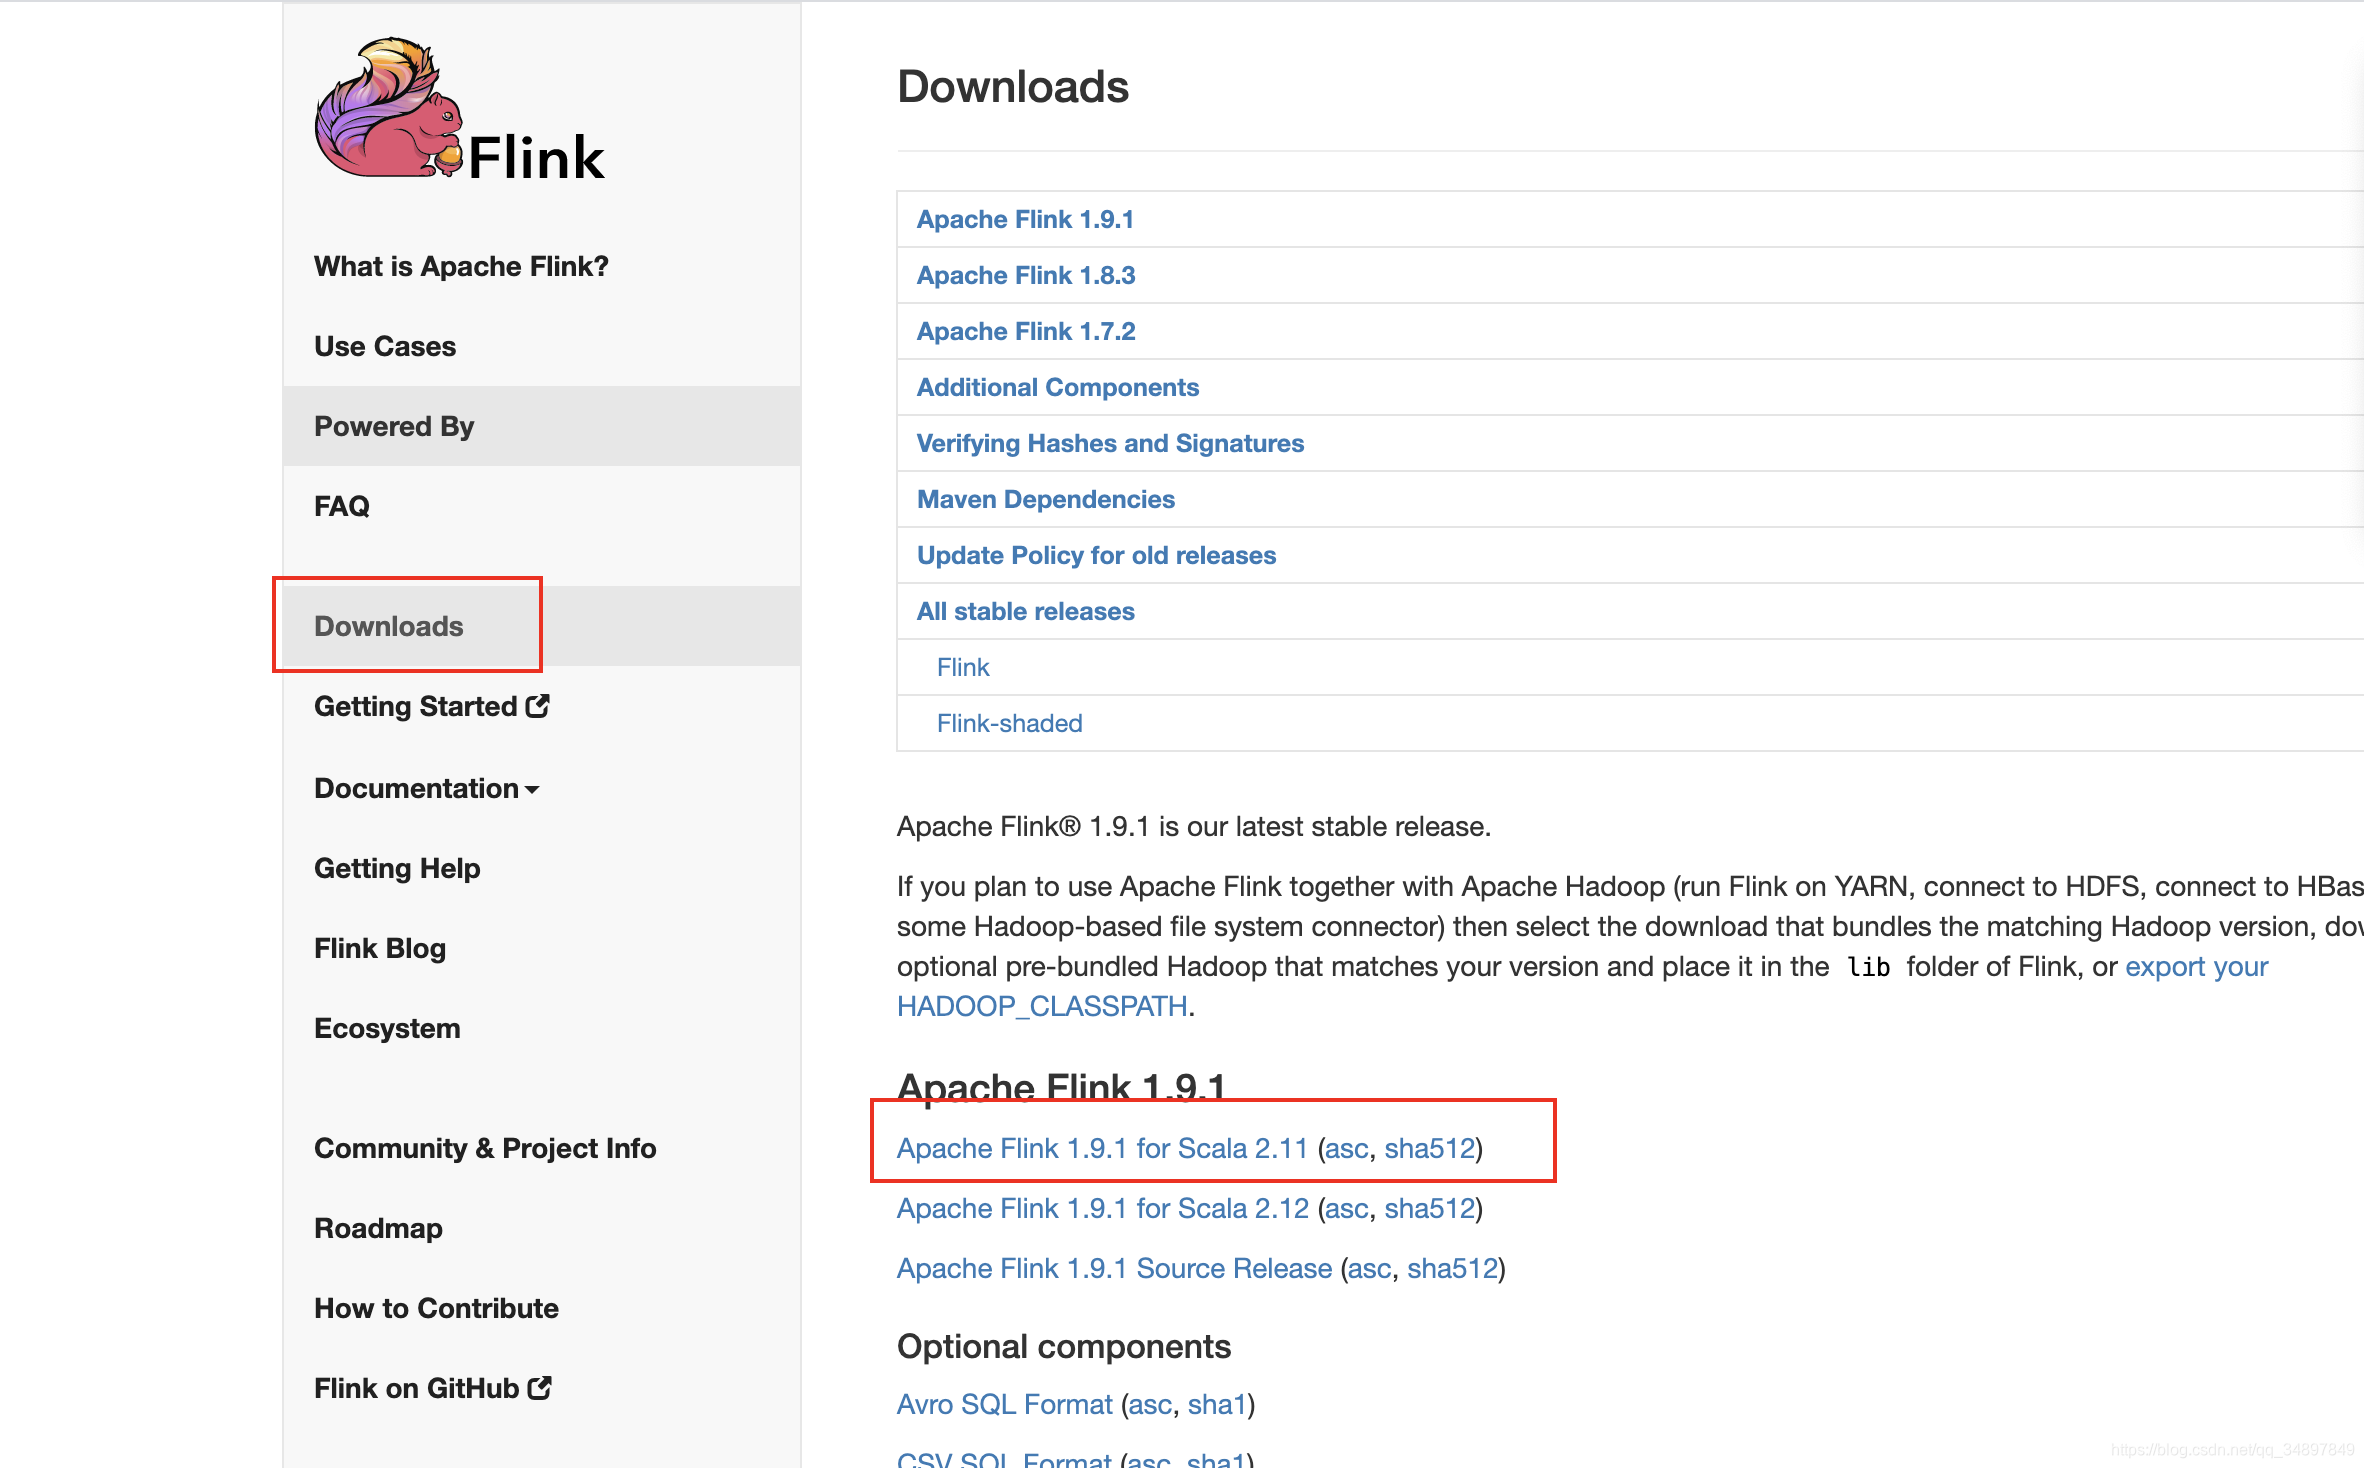
https://flink.apache.org/downloads.html#apache-flink-191
这里使用的是没有hadoop 支持的版本,standalone模式无需hadoop支持
修改配置文件
vim flink-1.9.1/conf/flink-conf.yaml
修改
jobmanager.rpc.address: localhost //jobmanager的rpc进程通信地址
jobmanager.rpc.port: 6123 		  //jobmanager的rpc进程通信端口
jobmanager.heap.size: 1024m
taskmanager.heap.size: 1024m
taskmanager.numberOfTaskSlots: 6	//没台taskmanager的插槽,资源管理器能调度的最小的单位。一般可以设置为机器的核心数
parallelism.default: 1				//集群默认的并行读
rest.port: 8081		//放开配置  web ui的端口
vim flink-1.9.1/conf/masters

localhost:8081
vim flink-1.9.1/conf/slaves

localhost
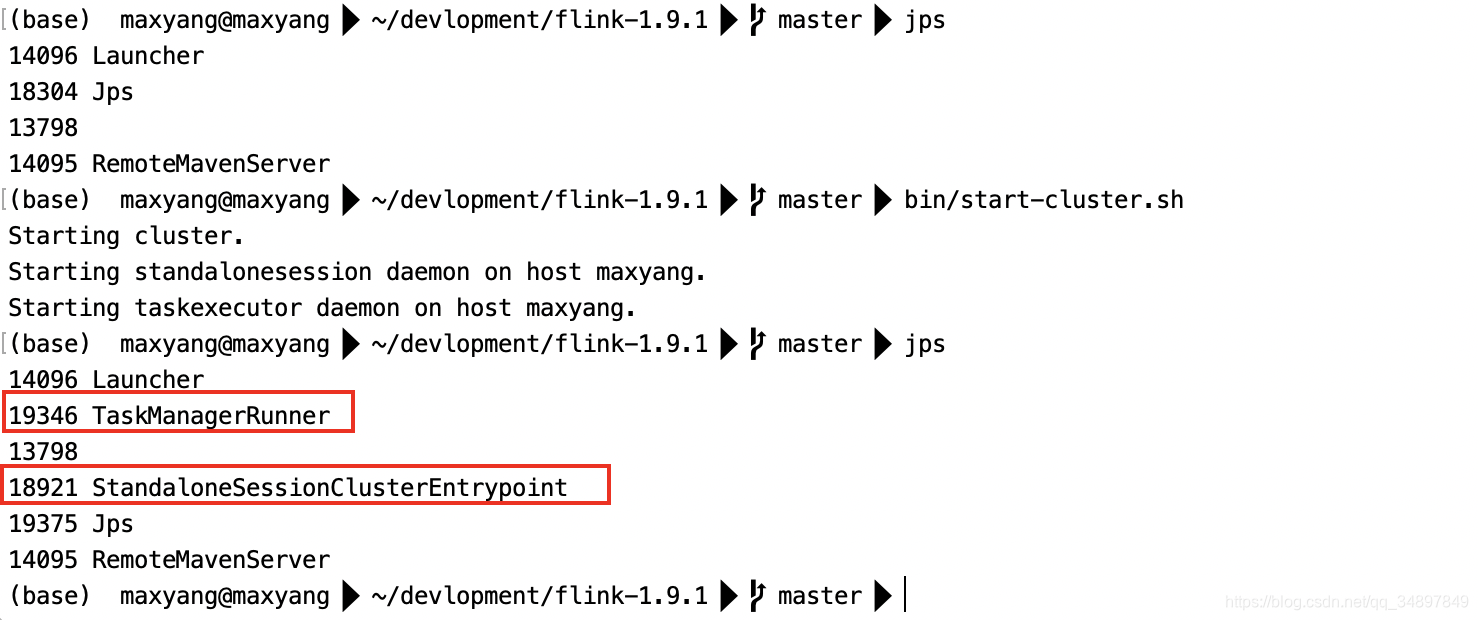
- 启动集群
flink-1.9.1/bin/start-cluster.sh
可以看到启动了两个进程
- 进入 web ui
http://localhost:8081/#/overview
编写程序提交任务
- pom.xml
<dependencies>
        <dependency>
            <groupId>org.apache.flink</groupId>
            <artifactId>flink-scala_2.11</artifactId>
            <version>1.9.1</version>
        </dependency>
        <dependency>
            <groupId>org.apache.flink</groupId>
            <artifactId>flink-streaming-scala_2.11</artifactId>
            <version>1.9.1</version>
        </dependency>

</dependencies>


 <build>
        <plugins>
            <!-- 该插件用于将Scala代码编译成class文件 -->
            <plugin>
                <groupId>net.alchim31.maven</groupId>
                <artifactId>scala-maven-plugin</artifactId>
                <version>3.4.6</version>
                <executions>
                    <execution>
                        <!-- 声明绑定到maven的compile阶段 -->
                        <goals>
                            <goal>testCompile</goal>
                        </goals>
                    </execution>
                </executions>
            </plugin>

            <plugin>
                <groupId>org.apache.maven.plugins</groupId>
                <artifactId>maven-assembly-plugin</artifactId>
                <version>3.0.0</version>
                <configuration>
                    <descriptorRefs>
                        <descriptorRef>
                            jar-with-dependencies
                        </descriptorRef>
                    </descriptorRefs>
                </configuration>
                <executions>
                    <execution>
                        <id>make-assembly</id>
                        <phase>package</phase>
                        <goals>
                            <goal>single</goal>
                        </goals>
                    </execution>
                </executions>
            </plugin>
        </plugins>
    </build>
-测试代码
import org.apache.flink.streaming.api.scala._
object StreamWordCount {
def main(args: Array[String]): Unit = {
//流处理执行环境
val env: StreamExecutionEnvironment = StreamExecutionEnvironment.getExecutionEnvironment
// env.disableOperatorChaining()
//接收一个socket文本流
/*
数据准备
nc netcat 简写
l listen
k keep
nc -lk 7777
*/
//并行度只能是 1
val dataStream: DataStream[String] = env.socketTextStream("localhost", 7777)
//对每条数据处理
val wordCountStream: DataStream[String] = dataStream.flatMap(_.split(" "))
val value: DataStream[(String, Int)] = wordCountStream
//可以有其他的操作
.filter(_.nonEmpty)
.map((_, 1))
//流处理分组用keybyhello
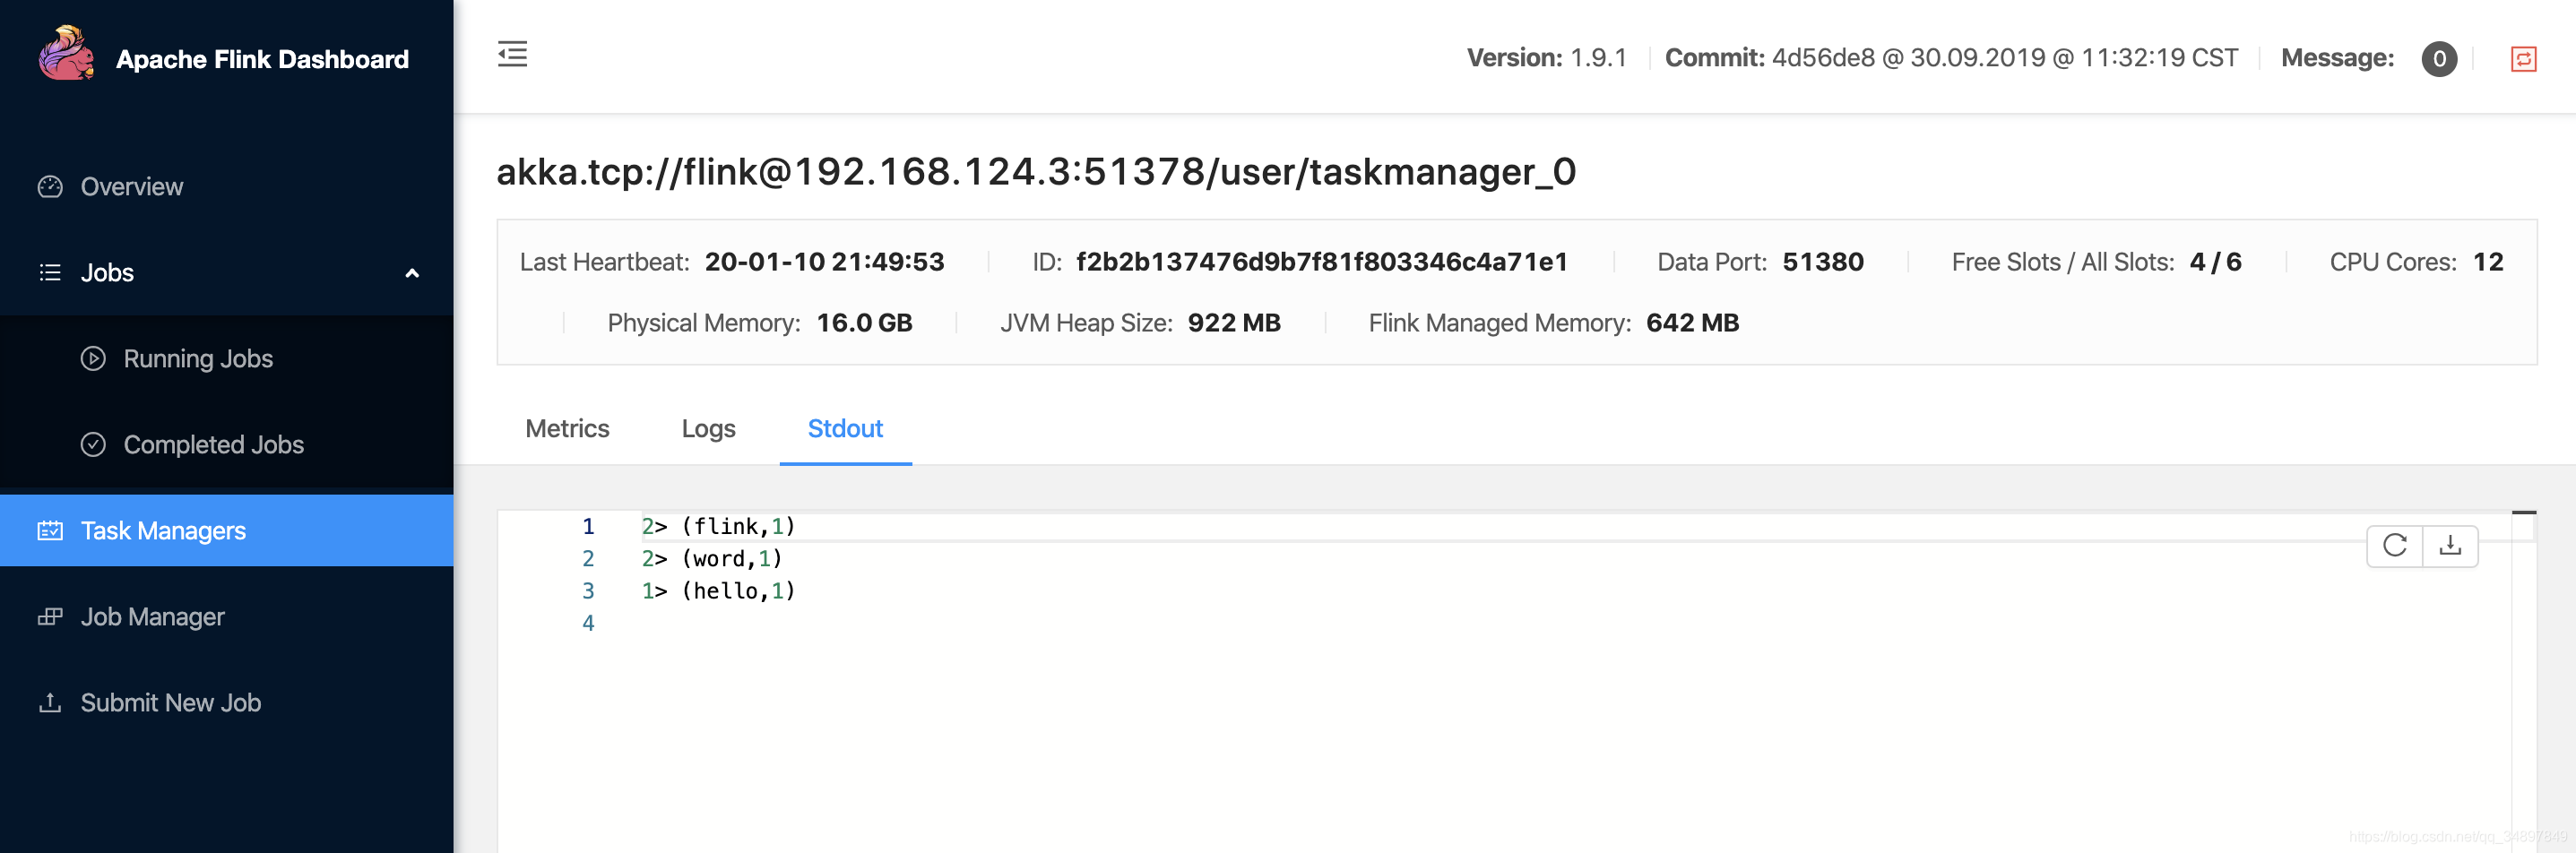
.keyBy(0).sum(1)
value.print()
/* 设置并行读
默认并行度是运行程序电脑的核心数量
可以指定并行度
*/
//输出到文件中
//wordCountStream.writeAsText("path")
//流处理不能停,前面的代码只是定义处理流程,要启动起来才行
env.execute("StreamWordCount")
}
}
-
测试程序

-
提交代码
import org.apache.flink.api.java.utils.ParameterTool
import org.apache.flink.streaming.api.scala._


object StreamWordCount {
  def main(args: Array[String]): Unit = {
    val params: ParameterTool = ParameterTool.fromArgs(args)
    val host: String = params.get("host")
    val port: Int = params.getInt("port")
    //流处理执行环境
    val env: StreamExecutionEnvironment = StreamExecutionEnvironment.getExecutionEnvironment

    // env.disableOperatorChaining()

    //接收一个socket文本流
    /*
    数据准备
    nc netcat 简写
    l listen
    k keep

    nc -lk 7777
    */

    //并行度只能是 1
    //val dataStream: DataStream[String] = env.socketTextStream("localhost", 7777)
    val dataStream: DataStream[String] = env.socketTextStream(host, port)

    //对每条数据处理
    val wordCountStream: DataStream[String] = dataStream.flatMap(_.split(" "))

    val value: DataStream[(String, Int)] = wordCountStream
      //可以有其他的操作
      .filter(_.nonEmpty)
      .map((_, 1))
      //流处理分组用keybyhello

      .keyBy(0).sum(1)


    value.print()


    /* 设置并行读
     默认并行度是运行程序电脑的核心数量
     可以指定并行度
     */


    //输出到文件中
    //wordCountStream.writeAsText("path")
    //流处理不能停,前面的代码只是定义处理流程,要启动起来才行
    env.execute("StreamWordCount")
  }
}
- 提交Flink集群运行
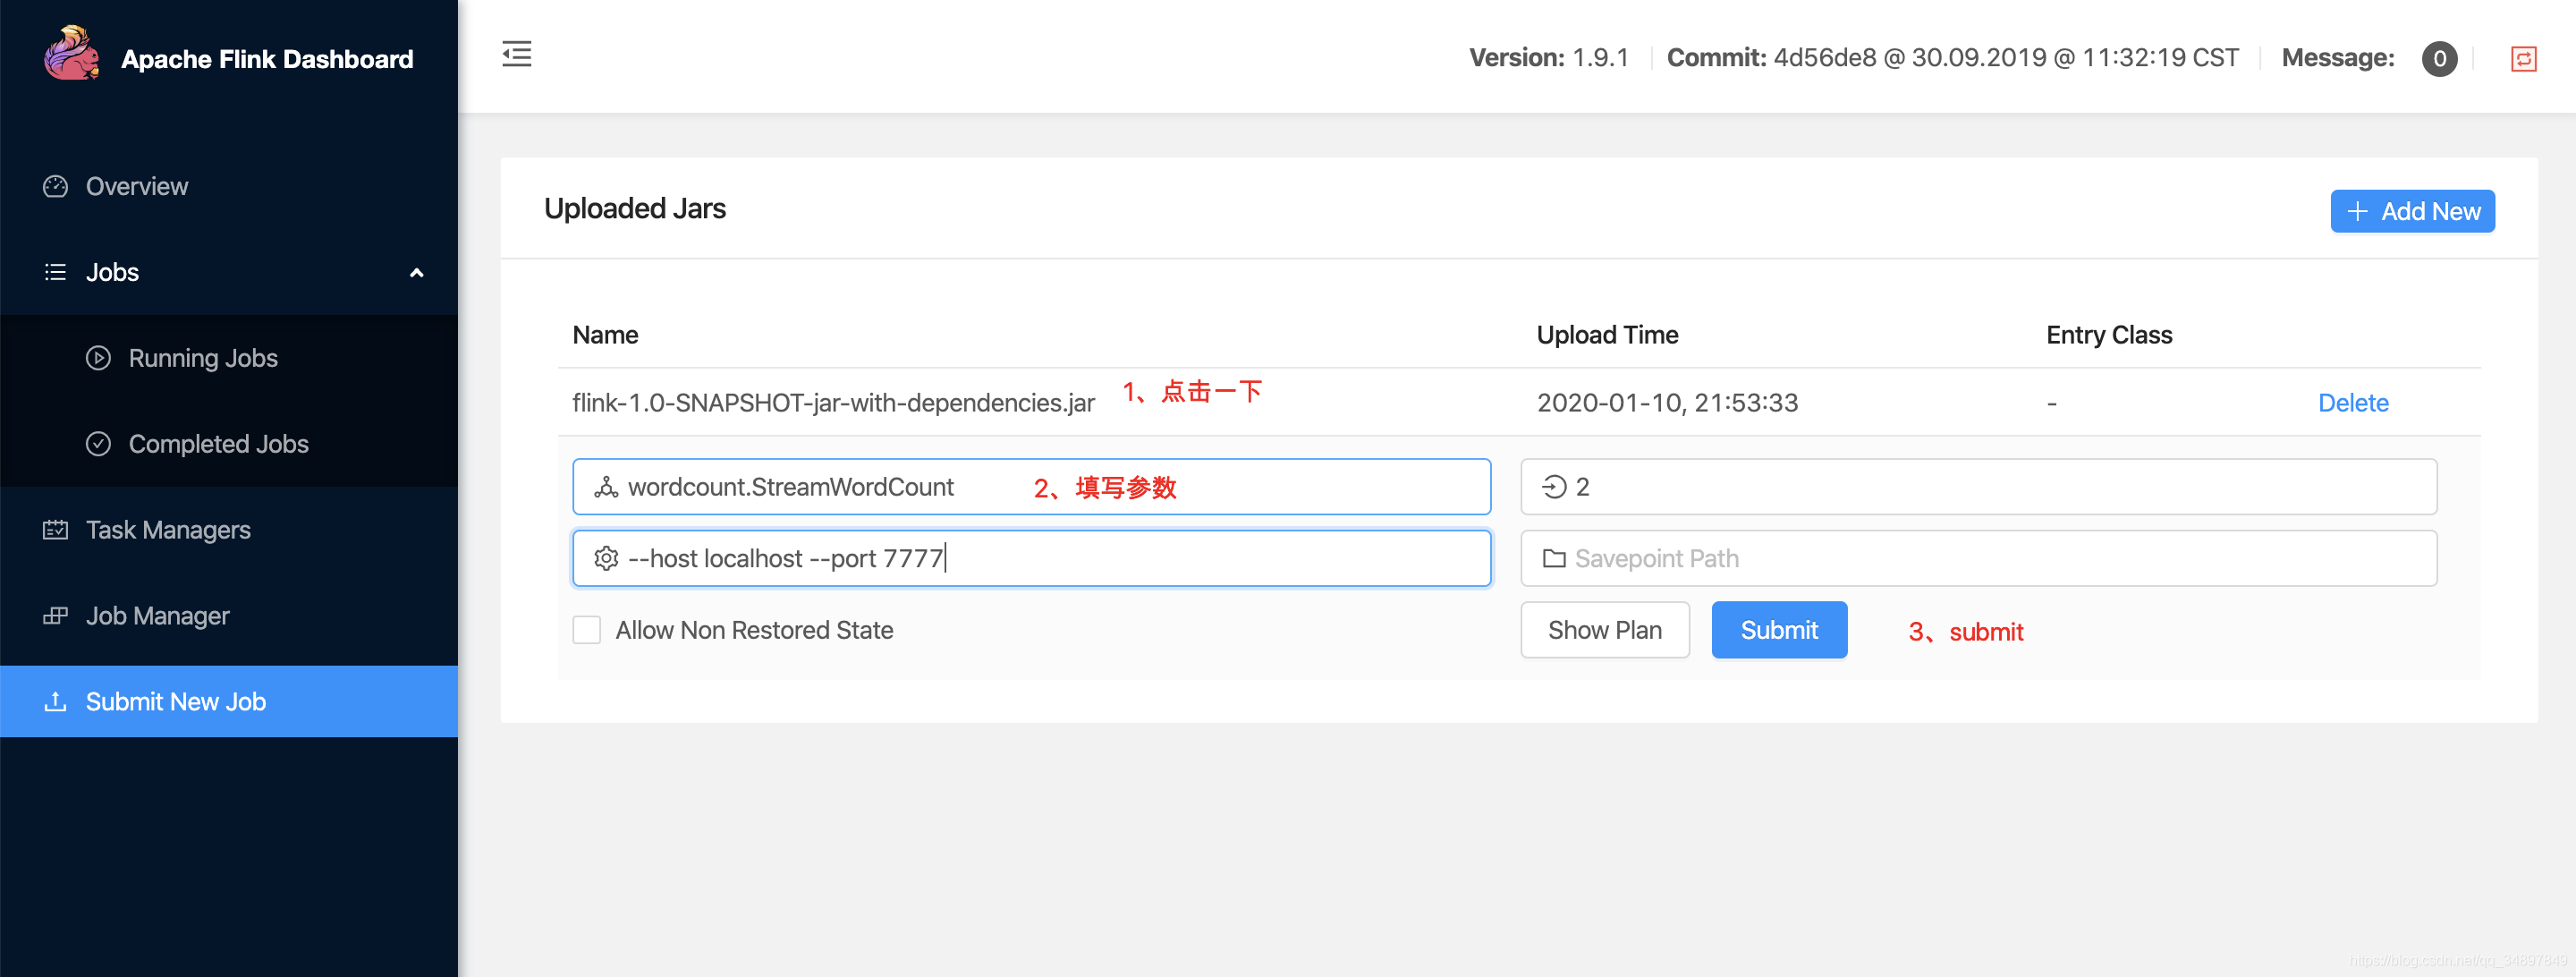
1、flink web 上传文件submit
- 上传jar包
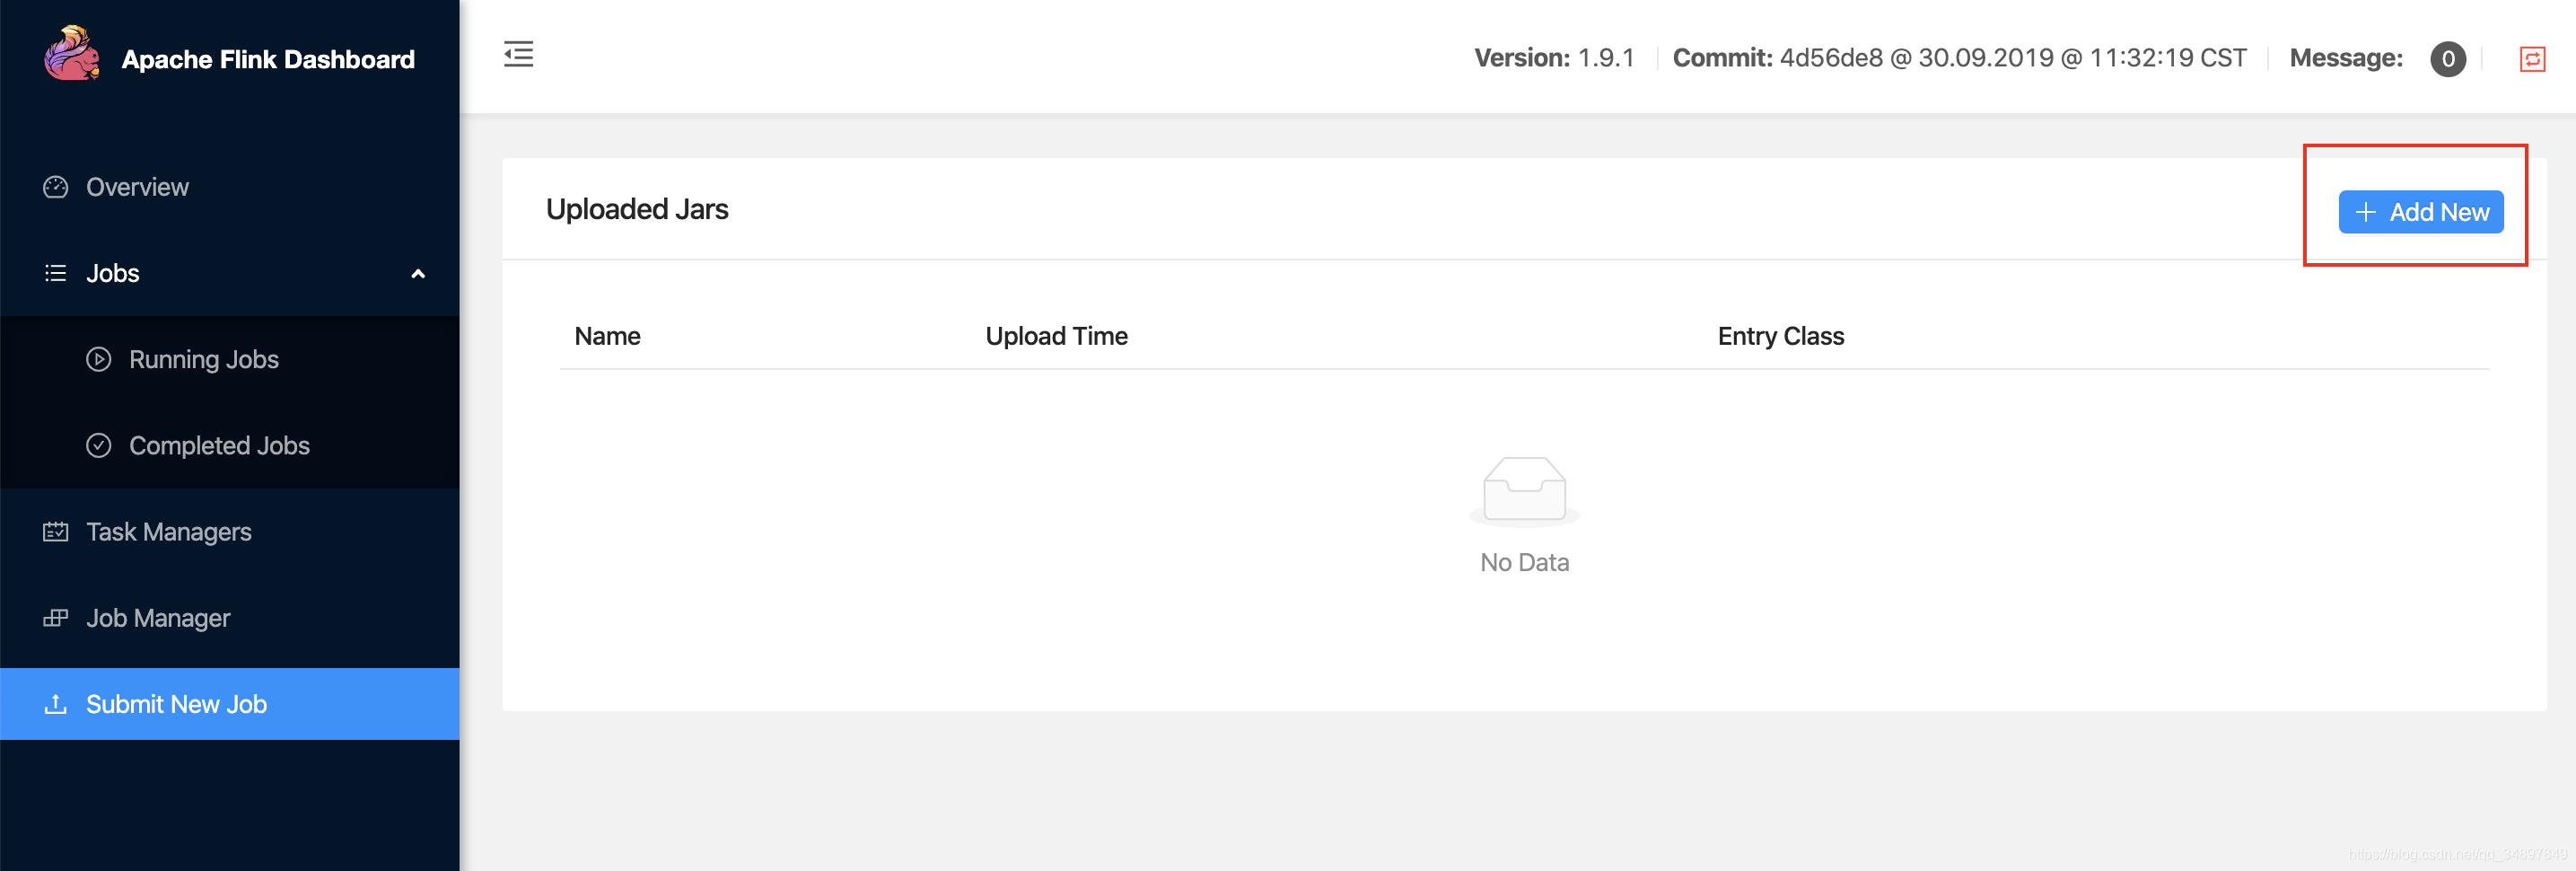
- 填写配置

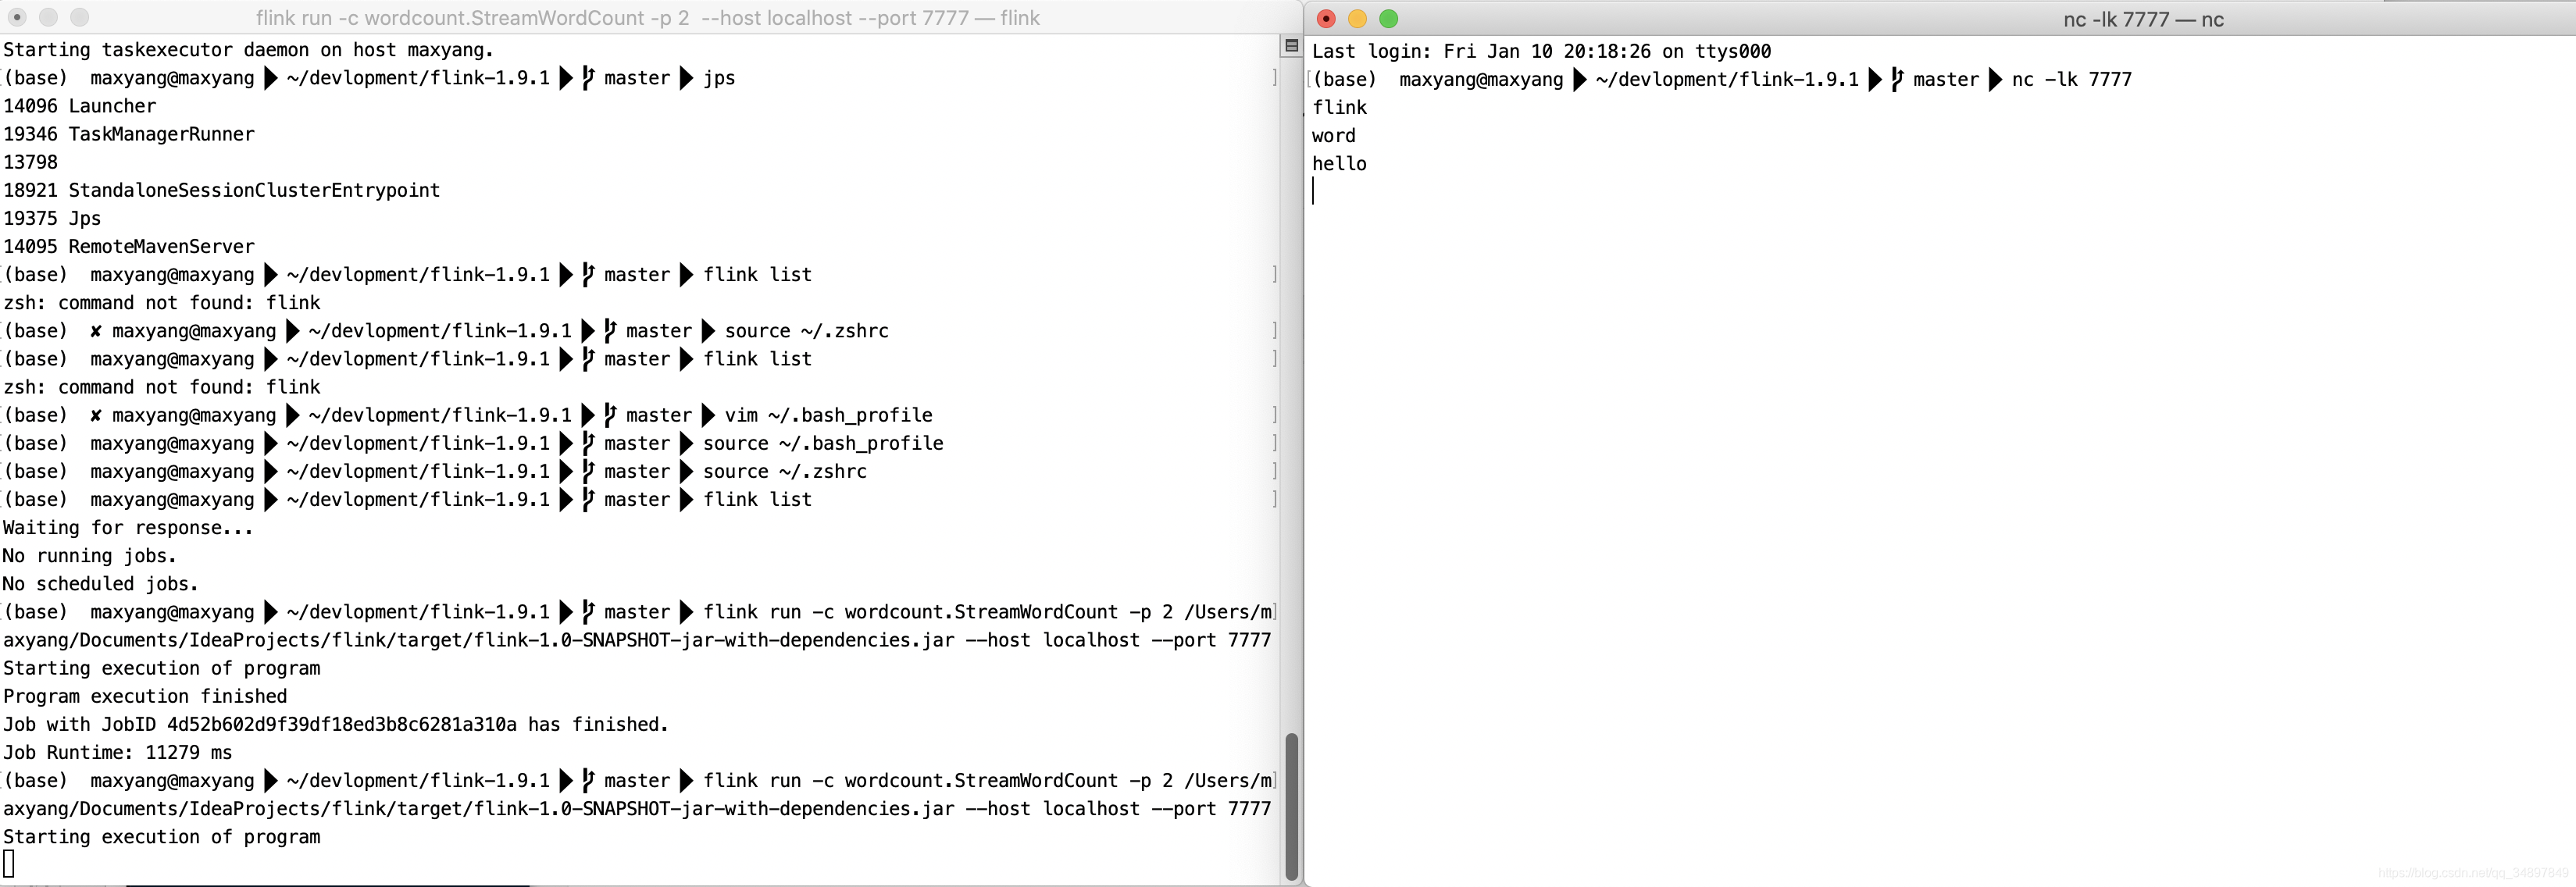
2、命令行
提交 参数直接跟在后面就行
//submit job
flink run -c 入口类 -p 并行度 jar包文件路径 [--参数名 参数值 ···(可以传多个参数) ]
//checklist job
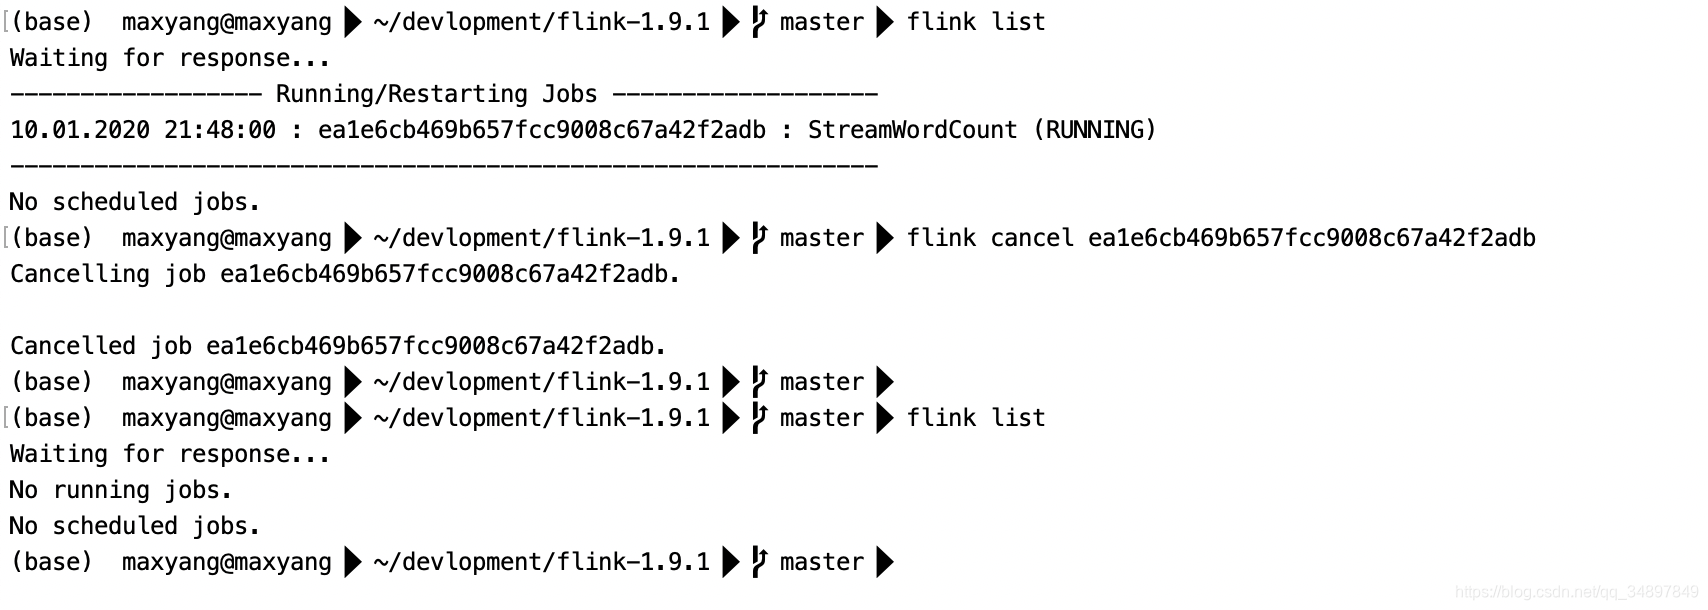
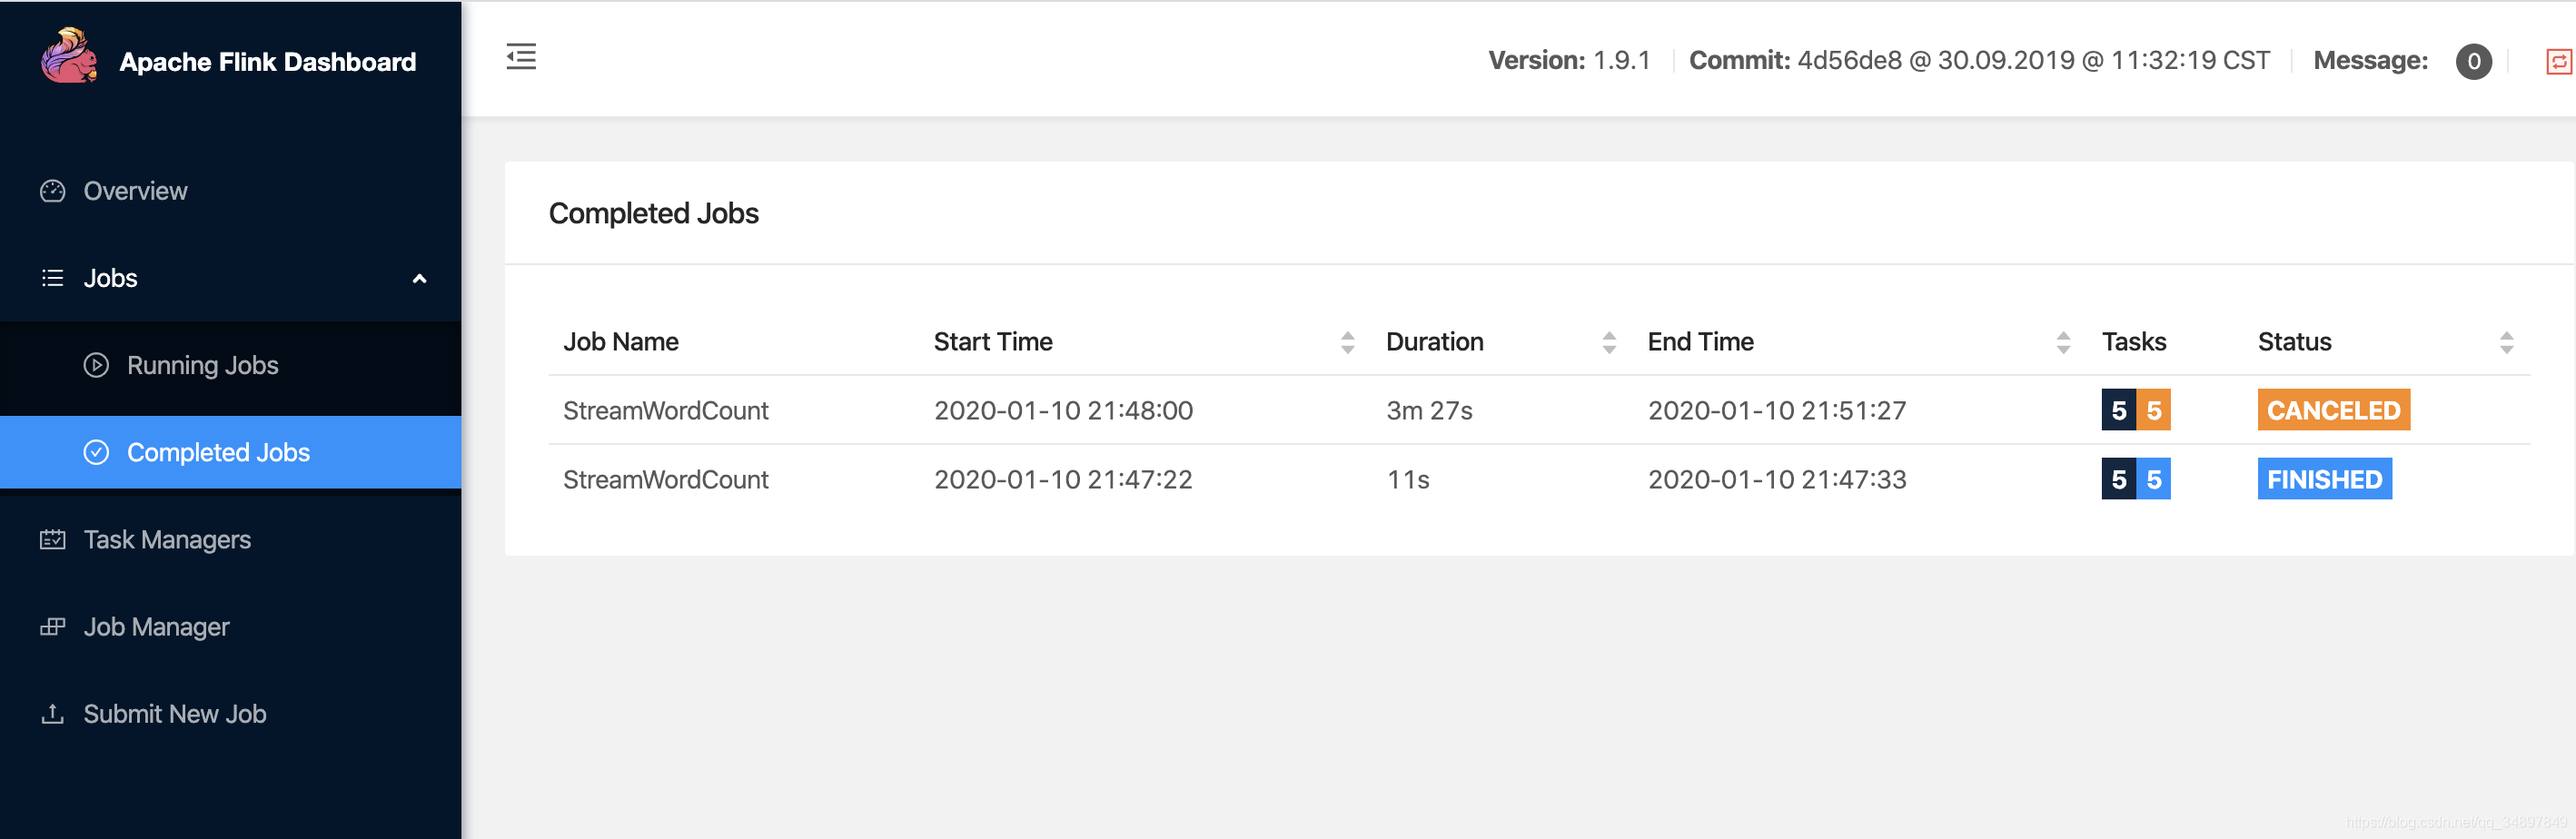
flink list
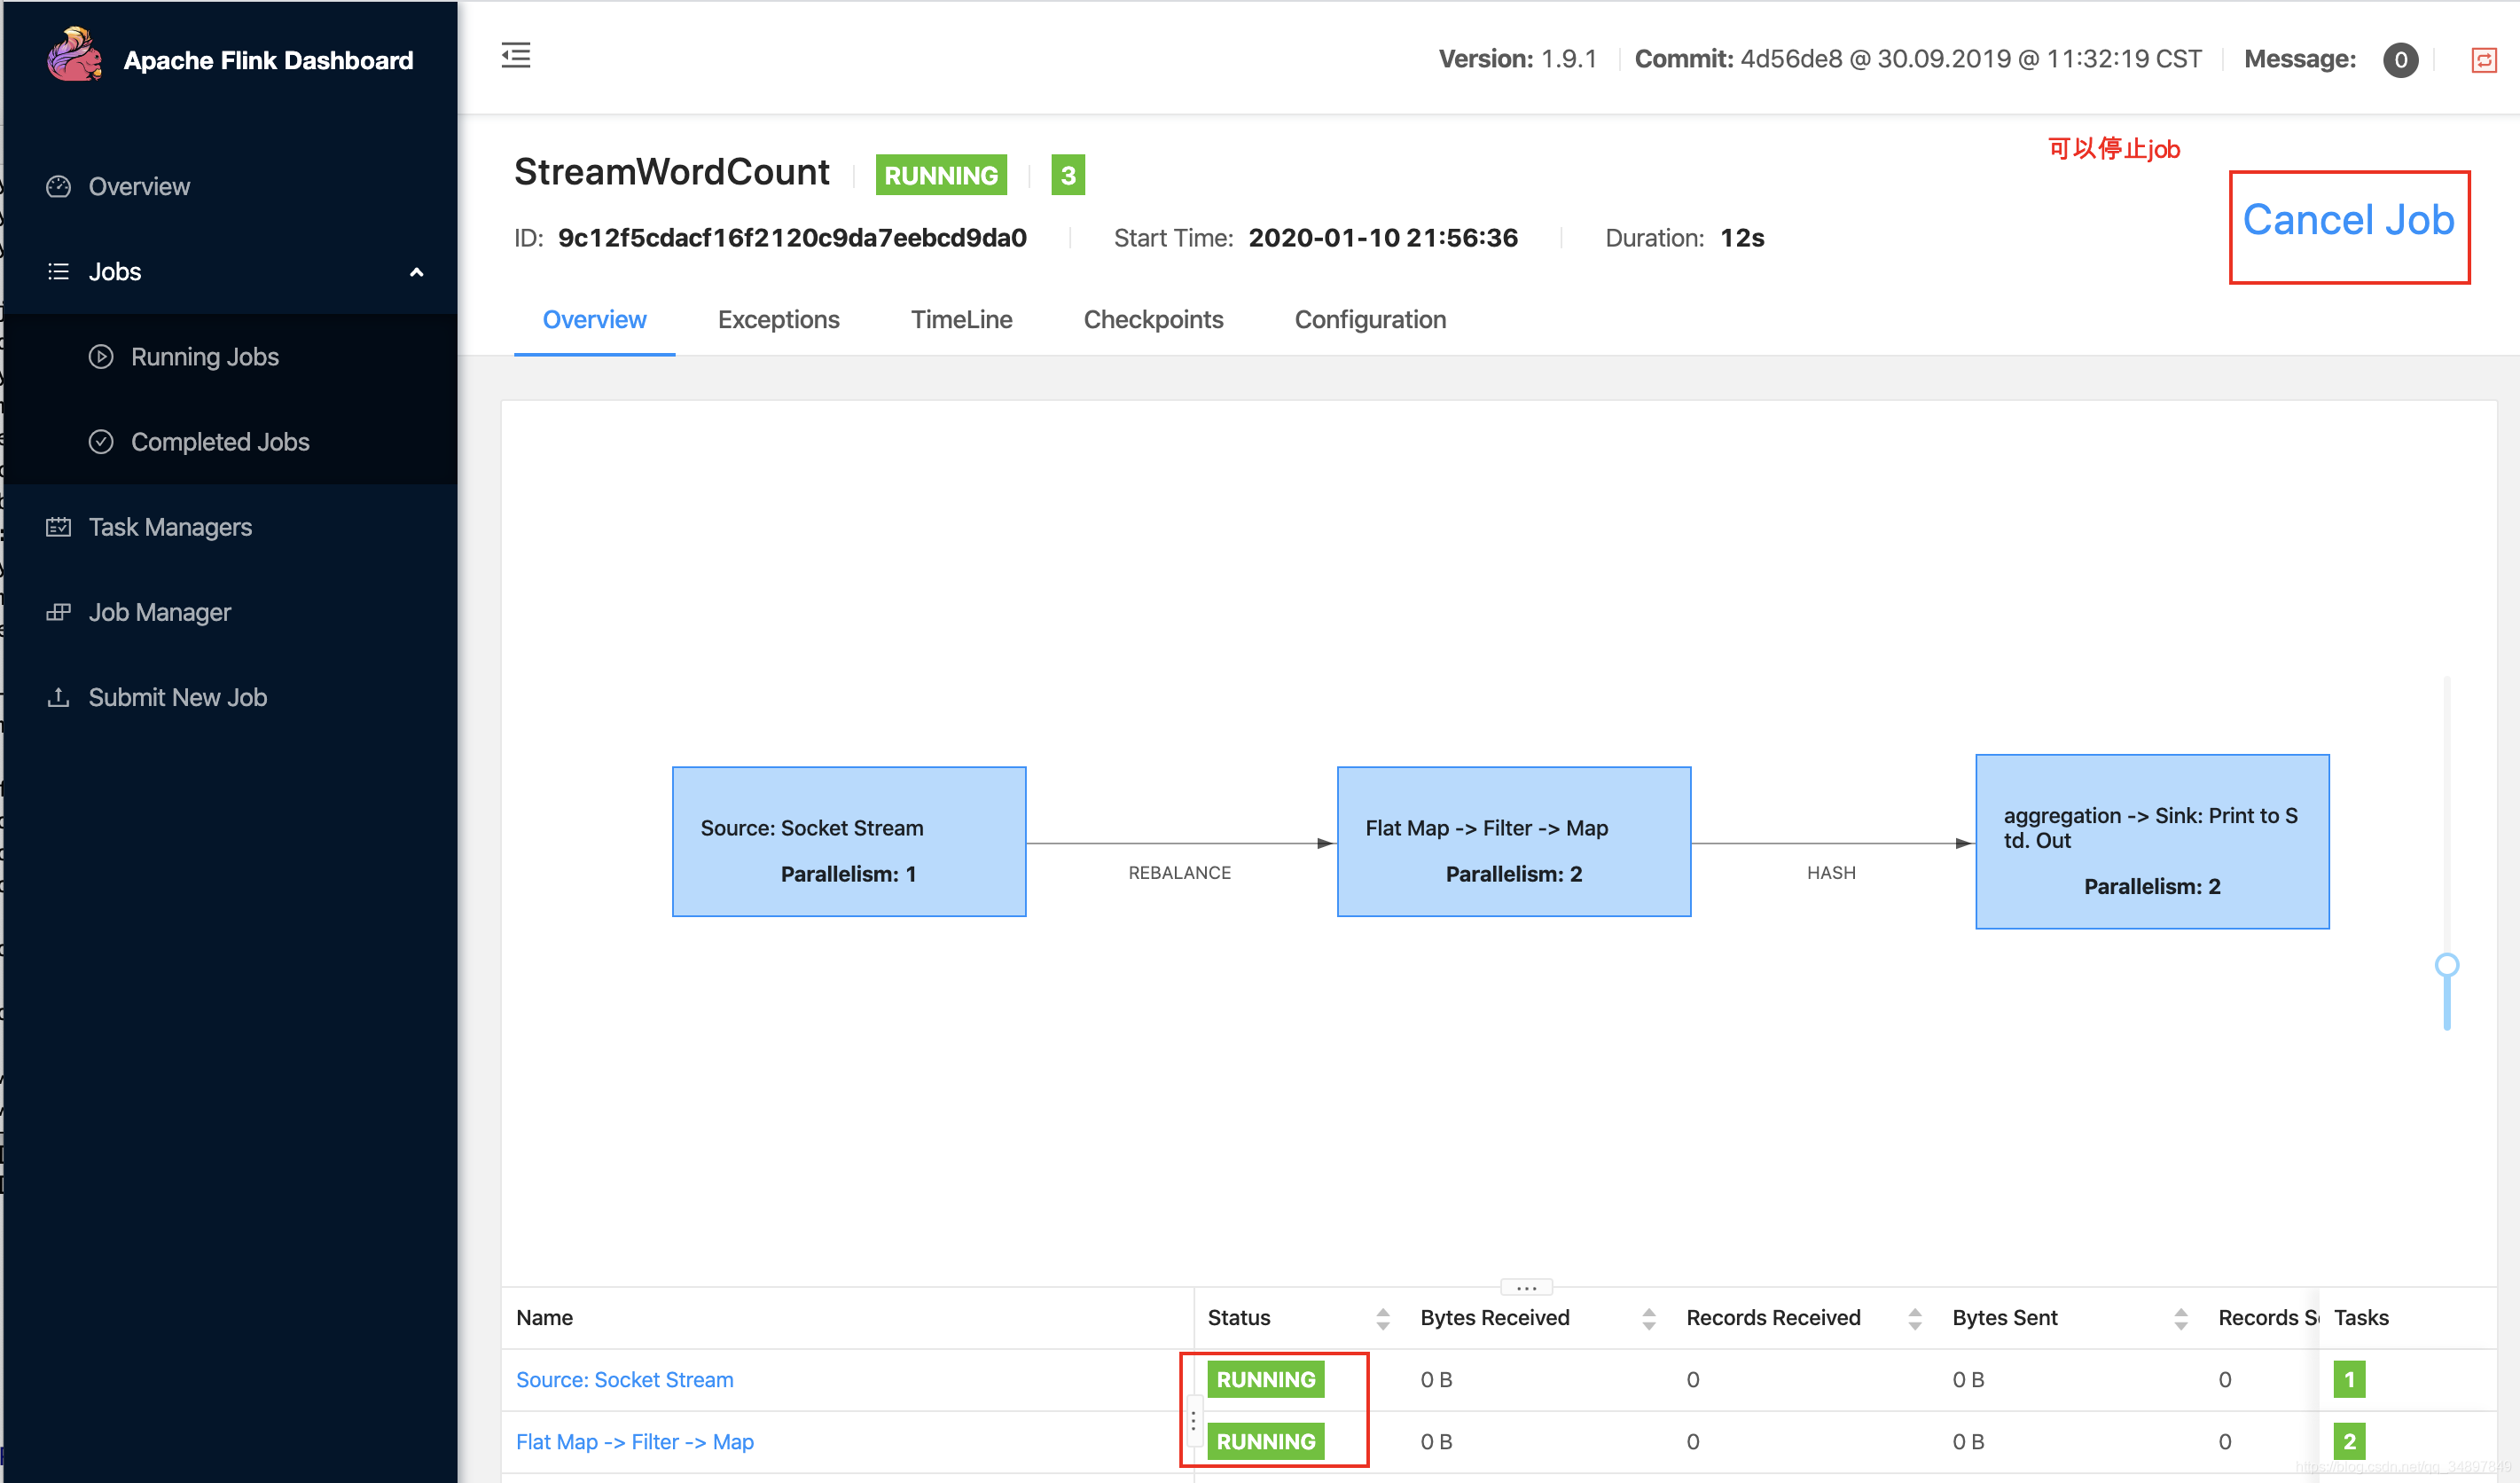
//stop job
flink cancel job_id
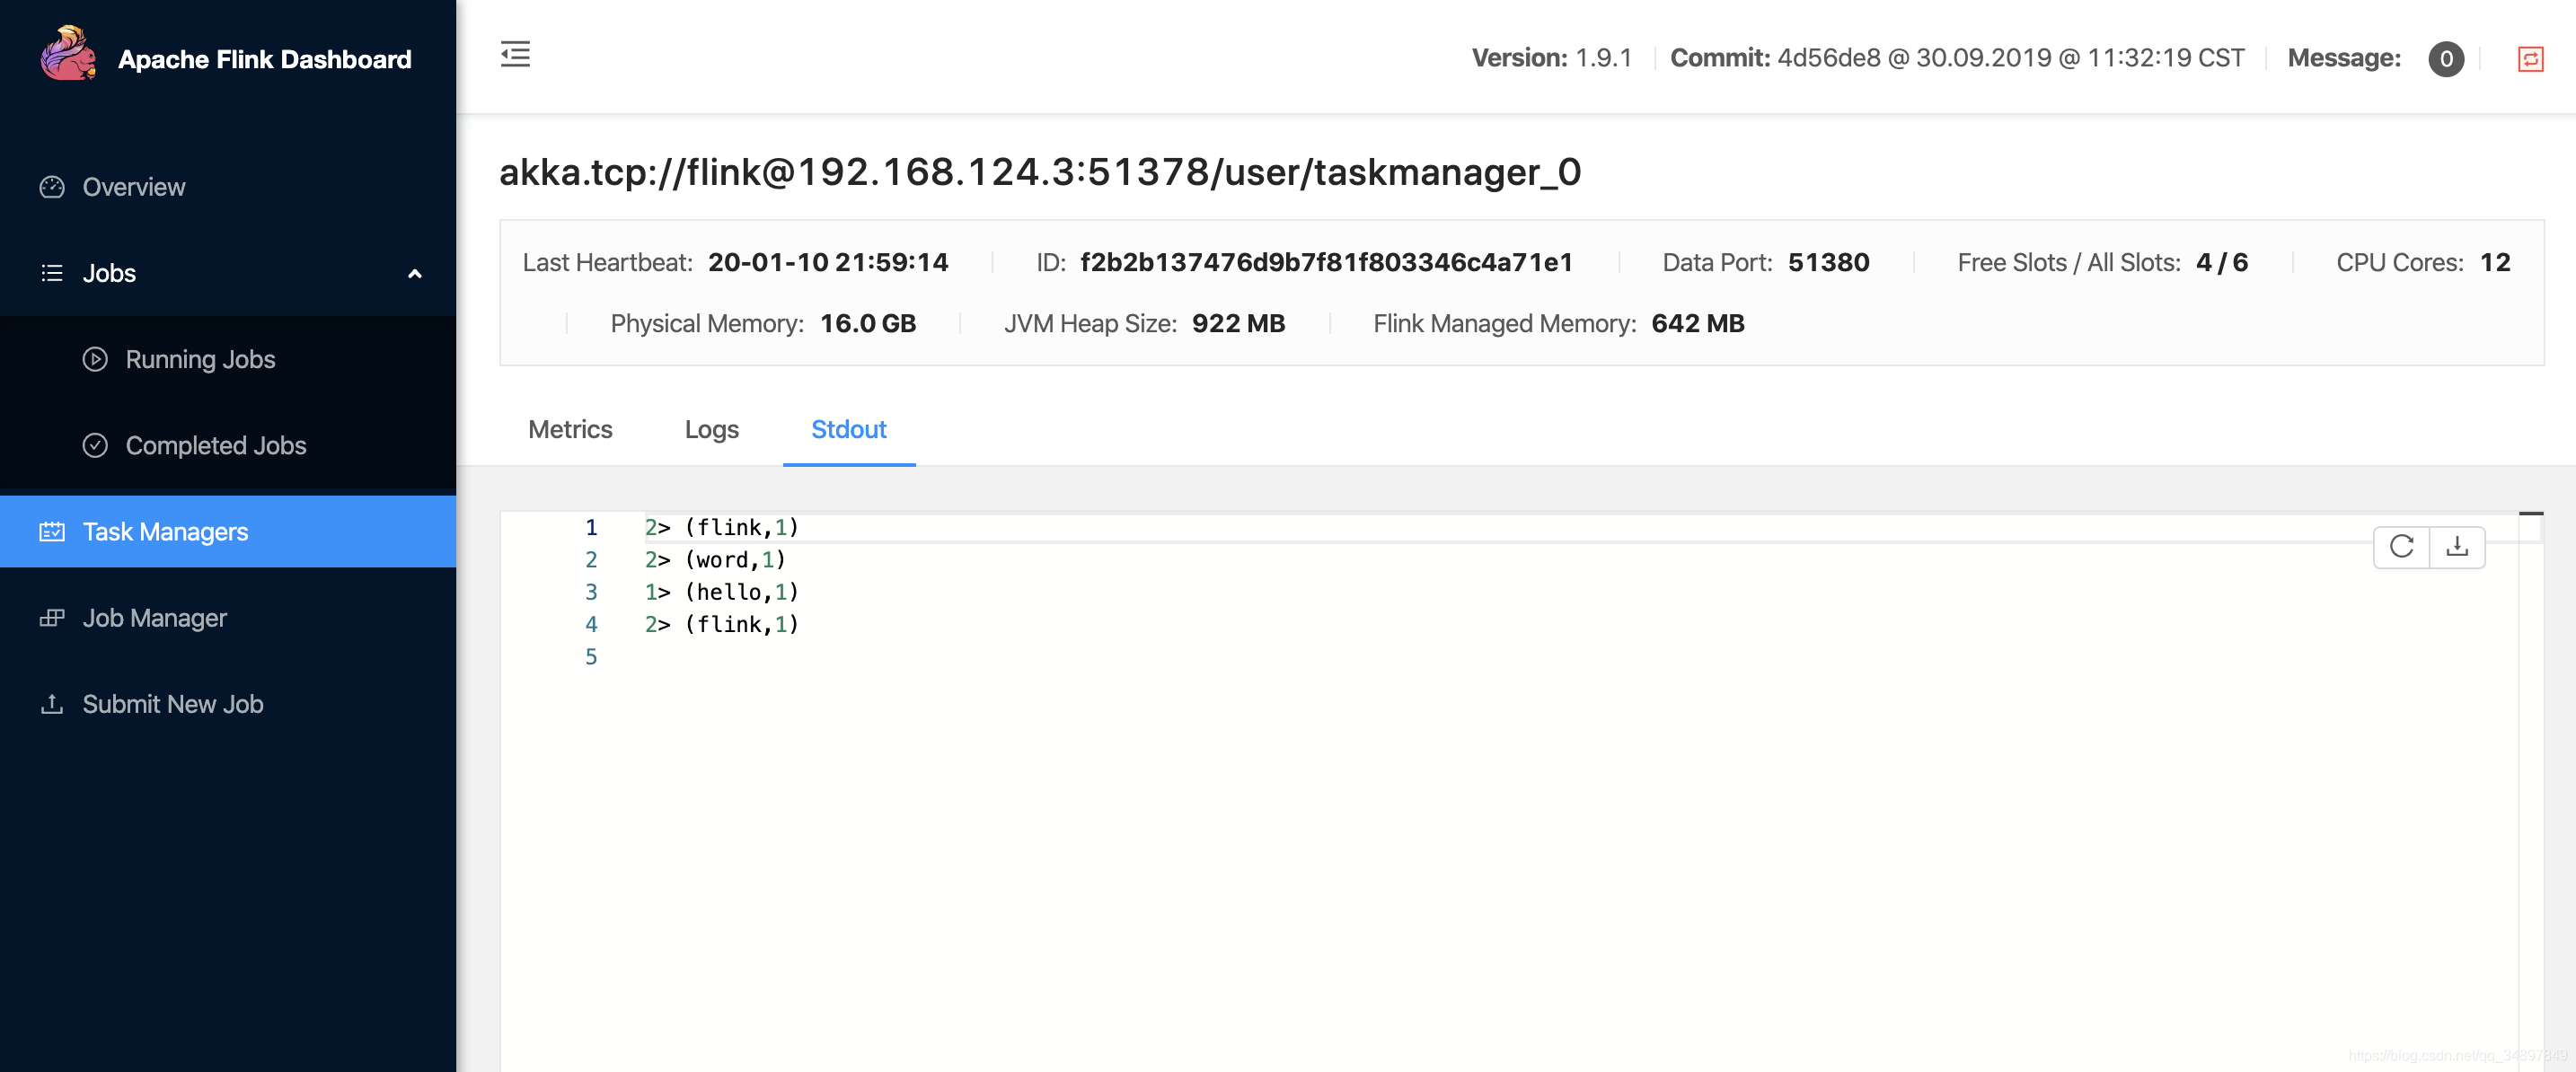
测试
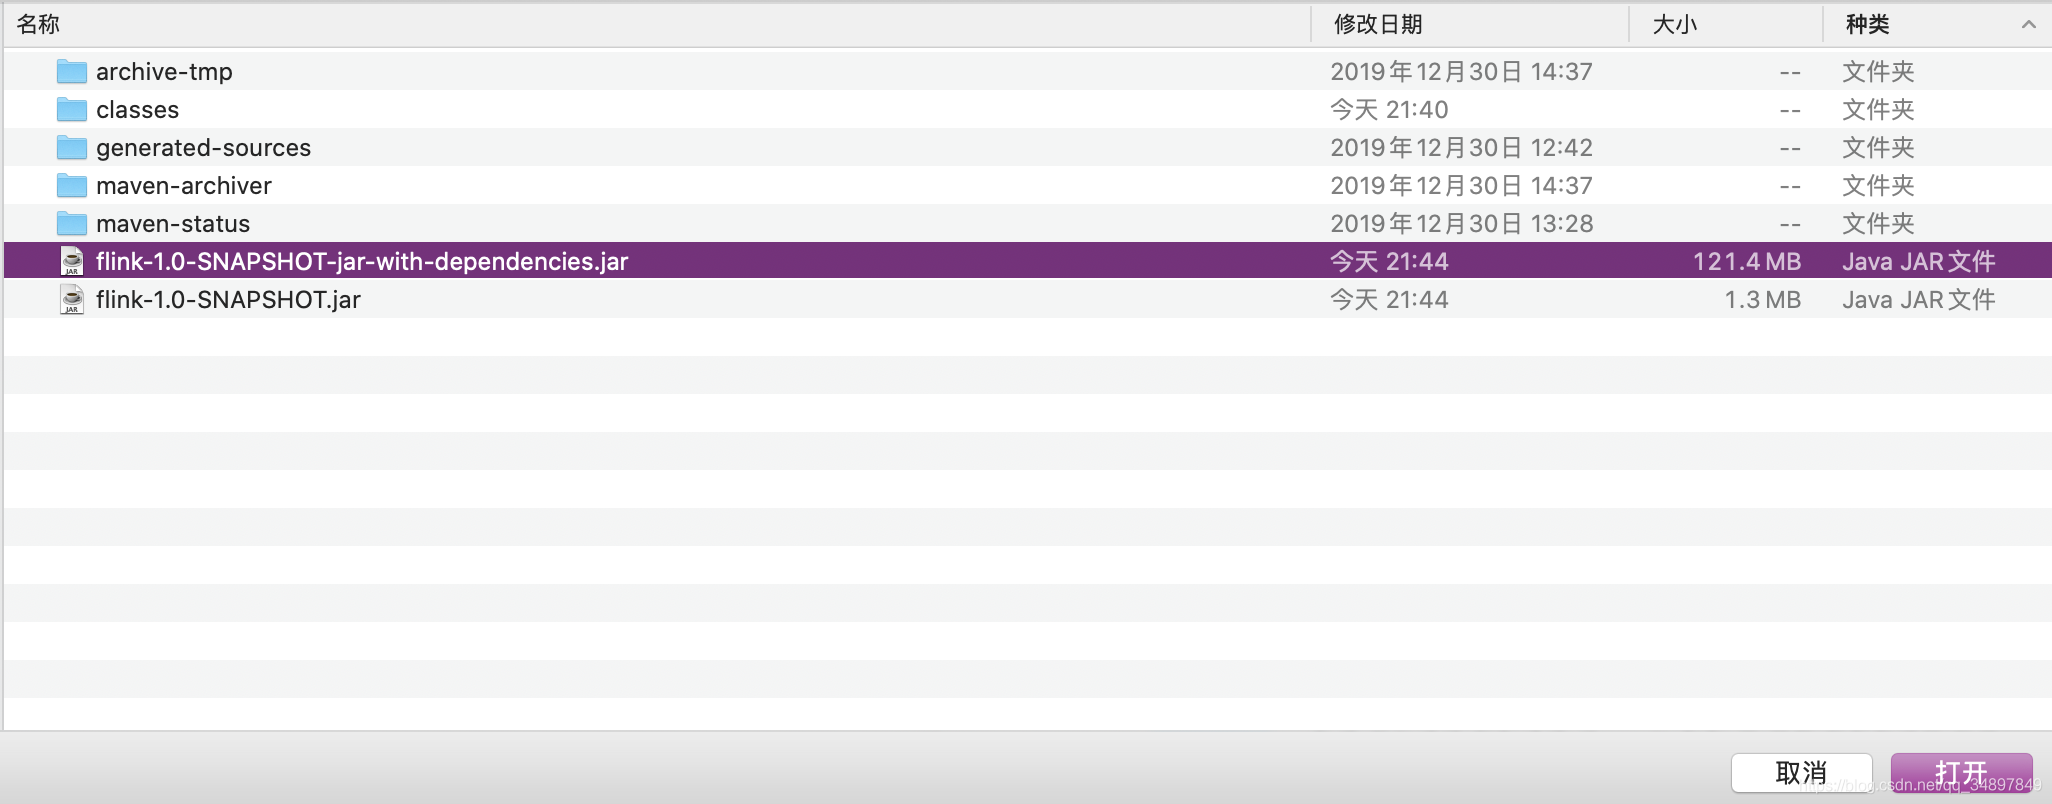
flink run -c wordcount.StreamWordCount -p 2 /Users/maxyang/Documents/IdeaProjects/flink/target/flink-1.0-SNAPSHOT-jar-with-dependencies.jar --host localhost --port 7777