本篇博客基于https://www.cnblogs.com/my-program-life/p/12076474.html
一、自定义用户访问控制
1、在SecurityConfig类中重写configure(HttpSecurity http)方法
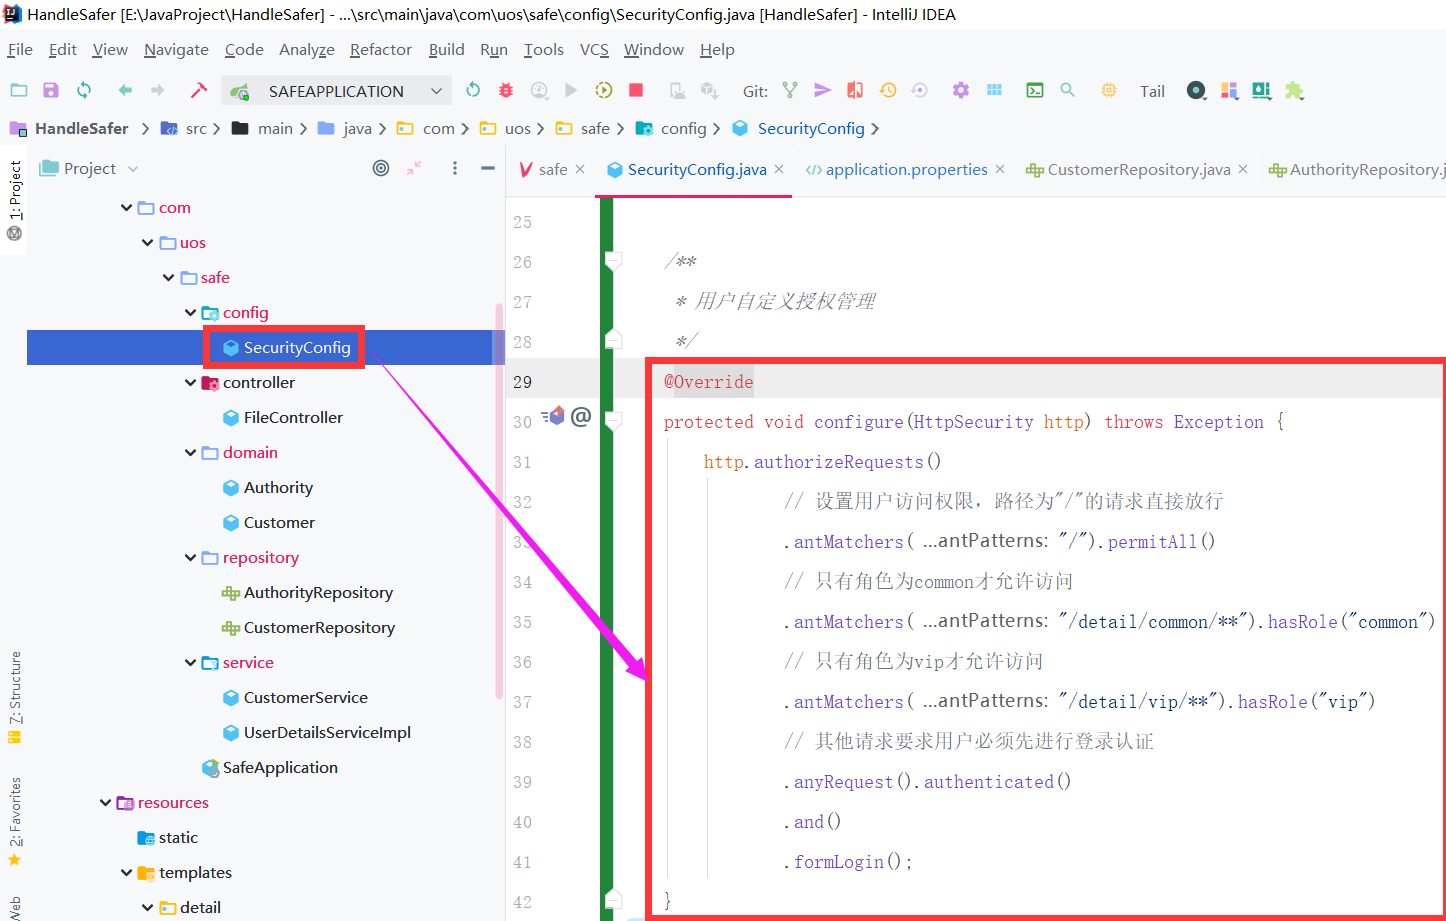
 @Override
    protected void configure(HttpSecurity http) throws Exception {
        http.authorizeRequests()
                // 设置用户访问权限,路径为"/"的请求直接放行
                .antMatchers("/").permitAll()
                // 只有角色为common才允许访问
                .antMatchers("/detail/common/**").hasRole("common")
                // 只有角色为vip才允许访问
                .antMatchers("/detail/vip/**").hasRole("vip")
                // 其他请求要求用户必须先进行登录认证
                .anyRequest().authenticated()
                .and()
                .formLogin();
    }
2、效果测试
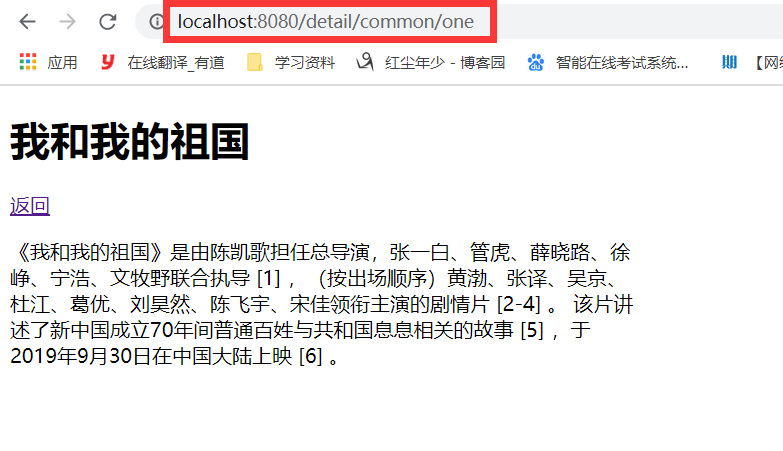
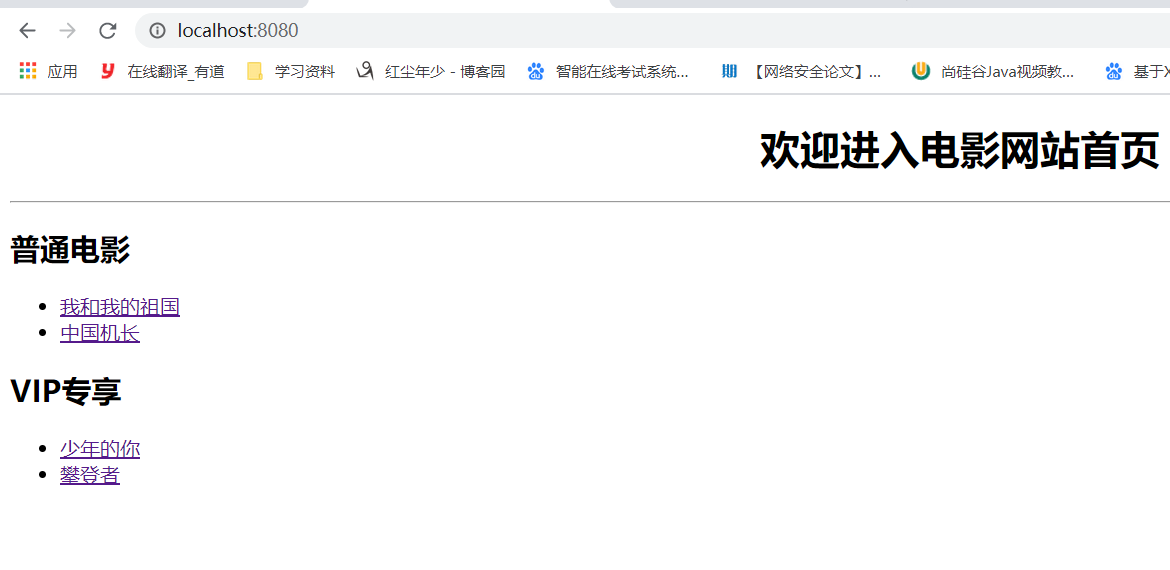
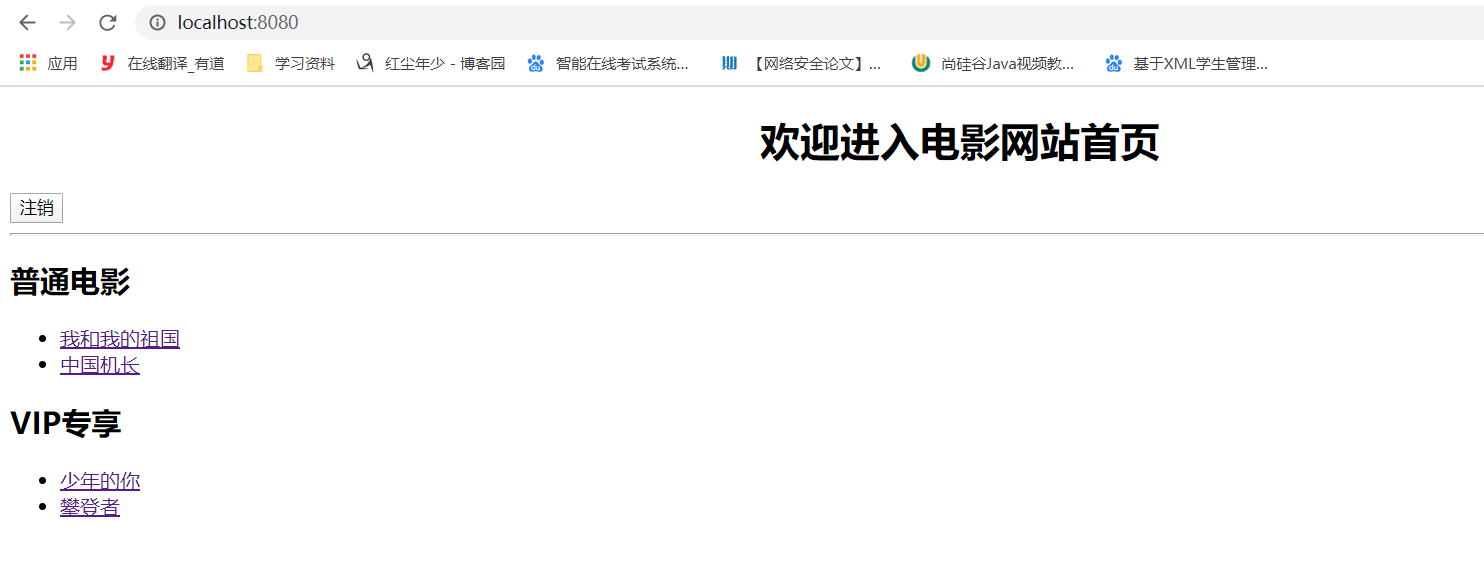
进入首页,点击普通电影下的任意条目,自动跳转到登录页面,在这里使用普通用户登录(用户名czy,密码123)
普通用户没有权限访问VIP专享电影,在页面会显示403错误(没有权限)
二、自定义用户登录
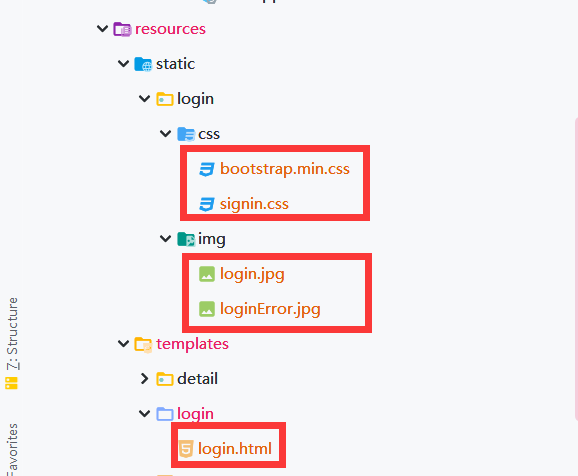
1、自定义用户登录页面
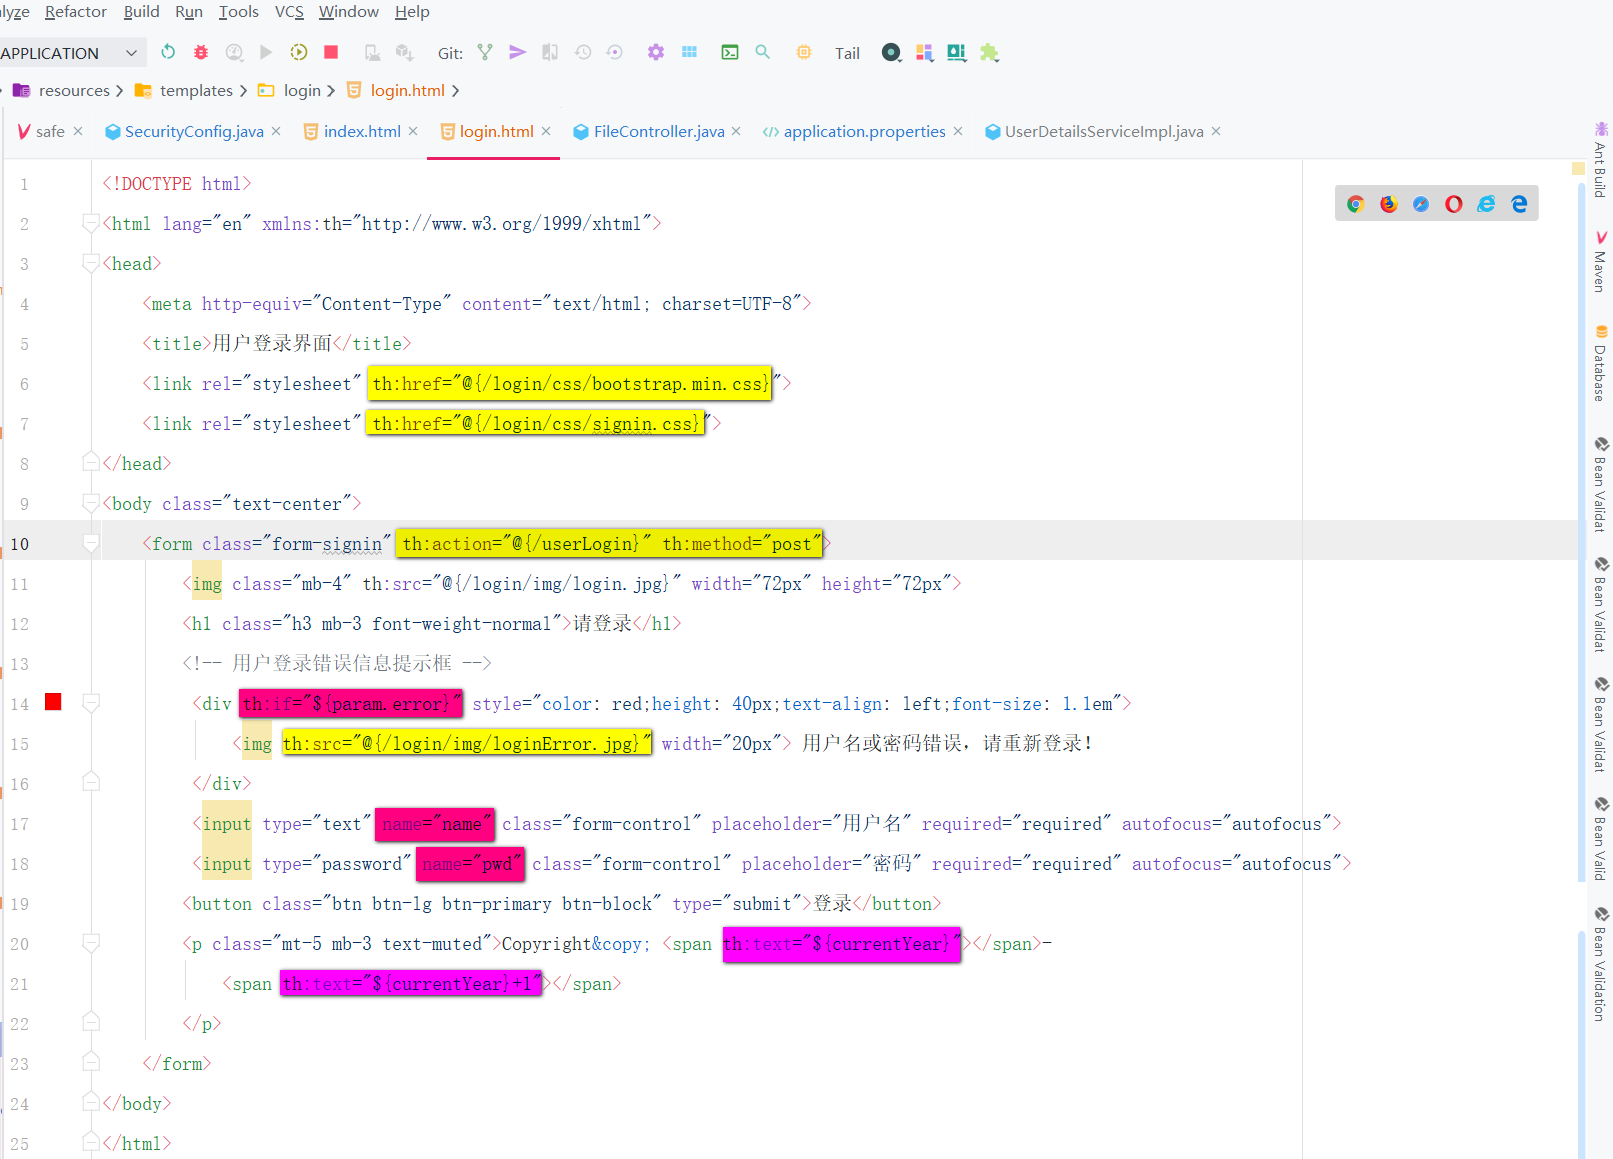
<!DOCTYPE html> <html lang="en" xmlns:th="http://www.w3.org/1999/xhtml"> <head> <meta http-equiv="Content-Type" content="text/html; charset=UTF-8"> <title>用户登录界面</title> <link rel="stylesheet" th:href="@{/login/css/bootstrap.min.css}"> <link rel="stylesheet" th:href="@{/login/css/signin.css}"> </head> <body class="text-center"> <form class="form-signin" th:action="@{/userLogin}" th:method="post"> <img class="mb-4" th:src="@{/login/img/login.jpg}" width="72px" height="72px"> <h1 class="h3 mb-3 font-weight-normal">请登录</h1> <!-- 用户登录错误信息提示框 --> <div th:if="${param.error}" style="color: red;height: 40px;text-align: left;font-size: 1.1em"> <img th:src="@{/login/img/loginError.jpg}" width="20px"> 用户名或密码错误,请重新登录! </div> <input type="text" name="name" class="form-control" placeholder="用户名" required="required" autofocus="autofocus"> <input type="password" name="pwd" class="form-control" placeholder="密码" required="required" autofocus="autofocus"> <button class="btn btn-lg btn-primary btn-block" type="submit">登录</button> <p class="mt-5 mb-3 text-muted">Copyright© <span th:text="${currentYear}"></span>- <span th:text="${currentYear}+1"></span> </p> </form> </body> </html>
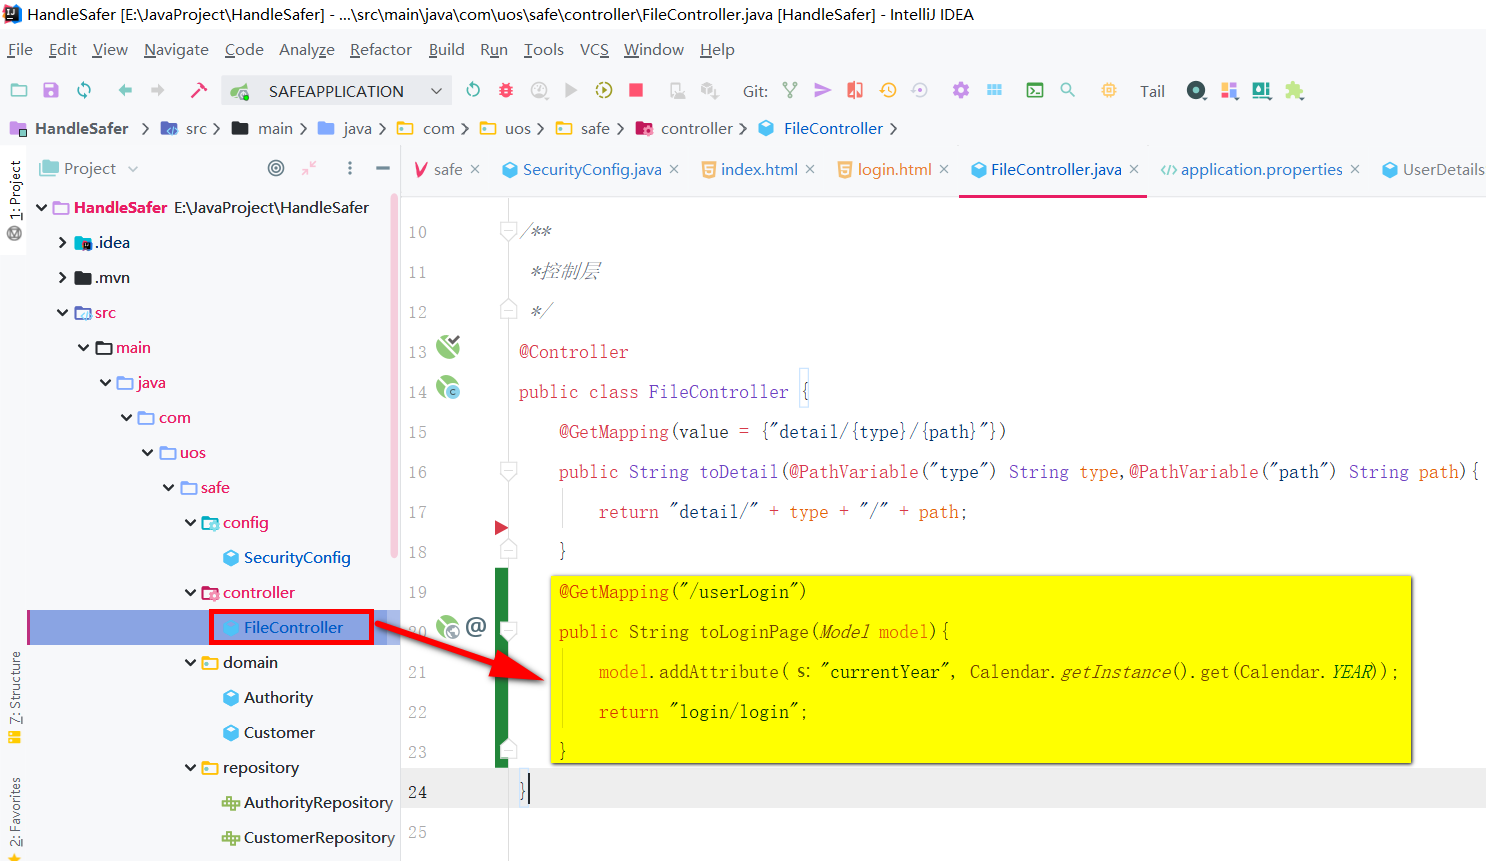
2、自定义用户登录跳转
3.自定义用户登录控制

4、效果测试
输入错误的密码

输入正确的用户名和密码,登录成功
三、自定义用户退出
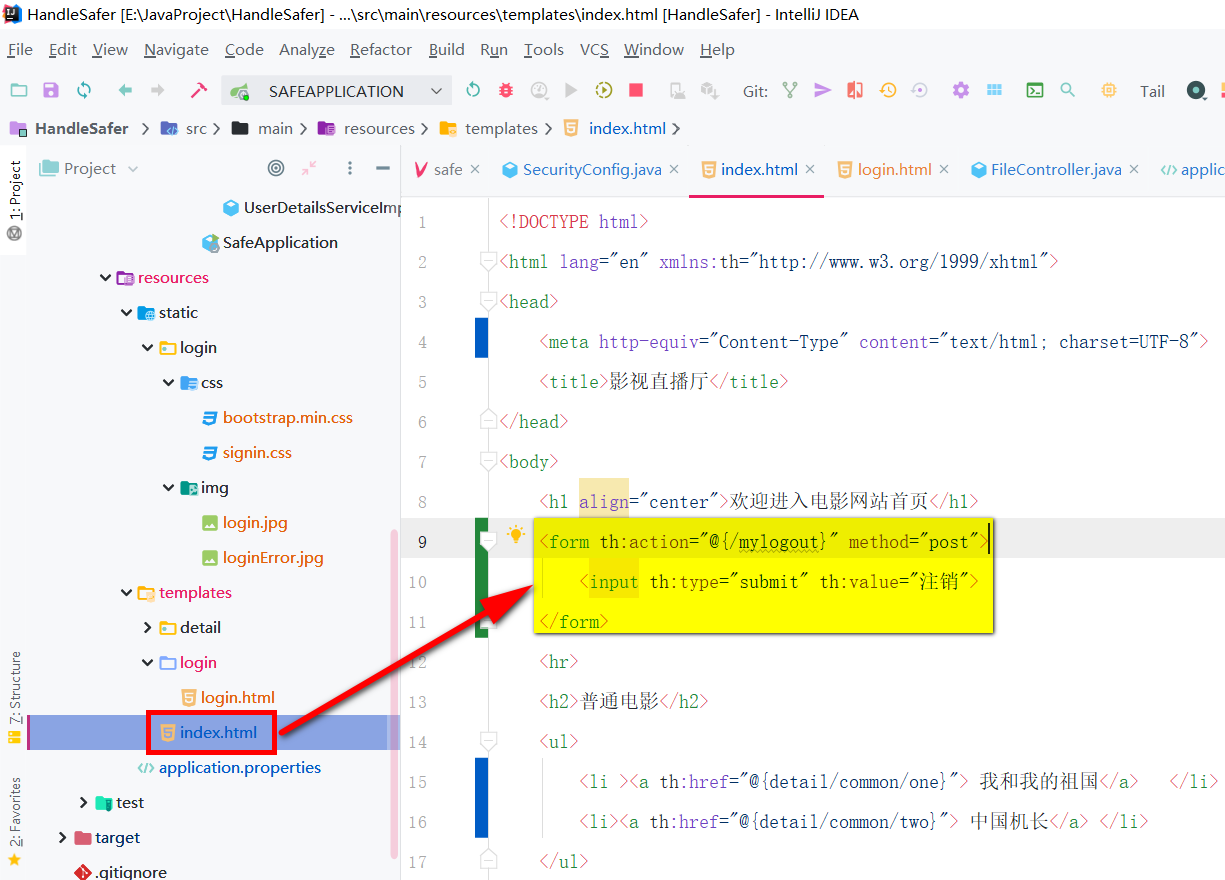
1、添加自定义用户退出链接
扫描二维码关注公众号,回复:
8387192 查看本文章

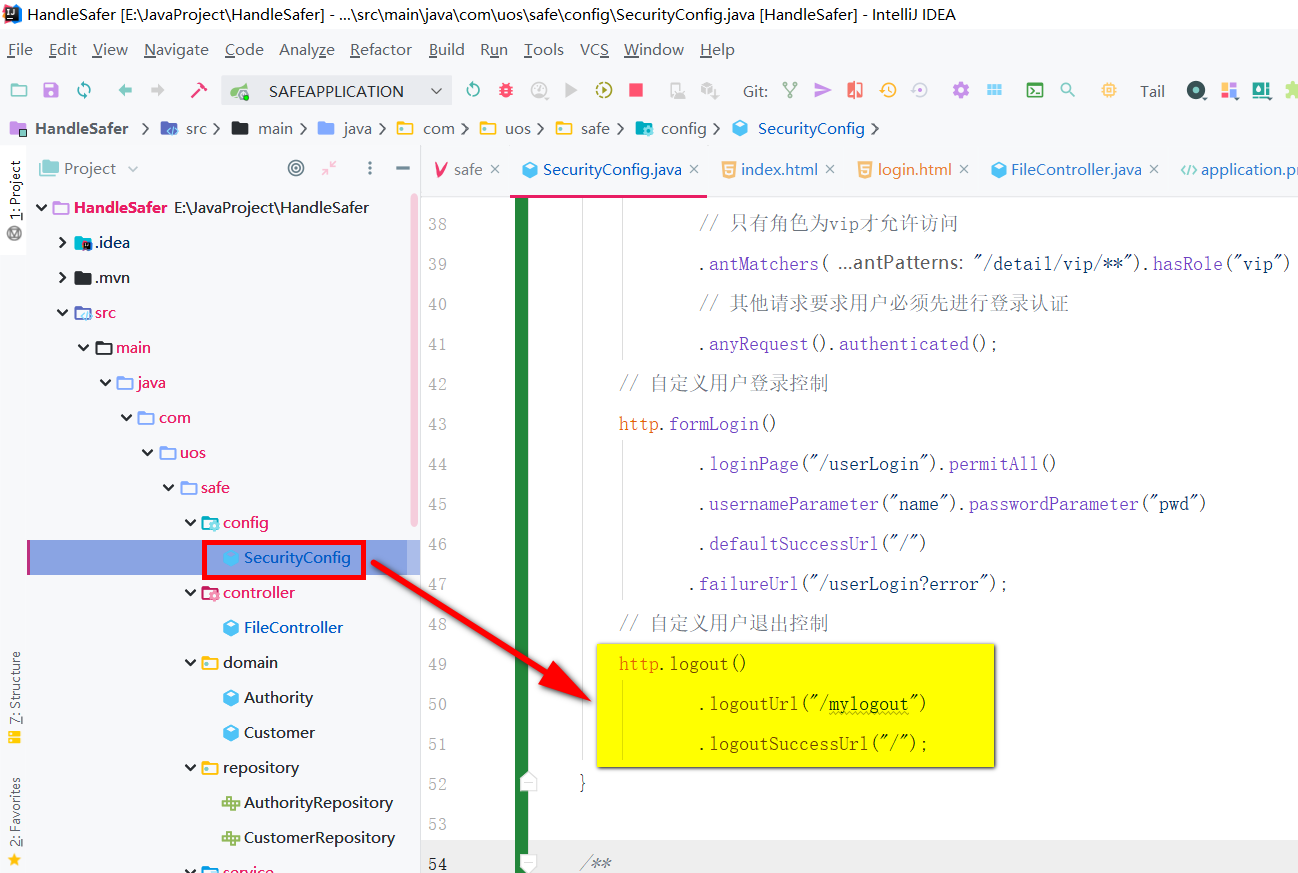
2、自定义用户退出控制
3、效果测试
先进行登录,然后点击注销按钮后,再次进入详情页需要重新登录
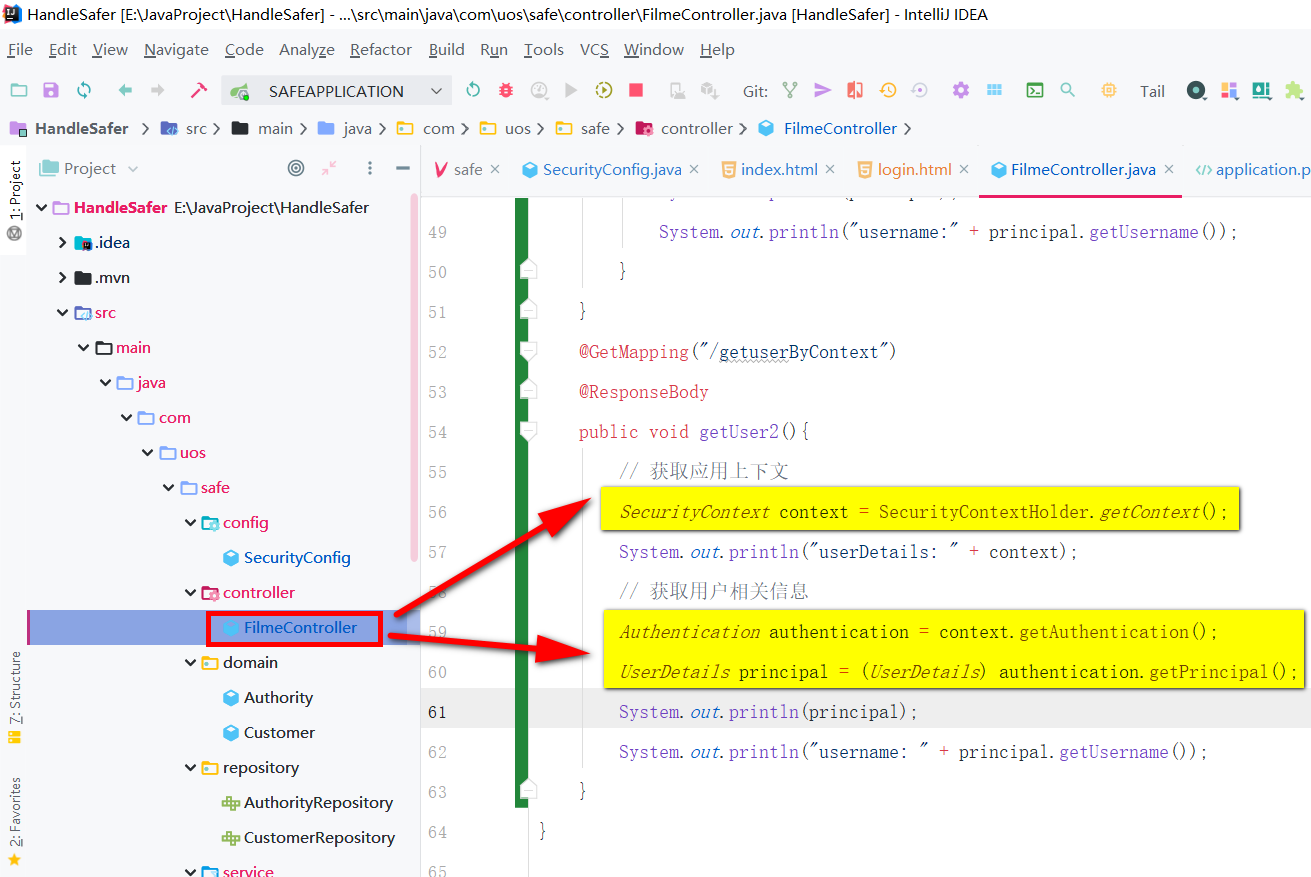
四、登录用户信息获取
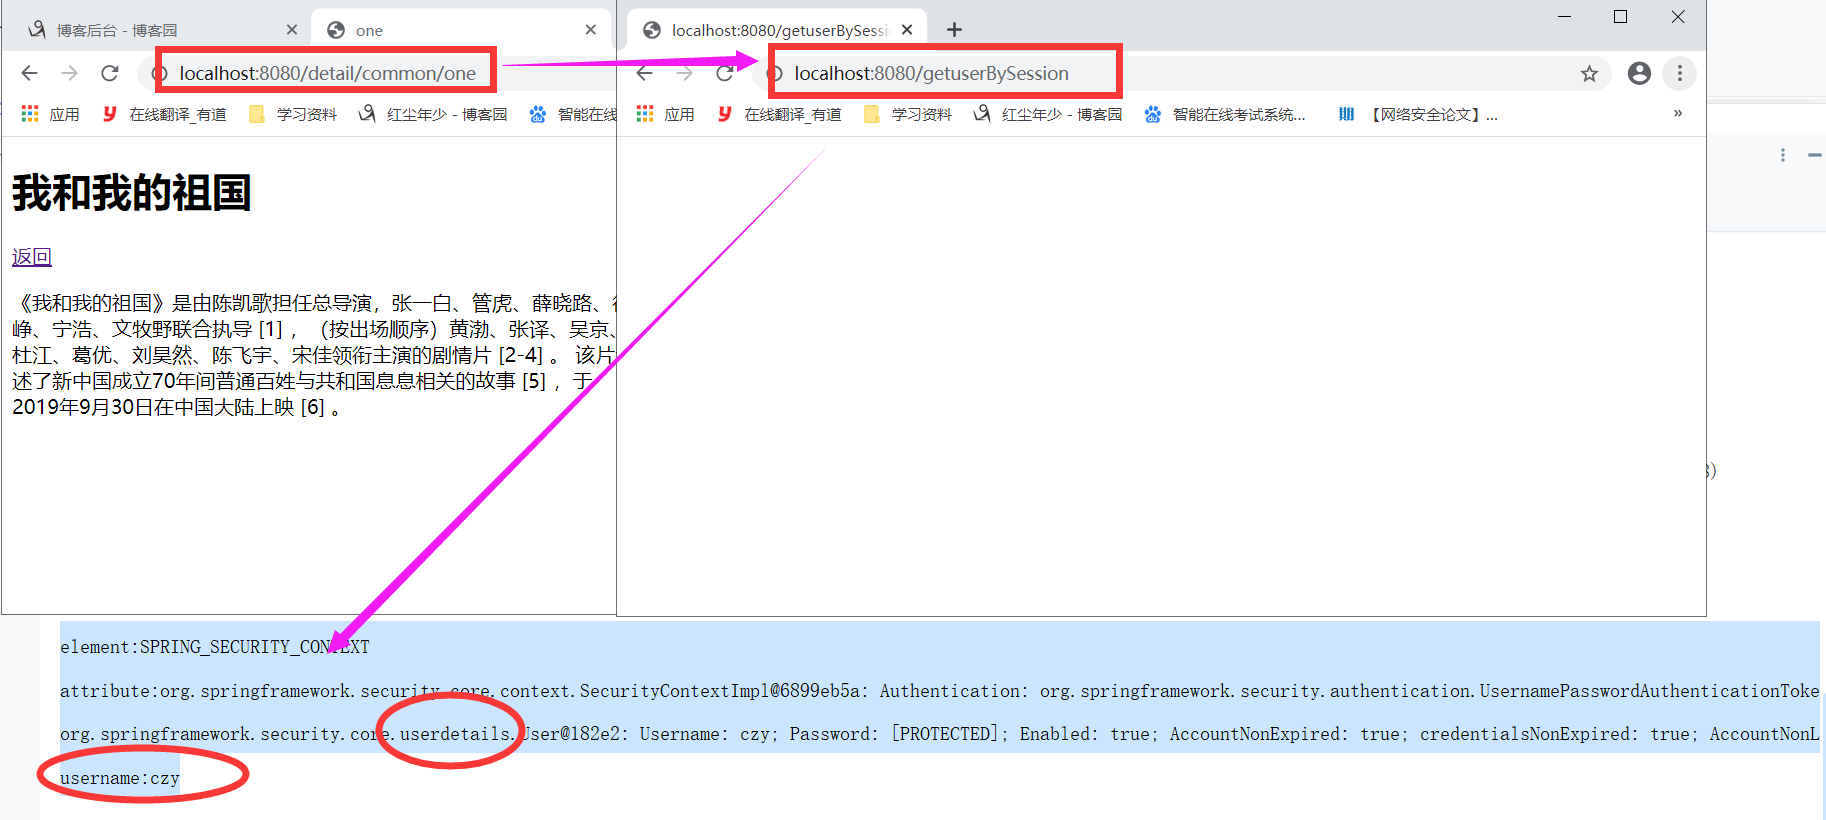
1、使用HttpSession获取用户信息
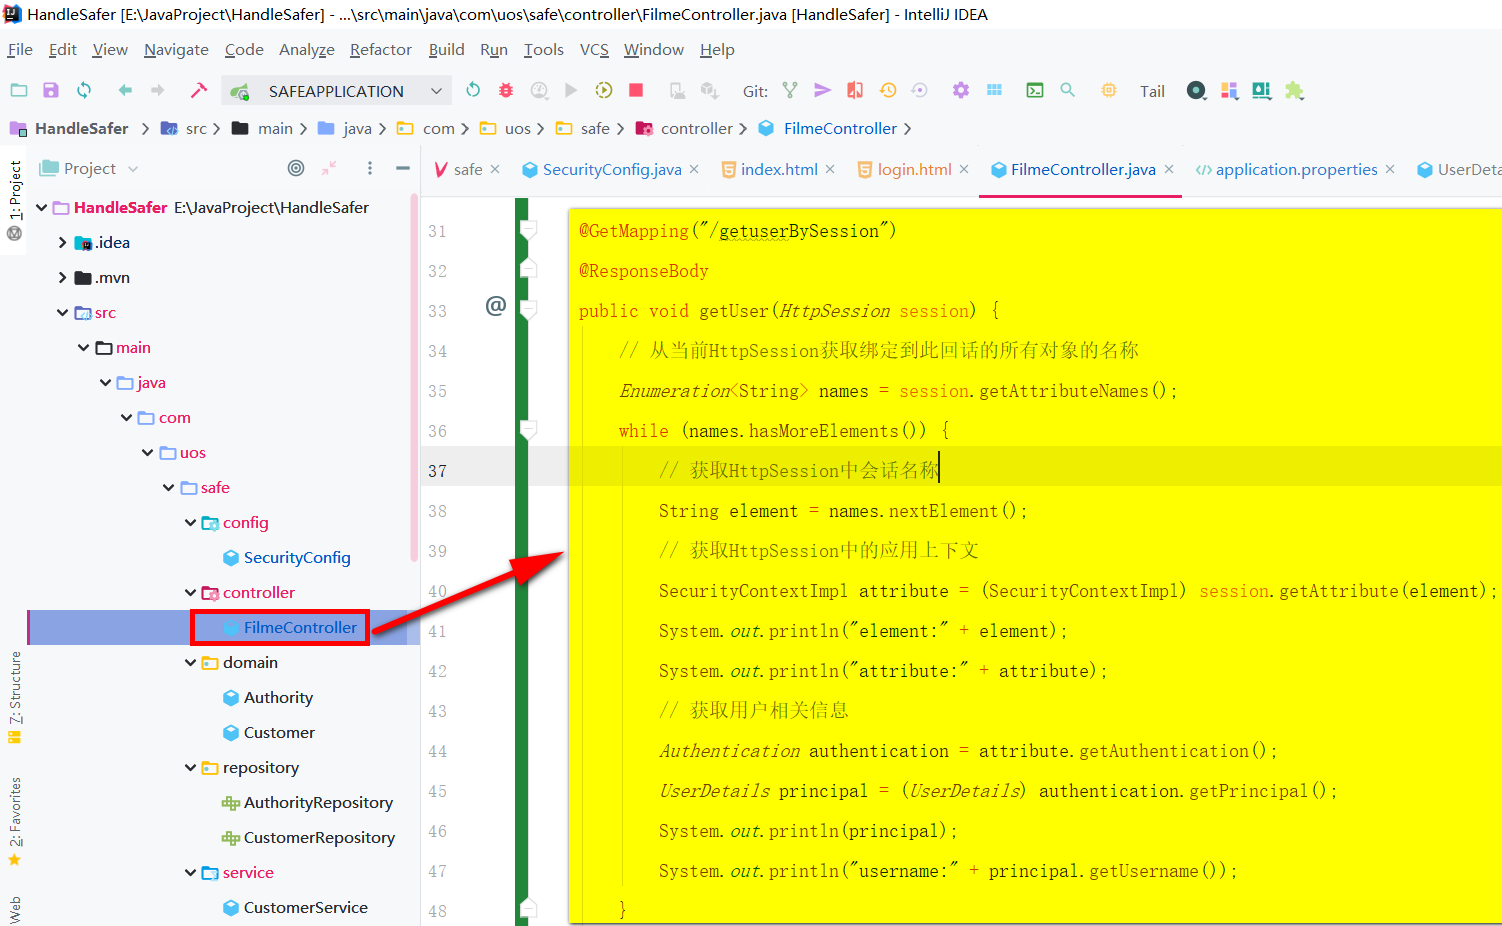


@GetMapping("/getuserBySession")
    @ResponseBody
    public void getUser(HttpSession session) {
        // 从当前HttpSession获取绑定到此回话的所有对象的名称
        Enumeration<String> names = session.getAttributeNames();
        while (names.hasMoreElements()) {
            // 获取HttpSession中会话名称
            String element = names.nextElement();
            // 获取HttpSession中的应用上下文
            SecurityContextImpl attribute = (SecurityContextImpl) session.getAttribute(element);
            System.out.println("element:" + element);
            System.out.println("attribute:" + attribute);
            // 获取用户相关信息
            Authentication authentication = attribute.getAuthentication();
            UserDetails principal = (UserDetails) authentication.getPrincipal();
            System.out.println(principal);
            System.out.println("username:" + principal.getUsername());
        }
    }
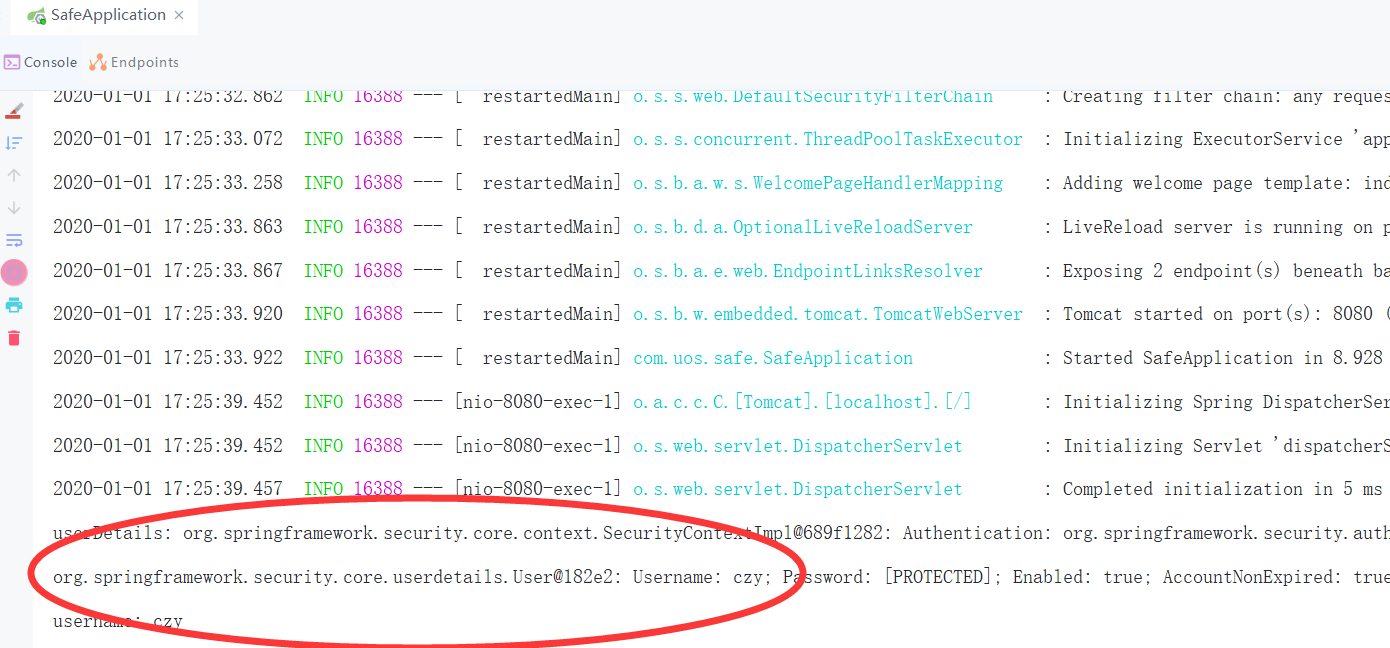
2、使用SecurityContextHolder获取用户信息(推荐使用)