1、默认表单认证
创建 springboot 项目,依赖:
<dependency>
    <groupId>org.springframework.boot</groupId>
    <artifactId>spring-boot-starter-web</artifactId>
</dependency>

<dependency>
    <groupId>org.springframework.boot</groupId>
    <artifactId>spring-boot-starter-security</artifactId>
</dependency>
写一个测试 controller
@RestController
@RequestMapping("/index")
public class IndexController {

    @RequestMapping("/test1")
    public String test1(String name, Integer age) {
        return "test1";
    }

}
启动项目,访问 http://localhost:8089/BootDemo/index/test1,弹出默认表单认证

默认用户名为 user, 密码是动态生成并打印到控制台的一窜随机码。当然,用户名和密码可以在application.properties 中配置
spring.security.user.name=test
spring.security.user.password=123
2、自定义表单登陆页
虽然spring security 自带的表单登陆页可以方便快速地启动,但大多数应用程序更希望提供自己的的表单登陆页,此时就需要自定义表单登陆页。
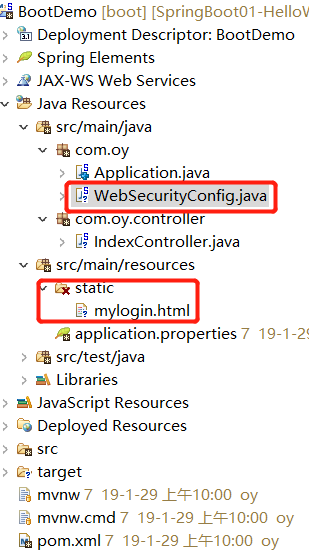
WebSecurityConfig
package com.oy;

import org.springframework.security.config.annotation.web.builders.HttpSecurity;
import org.springframework.security.config.annotation.web.configuration.EnableWebSecurity;
import org.springframework.security.config.annotation.web.configuration.WebSecurityConfigurerAdapter;

@EnableWebSecurity
public class WebSecurityConfig extends WebSecurityConfigurerAdapter {

    @Override
    protected void configure(HttpSecurity http) throws Exception {
        http.authorizeRequests().anyRequest().authenticated()
            .and().formLogin().loginPage("/mylogin.html")
            .loginProcessingUrl("/login") // 指定处理登陆请求的路径
            .permitAll() // 登陆页和 "/login" 不设置权限
            .and().csrf().disable();
    }
}
表单登陆页


<!DOCTYPE html> <html> <head> <meta charset="UTF-8"> <title>Insert title here</title> </head> <body> <h2>自定义表单登陆页</h2> <form action="login" method="post"> 用户名:<input type="text" name="username" /><br/> 密 码:<input type="text" name="password" /><br/> <input type="submit" value="提交" /> </form> </body> </html>
启动项目,访问 localhost:8089/BootDemo/index/test1,自动跳转到登陆页(浏览器地址为 http://localhost:8089/BootDemo/mylogin.html)。
输入test/123, 登陆成功,拿到响应结果:

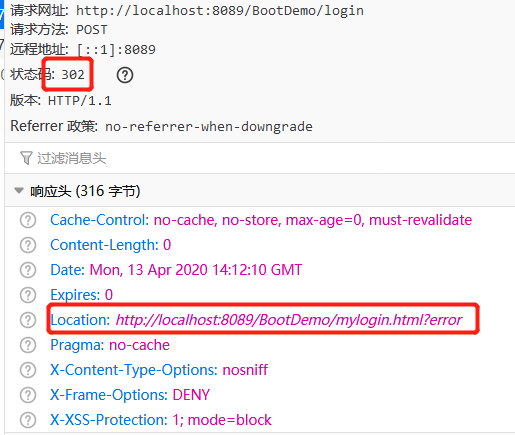
如果输入错误的用户名或密码,响应结果(状态码 302,重定向到登陆页)
对应现在前后端分离的项目而言,重定向不在需要后端做,后端一般返回 json 数据,告知前端登陆成功与否,由前端决定如何处理后续逻辑,而非由服务器主动执行页面跳转。这在 Spring Security 中同样可以实现。
@EnableWebSecurity
public class WebSecurityConfig extends WebSecurityConfigurerAdapter {

    @Override
    protected void configure(HttpSecurity http) throws Exception {
        http.authorizeRequests().anyRequest().authenticated().and()
            .formLogin().loginPage("/mylogin.html")
            .loginProcessingUrl("/login") // 指定处理登陆请求的路径
            // 指定登陆成功时的处理逻辑
            .successHandler(new AuthenticationSuccessHandler() {

                @Override
                public void onAuthenticationSuccess(HttpServletRequest request, HttpServletResponse response,
                        Authentication authentication) throws IOException, ServletException {
                    response.setContentType("application/json;charset=utf-8");
                    response.getWriter().write("{\"code\":0, \"data\":{}}");
                }

            })
            // 指定登陆失败时的处理逻辑
            .failureHandler(new AuthenticationFailureHandler() {

                @Override
                public void onAuthenticationFailure(HttpServletRequest request, HttpServletResponse response,
                        AuthenticationException exception) throws IOException, ServletException {
                    response.setContentType("application/json;charset=utf-8");
                    response.setStatus(401);
                    response.getWriter().write("{\"code\":0, \"msg\":\"用户名或密码错误\"}");
                }

            })

            .permitAll().and()
            .csrf().disable();
    }
}
其中,successHandler()方法带有一个 Authentication 参数,携带当前登陆用户名及其角色等信息;而 failureHandler() 方法携带一个AuthenticationException 异常参数。
3、自定义数据库模型的认证和授权
前面沿用了 Spring Security 默认的安全机制:仅有一个用户,仅有一种角色。在实际开发中,这自然是无法满足要求的。
编写三个 controller 进行测试,其中 /admin/api 下的内容是系统后台管理相关的API,必须拥有管理员权限(具有 "admin" 角色)才能访问; /user/api 必须在用户登陆并且具有 “user” 角色才能访问。
@RestController
@RequestMapping("/admin/api")
public class AdminController {
    @GetMapping("/hello")
    public String hello() {
        return "hello, admin";
    }
}
@RestController
@RequestMapping("/user/api")
public class UserController {
    @GetMapping("/hello")
    public String hello() {
        return "hello, user";
    }
}
@RestController
@RequestMapping("/app/api")
public class AppController {
    @GetMapping("/hello")
    public String hello() {
        return "hello, app";
    }
}
启动项目,访问 http://localhost:8089/BootDemo/user/api/hello,跳转到登陆页面,使用 test/123 登陆后。再次访问 http://localhost:8089/BootDemo/user/api/hello,此时服务器返回 403,表示用户授权失败(401 代表用户认证失败)。
自定义数据库模型
---