一、富文本braft-editor

- 安装并引用
npm install braft-editor --save

import BraftEditor from 'braft-editor'
import 'braft-editor/dist/index.css'
-
state中初始内容
editorState: BraftEditor.createEditorState(),
-
表单中使用<BraftEditor/>
 <FormItem label="教程正文" {...formLayout}>
        {getFieldDecorator('content', {
                validateTrigger: 'onBlur',
                rules: [{
                    required: true,
                    validator: (_, value, callback) => {
                    if (value.isEmpty()) {
                        callback('请输入正文内容')
                    } else {
                        callback()
                    }
                    }
                }],
                // 内容必须通过BraftEditor.createEditorState()转化为可读的格式
                initialValue: current && detail ? BraftEditor.createEditorState(defaultContent(detail.content)) : ''
                })(
                    <BraftEditor
                        className="my-editor"
                        controls={controls}                         // 按需添加控件按钮
                        extendControls={extendControls}             // 自定义控件按钮
                        placeholder="请输入正文内容"
                        media={{                                    // 媒体对象
                            uploadFn: handleUploadFn,               // 上传七牛云服务器获取url
                            validateFn: handleValidateFn,           // 上传文件的限制
                            accepts: {                              //  可上传格式
                              image: 'image/png, image/jpeg, image/jpg, image/gif, image/webp, image/apng, image/svg',
                              video: 'video/mp4',
                              audio: 'audio/mp3, audio/mp4, audio/ogg, audio/mpeg'
                            }
                        }}
                        onChange={this.handleContentChange}         // 内容更改方法
                    />
                )}
</FormItem>
- 打开弹框时处理获取到的HTML格式的content,转化为插件可读格式,同时字符串切割替换转换后台传来的七牛云前缀与安卓ios视频图片需要的标签处理
showEditModal = item => {
    const { dispatch } = this.props;

    let content = '';
    if(item.content){
      content = item.content;
      let contentObj = JSON.parse(BraftEditor.createEditorState(content).toRAW());
      let urlArr;
      Object.keys(contentObj.entityMap).forEach((key) => {
        if(contentObj.entityMap[key].data.url){
          urlArr = contentObj.entityMap[key].data.url.split('/')
          console.log('编辑时', urlArr)
          if(urlArr.length == 2){  //ios视频前缀yihezo
            urlArr.splice(0,1);
            contentObj.entityMap[key].data.url = `${setFileHost()}`+ 'yihezo/' + urlArr.join('/');
          }

          if(urlArr.length == 3){  //其它媒体文件前缀sys/tutorial
            urlArr.splice(0,1);
            contentObj.entityMap[key].data.url = `${setFileHost()}`+ 'sys/' + urlArr.join('/');
          }
        }
      });
      let contentRaw = JSON.stringify(contentObj);
      item.content = contentRaw;
    };

    dispatch({
      type: 'course/fetchDetail',
      payload: {
        id: item.id
      },
      callback: (res) => {
        if(res){
          let detail = res.data;
          let HTML = detail.content;
          HTML = HTML.substring(24).substring(0, HTML.length-6);
          HTML = HTML.replace(/style='max-width:100%' /g, "").replace(/poster=['|"].*?['|"]/g, "").replace(/alt='picvision' /g, "");
          detail.content = HTML;

          this.setState({
            detail,
            current: item,
            addSubmit: false
          }, () => {
            this.setState({
              visible: true
            })
          });
        }
      }
    })
  };
- 组件需要的参数和方法
// 自带的可按需选择的控件按钮
const controls = [ 'undo', 'redo', 'separator',
        'font-size', 'line-height', 'letter-spacing', 'separator',
        'text-color', 'bold', 'italic', 'underline', 'strike-through', 'separator',
        'superscript', 'subscript', 'remove-styles', 'emoji',  'separator', 'text-indent', 'text-align', 'separator',
        'headings', 'list-ul', 'list-ol', 'separator',
        'link', 'separator', 'hr', 'separator',
        'media', 'separator',
        'clear'
];

// 上传七牛云服务器获取url
const handleUploadFn = (param) => {
     const { file } = param;

     const fileTypeArr = file.type.split('/');
     const fileType = fileTypeArr[0];

     if(fileType == 'video'){
          handleImageUpload(file, 'tutorialVideo').then(res => {
            param.success({
              url: `${setFileHost()+res}`,
              meta: {
                id: new Date().getTime(),
                loop: false,
                autoPlay: false,
                controls: true
              }
            })
          })
     }else{
          handleImageUpload(file, 'tutorial').then(res => {
            param.success({
              url: `${setFileHost()+res}`,
              meta: {
                id: new Date().getTime(),
                loop: false,
                autoPlay: false,
                controls: true
              }
            })
          })
        }
      }

     // 可上传文件的大小范围
     const handleValidateFn = (file) => {
        return file.size < 1024 * 1024 * 100
     }

     // content内容存在时,处理为可编辑数据
     const defaultContent = (content) => {
          let contentObj = JSON.parse(BraftEditor.createEditorState(content).toRAW());
          let urlArr;
          Object.keys(contentObj.entityMap).forEach((key) => {
            if(contentObj.entityMap[key].data.url){
              urlArr = contentObj.entityMap[key].data.url.split('/')
              console.log('默认内容', urlArr);
              if(urlArr.length == 2){  //ios视频前缀yihezo
                urlArr.splice(0,1);
                contentObj.entityMap[key].data.url = `${setFileHost()}`+ 'yihezo/' + urlArr.join('/');
              }

              if(urlArr.length == 3){  //其它媒体文件前缀sys/tutorail
                urlArr.splice(0,1);
                contentObj.entityMap[key].data.url = `${setFileHost()}`+ 'sys/' + urlArr.join('/');
              }
            }
          });
          let contentRaw = JSON.stringify(contentObj);
          return contentRaw;
      }

      // 自定义控件按钮
      const extendControls = [
        {
          key: 'custom-button',
          type: 'button',
          text: '预览',
          onClick: this.handleEditPreview
        }
      ];
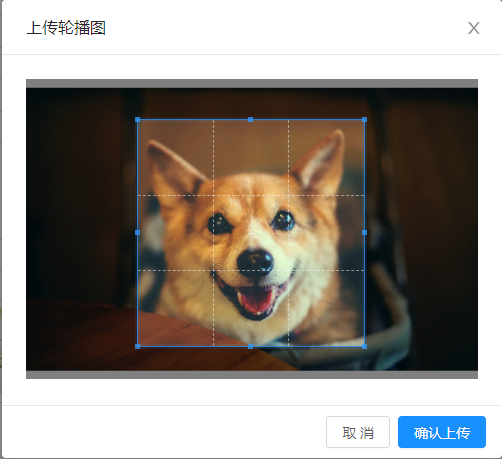
二、图片裁剪
- 安装并引用
npm install react-cropper --save

import Cropper from 'react-cropper'
import "cropperjs/dist/cropper.css"
-
Modal弹框包裹<Cropper />组件
<Modal title="上传轮播图" visible={this.state.editImageModalVisible} width={500} bodyStyle={{height: 350, textAlign: 'center' }} maskClosable={false} onCancel={this.handleCancelImg} okText="确认上传" cancelText="取消" onOk={this.handleSaveImg} onCancel={this.handleCancelImg} > <Cropper src={this.state.srcCropper} //图片路径,即是base64的值,在Upload上传的时候获取到的 ref="cropper" viewMode={1} //定义cropper的视图模式 aspectRatio={1/1} zoomable={false} //是否允许放大图像 movable={false} guides={true} //显示在裁剪框上方的虚线 background={false} //是否显示背景的马赛克 rotatable={false} //是否旋转 style={{ maxWidth:500, maxHeight: 300 }} cropBoxResizable={true} //是否可以拖拽 cropBoxMovable={true} //是否可以移动裁剪框 dragMode="move" center={true} /> </Modal> -
beforeUpload方法中在获得file之后,判断this.refs.cropper,设置组件所需参数
beforeUpload = (file) => { let type = file.type.split('/')[0]; let name = file.name.split('.')[0]; if(type == 'video') { let imgArray = [...this.state.imgList]; imgArray.push(file); handleImageUpload(file, 'video', name).then(res => { this.setState({ imgList: imgArray }); this.handleFileThumb(res, file, imgArray) }) }else{ //当打开同一张图片的时候清除上一次的缓存 if (this.refs.cropper) { this.refs.cropper.reset(); } var reader = new FileReader(); const image = new Image(); //因为读取文件需要时间,所以要在回调函数中使用读取的结果 reader.readAsDataURL(file); //开始读取文件 reader.onload = (e) => { image.src = reader.result; image.onload = () => { this.setState({ srcCropper: e.target.result, //cropper的图片路径 selectImgName: file.name, //文件名称 selectImgSize: (file.size / 1024 / 1024), //文件大小 selectImgSuffix: file.type.split("/")[1], //文件类型 editImageModalVisible: true, //打开控制裁剪弹窗的变量,为true即弹窗 }) if (this.refs.cropper) { this.refs.cropper.replace(e.target.result); } } } return false; } } -
点击弹框中【确定/保存裁剪后的图片,上传七牛云获取url,在Upload组件中显示】,【取消/关闭弹框】
handleSaveImg = () => {
    let imgArray = [...this.state.imgList];
    let imgFile = this.dataURLtoFile(this.refs.cropper.getCroppedCanvas().toDataURL(), this.state.selectImgName)
    imgArray.push(imgFile);


    // 上传七牛云方法 --- Upload组件使用中有js封装过程
    handleImageUpload(imgFile, 'image').then(res => {
      this.setState({
        imgList: imgArray,
        srcCropper: this.state.srcCropper, //cropper的图片路径
      }, () => {
         this.setState({
           editImageModalVisible: false
         })
      })
      this.handleFileThumb(res, imgFile, imgArray)
    })
  }


handleCancelImg = () => {
    this.setState({
      editImageModalVisible: false,
    });
}
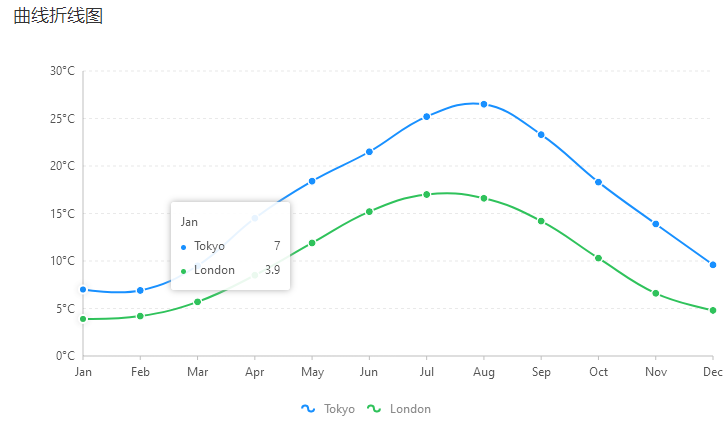
三、统计图表
- 官网图例:https://bizcharts.net/products/bizCharts
- 安装和引用
npm install bizcharts --save

import {ChartCard, Field, TimelineChart} from '@/components/Charts';

import {
  G2,
  Chart,
  Geom,
  Axis,
  Tooltip,
  Coord,
  Label,
  Legend,
  View,
  Guide,
  Shape,
  Facet,
  Util
} from "bizcharts";
官方折线图Mock数据示例:
class Curved extends React.Component {
  render() {
    const data = [
      {
          month: "Jan",
          city: "Tokyo",
          temperature: 7
      },
      {
          month: "Jan",
          city: "London",
          temperature: 3.9
      },
      {
          month: "Feb",
          city: "Tokyo",
          temperature: 6.9
      },
      {
          month: "Feb",
          city: "London",
          temperature: 4.2
      },
      {
          month: "Mar",
          city: "Tokyo",
          temperature: 9.5
      },
      {
          month: "Mar",
          city: "London",
          temperature: 5.7
      },
      {
          month: "Apr",
          city: "Tokyo",
          temperature: 14.5
      },
      {
          month: "Apr",
          city: "London",
          temperature: 8.5
      },
      {
          month: "May",
          city: "Tokyo",
          temperature: 18.4
      },
      {
          month: "May",
          city: "London",
          temperature: 11.9
      },
      {
          month: "Jun",
          city: "Tokyo",
          temperature: 21.5
      },
      {
          month: "Jun",
          city: "London",
          temperature: 15.2
      },
      {
          month: "Jul",
          city: "Tokyo",
          temperature: 25.2
      },
      {
          month: "Jul",
          city: "London",
          temperature: 17
      },
      {
          month: "Aug",
          city: "Tokyo",
          temperature: 26.5
      },
      {
          month: "Aug",
          city: "London",
          temperature: 16.6
      },
      {
          month: "Sep",
          city: "Tokyo",
          temperature: 23.3
      },
      {
          month: "Sep",
          city: "London",
          temperature: 14.2
      },
      {
          month: "Oct",
          city: "Tokyo",
          temperature: 18.3
      },
      {
          month: "Oct",
          city: "London",
          temperature: 10.3
      },
      {
          month: "Nov",
          city: "Tokyo",
          temperature: 13.9
      },
      {
          month: "Nov",
          city: "London",
          temperature: 6.6
      },
      {
          month: "Dec",
          city: "Tokyo",
          temperature: 9.6
      },
      {
          month: "Dec",
          city: "London",
          temperature: 4.8
      }
    ];
    const cols = {
      month: {
        range: [0, 1]
      }
    };
    return (
      <div>
        <Chart height={400} data={data} scale={cols} forceFit>
          <Legend />
          <Axis name="month" />
          <Axis
            name="temperature"
            label={{
              formatter: val => `${val}°C`
            }}
          />
          <Tooltip
            crosshairs={{
              type: "y"
            }}
          />
          <Geom
            type="line"
            position="month*temperature"
            size={2}
            color={"city"}
            shape={"smooth"}
          />
          <Geom
            type="point"
            position="month*temperature"
            size={4}
            shape={"circle"}
            color={"city"}
            style={{
              stroke: "#fff",
              lineWidth: 1
            }}
          />
        </Chart>
      </div>
    );
  }
}

ReactDOM.render(<Curved />, mountNode)
转载请注明出处